The art of shamanism or custom firmware for Olinuxino. Kernel and Ubuntu Part 3
- Tutorial
Build kernel
Let me explain why the existing images are not suitable. Their main problem is that they are compiled on the old 3.4 kernel, and this immediately imposes a maximum of 4 on the compiler and ubuntu 12.04, I don’t remember exactly 14.04. So it turns out that if you want to use the latest software and libraries, you will have to recompile the last kernel. Of course, you can remove the restriction on compiling not less than version 5 of gcc in the source code and correct the code so that it is assembled under version 4, but this is still a hemorrhoid. Not to mention the fact that in our case the graphic part of the linux is superfluous.
To start with kernel.org, we download the 4.14.57 kernel at that time, it was the last stable version.
In the folder with the source code, create a script that starts the configuration:
#!/bin/sh
make  	O=../olimex-kernel-4.14.57 		# папка где будет собрано ядро
	-j2 					# собирать в два потока
	ARCH=arm 				# тип процессора под который собирать
	CROSS_COMPILE=arm-linux-gnueabihf-  	# кросс компилятор
	xconfig				# запуск конфига
We get something like this:
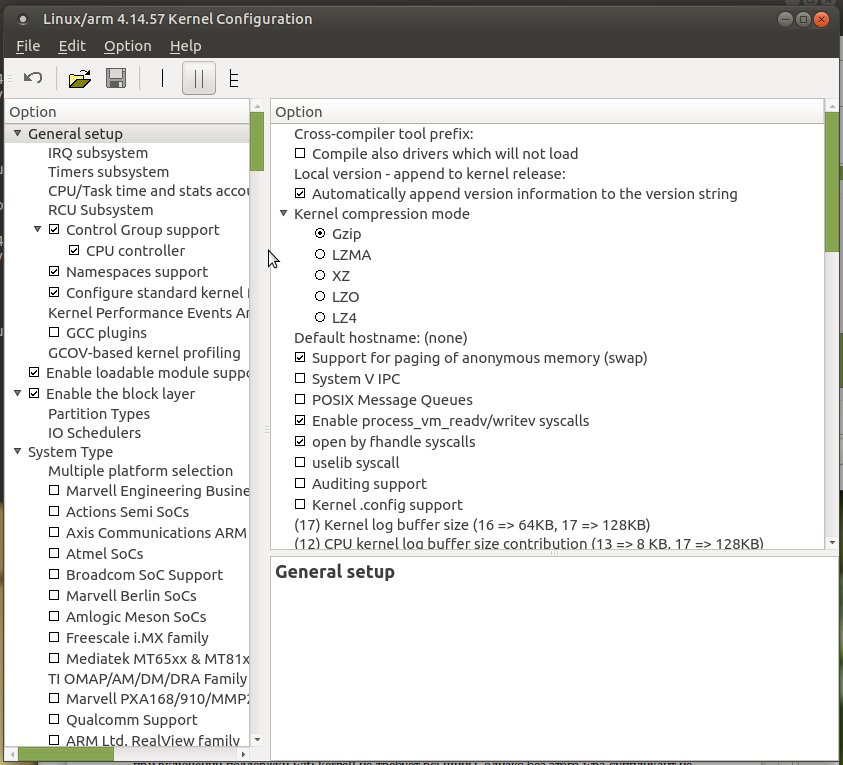
In the file menu at the address,
/linux-4.14.57/arch/arm/configs/select the file sunxi_defconfig, there are the basic settings for the processors of the sunxi series. And then you need to add some settings. Those. look for the flags below and configure them. If possible, we build everything into the kernel.
CONFIG_BLK_DEV_INITRD - we will not use ramfs instead, then we will get Aufs (advanced multi-layered unification filesystem). In short, remove the checkbox.
CONFIG_MEMCG - turn like everyone inside
CONFIG_BLK_CGROUP - include
CONFIG_CGROUP_DEVICE - include
CONFIG_CGROUP_CPUACCT - include
CONFIG_CGROUP_PERF - turn like everyone inside
CONFIG_EXPERT - just select and everything inside, leave the default
CONFIG_BLK_WBT - choose how and all that is within
CONFIG_PARTITION_ADVANCED - select and inside
CONFIG_SUN_PARTITION - select
ARCH_SUNXI - inside we leave only MACH_SUN5I
In bus support we select CONFIG_PCI, since USB wifi requires support for PCI bus. Obviously, when enabled, the wifi kernel does not require a pci bus, but without this wpa, the supplicant does not find usb wifi. Why this happens, you can look into the depths of history, but judging from the historical background, in general, you need to know and remember.
CONFIG_CPU_FREQ_STAT - we find and select
Inside CONFIG_NET we select WIRELESS and then CONFIG_CFG80211 and there we mark CONFIG_NL80211_TESTMODE and CONFIG_CFG80211_WEXT the latter includes our wifi driver for the supplicant.
CONFIG_MAC80211 - turn on the network stack.
CONFIG_MAC80211_MESH - enable
CONFIG_MAC80211_LED - well, and this will select
CONFIG_NFC - we include as well as what is inside except CONFIG_NFC_NCI.
CONFIG_PARPORT -
enable CONFIG_LED_TRIGGER_PHY - select
CONFIG_REALTEK_PHY - select
CONFIG_WLAN - select
CONFIG_RTL8XXXU - select, and inside CONFIG_RTL8XXXU_UNTESTED are checked.
CONFIG_SERIO_SUN4I_PS2 - turn on
CONFIG_SERIAL_DEV_BUS - turn on and inside select SERIAL_DEV_CTRL_TTYPORT.
CONFIG_USB_WUSB_CBAF - include
CONFIG_USB_WUSB_CBAF_DEBUG - include
CONFIG_USB_WDM - include
CONFIG_USB_SERIAL - choose
CONFIG_UWB - choose and select CONFIG_UWB_HWA inside and CONFIG_UWB_I1480U and then will CONFIG_USB_WUSB and also choose.
We select CONFIG_STAGING and inside we select the CONFIG_RTL8192U and CONFIG_RTLLIB driver, and inside the latter we also select everything. They are marked with modules so the poet will have to screw them separately.
CONFIG_R8188EU - select
In general, this is a necessary minimum of kernel settings, if you suddenly want to include something else then carefully read the dependencies of this parameter, otherwise there will be an error when compiling. Next you need to start compiling:
make  	O=../olimex-kernel-4.14.57/
	-j2
	ARCH=arm
	CROSS_COMPILE=arm-linux-gnueabihf-
	uImage 			# собрать ядро
	modules 			# собрать модули
	LOADADDR=0x40008000	# адрес в памяти откуда будет загружено ядро
At the same time collect and devicetree files:
make  	O=../olimex-kernel-4.14.57
	-j2
	ARCH=arm
	CROSS_COMPILE=arm-linux-gnueabihf-
	dtbs
This is necessary just in case, because the source files can be with an error even though they are the same in the kernel and in the uboot. Therefore, not one will work the other way.
The next step is to collect the collected files on the first section of the sd card:
-
/olimex-kernel-4.14.57/arch/arm/boot/from here we get the assembled kernel, it is called uImage and weighs only 4.7 meters. -
/olimex-uboot/arch/arm/dts/from here we get the compiled tree, the file sun5i-a13-olinuxino.dtb -
/u-boot-2018.05/from here we get the compiled boot script boot.scr.Build ubuntu
Since all the necessary parts for downloading rootfs are prepared, it remains to build ubuntu and for this we will get the latest version 18.04.
First, create a folder in the root directory:
sudo mkdir /destruptIt is here because in order to use chroot then you need either full rights as in the root directory, or register the chroot configuration for any other folder. In short, it is easier to create a folder in the root directory and do not fool around with configuration.
We need the following packages for the build, we need to install them if we don’t have them:
- Qemu-user-static
- debootstarp
- schroot
Then we start the ubuntu build:
sudo qemu-debootstrap # we use qemu since the ubuntu build will be installed and qemu will allow us to immediately run the chroot on the assembled ubuntu version --arch armhf # type of processor architecture --variant=minbase# build in the minimum version bionic # build version 18.04 /destrup/ # address where to collect http://ports.ubuntu.com/ubuntu-ports # where to collect the sourcesWell, we’ve compiled ubuntu 18.04. Now let's proceed to the step-by-step configuration:
1. Before launching, we climb into / destrup / etc / apt / and rule sources.list, add the following:
deb http://ports.ubuntu.com/ubuntu-ports bionic main restricted
	deb http://ports.ubuntu.com/ubuntu-ports bionic universe
	deb http://ports.ubuntu.com/ubuntu-ports bionic multiverse
These are just sources for distros under our processor.
2. Run change root on the ubuntu distrib that you just created:
sudo chroot /destrup First of all, set the password for the root user:
passwd rootThis password is required to log into the system at boot.
3. Install the following packages.
apt update- update packages We put a list of packages for the network:
iputils-ping, dhcpcd5, iproute2, iw, networkd-dispatcher, wireless-tools, net-tools.System packages for working with the network:
linux-firmware, wpasupplicant, systemd, hostapd, kmod, udev.Well, the rest is convenient to edit and configure all this: nano, mc, usbutils, sudo.
And I will not describe everything because it will stretch out for a couple of articles, just go through some of the packages required in the setup.
Configure wpa supplicant.
To begin with, let's briefly analyze what is usb wifi.
The chip itself which provides wifi (in this case rtl8188) is a wired ADC, with its own special data presentation and usb output. those. If you run the lsmod command without the r8188eu.ko module loaded, then we will see only that someone else occupied the usb port. When the module is loaded, the device name will be already visible, in other words, this module is only a software interface for managing this chip.
The next most important library is lib80211.ko, the IEEE 802.11 standard itself, in simple words it is the interpretation of digitized broadcast signals into the presentation of specific ehternet protocols. But in order to manage all these it is necessary to install linux-firmware in its composition there will be a driver -wext- which will do all this. We will connect it in further.
Let's start the configuration of the supplikant.
We climb in the freshly collected ubunte to this address:
/ etc / wpa_supplicant / wpa_supplicant.confAnd we create a configuration file if there isn’t, and if so, we reign to this:
ctrl_interface_group=0	# означает что не будет использоваться графический интерфейс
ctrl_interface=/var/run/wpa_supplicant	# ссыль  где будет лежать файл устройства# когда суппликант подключится и опознает наш usb свисток # тут будет лежать файл устройства
ap_scan=1   	#wpa_supplicant сканирует точку доступа, используется по-умолчанию
network={
ssid="SSID_сети"
psk="пароль сети"
key_mgmt=WPA-PSK	# протокол аутентификации
proto=WPA2
pairwise=CCMP
}
If everything is configured correctly and the modules described above are loaded, then a device file will be created at the address specified in the configuration (ctrl_interface parameter).
Systemd setup
We configured the supplicant, but there is no one to launch it yet. You can of course install a network-manager and enjoy auto-tuning, but where is the hardcore where the trash is. In general, solid boredom.
Therefore we climb to the address:
/ etc / systemd / system/And here we create a file with the name
network-wireless.serviceif not, and if there is, we begin to edit:[Unit] # описание порядка запуска и остановки сервиса
Description=Wireless network connectivity
Wants=network.target
After=sys-subsystem-net-devices-wlx007005012449.device
Before=network.target
BindsTo=sys-subsystem-net-devices-wlx007005012449.device
[Service] # описание запуска юнита
Type=oneshot
RemainAfterExit=yes
ExecStart=/sbin/ifconfig wlx007005012449 up # включение устройства
ExecStart=/sbin/wpa_supplicant -B -i wlx007005012449 -D wext -c /etc/wpa_supplicant/wpa_supplicant.conf # запуск супликанта
ExecStart=/sbin/dhcpcd wlx007005012449 # запуск dhcp для свистка
[Install]
WantedBy=multi-user.target
Let us dwell on the launch of the supplikant:
ExecStart=/sbin/wpa_supplicant # access path to the supplicant -B # run in the background -i wlx007005012449 # interface to run, the same device file -D wext # driver name for the whistle from the linux-firmware -c /etc/wpa_supplicant/wpa_supplicant.conf # address of the supplicant configuration file Well, in general, everything you need is configured, proceed to install modules.
Installing modules.
To install the modules, go back a little bit, namely to the folder with the kernel source and run the command to copy modules from the kernel to the folder with ubuntu from there:
make  O=../olimex-kernel-4.14.57
	-j2
	ARCH=arm
	CROSS_COMPILE=arm-linux-gnueabihf-
	modules_install 	# команда для установки модуля
	INSTALL_MOD_PATH=/destrup	# адрес установки модуля
After that, all our assembled modules are copied to ubuntu at:
/ lib / modules / 4.14.57 / kernelNow the most important thing is to register the launch of the copied modules and all their dependencies, so we crawl to the address:
/ etc / modulesAnd run open the modules file for editing and append the following modules:
michael_mic
r8188eu		#	наш модуль
r8192e_pci
rtllib
rtllib_crypt_ccmp
rtllib_crypt_tkip
rtllib_crypt_wep
r8192u_usb		#
lib80211		#	библиотека стандарта  IEEE 802.11
Now it remains to copy the entire collected ubuntu to the sd card section marked in the previous article as a section for ubuntu.
After that, you can insert a USB flash drive into the board, apply power and sit on its uart to access its controls or ssh. You can add a command to systemd to install an ip address or another configuration in general, then everything else is in your hands ...
First part of article
Second part of article