Configuring Let's Encrypt wildcard certificates in CentOS 7 with validation via the CloudFlare API
Like many, I have long been waiting for the opportunity to receive wildcard certificates from Let's Encrypt. And the moment has come, but there is no manual on Habré. Well, let's try to fix it.
This is the most simplified manual for setting up wildcard certificates from Let's Encrypt.
Instead of CloudFlare, you can use another service, as plugins are in the EPEL repository.
It makes no sense for us to install the latest version of certbot with github, as the functionality we need appeared in version 0.22.
To install certbot and its plugins, you need to connect the EPEL repository.
Then start the installation of certbot.
And then install the CloudFlare plugin for certbot.
In order for certbot to automatically renew wildcard certificates, you need to specify the CloudFlare account login and its API Key in the config.
Create the cloudflareapi.cfg file in the / etc / letsencrypt directory using an editor (for example nano):
And we write the following in it:
Unlike other validation methods, here a certificate is created quickly and easily. Specify your domain instead of example.org.
The fullchain.pem certificate you need will be located in the / etc / letsencrypt / live / example.org directory .
All generated certificates are renewed with certbot.
Actually, open / etc / crontab .
And add a line.
Which means that every Tuesday at 4 o’clock to check the relevance of certificates through certbot.
Also, here you should add the restart of the web server that will use this certificate, for example nginx:
The setup is simple, but forgetting it is pretty easy. Therefore, bookmark.
This manual is intended primarily for enthusiasts for their server or for small projects, so there is no special attention to security or additional settings.
This is the most simplified manual for setting up wildcard certificates from Let's Encrypt.
Instead of CloudFlare, you can use another service, as plugins are in the EPEL repository.
Install certbot and plugins
It makes no sense for us to install the latest version of certbot with github, as the functionality we need appeared in version 0.22.
To install certbot and its plugins, you need to connect the EPEL repository.
sudo yum install epel-release -yThen start the installation of certbot.
sudo yum install certbot -yAnd then install the CloudFlare plugin for certbot.
sudo yum install python2-cloudflare.noarch python2-certbot-dns-cloudflare.noarch -yIf you use another service, find its plugin using yum, for example for digitalocean yum list * digitalocean *Run certbot once to create configs.
sudo certbotConfigure CloudFlare API
In order for certbot to automatically renew wildcard certificates, you need to specify the CloudFlare account login and its API Key in the config.
Log in to your CloudFlare account and go to the profile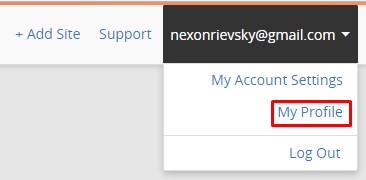
Click View opposite the Global API Key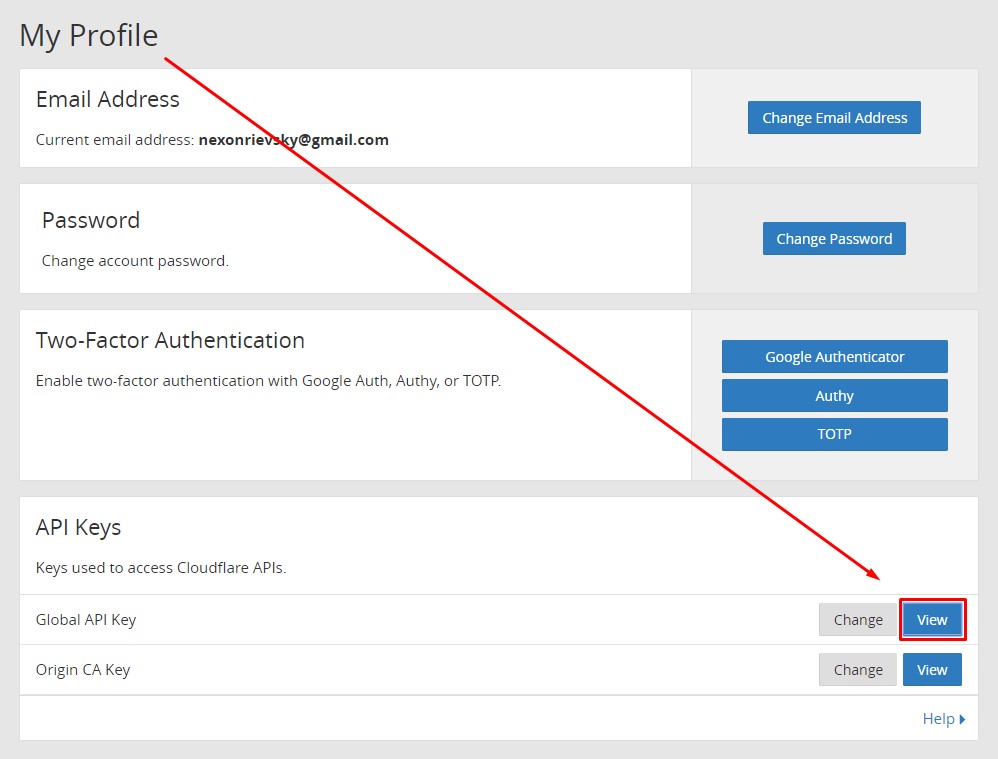
Enter the password for the account, go through the captcha and click View again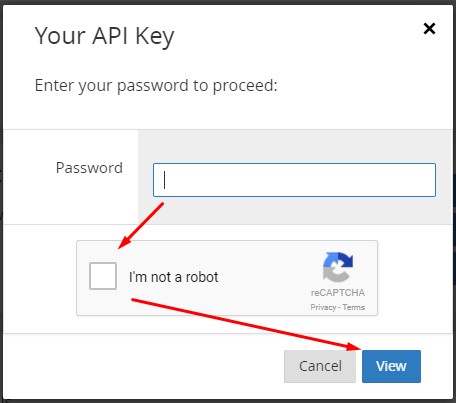
Copy your API Key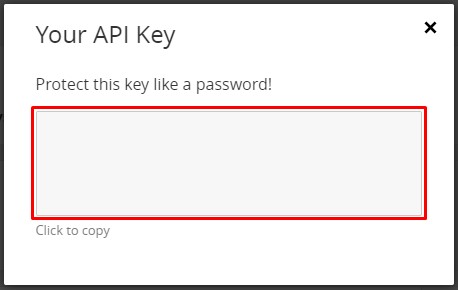
Create the cloudflareapi.cfg file in the / etc / letsencrypt directory using an editor (for example nano):
sudo nano /etc/letsencrypt/cloudflareapi.cfgAnd we write the following in it:
dns_cloudflare_email = <ваш CloudFlare логин>
dns_cloudflare_api_key = <ваш CloudFlare API Key>
AHTUNG! This method of storing the API Key is unsafe, but because you are using Let's Encrypt you should not care.
At least you can write sudo chmod 600 /etc/letsencrypt/cloudflareapi.cfg to limit read access.
Certificate Creation
Unlike other validation methods, here a certificate is created quickly and easily. Specify your domain instead of example.org.
sudo certbot certonly --cert-name example.org --dns-cloudflare --dns-cloudflare-credentials /etc/letsencrypt/cloudflareapi.cfg --server https://acme-v02.api.letsencrypt.org/directory -d "*.example.org" -d example.orgAt the first start, certbot may ask you for an email address for delivery of notifications, accept ToS (choose A ) and approve receipt of spam (choose N ).
That's all, if successful you will see something like this
IMPORTANT NOTES:
 - Congratulations! Your certificate and chain have been saved at:
   /etc/letsencrypt/live/example.org/fullchain.pem
   Your key file has been saved at:
   /etc/letsencrypt/live/example.org/privkey.pem
   Your cert will expire on 2018-07-21. To obtain a new or tweaked
   version of this certificate in the future, simply run certbot
   again. To non-interactively renew *all* of your certificates, run
   "certbot renew"
 - If you like Certbot, please consider supporting our work by:
   Donating to ISRG / Let's Encrypt:   https://letsencrypt.org/donate
   Donating to EFF:                    https://eff.org/donate-le
The fullchain.pem certificate you need will be located in the / etc / letsencrypt / live / example.org directory .
Web server setup
I will not describe the configuration of the web server here, as my piece of config is unlikely to suit you.
You yourself must find the SSL setting for your version of the web server and CMS.
Certificate Renewal
All generated certificates are renewed with certbot.
sudo certbot renewActually, open / etc / crontab .
sudo nano /etc/crontabAnd add a line.
0 4 * * 2 root certbot renewWhich means that every Tuesday at 4 o’clock to check the relevance of certificates through certbot.
Also, here you should add the restart of the web server that will use this certificate, for example nginx:
10 4 * * 2 root systemctl restart nginxConclusion
The setup is simple, but forgetting it is pretty easy. Therefore, bookmark.
This manual is intended primarily for enthusiasts for their server or for small projects, so there is no special attention to security or additional settings.