Creating a game on Lua and LÖVE - 5
- Transfer
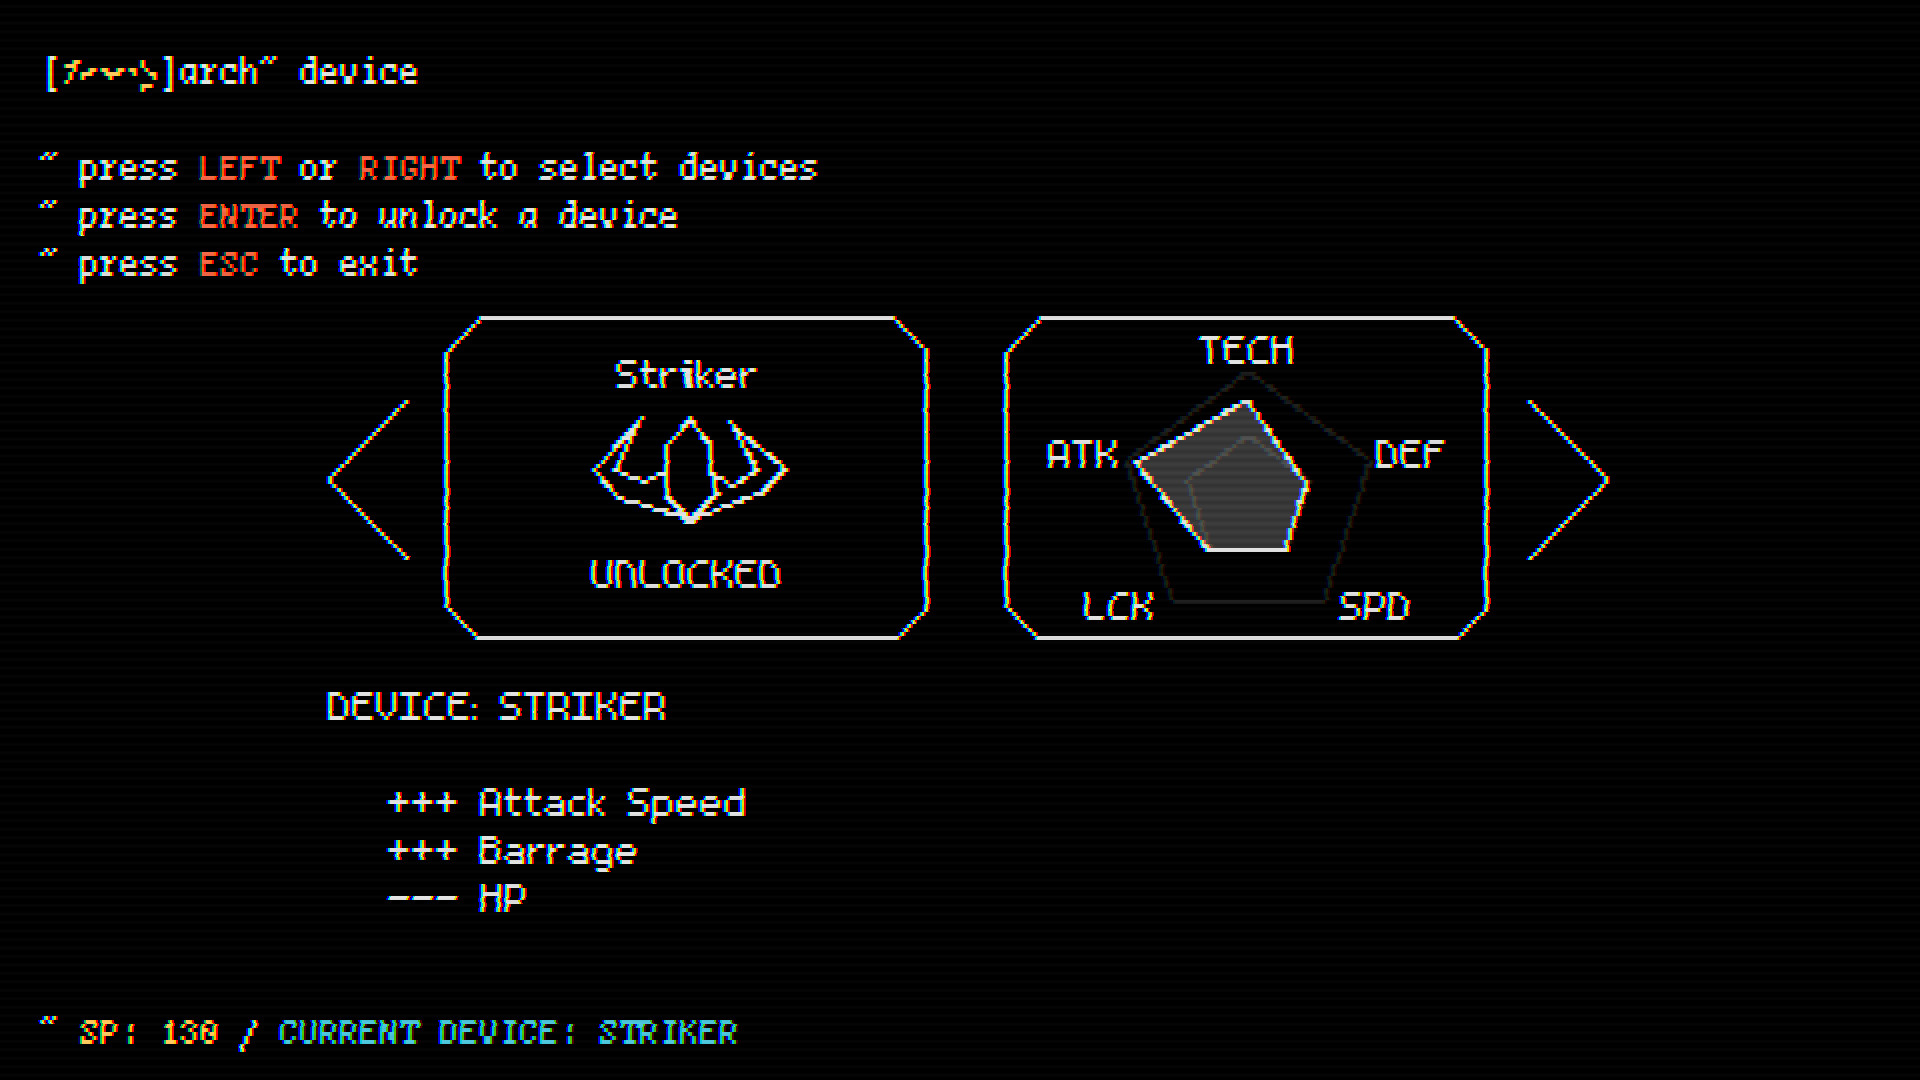
Table of contents
- Article 1
- Part 1. Game cycle
- Part 2. Libraries
- Part 3. Rooms and areas
- Part 4. Exercises
- Section 2
- Part 5. Game Basics
- Part 6. Player class basics
- Section 3
- Part 7. Parameters and attacks of the player
- Part 8. Enemies
- Section 4
- Part 9. Director and game cycle
- Part 10. Code Writing Practices
- Part 11. Passive skills
- Section 5
- Part 12. Other passive skills
13. Skill Tree
14. Console
15. Final
Part 12: Other Passive Skills
Volley
We will start by implementing the remaining attacks. The first is the Blast attack, which looks like this:
GIF
Several shells are fired at different speeds, like from a shotgun, which then quickly disappear. All colors are taken from the table
negative_colorsand each projectile does less damage than usual. Here's what the attack table will look like:attacks['Blast'] = {cooldown = 0.64, ammo = 6, abbreviation = 'W', color = default_color}And here is how the process of creating shells looks:
function Player:shoot()
    ...
    elseif self.attack == 'Blast' then
        self.ammo = self.ammo - attacks[self.attack].ammo
        for i = 1, 12 do
            local random_angle = random(-math.pi/6, math.pi/6)
            self.area:addGameObject('Projectile',
      	        self.x + 1.5*d*math.cos(self.r + random_angle),
      	        self.y + 1.5*d*math.sin(self.r + random_angle),
            table.merge({r = self.r + random_angle, attack = self.attack,
          	v = random(500, 600)}, mods))
        end
        camera:shake(4, 60, 0.4)
    end
    ...
end
Here we simply create 12 shells with a random angle in the interval from -30 to +30 degrees from the direction in which the player is moving. We also randomize the speed in the range of 500 and 600 (usually its value is 200), that is, the projectile will be about three times faster than usual.
However, this will not give us the desired behavior, because we want the shells to disappear quickly enough. This can be implemented as follows:
function Projectile:new(...)
    ...
    if self.attack == 'Blast' then
        self.damage = 75
        self.color = table.random(negative_colors)
        self.timer:tween(random(0.4, 0.6), self, {v = 0}, 'linear', function() self:die() end)
    end
    ...
end
Three things happen here. First, we set the damage value to less than 100. This means that to kill an ordinary enemy with 100 HP, we need not one, but two shells. This is logical, because in this attack 12 shells are fired simultaneously. Secondly, we set the color of the shell, randomly choosing it from the table
negative_colors. It is in this place of the code that it is convenient for us to do this. Finally, we report that after a random period of time from 0.4 to 0.6 seconds, this projectile should be destroyed, which will give us the desired effect. In addition, we do not just destroy the projectile, but reduce its speed to 0, because it looks a little better.All this creates the behavior we need and it seems that we are already done. However, after adding a bunch of passive skills in the previous part of the article, we need to be careful and make sure that everything added after will work well with these passive skills. For example, the last in the previous part we added the effect of a shield projectile. The problem with the Blast attack is that it doesn’t combine with the effect of the shield projectile, because the Blast shells die in 0.4-0.6 seconds, which makes them very bad shield projectiles.
One way to solve this problem is to separate the interfering passive skills (in our case, the shield) and apply their own logic to each situation. In a situation where the value
shieldfor the projectile is true, then the projectile should exist for 6 seconds regardless of everything else. And in all other situations, the duration specified by the attack will be preserved. Here's what it would look like:function Projectile:new(...)
...
if self.attack == 'Blast' then
self.damage = 75
self.color = table.random(negative_colors)
if not self.shield then
self.timer:tween(random(0.4, 0.6), self, {v = 0}, 'linear', function()
self:die()
end)
end
end
if self.shield then
...
self.timer:after(6, function() self:die() end)
end
...
endThis decision seems like a hack, and you can easily imagine that it will gradually become more complicated with the addition of new passive skills, and we will have to add more and more conditions. But based on my experience, this method is the simplest and least prone to errors than everyone else. You can try to solve this problem in a different, more general way, and usually it will have unintended consequences. Perhaps there is a better general solution to this problem, which I personally did not think of, but if I did not find it, then the next best solution will be the simplest, namely many conditional constructions that determine what can and cannot be done. Be that as it may, now we will precede each condition with a new attack that changes the projectile's lifespan
if not self.shield.172. (CONTENT) Implement a passive skill
projectile_duration_multiplier. Remember to use it for all Projectile class behaviors related to duration.Rotation
The next feasible attack will be Spin. It looks like this:
GIF
These shells constantly change the angle by a constant value. We can realize this by adding a variable
rvthat will denote the rate of change of the angle, and then add this value to each frame r:function Projectile:new(...)
...
self.rv = table.random({random(-2*math.pi, -math.pi), random(math.pi, 2*math.pi)})
end
function Projectile:update(dt)
...
if self.attack == 'Spin' then
self.r = self.r + self.rv*dt
end
...
endWe choose between intervals from -2 * math.pi to -math.pi OR between intervals from math.pi to 2 * math.pi because we do not want absolute values to be less than math.pi or more than 2 * math.pi . Low absolute values mean that the circle made by the projectile becomes larger, and large absolute values mean that the circle becomes smaller. We want to limit the size of the circle to the values we need to make it look right. It should also be understood that the difference between negative and positive values lies in the direction in which the circle rotates.
In addition, we can add Spin shells a lifespan because we do not want them to exist forever:
function Projectile:new(...)
    ...
    if self.attack == 'Spin' then
        self.timer:after(random(2.4, 3.2), function() self:die() end)
    end
end
Here's what the function will look like
shoot:function Player:shoot()
...
elseif self.attack == 'Spin' then
self.ammo = self.ammo - attacks[self.attack].ammo
self.area:addGameObject('Projectile',
self.x + 1.5*d*math.cos(self.r), self.y + 1.5*d*math.sin(self.r),
table.merge({r = self.r, attack = self.attack}, mods))
end
endAnd here is what the attack table looks like:
attacks['Spin'] = {cooldown = 0.32, ammo = 2, abbreviation = 'Sp', color = hp_color}This way we get the behavior we need. However, we need one more thing - the trace of the shell. Unlike a homing projectile that uses the same trail that was used for the player’s ships, this projectile trail will repeat the shape and color of the projectile, but will also slowly become invisible until it completely disappears. We can implement this in the same way as we did for another trace object, but taking into account these differences:
ProjectileTrail = GameObject:extend()
function ProjectileTrail:new(area, x, y, opts)
    ProjectileTrail.super.new(self, area, x, y, opts)
    self.alpha = 128
    self.timer:tween(random(0.1, 0.3), self, {alpha = 0}, 'in-out-cubic', function()
    	self.dead = true
    end)
end
function ProjectileTrail:update(dt)
    ProjectileTrail.super.update(self, dt)
end
function ProjectileTrail:draw()
    pushRotate(self.x, self.y, self.r)
    local r, g, b = unpack(self.color)
    love.graphics.setColor(r, g, b, self.alpha)
    love.graphics.setLineWidth(2)
    love.graphics.line(self.x - 2*self.s, self.y, self.x + 2*self.s, self.y)
    love.graphics.setLineWidth(1)
    love.graphics.setColor(255, 255, 255, 255)
    love.graphics.pop()
end
function ProjectileTrail:destroy()
    ProjectileTrail.super.destroy(self)
end
И это выглядит достаточно стандартно, единственный заметный аспект заключается в том, что у нас есть переменная
alpha, которую мы изменяем через tween до 0, чтобы снаряд медленно исчезал через случайный промежуток времени от 0.1 до 0.3 секунды, а затем мы отрисовываем след точно так же, как отрисовываем снаряд. Важно, что мы используем переменные r, s и color родительского снаряда, то есть при создании его нам нужно их все передавать:function Projectile:new(...)
...
if self.attack == 'Spin' then
self.rv = table.random({random(-2*math.pi, -math.pi), random(math.pi, 2*math.pi)})
self.timer:after(random(2.4, 3.2), function() self:die() end)
self.timer:every(0.05, function()
self.area:addGameObject('ProjectileTrail', self.x, self.y,
{r = Vector(self.collider:getLinearVelocity()):angle(),
color = self.color, s = self.s})
end)
end
...
endТаким образом мы добьёмся нужных нам результатов.
173. (КОНТЕНТ) Реализуйте атаку
Flame. Вот, как должна выглядеть таблица атаки:attacks['Flame'] = {cooldown = 0.048, ammo = 0.4, abbreviation = 'F', color = skill_point_color}А вот, как выглядит сама атака:
GIF
The shells must remain alive for a random interval of time from 0.6 to 1 second and resemble Blast shells, and their speed should be changed with tween to 0 during this time. These shells also use the ProjectileTrail object like Spin shells do. Each of the Flame shells also deals reduced damage of 50 units.
Bouncing shells
Bounce shells should bounce off walls, not be destroyed by them. By default, a Bounce shell can bounce off walls 4 times before being destroyed the next time it hits a wall. We can set this using a table
optsin a function shoot:function Player:shoot()
...
elseif self.attack == 'Bounce' then
self.ammo = self.ammo - attacks[self.attack].ammo
self.area:addGameObject('Projectile',
self.x + 1.5*d*math.cos(self.r), self.y + 1.5*d*math.sin(self.r),
table.merge({r = self.r, attack = self.attack, bounce = 4}, mods))
end
endThus, the variable
bouncewill contain the number of bounces left by the projectile. We can use it, decreasing by 1 with every hit against the wall:function Projectile:update(dt)
...
-- Collision
if self.bounce and self.bounce > 0 then
if self.x < 0 then
self.r = math.pi - self.r
self.bounce = self.bounce - 1
end
if self.y < 0 then
self.r = 2*math.pi - self.r
self.bounce = self.bounce - 1
end
if self.x > gw then
self.r = math.pi - self.r
self.bounce = self.bounce - 1
end
if self.y > gh then
self.r = 2*math.pi - self.r
self.bounce = self.bounce - 1
end
else
if self.x < 0 then self:die() end
if self.y < 0 then self:die() end
if self.x > gw then self:die() end
if self.y > gh then self:die() end
end
...
endHere, in addition to reducing the number of remaining bounces, we also change the direction of the projectile taking into account the wall that it hit. Perhaps there is a more general way to do this, but I could only come up with a solution that takes into account the collision with each wall separately, after which the necessary calculations are performed to correctly reflect / mirror the angle of the projectile. Note that when it
bounceis 0, then the first conditional construct is skipped and we go to the usual path, which leads us to destroy the projectile. It’s also important to put all this collision code in front of the call
setLinearVelocityotherwise, the bounces will not work, because we will rotate the projectile with a delay of one frame, but simply reversing its angle will not make it go back. For safety's sake, in addition to turning the angle of the projectile, we can also use it setPositionto force its position, but it does not seem necessary to me. The colors of the bouncing projectile will be random, as with the Spread projectile, except that they are taken from the table
default_colors. This means that we need to take care of them in the function Projectile:drawseparately:function Projectile:draw()
...
if self.attack == 'Bounce' then love.graphics.setColor(table.random(default_colors)) end
...
endThe attack table is as follows:
attacks['Bounce'] = {cooldown = 0.32, ammo = 4, abbreviation = 'Bn', color = default_color}And all this should look like this:
GIF
174. (CONTENT) Implement an attack
2Split. Here's what it looks like:GIF
It looks exactly like a Homing shell, only uses color
ammo_color. When the projectile hits the enemy, it is divided into two (two new projectiles are created) at angles of + -45 degrees from the direction of the original projectile. If the shell hits the wall, then two shells are created either with an angle of reflection from the wall (that is, if the shell hits the top wall, two shells are created, directed to math.pi / 4 and 3 * math.pi / 4) or opposite to the corner projectile reflections, you can choose for yourself. Here's what the table of this attack looks like:
attacks['2Split'] = {cooldown = 0.32, ammo = 3, abbreviation = '2S', color = ammo_color}175. (CONTENT) Implement an attack
4Split. Here's what it looks like:GIF
It behaves in exactly the same way as the 2Split attack, but it does not create 2, but 4 shells. Shells are sent at all angles at 45 degrees from the center, i.e. math.pi / 4, 3 * math.pi / 4, -math.pi / 4 and -3 * math.pi / 4. Here's what the attack table looks like:
attacks['4Split'] = {cooldown = 0.4, ammo = 4, abbreviation = '4S', color = boost_color}Lightning
Here's what the Lightning attack looks like:
GIF
When a player reaches a certain distance from the enemy, a lightning bolt is created, causing damage to the enemy. Most of the work here is to create a charge of lightning, so we will consider it first of all. We implement it by creating an object
LightningLinethat will be a visual representation of the lightning charge:LightningLine = GameObject:extend()
function LightningLine:new(area, x, y, opts)
LightningLine.super.new(self, area, x, y, opts)
...
self:generate()
end
function LightningLine:update(dt)
LightningLine.super.update(self, dt)
end
-- Generates lines and populates the self.lines table with them
function LightningLine:generate()
end
function LightningLine:draw()
end
function LightningLine:destroy()
LightningLine.super.destroy(self)
endI will focus on the drawing function and leave the creation of lightning lines to you! This tutorial describes the generation method in great detail, so I won’t repeat it here. We assume that all the lines that make up the lightning charge are in the table
self.lines, and that each line is a table containing the keys x1, y1, x2, y2. With this in mind, we can draw the lightning charge in the simplest way like this:function LightningLine:draw()
for i, line in ipairs(self.lines) do
love.graphics.line(line.x1, line.y1, line.x2, line.y2)
end
endHowever, it looks too simple. Therefore, we first need to draw these lines with color
boost_colorand with a line thickness of 2.5, and then on top of them we will draw the same lines again, but with color default_colorand line thickness of 1.5. This will make the zipper charge a little thicker and more like a zipper.function LightningLine:draw()
for i, line in ipairs(self.lines) do
local r, g, b = unpack(boost_color)
love.graphics.setColor(r, g, b, self.alpha)
love.graphics.setLineWidth(2.5)
love.graphics.line(line.x1, line.y1, line.x2, line.y2)
local r, g, b = unpack(default_color)
love.graphics.setColor(r, g, b, self.alpha)
love.graphics.setLineWidth(1.5)
love.graphics.line(line.x1, line.y1, line.x2, line.y2)
end
love.graphics.setLineWidth(1)
love.graphics.setColor(255, 255, 255, 255)
endIn addition, I use here an attribute
alphathat is initially 255 and is reduced by tween to 0 over the life of the line, that is, about 0.15 seconds.Now let's move on to the very creation of this LightningLine object. We want this attack to work like this: when a player gets close enough to the enemy within his immediate line of sight, an attack is triggered and we deal damage to the enemy. So let's get all the enemies close to the player first. We can do this in the same way as in the case of a homing projectile, which picked up a target in a certain radius. However, we want the radius not to be centered on the player, because the player should not be able to inflict damage on the enemies behind him, so we will shift the center of this circle forward, in the direction of the player’s movement, after which we will perform actions.
function Player:shoot()
    ...
    elseif self.attack == 'Lightning' then
        local x1, y1 = self.x + d*math.cos(self.r), self.y + d*math.sin(self.r)
        local cx, cy = x1 + 24*math.cos(self.r), y1 + 24*math.sin(self.r)
        ...
end
Here we determine
x1, y1, that is, the position from which we generally shoot shells (on the bow of the ship), and then we also determine cx, cy, that is, the center of the radius that we will use to find the closest enemy. We are shifting the circle by 24 units, which is large enough so that he cannot select enemies behind the player. The next thing we can do is simply copy-paste the code that we used in the Projectile object when we wanted the homing shells to find their targets, but change them to fit our needs, replacing the position of the circle with our center of the circle
cx, cy:function Player:shoot()
...
elseif self.attack == 'Lightning' then
...
-- Find closest enemy
local nearby_enemies = self.area:getAllGameObjectsThat(function(e)
for _, enemy in ipairs(enemies) do
if e:is(_G[enemy]) and (distance(e.x, e.y, cx, cy) < 64) then
return true
end
end
end)
...
endAfter that, we get a list of enemies within a radius of 64 units of the circle, located 24 units in front of the player. Here we can either choose the enemy at random, or take the closest. We will focus on the latter option, that is, for this we need to sort the table based on the distance from each of the enemies to the circle:
function Player:shoot()
    ...
    elseif self.attack == 'Lightning' then
        ...
        table.sort(nearby_enemies, function(a, b)
      	    return distance(a.x, a.y, cx, cy) < distance(b.x, b.y, cx, cy)
    	end)
        local closest_enemy = nearby_enemies[1]
  	...
end
You can use here for this purpose
table.sort. Then we just need to take the first element of the sorted table and attack it:function Player:shoot()
...
elseif self.attack == 'Lightning' then
...
-- Attack closest enemy
if closest_enemy then
self.ammo = self.ammo - attacks[self.attack].ammo
closest_enemy:hit()
local x2, y2 = closest_enemy.x, closest_enemy.y
self.area:addGameObject('LightningLine', 0, 0, {x1 = x1, y1 = y1, x2 = x2, y2 = y2})
for i = 1, love.math.random(4, 8) do
self.area:addGameObject('ExplodeParticle', x1, y1,
{color = table.random({default_color, boost_color})})
end
for i = 1, love.math.random(4, 8) do
self.area:addGameObject('ExplodeParticle', x2, y2,
{color = table.random({default_color, boost_color})})
end
end
end
endFirst we need to make sure that
closest_enemynil is not equal, because if so, then we should not do anything. Most of the time it will be nil, as there are no enemies nearby. If this is not so, then we reduce the ammunition, as we did for all other attacks, and then call the function hitfor the enemy who is being damaged. After that, we create a LightningLine object with variables x1, y1, x2, y2representing the position right in front of the ship, from which the charge will be released, as well as the center of the enemy. Finally, we create a bunch of ExplodeParticle particles to make the attack more interesting. The last thing we need for the attack to work is its table:
attacks['Lightning'] = {cooldown = 0.2, ammo = 8, abbreviation = 'Li', color = default_color}And all this should look like this:
GIF
176. (CONTENT) Implement an attack
Explode. Here's what it looks like:GIF
An explosion is created that destroys all enemies in a certain radius. The shell itself looks like a homing one, except that it is a
hp_colorbit larger. The attack table looks like this:attacks['Explode'] = {cooldown = 0.6, ammo = 4, abbreviation = 'E', color = hp_color}177. (CONTENT) Implement an attack
Laser. Here's what it looks like:GIF
A huge line is created that destroys all the enemies that cross it. It can be programmed either as a line or as a rotated rectangle for detecting collisions. If you decide to use a line, it is better to use 3 or 5 lines that are slightly separated from each other, otherwise the player will sometimes miss the enemies, which seems unfair.
The effect of the attack itself is different from all the others, but it should not be a problem. One huge white line in the middle, the thickness of which changes over time with tween, and two red lines on the sides, which are at first close to the white lines, but then expand and disappear when the effect ends. The shooting effect is an enlarged version of the original ShootEffect object and also has a red color. The attack table looks like this:
attacks['Laser'] = {cooldown = 0.8, ammo = 6, abbreviation = 'La', color = hp_color}178. (CONTENT) Implement a passive skill
additional_lightning_bolt. If it is true, then the player can attack with two lightning bolts simultaneously. From a programming point of view, this means that instead of looking for one closest enemy, we will search for two and attack both if they exist. You can also try to separate each attack with a small interval, for example 0.5 seconds, because it looks better. 179. (CONTENT) Implement a passive skill
increased_lightning_angle. This skill increases the angle at which a lightning attack can fire, that is, it will also attack enemies on the sides, and sometimes behind the player. From a programming point of view, this means that when it increased_lightning_angleis true, then we do not shift the lightning circle by 24 units and use the center of the player in our calculations.180. (CONTENT) Implement a passive skill
area_multiplier. This skill increases the area of all attacks and effects associated with areas. The most recent examples are the Lightning attack lightning circle, as well as the Explode attack area. But this will also apply to explosions in general, as well as to everything related to areas (when a circle is used to obtain information or apply effects). 181. (CONTENT) Implement a passive skill
laser_width_multiplier. This skill increases or decreases the thickness of the Laser attack. 182. (CONTENT) Implement a passive skill
additional_bounce_projectiles. This skill increases or decreases the number of Bounce projectile bounces. By default, Bounce attack shells can bounce 4 times. Ifadditional_bounce_projectilesequal to 4, then Bounce attack shells will be able to bounce 8 times. 183. (CONTENT) Implement a passive skill
fixed_spin_attack_direction. This skill like boolean makes all Spin attack shells rotate in a constant direction, that is, they will all rotate either just left or just right. 184. (CONTENT) Implement a passive skill
split_projectiles_split_chance. This is a projectile that adds the probability of being divided again by the already divided 2Split or 4Split attacks. For example, if this probability becomes equal to 100, then the divided shells will be recursively divided constantly (however, we will not allow this in the skill tree). 185. (CONTENT) Implement passive skills
[attack]_spawn_chance_multiplierwhere[attack]Is the name of each attack. These skills increase the likelihood of a specific attack. Now, when we create the Attack resource, the attack is randomly selected. However, now we want them to be selected from a chanceList, which initially has equal probabilities for all attacks, but changes with passive skills [attack]_spawn_chance_multiplier. 186. (CONTENT) Implement passive skills
start_with_[attack], where [attack]is the name of each attack. These passive skills make the player start the game with the appropriate attack. For example, if start_with_bouncetrue, then the player will start each round with a Bounce attack. If several passive skills have true start_with_[attack], then one of them is randomly selected.Additional homing shells
Passive Skill
additional_homing_projectilesadds additional projectiles to passive skills such as “Homing Projectile Launch”. Usually launched homing shells look like this:function Player:onAmmoPickup()
if self.chances.launch_homing_projectile_on_ammo_pickup_chance:next() then
local d = 1.2*self.w
self.area:addGameObject('Projectile',
self.x + d*math.cos(self.r), self.y + d*math.sin(self.r),
{r = self.r, attack = 'Homing'})
self.area:addGameObject('InfoText', self.x, self.y, {text = 'Homing Projectile!'})
end
endadditional_homing_projectilesIs a number telling us how many extra shells need to be used. For this to work, we can do something like this:function Player:onAmmoPickup()
if self.chances.launch_homing_projectile_on_ammo_pickup_chance:next() then
local d = 1.2*self.w
for i = 1, 1+self.additional_homing_projectiles do
self.area:addGameObject('Projectile',
self.x + d*math.cos(self.r), self.y + d*math.sin(self.r),
{r = self.r, attack = 'Homing'})
end
self.area:addGameObject('InfoText', self.x, self.y, {text = 'Homing Projectile!'})
end
endAnd then we just need to apply this to each instance in which a passive skill of
launch_homing_projectileany type appears . 187. (CONTENT) Implement a passive skill
additional_barrage_projectiles. 188. (CONTENT) Implement a passive skill
barrage_nova. This is the boolean variable, which, when set, makes it so that the shells of the queue are released in a circle, and not in the direction of movement of the player. Here's what it looks like:GIF
Mineshell
A mine shell is a shell that remains at the place of its creation and explodes over time. Here's what it looks like:
GIF
As you can see, it just spins like a Spin attack projectile, but much faster. To implement this, we will say that if the attribute
minehas the value true for the projectile, then it will behave like Spin shells, but with an increased rotation speed.function Projectile:new(...)
...
if self.mine then
self.rv = table.random({random(-12*math.pi, -10*math.pi),
random(10*math.pi, 12*math.pi)})
self.timer:after(random(8, 12), function()
-- Explosion
end)
end
...
end
function Projectile:update(dt)
...
-- Spin or Mine
if self.attack == 'Spin' or self.mine then self.r = self.r + self.rv*dt end
...
endHere, instead of restricting rotation speeds in the range of absolute values from math.pi to 2 * math.pi, we take absolute values from 10 * math.pi to 12 * math.pi. As a result, the shell rotates much faster and covers a smaller area, which is ideal for this type of behavior.
In addition, after a random period of time from 8 to 12 seconds, the projectile explodes. This explosion does not need to be handled in the same way as explosions processed for an Explode shell. In my case, I created an object
Explosion, but there are many ways to implement this action. I will leave it as an exercise because the Explode attack was also an exercise. 189. (CONTENT) Implement a passive skill
drop_mines_chance, which adds to the player the probability of leaving a min-shell every 0.5 seconds. From a programming point of view, this is implemented through a timer that starts every 0.5 seconds. In each of these runs, we roll function cubes drop_mines_chance:next(). 190. (CONTENT) Implement a passive skill
projectiles_explode_on_expirationthat makes it possible to explode when shells are destroyed due to their life span. This should only apply to the time that their life ends. If the projectile collides with an enemy or a wall, then it should not explode when this skill is true. 191. (CONTENT) Implement a passive skill
self_explode_on_cycle_chance. This skill gives the player the chance to create explosions around himself in each cycle. It will look like this:GIF
It uses the same explosions as in the Explode attack. The number, location and size of the created explosions you can choose yourself.
192. (CONTENT) Implement a passive skill
projectiles_explosions. If it is true, then all explosions arising from the projectile created by the player will create multiple shells that resemble a passive skill barrage_nova. The number of projectiles created is initially 5 and this amount is affected by a passive skill additional_barrage_projectiles.Energy shield
When the passive skill
energy_shieldis true, then the player’s HP turns into an energy shield (from now on called ES). ES performance differs from HP performance in the following ways:- Player takes double damage
- Player ES recharges after a certain period of time if he does not receive damage
- Player invulnerability time becomes half
We can implement all this mainly in a function
hit:function Player:new(...)
...
-- ES
self.energy_shield_recharge_cooldown = 2
self.energy_shield_recharge_amount = 1
-- Booleans
self.energy_shield = true
...
end
function Player:hit(damage)
...
if self.energy_shield then
damage = damage*2
self.timer:after('es_cooldown', self.energy_shield_recharge_cooldown, function()
self.timer:every('es_amount', 0.25, function()
self:addHP(self.energy_shield_recharge_amount)
end)
end)
end
...
endWe announce that the pause before starting reloading an ES after a hit is 2 seconds, and that the reloading speed is 4 ES per second (1 in 0.25 seconds in a call
every). We also place the conditional construct at the top of the hit function and double the damage variable, which will be used below to cause damage to the player. The only thing left for us here is to halve the time of invulnerability. We can do this either in the hit function or in the function
setStats. We will choose the second option, because we have not dealt with this function for a long time.function Player:setStats()
...
if self.energy_shield then
self.invulnerability_time_multiplier = self.invulnerability_time_multiplier/2
end
endSince it
setStatsis called at the end of the constructor and after the function is called treeToPlayer(that is, it is called after loading all passive skills from the tree), we can be sure that the value energy_shieldreflects all the skills selected by the player in the tree. In addition, we can be sure that we reduce the invulnerability timer after applying all the increases / decreases of this multiplier from the tree. This is actually not necessary for this passive skill, since the order is not important here, but for other skills it may be important, in which case applying changes setStatsmakes sense. Usually, if the probability of the parameter is obtained from the boolean variable and this change is constant in the game, then it is more logical to put it in setStats. 193. (CONTENT) Change the HP UI so that when
energy_shield true, it looked like this:GIF
194. (CONTENT) Implement a passive skill
energy_shield_recharge_amount_multiplierthat increases or decreases the number of ES restored per second. 195. (CONTENT) Implement a passive skill
energy_shield_recharge_cooldown_multiplierthat increases or decreases the pause time after dealing damage to a player, after which the ES begins to recharge.Adding credibility to all kill events
For example, if it
added_chance_to_all_on_kill_eventsis equal to 5, then the probability of all passive skills of the “kill” type increases by 5%. This means that if the player initially acquired skills that increased it launch_homing_projectile_on_kill_chanceto 8 in total , then the final probability instead of 8% will be 13%. This is too powerful a passive skill, but it is interesting to consider from the point of view of implementation. We can implement it by changing the way the
generateChanceslists function generates a chanceList. Since this function bypasses all passive skills whose name ends with _chance, it is obvious that we can also parse all passive skills that contain in the name _on_kill. That is, after we do this, it will be enough for us to add added_chance_to_all_on_kill_eventschanceList to the appropriate place in the generation process.To begin with, we will separate the usual passive skills from those that have in the title
on_kill:function Player:generateChances()
self.chances = {}
for k, v in pairs(self) do
if k:find('_chance') and type(v) == 'number' then
if k:find('_on_kill') and v > 0 then
else
self.chances[k] = chanceList({true, math.ceil(v)}, {false, 100-math.ceil(v)})
end
end
end
endWe use the same method that we used to search for passive skills with
_chance, just replace this line with _on_kill. In addition, we also need to verify that this passive skill has a probability of generating an event greater than 0%. We don’t want the new passive skill to add its probability to all events such as “when killed”, when the player did not spend points on this event, so we only do this for events in which the player has already invested some probability. Now we can just create a chanceList, but instead of using
vourselves, we will use v+added_chance_to_all_on_kill_events:function Player:generateChances()
self.chances = {}
for k, v in pairs(self) do
if k:find('_chance') and type(v) == 'number' then
if k:find('_on_kill') and v > 0 then
self.chances[k] = chanceList(
{true, math.ceil(v+self.added_chance_to_all_on_kill_events)},
{false, 100-math.ceil(v+self.added_chance_to_all_on_kill_events)})
else
self.chances[k] = chanceList({true, math.ceil(v)}, {false, 100-math.ceil(v)})
end
end
end
endIncreased ASPD with added ammunition
This skill is the conversion of part of one parameter to another. In this case, we take all the increases in the Ammo resource and add them as an additional attack speed. We can implement this with the following formula:
local ammo_increases = self.max_ammo - 100
local ammo_to_aspd = 30
aspd_multiplier:increase((ammo_to_aspd/100)*ammo_increases)
It means that if, for example, the maximum stockpile is 130 ammunition, and
ammo_to_aspdhas a conversion factor of 30%, then as a result we will increase the attack speed by 0.3 * 30 = 9%. If the maximum is 250 ammunition, then with the same conversion percentage, we get 1.5 * 30 = 45%. To implement this, we first define an attribute:
function Player:new(...)
    ...
    -- Conversions
    self.ammo_to_aspd = 0
end
And then we can apply the transformation to the variable
aspd_multiplier. Since this variable is Stat, we need to do this in a function update. If this variable were ordinary, then we would do it in a function setStats.function Player:update(dt)
...
-- Conversions
if self.ammo_to_aspd > 0 then
self.aspd_multiplier:increase((self.ammo_to_aspd/100)*(self.max_ammo - 100))
end
self.aspd_multiplier:update(dt)
...
endAnd that should work exactly as we intended.
Last passive skills
We only need to realize about 20 passive skills. Most of them are pretty trivial, so I'll leave them to the exercises. In fact, they are almost completely unrelated to most of the skills that we implemented earlier, therefore, although they may be trivial, you can consider them as tasks with which you can check whether you really understand what is happening and how in the code base.
196. (CONTENT) Implement a passive skill
change_attack_periodicallythat changes the player’s attack every 10 seconds. A new attack is randomly selected. 197. (CONTENT) Implement the passive skill
gain_sp_on_deaththat gives the player after death 20 SP. 198. (CONTENT) Implement a passive skill
convert_hp_to_sp_if_hp_full, which gives the player 3 SP every time he picks up an HP resource, and his HP is already maximum. 199. (CONTENT) Implement a passive skill
mvspd_to_aspdthat adds increased movement speed to attack speed. This increase should be added using the same formula that is used for ammo_to_aspd. That is, if a player has an increase in MVSPD by 30%, and mvspd_to_aspdis equal to 30 (that is, the conversion coefficient is 30%), then his ASPD should be increased by 9%. 200. (CONTENT) Implement a passive skill
mvspd_to_hpthat adds speed reduction to the player’s HP. For example, if MVSPD is reduced by 30%, but mvspd_to_hpequal to 30 (that is, the conversion coefficient is 30%), then 21 HP should be added to it. 201. (CONTENT)Implement a passive skill
mvspd_to_pspdthat adds an increase in speed to projectile speed. It works exactly the same as mvspd_to_aspd. 202. (CONTENT) Implement a passive skill
no_boostthat disables the player’s Boost acceleration (max_boost = 0). 203. (CONTENT) Implement a passive skill
half_ammothat halves the player’s ammunition. 204. (CONTENT) Implement a passive skill
half_hpthat halves the player’s HP. 205. (CONTENT) Implement a passive skill
deals_damage_while_invulnerablethat allows the player to damage enemies on contact when he is invulnerable (for example, when an attribute invincibleis set to true after hitting ). 206. (CONTENT) Implement a passive skill
refill_ammo_if_hp_full, fully restores the player’s ammunition if he selects an HP resource at full HP. 207. (CONTENT) Implement a passive skill
refill_boost_if_hp_fullthat completely restores the player’s Boost when he selects an HP resource at full HP. 208. (CONTENT) Implement a passive skill
only_spawn_boostthat makes Boost the only resource you create. 209. (CONTENT) Implement a passive skill
only_spawn_attackthat makes it possible that within a given period of time no resources are created except attacks. This means that all attacks are created after a pause of resources, as well as an own pause of the attack (that is, every 16 seconds, as well as every 30 seconds). 210. (CONTENT) Implement a passive skill
no_ammo_dropin which ammunition never drops from enemies. 211. (CONTENT) Implement a passive skill
infinite_ammoin which none of the player’s attacks consumes ammunition. And this is where we end with passive skills. In total, we examined about 150 different passive skills, which in the skill tree will stretch to about 900 nodes, since many of these skills are just parameter changes, and can be scattered around the tree, rather than concentrating in one place.
But before we start the tree (which we will discuss in the next part of the article), we can expand the content a bit, and also realize all the player’s ships and all the enemies. You may not fully follow my examples, which I will give in the exercises, and create your own ships / enemies.
Enemies
212. (CONTENT) Realize the enemy
BigRock. This enemy behaves in exactly the same way as Rockonly he is divided into 4 objects more and after death Rock. By default, it has 300 HP.GIF
213. (CONTENT) Realize the enemy
Waver. This enemy behaves like a wave projectile and from time to time fires shells in front and behind (like a Back attack). By default, it has 70 HP.GIF
214. (CONTENT) Realize the enemy
Seeker. This enemy behaves like an Ammo object and moves slowly towards the player. At regular intervals, this enemy also lays mines in the same way as mines. By default, it has 200 HP.GIF
215. (CONTENT) Implement the enemy
Orbitter. This enemy behaves like Rock or BigRock, but around him there is a shield of shells. These shells behave like shield shells, which we implemented in the previous part of the article. If Orbitter dies before the death of its shells, then the remaining shells homing on the player for a short period of time. By default, it has 450 HP.GIF
Ships
We have already considered the graphics of all the ships in one of the previous parts of the tutorial, which was also implemented in exercises. So we will assume that you have already made them, and also that they have names and everything else. In the following exercises we will use the ones I created, but since we implemented most of the passive skills used in the previous and current parts of the article, you can create your own ships to your taste. I will give an example of those that I myself have invented.
216. (CONTENT) Implement a ship
Crusader:GIF
It has the following options:
- Boost = 80
- Boost efficiency factor = 2
- Speed factor = 0.6
- Turn Rate Multiplier = 0.5
- Attack Speed Multiplier = 0.66
- Projectile Speed Multiplier = 1.5
- HP = 150
- Size factor = 1.5
217. (CONTENT) Implement a ship
Rogue:GIF
It has the following options:
- Boost = 120
- Cooldown Boost Multiplier = 1.5
- Speed factor = 1.3
- Ammo = 120
- Attack Speed Multiplier = 1.25
- HP = 80
- Invulnerability Multiplier = 0.5
- Size factor = 0.9
218. (CONTENT) Implement a ship
Bit Hunter:GIF
It has the following options:
- Speed factor multiplier = 0.9
- Turn Rate Multiplier = 0.9
- Ammo = 80
- Attack Speed Multiplier = 0.8
- Projectile Speed Multiplier = 0.9
- Invulnerability Multiplier = 1.5
- Size factor = 1.1
- Luck Multiplier = 1.5
- Resource Creation Frequency Multiplier = 1.5
- Enemy Creation Frequency Multiplier = 1.5
- Cycle Speed Multiplier = 1.25
219. (CONTENT) Implement a ship
Sentinel:GIF
It has the following options:
- Energy Shield = true
220. (CONTENT) Implement a ship
Striker:GIF
It has the following options:
- Ammo = 120
- Attack Speed Multiplier = 2
- Shell Speed Multiplier = 1.25
- HP = 50
- Additional projectile shells = 8
- Chance to fire a burst on a kill = 10%
- The probability of firing a burst in a cycle = 10%
- Barrage nova = true
221. (CONTENT) Implement a ship
Nuclear:GIF
It has the following options:
- Boost = 80
- Turn Rate Multiplier = 0.8
- Ammo = 80
- Attack Speed Multiplier = 0.85
- HP = 80
- Invulnerability Multiplier = 2
- Luck Multiplier = 1.5
- Resource Creation Frequency Multiplier = 1.5
- Enemy Creation Frequency Multiplier = 1.5
- Cycle Speed Multiplier = 1.5
- The probability of a player exploding during a cycle = 10%
222. (CONTENT) Implement a ship
Cycler:GIF
It has the following options:
- Cycle Speed Multiplier = 2
223. (CONTENT) Implement a ship
Wisp:GIF
It has the following options:
- Boost = 50
- Speed factor = 0.5
- Turn Rate Multiplier = 0.5
- Attack Speed Multiplier = 0.66
- Projectile Speed Multiplier = 0.5
- HP = 50
- Size factor = 0.75
- Resource Creation Frequency Multiplier = 1.5
- Enemy Creation Frequency Multiplier = 1.5
- Chance of projectile shield = 100%
- Projectile Life Factor = 1.5
END
And this is where we finished the implementation of all the content of the game. In the last two parts of the article there were a lot of exercises, mainly related to adding content manually. This may seem very boring to some, so this work is a good indicator of whether you like the implementation of such content. Most of the game’s development is simply adding these elements, so if you don’t like it at all, it’s better to find out sooner rather than later.
In the next part, we will look at the skill tree in which the player will display all of these passive skills. We will focus on creating everything you need for the skill tree to work, but creating the tree itself (for example, placing and connecting nodes) will remain entirely your task. This is another of those moments when we simply manually add content to the game and do not do anything particularly complicated.
If you enjoy this series of tutorials, then you can encourage me to write something similar in the future:
Having bought a tutorial on itch.io, you will have access to the complete source code of the game, to the answers to the exercises from parts 1-9, to the code broken into parts of the tutorial (the code will look like it should look at the end of each part) and to the key games on Steam.