 January 5, 2018 at 16:01
Telegram bot as a gift
Hello, Habr! Today I want to talk about how I wrote a Telegram bot, not a simple one, but a gift one. I ask for a cut for those who find this story funny, as well as those who are trying to write their Telegram bots in Java. Perhaps my little experience will be useful in something.
I work as a programmer for a little over six years, I write mainly in Java and 1C, I don’t grab stars from the sky, but I carry out the tasks.
In the spring of 2017, I was interested in creating bots for various instant messengers. At first, creating a bot in Viber seemed like a good idea. In Siberia, it is the most popular, almost all the acquaintances are sitting in it, corporate chats are also conducted in it. In addition, this article inspired . However, creating a public account was not such an easy task - laconic refusals came to all requests.
After suffering with Weiber for about a week, I drew attention to Telegram, it turned out that registering a bot there is very easy, and the life of a Java programmer is facilitated by the presence of the TelegramBots library. As a sample test, a bot was written that allows you to receive some reports from corporate systems, then there was a bot with background information, and in the fall I tried to make a bot for myself for appointment in the beauty salon. All these were interesting crafts that others liked, and the first two bots were even actually used in the work. Thanks to this, thoughts about how you can still use bots in everyday life and the national economy were constantly spinning in my head.
There was only 4 days left to complete all the work, or more precisely, 4 pm, and even then incomplete. At hand there were sources of three other bots that could be used as “spare parts”, and it was clear that an exciting rally on a bicycle from crutches awaited.
As a programming language, the Java has been chosen, as a library, for use with Telegram the API - TelegramBots , used databases to store questions base H2 .
The first task was to create a base of questions. To do this, I had to do a lot of work to collect photos from the phone, work and home computers and social networks. The resulting photos were structured in such a way that 26 questions were obtained, each of which was attached from 2 to 4 photos and 4 answer options. In this case, obviously no correct answer options were provided, and the answer to each question was simply accompanied by a comment. I also wanted to save the history of the selected answer options, but at the very last moment I just forgot to screw this feature.
Layout of photos and inventing questions turned out to be a very laborious process, and it took them one and a half nights.
Next was implemented a database that stores questions. The following is a description of the database tables and the DDL script.
After creation, the database was filled with data manually, since Netbeans, which I use as a development environment, is a fairly convenient editor of SQL scripts.
After two days, the database of questions and photos was ready, there was very little time left, it was time to move on to creating the bot itself.
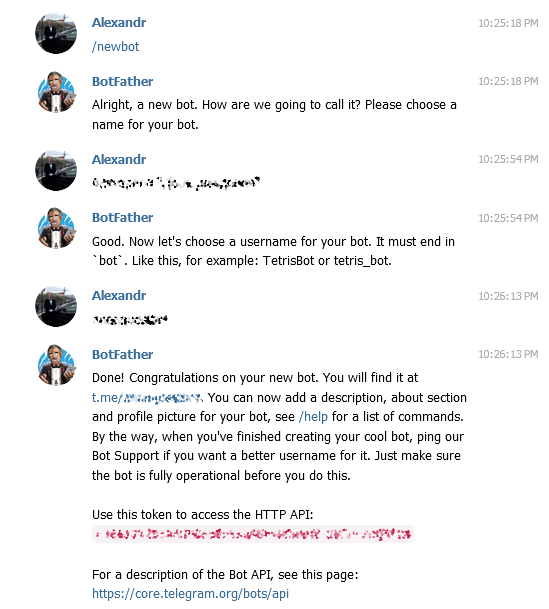
Let me remind you that to create a bot in Telegram you need to write @BotFather using the / newbot command to enter the display name and username for the bot. After completing these steps, a token will be obtained for accessing the Telegram API. It looks something like this.
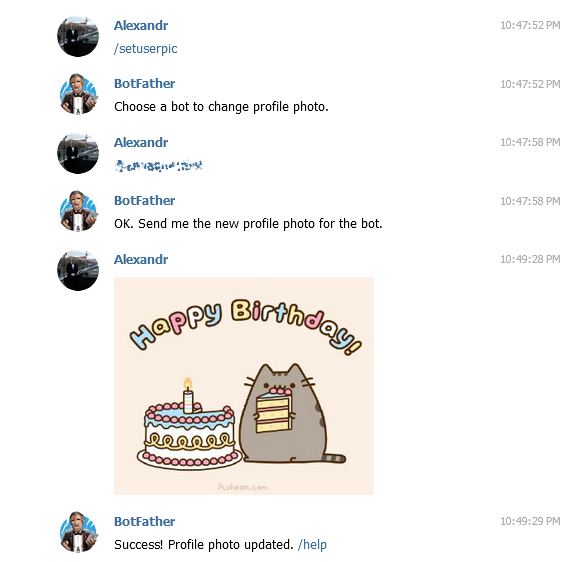
For beauty, add a profile photo using / setuserpic.
Now let's move on to creating the bot itself using TelegramBots. Let me remind you that Telegram allows you to create bots that work with Webhooks and LongPolling bots. The second option was chosen. To create a LongPolling bot, you must implement your own class that inherits from the class
The method
The bot being created is a regular console application and its launch looks like this:
There is nothing complicated in initializing the bot, but I want to draw attention to the fact that it is important to provide the ability to specify a proxy to the bot. In our case, the proxy settings are stored in the usual properties-file, from where they are read when the program starts. I also note that the application uses its own bad bike in the form of some semblance of a global context
The bot naturally starts by processing the / start command. As described above, this command is processed by the method
At the beginning of the method, declare the emoticons that will be used in the text of the greeting message.
Next, the entered command is checked and if it is the / start command, a response message is generated
An interesting point is the installation of callback data. This data can be used in processing button clicks. In our case, the serialized in JSON object is written to the callback data. This method is heavy for this task, but allows you to work with the return data without unnecessary troubles on the conversion. Return data is generated in a special builder
In order to
The marshaller that is used in
And finally, the message is sent:
In the end, the welcome message looks like this.

It remained to do the most interesting thing - to implement the logic of the bot.
To work with the question base, JPA was used. I will give the code of entity classes.
I also note that hereinafter an object that implements the interface is used to access data
Now let's move on to the moment when the “Start!” Button is clicked. At this very moment, the bot processes the next batch of incoming information and calls the previously mentioned method
If the quiz has just begun, you need to initialize the list of questions and ask the first question.
Now consider the initialization of the list of questions
In the method
After initialization, the first question is asked. But we'll talk about this a bit later. In the meantime, consider the situation when the answer to the already asked question has come and the bot needs to send a comment regarding this answer option. Everything is quite simple here, first we look for the answer in the database (the unique identifier of the answer option is saved in the
Then we prepare a message based on the response found and send it:
Now consider a method
If Enumeration still contains elements, then we are preparing a question for sending, otherwise it's time to display a message about the end of the quiz. We send the question itself:
Now we send photos related to this issue:
And finally, the answer options:
A keyboard with answer options is formed as follows
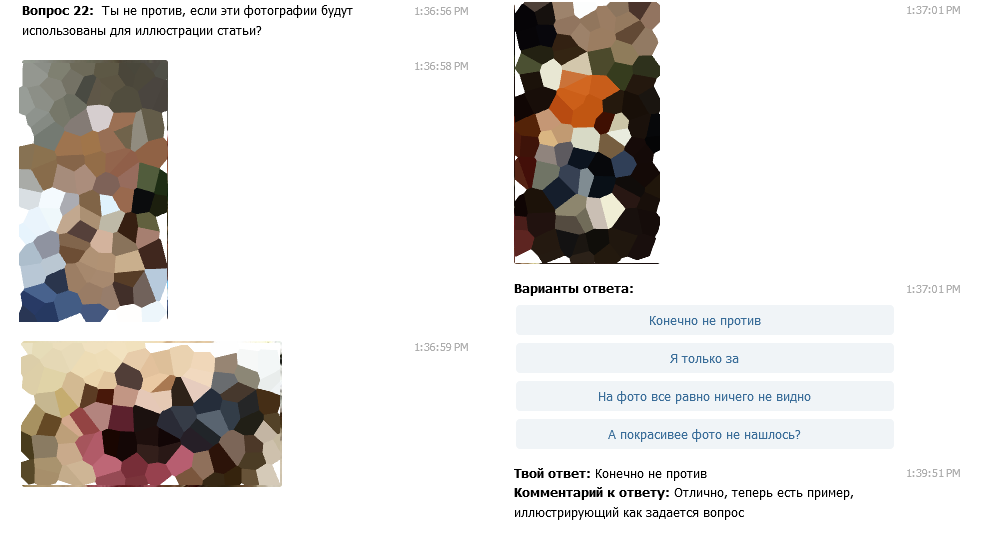
Question sent. It will look something like this (the photos are a bit blurry so as not to bother anyone).
At the moment when the questions are over, a message will be generated about the end of the quiz:
And at the very end we will send a funny sticker:
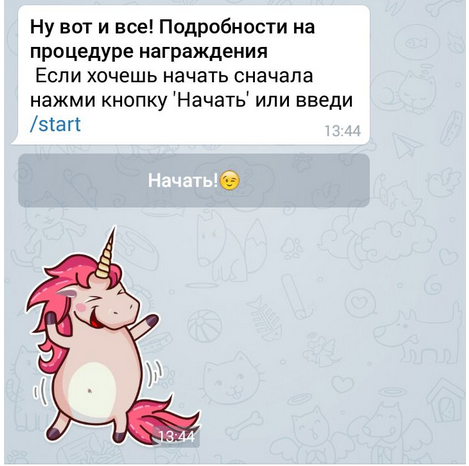
This completes the work of the bot.
Work on all the described functionality was completed at about 11 o’clock in the evening of the day preceding X. I note that, having in mind some features, I understood that the bot had to be launched at exactly 12 nights. In this regard, I experienced some time pressure (why I forgot about the history of answers). In addition, a colleague needed to somehow inform about this quiz. For a number of reasons, I couldn’t just drop the link, so I entrusted the notification to another bot (since the user ID was saved during the testing process and the bot could write freely). This is where the story of writing the bot ends.
There will be no deep conclusions from this story. The bot itself was received with interest and liked, so I tried not in vain. If we move on to the technical part of the question, then work on the bot allowed us to think about the fact that it was time to get rid of some crutches and bicycles, which I tried to do in the next bot.
I also want to note that the idea of bots is very promising. There are many everyday tasks from ordering pizza to calling a taxi, which are proposed to be addressed through mobile applications, sites and their mobile versions or phone calls to the operator. On the one hand, all of these methods have proven effective, convenient and unlikely to change in the near future. On the other hand, applications for mobile devices, although rich in functionality, require installation, updating and studying their interface, and they also have the ability to eat battery. Sites and their mobile versions require the user to at least go to the browser and work with the new interface, which is not always convenient, especially on mobile devices. Phone interaction is convenient for many, but does not imply any visualization in principle, and besides, the operator will always be the bottleneck of the system. To solve the same problems, bots do not require the installation of anything other than a messenger, do not require the study of new interfaces and allow the user to work asynchronously (unlike a phone call) in a relatively familiar messenger interface. The messenger in this case provides a certain environment for client-server interaction, where the bot acts as the server, and the client part is implemented by means of the messenger. Of course, when working with bots for the user, various difficulties also arise, in some ways similar to the difficulties in working with text interfaces, in some way due to the limitations of the messengers themselves. But all the same, bots focused on solving small everyday tasks (or on entertainment, like the bot described in this article) seem promising. To solve the same problems, bots do not require the installation of anything other than a messenger, do not require the study of new interfaces and allow the user to work asynchronously (unlike a phone call) in a relatively familiar messenger interface. The messenger in this case provides a certain environment for client-server interaction, where the bot acts as the server, and the client part is implemented by means of the messenger. Of course, when working with bots for the user, various difficulties also arise, in some ways similar to the difficulties in working with text interfaces, in some way due to the limitations of the messengers themselves. But all the same, bots focused on solving small everyday tasks (or on entertainment, like the bot described in this article) seem promising. To solve the same problems, bots do not require the installation of anything other than a messenger, do not require the study of new interfaces and allow the user to work asynchronously (unlike a phone call) in a relatively familiar messenger interface. The messenger in this case provides a certain environment for client-server interaction, where the bot acts as the server, and the client part is implemented by means of the messenger. Of course, when working with bots for the user, various difficulties also arise, in some ways similar to the difficulties in working with text interfaces, in some way due to the limitations of the messengers themselves. But all the same, bots focused on solving small everyday tasks (or on entertainment, like the bot described in this article) seem promising.
This is my first post, I will be grateful for the constructive feedback!
UPD: Uploaded the project on GitHub github.com/altmf/questbot
Brief Background
I work as a programmer for a little over six years, I write mainly in Java and 1C, I don’t grab stars from the sky, but I carry out the tasks.
In the spring of 2017, I was interested in creating bots for various instant messengers. At first, creating a bot in Viber seemed like a good idea. In Siberia, it is the most popular, almost all the acquaintances are sitting in it, corporate chats are also conducted in it. In addition, this article inspired . However, creating a public account was not such an easy task - laconic refusals came to all requests.
After suffering with Weiber for about a week, I drew attention to Telegram, it turned out that registering a bot there is very easy, and the life of a Java programmer is facilitated by the presence of the TelegramBots library. As a sample test, a bot was written that allows you to receive some reports from corporate systems, then there was a bot with background information, and in the fall I tried to make a bot for myself for appointment in the beauty salon. All these were interesting crafts that others liked, and the first two bots were even actually used in the work. Thanks to this, thoughts about how you can still use bots in everyday life and the national economy were constantly spinning in my head.
Now it is necessary to make a digression to talk about who the gift was made for (those who are interested in only the technical details can safely skip).
In working as a programmer in 1C, I have to communicate and work together with a very nice colleague, the colleague, besides being pretty, is also smart, and at times (when the mood is good), she delves deep enough into development issues (and, if desired, can program anything) and generally has systemic thinking. And systemic thinking is the crown of female attractiveness, who would argue. So, with such an attractive colleague, we often discuss all sorts of whistle-blowers for 1C (we discuss it on my head, since then they fall into the next requirements for the developed system), various new technologies and near-IT topics. By the way, I showed my first bot to this colleague and then received a good feedback and impulse to study the topic.
It should be noted here that a colleague had a birthday in the very beginning of December, and of course it was impossible not to congratulate her. It is quite obvious that colleagues with systemic thinking as gifts can count not only on sweets, flowers and other nishtyaks, but also on something that claims to be witty. So in 2016, as a gift, the main page of the system that we do together was set up, and instead of a standard splash screen, a congratulation greeted a colleague on his birthday. It seems to be a trifle, but in our organization nobody was so congratulated and the gift, as they say, went in, and went in so much that the colleague considered this congratulation to be the best on that day (I hope it was). After such achievements, it was clear that in 2017 it was necessary to develop the theme and again supplement the standard congratulatory set with something IT. Thoughts in my head vaguely wandered that "something IT" could be connected with bots, but there was no clear idea, and I almost came to terms with the fact that nothing original could come up. Time passed, before the birthday was 5 days ...
I returned home from work, the cork was sluggish, and I could go deeper into my thoughts: development plans, technical solutions, automation with bots, anticipation of Friday beer, in general, a standard mess. Suddenly, a thought flashed through my head that my colleague still needed to give a bot, albeit a very simple one, for example, issuing various photographs memorable for a colleague. The thought seemed completely stale, but I began to wonder what photos could be used. There were many photos, but the circumstances under which they were made were hardly remembered. This is where the idea of the gift bot came about: a comic quiz in which each question would be accompanied by photographs of a colleague and several answer options, while the bot would give some kind of funny comment for each answer. On the one hand, I found this idea quite original,
It should be noted here that a colleague had a birthday in the very beginning of December, and of course it was impossible not to congratulate her. It is quite obvious that colleagues with systemic thinking as gifts can count not only on sweets, flowers and other nishtyaks, but also on something that claims to be witty. So in 2016, as a gift, the main page of the system that we do together was set up, and instead of a standard splash screen, a congratulation greeted a colleague on his birthday. It seems to be a trifle, but in our organization nobody was so congratulated and the gift, as they say, went in, and went in so much that the colleague considered this congratulation to be the best on that day (I hope it was). After such achievements, it was clear that in 2017 it was necessary to develop the theme and again supplement the standard congratulatory set with something IT. Thoughts in my head vaguely wandered that "something IT" could be connected with bots, but there was no clear idea, and I almost came to terms with the fact that nothing original could come up. Time passed, before the birthday was 5 days ...
I returned home from work, the cork was sluggish, and I could go deeper into my thoughts: development plans, technical solutions, automation with bots, anticipation of Friday beer, in general, a standard mess. Suddenly, a thought flashed through my head that my colleague still needed to give a bot, albeit a very simple one, for example, issuing various photographs memorable for a colleague. The thought seemed completely stale, but I began to wonder what photos could be used. There were many photos, but the circumstances under which they were made were hardly remembered. This is where the idea of the gift bot came about: a comic quiz in which each question would be accompanied by photographs of a colleague and several answer options, while the bot would give some kind of funny comment for each answer. On the one hand, I found this idea quite original,
Preparation and creation of a database of questions
There was only 4 days left to complete all the work, or more precisely, 4 pm, and even then incomplete. At hand there were sources of three other bots that could be used as “spare parts”, and it was clear that an exciting rally on a bicycle from crutches awaited.
As a programming language, the Java has been chosen, as a library, for use with Telegram the API - TelegramBots , used databases to store questions base H2 .
The first task was to create a base of questions. To do this, I had to do a lot of work to collect photos from the phone, work and home computers and social networks. The resulting photos were structured in such a way that 26 questions were obtained, each of which was attached from 2 to 4 photos and 4 answer options. In this case, obviously no correct answer options were provided, and the answer to each question was simply accompanied by a comment. I also wanted to save the history of the selected answer options, but at the very last moment I just forgot to screw this feature.
Layout of photos and inventing questions turned out to be a very laborious process, and it took them one and a half nights.
Next was implemented a database that stores questions. The following is a description of the database tables and the DDL script.
CLS_QUEST- a table containing the texts of the questionsCLS_QUEST_PHOTO- a table containing the relative paths to the photos that are related to the question asked; the photos themselves are in the file system in folders corresponding to the question.CLS_ANSWER- a table containing the answers to the question, as well as comments on each answer
Script
CREATE SCHEMA IF NOT EXISTS QUE;
SET SCHEMA QUE;
CREATE TABLE QUE.CLS_QUEST(
    ID              BIGINT IDENTITY,
    IS_DELETED      INT DEFAULT 0,
    QUEST_TEXT      CLOB
);
CREATE TABLE QUE.CLS_QUEST_PHOTO(
    ID              BIGINT IDENTITY,
    ID_QUEST        BIGINT NOT NULL,
    IS_DELETED      INT DEFAULT 0,
    REL_FILE_PATH   CLOB,
    PHOTO_TEXT      CLOB,
    FOREIGN KEY(ID_QUEST) REFERENCES CLS_QUEST(ID)
);
CREATE TABLE QUE.CLS_ANSWER(
    ID              BIGINT IDENTITY,
    ID_QUEST        BIGINT NOT NULL,
    IS_DELETED      INT DEFAULT 0,
    ANSWER_TEXT     CLOB,
    ANSWER_COMMENT  CLOB,
    FOREIGN KEY(ID_QUEST) REFERENCES CLS_QUEST(ID)
);
After creation, the database was filled with data manually, since Netbeans, which I use as a development environment, is a fairly convenient editor of SQL scripts.
After two days, the database of questions and photos was ready, there was very little time left, it was time to move on to creating the bot itself.
Bot frame
Let me remind you that to create a bot in Telegram you need to write @BotFather using the / newbot command to enter the display name and username for the bot. After completing these steps, a token will be obtained for accessing the Telegram API. It looks something like this.
For beauty, add a profile photo using / setuserpic.
Now let's move on to creating the bot itself using TelegramBots. Let me remind you that Telegram allows you to create bots that work with Webhooks and LongPolling bots. The second option was chosen. To create a LongPolling bot, you must implement your own class that inherits from the class
org.telegram.telegrambots.bots.TelegramLongPollingBot.Class source code
public class Bot extends TelegramLongPollingBot {
    private static final String TOKEN = "TOKEN";
    private static final String USERNAME = "USERNAME";
    public Bot() {
    }
    public Bot(DefaultBotOptions options) {
        super(options);
    }
    @Override
    public String getBotToken() {
        return TOKEN;
    }
    @Override
    public String getBotUsername() {
        return USERNAME;
    }
    @Override
    public void onUpdateReceived(Update update) {
        if (update.hasMessage() && update.getMessage().hasText()) {
            processCommand(update);
        } else if (update.hasCallbackQuery()) {
            processCallbackQuery(update);
        }
    }
}
TOKEN - token for accessing the Telegram API received at the bot registration stage. USERNAME - bot name obtained at the bot registration stage. The method
onUpdateReceivedis called when the bot receives "incoming updates . " In our bot, we are interested in processing text commands (to be honest, only / start commands) and processing callbacks (callbacks) that occur when you click on the inline keyboard buttons (located in the message area).
The bot checks whether the incoming update is a text message or a callback , and then calls the appropriate methods for processing. We will talk about the contents of these methods a little later.update.hasMessage() && update.getMessage().hasText()update.hasCallbackQuery()The bot being created is a regular console application and its launch looks like this:
The source code of the main class
public class Main {
    public static void main(String[] args) {
	ApiContextInitializer.init();
	TelegramBotsApi botsApi = new TelegramBotsApi();
        Runnable r = () -> {
            Bot bot = null;
            HttpHost proxy = AppEnv.getContext().getProxy();
            if (proxy == null) {
                bot = new Bot();
            } else {
                DefaultBotOptions instance = ApiContext
                        .getInstance(DefaultBotOptions.class);
                RequestConfig rc = RequestConfig.custom()
                        .setProxy(proxy).build();
                instance.setRequestConfig(rc);
                bot = new Bot(instance);
            }
            try {
                botsApi.registerBot(bot);
                AppEnv.getContext().getMenuManager().setBot(bot);
            } catch (TelegramApiRequestException ex) {
                Logger.getLogger(Main.class.getName())
                        .log(Level.SEVERE, null, ex);
            }
        };
        new Thread(r).start()
        while (true) {
            try {
                Thread.sleep(80000L);
            } catch (InterruptedException ex) {
                Logger.getLogger(Main.class.getName())
                        .log(Level.SEVERE, null, ex);
            }
        }
    }
}
There is nothing complicated in initializing the bot, but I want to draw attention to the fact that it is important to provide the ability to specify a proxy to the bot. In our case, the proxy settings are stored in the usual properties-file, from where they are read when the program starts. I also note that the application uses its own bad bike in the form of some semblance of a global context
AppEnv.getContext(). At the time of writing the bot, there was no time to fix it, but in the new "crafts" it was possible to get rid of this bike and use Google Guice instead.Welcome message
The bot naturally starts by processing the / start command. As described above, this command is processed by the method
processCommand. At the beginning of the method, declare the emoticons that will be used in the text of the greeting message.
final String smiling_face_with_heart_eyes =
    new String(Character.toChars(0x1F60D));
final String winking_face = new String(Character.toChars(0x1F609));
final String bouquet = new String(Character.toChars(0x1F490));
final String party_popper = new String(Character.toChars(0x1F389));
Next, the entered command is checked and if it is the / start command, a response message is generated
answerMessage. The message is set to text setText(), the support for some html tags is enabled, setParseMode("HTML") and the identifier of the chat to which the message will be sent is set setChatId(update.getMessage().getChatId()). It remains only to add the "Start" button. To do this, create an inline keyboard and add it to the response:SendMessage answerMessage = null;
String text = update.getMessage().getText();
if ("/start".equalsIgnoreCase(text)) {
answerMessage = new SendMessage();
answerMessage.setText("Привет!" + smiling_face_with_heart_eyes +
"\nВо-первых с днем рождения!"
+ bouquet + bouquet + bouquet + party_popper
+ " А во-вторых, ты готова поиграть в увлекательную викторину?");
answerMessage.setParseMode("HTML");
answerMessage.setChatId(update.getMessage().getChatId());
InlineKeyboardMarkup markup = keyboard(update);
answerMessage.setReplyMarkup(markup);
}The source code for forming the keyboard is shown below:
private InlineKeyboardMarkup keyboard(Update update) {
    final InlineKeyboardMarkup markup = new InlineKeyboardMarkup();
    List> keyboard = new ArrayList<>();
    keyboard.add(Arrays.asList(buttonMain()));
    markup.setKeyboard(keyboard);
    return markup;
}
private InlineKeyboardButton buttonMain() {
    final String OPEN_MAIN = "OM";
    final String winking_face = new String(Character.toChars(0x1F609));
    InlineKeyboardButton button = new InlineKeyboardButtonBuilder()
        .setText("Начать!" + winking_face)
        .setCallbackData(new ActionBuilder(marshaller)
            .setName(OPEN_MAIN)
            .asString())
         .build();
    return button;
}
InlineKeyboardButtonBuilder
public class InlineKeyboardButtonBuilder {
    private final InlineKeyboardButton button;
    public InlineKeyboardButtonBuilder(){
        this.button = new InlineKeyboardButton();
    }
    public InlineKeyboardButtonBuilder setText(String text){
        button.setText(text);
        return this;
    }
    public InlineKeyboardButtonBuilder setCallbackData(String callbackData){
        button.setCallbackData(callbackData);
        return this;
    }
    public InlineKeyboardButton build(){
        return button;
    }
}
An interesting point is the installation of callback data. This data can be used in processing button clicks. In our case, the serialized in JSON object is written to the callback data. This method is heavy for this task, but allows you to work with the return data without unnecessary troubles on the conversion. Return data is generated in a special builder
ActionBuilder.Source Code ActionBuilder
public class Action {
    protected String name = "";
    protected String id = "";
    protected String value = "";
    public String getName() {
        return name;
    }
    public void setName(String value) {
        this.name = value;
    }
    public String getValue() {
        return value;
    }
    public void setValue(String value) {
        this.value = value;
    }
}
public class ActionBuilder {
    private final DocumentMarshaller marshaller;
    private Action action = new Action();
    public ActionBuilder(DocumentMarshaller marshaller) {
        this. marshaller = marshaller;
    }
    public ActionBuilder setName(String name) {
        action.setName(name);
        return this;
    }
    public ActionBuilder setValue(String name) {
        action.setValue(name);
        return this;
    }
    public String asString() {
        return marshaller.marshal(action, "Action");
    }
    public Action build() {
        return action;
    }
    public Action build(Update update) {
        String data = update.getCallbackQuery().getData();
        if (data == null) {
            return null;
        }
        action = marshaller.unmarshal(data, "Action");
        if (action == null) {
            return null;
        }
        return action;
    }
}
In order to
ActionBuilder be able to return JSON, it needs to be passed a marshaller. Hereinafter, when referring to the variable marshaller, it is assumed that it is an object of a class that implements the interface DocumentMarshaller.Source Code DocumentMarshaller
public interface DocumentMarshaller {
     String marshal(T document);
     T unmarshal(String str);
     T unmarshal(String str, Class clazz);
}
The marshaller that is used in
ActionBuilderis implemented using Jackson . And finally, the message is sent:
try {
    if (answerMessage != null) {
        execute(answerMessage);
    }
} catch (TelegramApiException ex) {
     Logger.getLogger(Bot.class.getName())
        .log(Level.SEVERE, null, ex);
}
In the end, the welcome message looks like this.
Asking questions
It remained to do the most interesting thing - to implement the logic of the bot.
To work with the question base, JPA was used. I will give the code of entity classes.
Source Code for Entity Classes
public abstract class Classifier implements Serializable {
    private static final long serialVersionUID = 1L;
    public Classifier() {
    }
    public abstract Long getId();
    public abstract Integer getIsDeleted();
    public abstract void setIsDeleted(Integer isDeleted);
}
@Entity
@Table(name = "CLS_ANSWER", catalog = "QUEB", schema = "QUE")
@XmlRootElement
public class ClsAnswer extends Classifier implements Serializable {
    private static final long serialVersionUID = 1L;
    @Id
    @GeneratedValue(strategy = GenerationType.IDENTITY)
    @Basic(optional = false)
    @Column(name = "ID")
    private Long id;
    @Column(name = "IS_DELETED")
    private Integer isDeleted;
    @Lob
    @Column(name = "ANSWER_TEXT")
    private String answerText;
    @Lob
    @Column(name = "ANSWER_COMMENT")
    private String answerComment;
    @OneToMany(cascade = CascadeType.ALL, mappedBy = "idAnswer")
    private Collection regQuestAnswerCollection;
    @JoinColumn(name = "ID_QUEST", referencedColumnName = "ID")
    @ManyToOne(optional = false)
    private ClsQuest idQuest;
    public ClsAnswer() {
    }
    public ClsAnswer(Long id) {
        this.id = id;
    }
    public Long getId() {
        return id;
    }
    public void setId(Long id) {
        this.id = id;
    }
    public Integer getIsDeleted() {
        return isDeleted;
    }
    public void setIsDeleted(Integer isDeleted) {
        this.isDeleted = isDeleted;
    }
    public String getAnswerText() {
        return answerText;
    }
    public void setAnswerText(String answerText) {
        this.answerText = answerText;
    }
    public String getAnswerComment() {
        return answerComment;
    }
    public void setAnswerComment(String answerComment) {
        this.answerComment = answerComment;
    }
    @XmlTransient
    public Collection getRegQuestAnswerCollection() {
        return regQuestAnswerCollection;
    }
    public void setRegQuestAnswerCollection(Collection regQuestAnswerCollection) {
        this.regQuestAnswerCollection = regQuestAnswerCollection;
    }
    public ClsQuest getIdQuest() {
        return idQuest;
    }
    public void setIdQuest(ClsQuest idQuest) {
        this.idQuest = idQuest;
    }
}
@Entity
@Table(name = "CLS_QUEST", catalog = "QUEB", schema = "QUE")
@XmlRootElement
public class ClsQuest extends Classifier implements Serializable {
    private static final long serialVersionUID = 1L;
    @Id
    @GeneratedValue(strategy = GenerationType.IDENTITY)
    @Basic(optional = false)
    @Column(name = "ID")
    private Long id;
    @Column(name = "IS_DELETED")
    private Integer isDeleted;
    @Lob
    @Column(name = "QUEST_TEXT")
    private String questText;
    @OneToMany(cascade = CascadeType.ALL, mappedBy = "idQuest")
    private Collection regQuestAnswerCollection;
    @OneToMany(cascade = CascadeType.ALL, mappedBy = "idQuest")
    private Collection clsAnswerCollection;
    @OneToMany(cascade = CascadeType.ALL, mappedBy = "idQuest")
    private Collection clsQuestPhotoCollection;
    public ClsQuest() {
    }
    public ClsQuest(Long id) {
        this.id = id;
    }
    public Long getId() {
        return id;
    }
    public void setId(Long id) {
        this.id = id;
    }
    public Integer getIsDeleted() {
        return isDeleted;
    }
    public void setIsDeleted(Integer isDeleted) {
        this.isDeleted = isDeleted;
    }
    public String getQuestText() {
        return questText;
    }
    public void setQuestText(String questText) {
        this.questText = questText;
    }
    @XmlTransient
    public Collection getRegQuestAnswerCollection() {
        return regQuestAnswerCollection;
    }
    public void setRegQuestAnswerCollection(Collection regQuestAnswerCollection) {
        this.regQuestAnswerCollection = regQuestAnswerCollection;
    }
    @XmlTransient
    public Collection getClsAnswerCollection() {
        return clsAnswerCollection;
    }
    public void setClsAnswerCollection(Collection clsAnswerCollection) {
        this.clsAnswerCollection = clsAnswerCollection;
    }
    @XmlTransient
    public Collection getClsQuestPhotoCollection() {
        return clsQuestPhotoCollection;
    }
    public void setClsQuestPhotoCollection(Collection clsQuestPhotoCollection) {
        this.clsQuestPhotoCollection = clsQuestPhotoCollection;
    }
}
@Entity
@Table(name = "CLS_QUEST_PHOTO", catalog = "QUEB", schema = "QUE")
@XmlRootElement
public class ClsQuestPhoto extends Classifier implements Serializable {
    private static final long serialVersionUID = 1L;
    @Id
    @GeneratedValue(strategy = GenerationType.IDENTITY)
    @Basic(optional = false)
    @Column(name = "ID")
    private Long id;
    @Column(name = "IS_DELETED")
    private Integer isDeleted;
    @Lob
    @Column(name = "REL_FILE_PATH")
    private String relFilePath;
    @Lob
    @Column(name = "PHOTO_TEXT")
    private String photoText;
    @JoinColumn(name = "ID_QUEST", referencedColumnName = "ID")
    @ManyToOne(optional = false)
    private ClsQuest idQuest;
    public ClsQuestPhoto() {
    }
    public ClsQuestPhoto(Long id) {
        this.id = id;
    }
    public Long getId() {
        return id;
    }
    public void setId(Long id) {
        this.id = id;
    }
    public Integer getIsDeleted() {
        return isDeleted;
    }
    public void setIsDeleted(Integer isDeleted) {
        this.isDeleted = isDeleted;
    }
    public String getRelFilePath() {
        return relFilePath;
    }
    public void setRelFilePath(String relFilePath) {
        this.relFilePath = relFilePath;
    }
    public String getPhotoText() {
        return photoText;
    }
    public void setPhotoText(String photoText) {
        this.photoText = photoText;
    }
    public ClsQuest getIdQuest() {
        return idQuest;
    }
    public void setIdQuest(ClsQuest idQuest) {
        this.idQuest = idQuest;
    }
}
I also note that hereinafter an object that implements the interface is used to access data
ClassifierRepository, and when a variable classifierRepository is mentioned , it is assumed that it is an object of a class that implements the interfaceClassifierRepositorySource Code ClassifierRepository
public interface ClassifierRepository {
     void add(T classifier);
     List find(Class clazz);
     T find(Class clazz, Long id);
     List find(Class clazz, boolean isDeleted);
     List getAll(Class clazz);
     List getAll(Class clazz, boolean isDeleted);
}
Now let's move on to the moment when the “Start!” Button is clicked. At this very moment, the bot processes the next batch of incoming information and calls the previously mentioned method
processCallbackQuery(). At the beginning of the method, the incoming update is processed, and the callback data is also extracted. Based on the callback data, it is determined whether the “Start!” Button was pressed OPEN_MAIN.equals(action.getName(), or the button for answering another question was pressed. GET_ANSWER.equals(action.getName()).final String OPEN_MAIN = "OM";
final String GET_ANSWER = "GA";
Action action = new ActionBuilder(marshaller).buld(update);
String data = update.getCallbackQuery().getData();
Long chatId = update.getCallbackQuery().getMessage().getChatId();
If the quiz has just begun, you need to initialize the list of questions and ask the first question.
 if (OPEN_MAIN.equals(action.getName())) {
     initQuests(update);
     sendQuest(update);
}
Now consider the initialization of the list of questions
initQuests():private void initQuests(Update update) {
QuestStateHolder questStateHolder = new QuestStateHolder();
List q = classifierRepository.find(ClsQuest.class, false);
Collections.shuffle(q);
questStateHolder.put(update, new QuestEnumeration(q));
} In the method
initQuests, we first get all 26 questions, and then mix in random order. After this, we put the questions in QuestEnumeration, from where we will receive them one at a time, until all 26 questions are received. QuestEnumerationadd a special class to the object QuestStateHolderthat stores the correspondence of the user and his current session of questions. Class code QuestStateHolderand QuestEnumerationbelow.Source code for QuestStateHolder and QuestEnumeration
public class QuestStateHolder{
    private Map questStates = new HashMap<>();
    public QuestEnumeration get(User user) {
        return questStates.get(user.getId()) == null ? null : questStates.get(user.getId());
    }
    public QuestEnumeration get(Update update) {
        User u = getUserFromUpdate(update);
        return get(u);
    }
    public void put(Update update, QuestEnumeration questEnumeration) {
        User u = getUserFromUpdate(update);
        put(u, questEnumeration);
    }
    public void put(User user, QuestEnumeration questEnumeration) {
        questStates.put(user.getId(), questEnumeration);
    }
	static User getUserFromUpdate(Update update) {
        return update.getMessage() != null ? update.getMessage().getFrom()
                : update.getCallbackQuery().getFrom();
    }
}
public class QuestEnumeration implements Enumeration{
    private List quests = new ArrayList<>();
    private Integer currentQuest = 0;
    public QuestEnumeration(List quests){
        this.quests.addAll(quests);
    }
    @Override
    public boolean hasMoreElements() {
        return currentQuest < quests.size();
    }
    @Override
    public ClsQuest nextElement() {
        ClsQuest q = null;
        if (hasMoreElements()){
            q = quests.get(currentQuest);
            currentQuest++;
        }
        return q;
    }
    public Integer getCurrentQuest(){
        return currentQuest;
    }
}
After initialization, the first question is asked. But we'll talk about this a bit later. In the meantime, consider the situation when the answer to the already asked question has come and the bot needs to send a comment regarding this answer option. Everything is quite simple here, first we look for the answer in the database (the unique identifier of the answer option is saved in the
CallbackData button that was pressed):Long answId = Long.parseLong(action.getValue());
ClsAnswer answ = classifierRepository.find(ClsAnswer.class, answId);Then we prepare a message based on the response found and send it:
SendMessage comment = new SendMessage();
comment.setParseMode("HTML");
comment.setText("Твой ответ: "
    + answ.getAnswerText()
    + "\nКомментарий к ответу: "
    + answ.getAnswerComment() + "\n");
comment.setChatId(chatId);
execute(comment);
Now consider a method
sendQuestthat sends another question. It all starts with getting another question:QuestEnumeration qe = questStateHolder.get(update);
ClsQuest nextQuest = qe.nextElement();If Enumeration still contains elements, then we are preparing a question for sending, otherwise it's time to display a message about the end of the quiz. We send the question itself:
Long chatId = update.getCallbackQuery().getMessage().getChatId();
SendMessage quest = new SendMessage();
quest.setParseMode("HTML");
quest.setText("Вопрос " + qe.getCurrentQuest() + ":  "
    + nextQuest.getQuestText());
quest.setChatId(chatId);
execute(quest);
Now we send photos related to this issue:
for (ClsQuestPhoto clsQuestPhoto : nextQuest.getClsQuestPhotoCollection()) {
    SendPhoto sendPhoto = new SendPhoto();
    sendPhoto.setChatId(chatId);
    sendPhoto.setNewPhoto(new File("\\photo" + clsQuestPhoto.getRelFilePath()));
    sendPhoto(sendPhoto);
}
And finally, the answer options:
SendMessage answers = new SendMessage();
answers.setParseMode("HTML");
answers.setText("Варианты ответа:");
answers.setChatId(chatId);
answers.setReplyMarkup(keyboardAnswer(update, nextQuest));
execute(answers);
A keyboard with answer options is formed as follows
Source
private InlineKeyboardMarkup keyboardAnswer(Update update, ClsQuest quest) {
    final InlineKeyboardMarkup markup = new InlineKeyboardMarkup();
    List> keyboard = new ArrayList<>();
    for (ClsAnswer clsAnswer : quest.getClsAnswerCollection()) {
        keyboard.add(Arrays.asList(buttonAnswer(clsAnswer)));
    }
    markup.setKeyboard(keyboard);
    return markup;
}
private InlineKeyboardButton buttonAnswer(ClsAnswer clsAnswer) {
    InlineKeyboardButton button = new InlineKeyboardButtonBuilder()
        .setText(clsAnswer.getAnswerText())
        .setCallbackData(new ActionBuilder(marshaller)
                .setName(GET_ANSWER)
                .setValue(clsAnswer.getId().toString())
                .asString())
        .build();
    return button;
}
Question sent. It will look something like this (the photos are a bit blurry so as not to bother anyone).
At the moment when the questions are over, a message will be generated about the end of the quiz:
SendMessage answers = new SendMessage();
answers.setParseMode("HTML");
answers.setText("Ну вот и все! Подробности на процедуре награждения \n "
    + "Если хочешь начать заново нажми кнопку 'Начать' или введи /start");
answers.setChatId(chatId);
execute(answers);
And at the very end we will send a funny sticker:
SendSticker sticker = new SendSticker();
sticker.setChatId(chatId);
File stikerFile = new File("\\photo\\stiker.png");
sticker.setNewSticker(stikerFile);
sendSticker(sticker);
This completes the work of the bot.
Work on all the described functionality was completed at about 11 o’clock in the evening of the day preceding X. I note that, having in mind some features, I understood that the bot had to be launched at exactly 12 nights. In this regard, I experienced some time pressure (why I forgot about the history of answers). In addition, a colleague needed to somehow inform about this quiz. For a number of reasons, I couldn’t just drop the link, so I entrusted the notification to another bot (since the user ID was saved during the testing process and the bot could write freely). This is where the story of writing the bot ends.
Conclusion
There will be no deep conclusions from this story. The bot itself was received with interest and liked, so I tried not in vain. If we move on to the technical part of the question, then work on the bot allowed us to think about the fact that it was time to get rid of some crutches and bicycles, which I tried to do in the next bot.
I also want to note that the idea of bots is very promising. There are many everyday tasks from ordering pizza to calling a taxi, which are proposed to be addressed through mobile applications, sites and their mobile versions or phone calls to the operator. On the one hand, all of these methods have proven effective, convenient and unlikely to change in the near future. On the other hand, applications for mobile devices, although rich in functionality, require installation, updating and studying their interface, and they also have the ability to eat battery. Sites and their mobile versions require the user to at least go to the browser and work with the new interface, which is not always convenient, especially on mobile devices. Phone interaction is convenient for many, but does not imply any visualization in principle, and besides, the operator will always be the bottleneck of the system. To solve the same problems, bots do not require the installation of anything other than a messenger, do not require the study of new interfaces and allow the user to work asynchronously (unlike a phone call) in a relatively familiar messenger interface. The messenger in this case provides a certain environment for client-server interaction, where the bot acts as the server, and the client part is implemented by means of the messenger. Of course, when working with bots for the user, various difficulties also arise, in some ways similar to the difficulties in working with text interfaces, in some way due to the limitations of the messengers themselves. But all the same, bots focused on solving small everyday tasks (or on entertainment, like the bot described in this article) seem promising. To solve the same problems, bots do not require the installation of anything other than a messenger, do not require the study of new interfaces and allow the user to work asynchronously (unlike a phone call) in a relatively familiar messenger interface. The messenger in this case provides a certain environment for client-server interaction, where the bot acts as the server, and the client part is implemented by means of the messenger. Of course, when working with bots for the user, various difficulties also arise, in some ways similar to the difficulties in working with text interfaces, in some way due to the limitations of the messengers themselves. But all the same, bots focused on solving small everyday tasks (or on entertainment, like the bot described in this article) seem promising. To solve the same problems, bots do not require the installation of anything other than a messenger, do not require the study of new interfaces and allow the user to work asynchronously (unlike a phone call) in a relatively familiar messenger interface. The messenger in this case provides a certain environment for client-server interaction, where the bot acts as the server, and the client part is implemented by means of the messenger. Of course, when working with bots for the user, various difficulties also arise, in some ways similar to the difficulties in working with text interfaces, in some way due to the limitations of the messengers themselves. But all the same, bots focused on solving small everyday tasks (or on entertainment, like the bot described in this article) seem promising.
This is my first post, I will be grateful for the constructive feedback!
UPD: Uploaded the project on GitHub github.com/altmf/questbot









