December 26, 2017 at 09:56
How does it feel to create a game for Game Boy in 2017
- Transfer
Everyone had a childhood dream. Personally, I dreamed of creating a game for my first console: Nintendo Game Boy. Today my dream came true - I released the first game for Game Boy on a real cartridge : Sheep It Up!
In this article, I will talk about the tools I used and the obstacles that a beginner had to overcome in order to create a project. The article is very long, therefore it is divided into two parts:
- Part 1: used tools / technical difficulties / graphics difficulties
- Part 2: sound restrictions / creating cartridges / player reviews (this part is being written)
The game
"Sheep It Up!" - This is an arcade game in which a sheep must climb up, clinging to flying Velcro fasteners. The concept is simple, but the game itself is rapidly becoming more and more complicated: how high can you climb without falling?
Gameplay Sheep It Up!
I am a collector myself, so I wanted the project to be created in the spirit of the old Game Boy games. Therefore, everything was designed specifically for this game: printed circuit board, ROM, shell, protective case and even a sticker! We also sought to maintain a reasonable price so that everyone could enjoy the game: $ 15 (+ shipping) . It will run on any Game Boy model, from the very first to GBA SP, including the Super Game Boy.

If you still have a Game Boy, then you can buy a cartridge on the publisher’s website:
https://catskullgames.com/sheep-it-up
Tools: thanks, 2017!
In the 90s, creating a game for an 8-bit console was a real challenge, and it required a whole team of experienced professionals. I consider the designers, artists and developers of that time to be real heroes: they were able to create such wonderful games with tools, the capabilities of which are much poorer than those of modern ones.
In 2017, you still need to work hard to make a game for the 8-bit console. But thanks to the wonderful community of lovers, we have many tools to make life easier! Without them, a newcomer like me would not be able to create a game for Game Boy alone. So what are these tools?
To start, I’ll talk about a programming language. In those days, all specialized gaming equipment was programmed in assembler. It is still possible (and even recommended). But now this is not the only option, because many development kits for 8-bit and 16-bit consoles are based on the C language. For Game Boy, this terrific tool is called the Game Boy Developers Kit (GBDK).
In addition, graph paper and a hand scanner are no longer needed to create graphics and level design. Fortunately, you can now use two complementary tools:
- Game Boy Tile Designer (GBTD) . It allows you to draw sprites and tiles, and then export them to a binary format understood by Game Boy.
- Game Boy Map Builder (GBMB) . This tool allows you to build levels and background images based on tiles drawn in GBTD (it's like Tiled, but for Game Boy) .

Last but not least, we need some way to test the game. And here, too, modern tools are important. In the 90s, developers had to use expensive ICE kits, but today we have powerful software emulators that can be run on any computer. For testing your own game, BGB is the best choice . This is a very accurate Game Boy emulator with a powerful debugger - a must-have tool for creating a working game!

The game itself is located in the upper right corner, and all the other frightening windows are different debugging tools!
But be prepared for the fact that to ensure the performance of the game you have to test it on real equipment. In the 90s, people recorded their program on an EPROM chip and used special cartridges to insert this chip into a real Game Boy. This process is effective, but rather lengthy and expensive. Today we have the so-called "Flashcarts" - cartridges into which you can insert SD cards with a ROM image that runs on Game Boy. The idea is similar, but new tools are more convenient and faster to use. There are different Flashcarts for Game Boy, but in my opinion the best one is created by Krikzz: Everdrive Game Boy. A newer and improved model was released this summer, but I used the old version that I bought earlier.
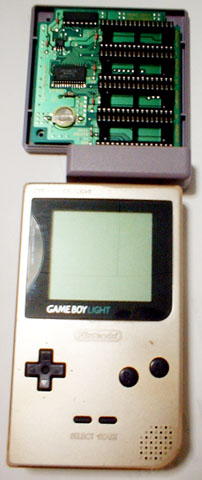
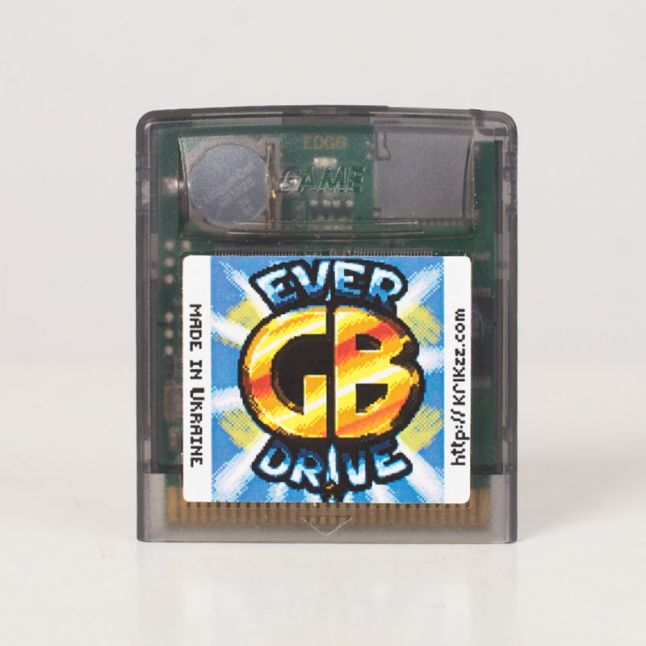
Flashcart from the 90s and from the 2010s
Despite the existence in 2017 of all these wonderful tools, creating a game for the 1989 game console still remains a challenge. Especially for those who are used to using “modern tools” such as Unity, Unreal Engine or Godot. I will talk about the main difficulties encountered in the development of Sheep It Up! , including how I was surprised at how Game Boy worked.
Technical difficulties
Size restrictions
Let's start with the obvious: Sheep It Up! - This is a pretty simple game. This is due to one reason - the whole game weighs only 32KB . Namely - all the code, images and even sounds fit into a tiny 32KB space. For comparison, I can say that 32KB is the size of the Wikipedia logo in a very small resolution:
Full game: 32KB

160x146 pixels (PNG-24): 32KB
Of course, not every game for a Game Boy fits in 32KB. For me, this was a technical limitation to release the game on a real cartridge (more about this in the second part) . The best and most famous games for Game Boy actually weigh a lot more:
- Pokemon Red / Blue takes up 1024KB (huge games!)
- Wario Land and Zelda Link's Awakening - 512KB
- Kirby Dream Land - 256KB
- Gargoyle's Quest - 128KB
In reality, only a few games for Game Boy occupied only 32 KB. They were mainly created in the early stages of console life. For example, both Alleyway (one of the games released with Game Boy in Japan) and Tetris (released with the console in the USA and Europe) fit in 32KB. Both of these games are wonderful, but due to the small size of the cartridge they are quite "limited" in scale: only one screen, a small amount of graphic and sound resources, etc.
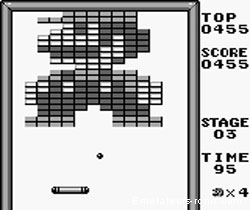

Alleyway and Tetris were 32K games, as was Sheep It Up!
Processor: play with portable power!
Game Boy has a 4MHz processor specially designed for the console (this is a combination of Zilog Z80 and Intel 8080 processors) . Overall, Gameboy’s computing power is comparable to NES, and even slightly higher due to its smaller screen size and number of colors (more on this later) . Despite the low speed of 4 MHz, all games for Game Boy provided stable 60fps . Learn PS4 Pro and Xbox One X!
But for a programmer who just graduated from college, the biggest limitation was the eight-bit processor. As you probably know, inside all computers use zeros and ones to process data. One digit, which may be 0 or 1, is called a “bit”(short for “binary digit”, “binary value”, because it can have only two values) . A processor is called “8-bit” if it can process 8 bits of data in one operation.
How does this affect the creation of video games?
The fewer bits a processor can process, the more limited are the gameplay variables. For example, games use a lot of integers representing different values: energy, speed, points, etc.
With 8 data bits, an integer can store lower values than 16-bit variables:
- 8-bit integer variable: -127 to 128 (or 0 to 255 without the use of a character)
- 16-bit integer variable: -32768 to 32767 (or 0 to 65535 if no sign is used)
If you still don't understand this, let's take a concrete example from Sheet It Up!
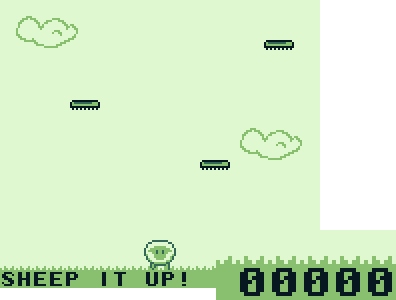
As you see in the picture, the points variable contains 5 digits and can vary from 0 to 99999. Unfortunately, this is much more than can be stored in an 8-bit integer. In fact, even a 16-bit variable will not be enough to store such a “big” account!
So, to track the number of points in Sheep It Up! I had to use not one, but five different 8-bit integer variables. Imagine how “fun” it is to process all these variables, especially when you consider that I added the ability to save record results. I had to compare two values stored in five different variables. Programming on an 8-bit system makes you constantly look for such complex solutions, while modern systems simply use 32-bit or 64-bit variables, and never cause such problems to their programmers.
(Note for experienced game developers: I know that you could find a more efficient approach than storing a single bit with values from 0 to 9 as a whole int8. But in fact, I needed each variable to be able to take values from 0 to 255 , because I do not store the bit categories themselves, but the tile identifiers used to display this number on the screen.)
Graphics Challenges
One world, two planes
All images on the Game Boy consist of two elements: a background layer (BKG) and several moving objects called sprites (OBJ). There can be no more than 40 sprites on the screen. In addition, there is another limitation: Game Boy cannot display more than ten sprites on one line.
Background (BKG) and sprites (OBJ)
In fact, everything is a little more complicated, because there is an additional layer of the “window”, which can scroll independently of the background. It is usually used for the user interface (glasses, etc.). But this layer is opaque: it hides all the graphic data of the background layer located behind it. Therefore, for the sake of simplicity, we can assume that in the Game Boy there is one "background" layer, but if necessary, part of it can be scrolled independently.
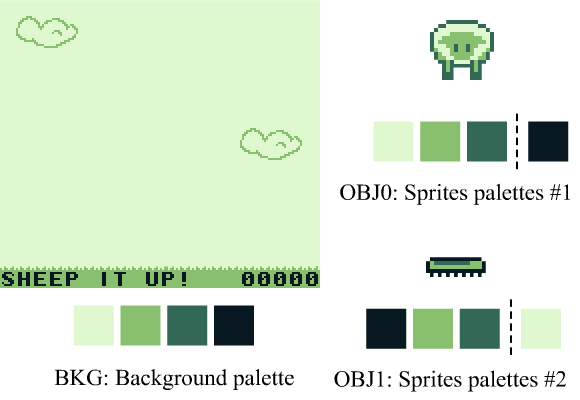
Game Boy sees four colors!
Let's finally get acquainted with the most obvious: the original Game Boy model could display only four different colors.

Some might argue that Light Gray (light gray) and Dark Gray (dark gray) is actually more likely Light Green (light green) and Dark Green (dark green), but it doesn’t matter: for drawing graphics, in any case, we can use only four colors. At least this relates to the background, because in the case of sprites the situation is different!
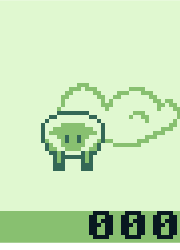
And in fact, as can be seen in the picture, the sheep is painted in only three colors. Why so? In fact, I painted the sprite in four colors. But the fourth color (here it is black) simply does not appear, because Game Boy is used as a "transparent color". Due to this, not all sprites become square images, they can have various shapes that allow you to see the background behind them.

Does this mean that you can’t use black for drawing sprites?
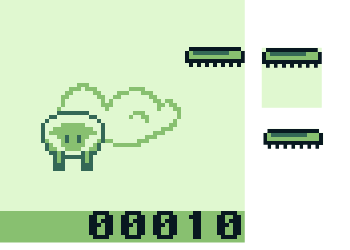
Of course not, as seen below with the Velcro sprite as an example. For this sprite, I used a different palette of 3 + 1 colors: “White” is used as a transparent color, and “Black” is displayed on the sprite.
Fun with palettes
Despite being limited to just four colors, Game Boy actually uses three different palettes to display images, which is pretty cool!
As you can see, there is one palette in four colors for the background layer and two palettes in 3 colors + 1 transparent color that can be used by sprites (each sprite can use one or the other palette) . The great thing is that you can freely assign any color to any slot in the palette. This allows you to create very interesting effects, for example, a gradual decrease and increase in screen brightness, used in many games.
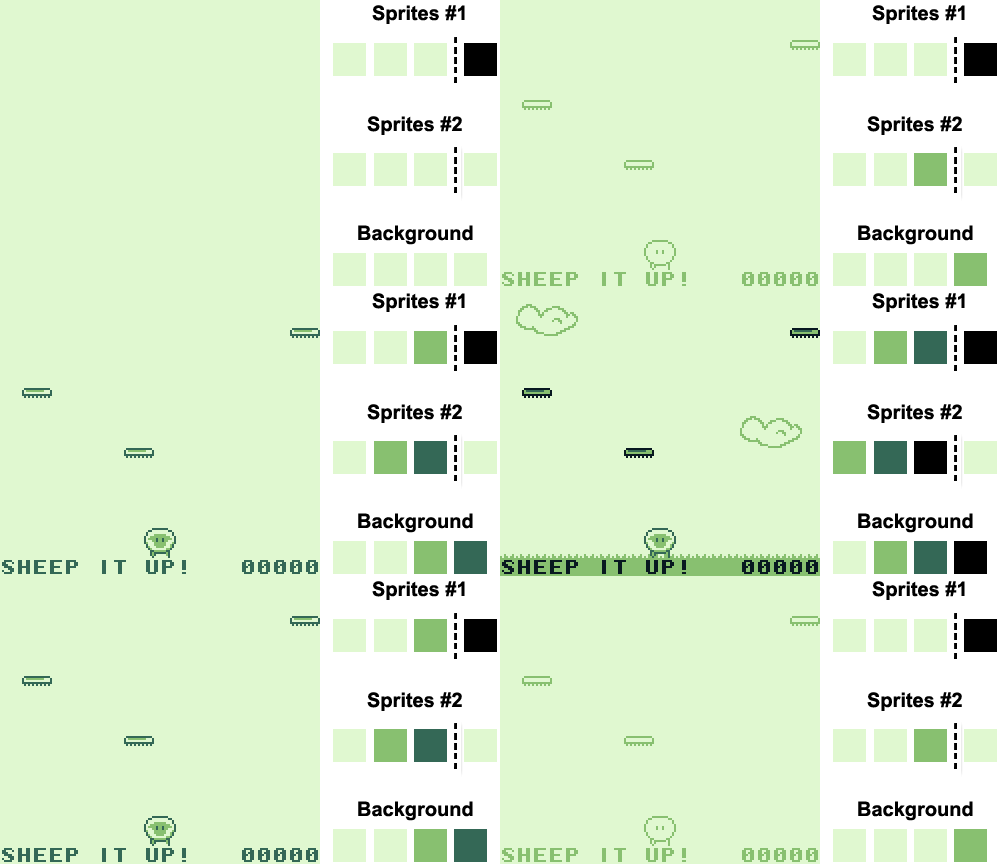
To implement screen shadowing on Game Boy, just change the colors in three palettes. At the first stage, all the slots of the palettes are filled with white. Then, at the second stage, the darkest color slot (black) is filled with light gray, gradually developing an image. In the third stage, light gray becomes dark gray, and so on, until all four colors are displayed in each palette.
Using a similar method, we can make the character “flicker” by changing colors in the palette in each frame. For example, this method is used when Mario in Super Mario Land catches an asterisk and becomes invulnerable.
Create a world from tiles!
There is another, last, strangeness in how Game Boy displays images, especially it is unusual for a game developer working with engines of the current generation. Since the console does not have a “frame buffer”, we must set the color of each pixel on the screen separately. All screen images are collected from many “tiles”, i.e. 8x8 pixels. This applies to both backgrounds and sprites:

This technique, designed to reduce the amount of video memory needed to display graphics, implies that we cannot draw arbitrary lines on the Game Boy screen. But this is also one of the secrets that allows the Game Boy to display such beautiful games with a processor of only 4MHz and 8KB video memory (that's right, kilobytes, not megabytes or gigabytes).
However, one of the drawbacks of such a tile display is that our sheep and Velcro sprites are composed of several sprites. A sheep has a size of 16x16 pixels, therefore, in theory, four 8x8 sprites are required to display it. Fortunately, Game Boy also has an 8x16 sprite display mode, which means that every object in Sheep It Up! consists of only two sprites, not four.

Do you remember that we are limited to a maximum of 40 sprites per screen ? In addition, Game Boy cannot display more than 10 sprites on one line .
In our case, this means that we can arrange no more than five sheep in one line, and not ten, as you might think at first (because from the point of view of hardware, a sheep consists of two sprites) .
Full Screen Tiles
I haven't mentioned this before, but the Game Boy's screen resolution is 160x144 pixels. This means that to close the entire screen you need 20x18 = 360 tiles .

Unfortunately, Game Boy video memory is limited (8KB) , and can store a total of 256 different sprites . This means that without software tricks it is impossible to display a full-screen image:

The secret is to reuse the tiles: as you can see, there is a lot of “empty space” in the tile image, that is, one “white tile” from RAM is located on the image several times. Only 178 different tiles are used on the screen saver, that is, if I wanted, I could add additional details.

I don’t know what method of reusing tiles was used in the 90s, but today we have a very convenient tool for this called Game Boy Tile Data Generator . We give him a PNG image (in four colors) , and it automatically generates tiles and a tile map that needs to be displayed on a real Game Boy. Obviously, it also automatically recognizes and reuses the same tiles to save as much console video memory as possible!

For reference: most of the consoles of the 80s and 90s worked similarly and had a screen based on 8x8 tiles: Nes, Master System, PC-Engine, Super Nintendo, Genesis, Game Boy, Game Gear ... The first popular home consoles with the frame buffer was PlayStation and Saturn, and the first portable console with this technology was Game Boy Advance (Atari Lynx was the first portable console with single-pixel control) . That is, having mastered the "work with tiles" on the Game Boy, you can use your skills in the future on other retroconsoles!
Professional Tips: Create Four-Color Sprites!
Let's end with a little advice from the talented Nintendo developers. Take a look at the screenshot from Wario Land:

Do you see that the coin sprite is actually painted in four colors? How did they manage to do this if I said that Game Boy can display only three colors per sprite?
GIF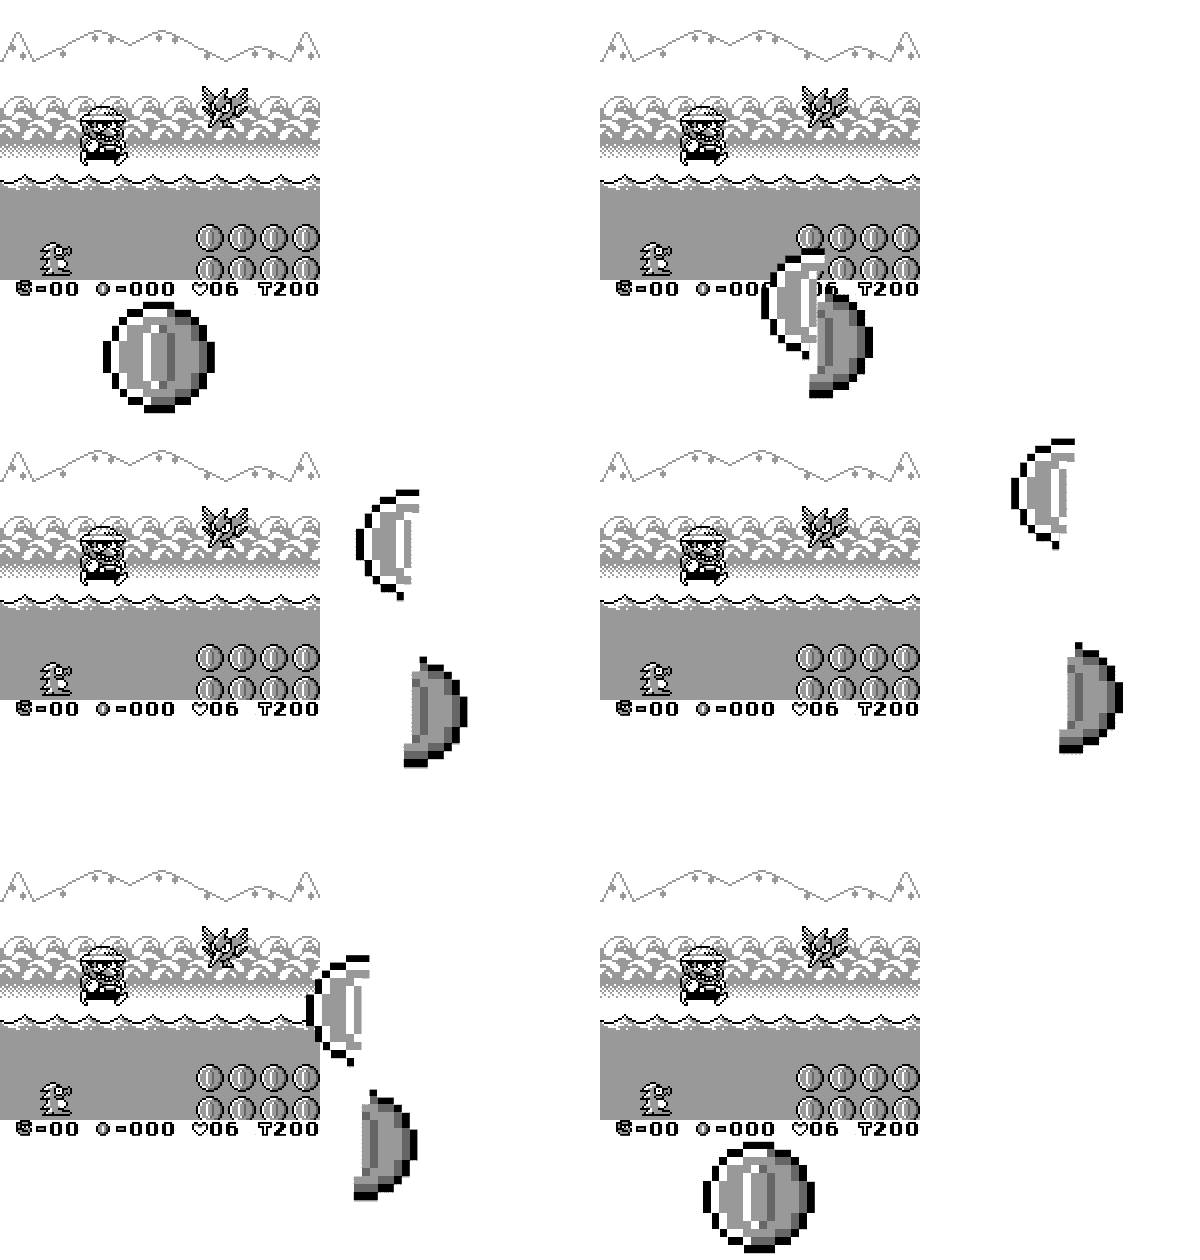
The answer is simple: each coin consists of two sprites, and each sprite uses its own palette. As you can see, when we split a coin into two halves, it is actually created from two 8x16 sprites. As usual, Nintendo is very attentive to details: they do not just look like two connected “sprite halves”, the developers slightly shifted them and they overlap each other by one pixel, which makes the coin more like a single element!
Conclusion
This concludes the first part of the post-mortem of my game. Thank you for reading! In the second part, we will discuss problems with sound (there is also a lot of strange things there!) And the creation of cartridges without destroying an existing game for Game Boy. I will also review the feedback received from the Sheep It Up players !
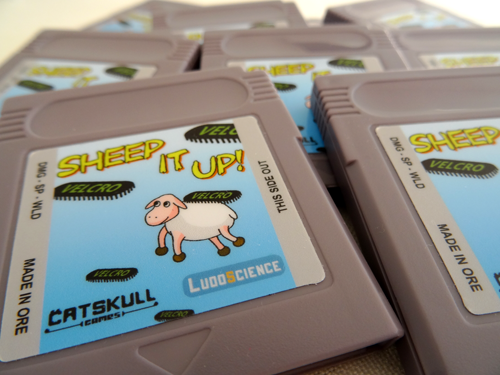
Hope you enjoyed the article! And if you still have the Game Boy console, then don't forget that you can buy the perfect Sheep It Up cartridge for only $ 15 from Catskull games. Before shipping, each cartridge is assembled manually!