Local build automation (Crashlytics + Slack + FastLane)
Build Automation (Crashlytics + Slack + FastLane).
Previously (Black-and-white picture, a gloomy developer sitting at the table)
1. Upgrades the version code in build.gradle
2. Collects the build
3. Loads the build in crashlytics
4. Writes in the slack that the new build is uploaded
Now (Bright picture, funny guy):
console:
Now seriously. In our business, you need to automate everything, and in this article I will tell you how to automate the release of builds using fastlane.
Fastlane is a product from fabric that helps automate the creation of builds for android, ios and mac. I work on mac and I will talk about the installation on it.
A few preparatory steps:
And when all the preparatory steps are completed, the fun begins. In the fastlane folder there is a Fastfile file (The guys did not bother with the names), this is a script in ruby.
Immediately you need to understand the two basic concepts of lane and action .
Lane is a set of actions that will be executed. There may be several of them; they may differ from each other in, for example, the gradle task launched. And we will launch Lane
Action directly - these are actions that fastlane can do. Here is the set of available Actions.
And now some code:
All the possibilities for customizing action can be viewed on the link
What we have done is pretty good. We can assemble the project in one line, upload it to crashlytics and write a message about it in slack. By the way, this is how it looks:
On real projects, there is a need to assemble different assemblies for different purposes, for example: on a live server for customers and on a test server for testers.
This can be done through the product flavor in gradle. If this article will be interesting to readers in the next I’ll tell you how to make it possible to assemble different assemblies for different needs, auto-increment the version of the code in the necessary assemblies and write about it in slack.
Previously (Black-and-white picture, a gloomy developer sitting at the table)
1. Upgrades the version code in build.gradle
2. Collects the build
3. Loads the build in crashlytics
4. Writes in the slack that the new build is uploaded
Now (Bright picture, funny guy):
console:
fastlane new_buildNow seriously. In our business, you need to automate everything, and in this article I will tell you how to automate the release of builds using fastlane.
Fastlane is a product from fabric that helps automate the creation of builds for android, ios and mac. I work on mac and I will talk about the installation on it.
A few preparatory steps:
- You will need to install xcode (The necessary libraries are installed with it)
- Install fastlane itself. Click here and select what we want to connect and download the archive
- Inside you will find the installer / install file . Install it (Most likely, you will need to enable the ability to install not from the side in the security settings)
- And the last boring step, in the console we write:
cd /path_your_projectfastlane init
this will create the fastlane folder in your project.
And when all the preparatory steps are completed, the fun begins. In the fastlane folder there is a Fastfile file (The guys did not bother with the names), this is a script in ruby.
Immediately you need to understand the two basic concepts of lane and action .
Lane is a set of actions that will be executed. There may be several of them; they may differ from each other in, for example, the gradle task launched. And we will launch Lane
Action directly - these are actions that fastlane can do. Here is the set of available Actions.
And now some code:
# Название lane - test (вызвать его из консоли : fastlane test)
lane :test do
  # Выполняется билд приложения
  gradle(task: "assembleDevDebug")
  # Дальше загрузка в crashlytics
 crashlytics(
    api_token: "api_token",
    build_secret: "build_secret",
    emails: "name@gmail.com, ivan@gmail.com",
    # Это путь к файлу откуда подтягиваем note для крашлитики
    notes_path:"/Users/Android/notes.txt"
  )
  slack(
      # У слета есть web hook, который указывает в каком канале создавать меседж
     slack_url: "https://hooks.slack.com/services/dddd/ddddd/ddddd",
     icon_url: "https://icon.png",
     username: "Android",
     default_payloads: [:test_result,:last_git_commit_message],
     payload: {"Build Date" => Time.new.to_s,},
     message: message
  )
end
All the possibilities for customizing action can be viewed on the link
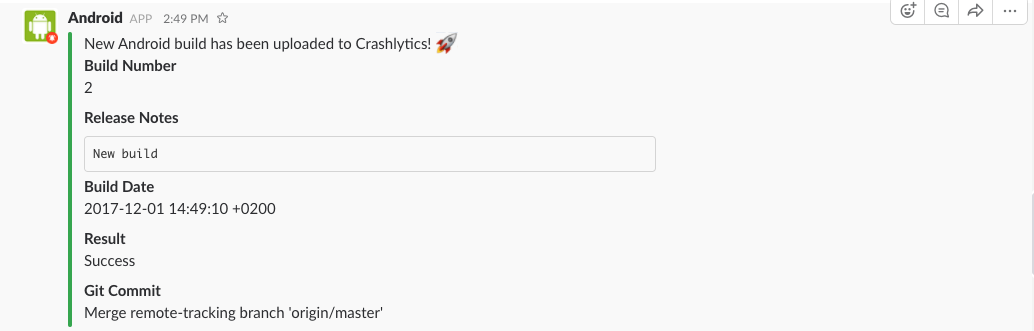
What we have done is pretty good. We can assemble the project in one line, upload it to crashlytics and write a message about it in slack. By the way, this is how it looks:
On real projects, there is a need to assemble different assemblies for different purposes, for example: on a live server for customers and on a test server for testers.
This can be done through the product flavor in gradle. If this article will be interesting to readers in the next I’ll tell you how to make it possible to assemble different assemblies for different needs, auto-increment the version of the code in the necessary assemblies and write about it in slack.