November 29, 2017 at 11:48
Classify Sounds with TensorFlow
- Tutorial
Igor Panteleev, Software Developer, DataArt
Many services have been invented to recognize human speech - just remember Pocketsphinx or the Google Speech API. They can quite qualitatively convert phrases recorded in the form of an audio file into printed text. But none of these applications can sort the different sounds captured by the microphone. What exactly was recorded: human speech, cries of animals or music? We are faced with the need to answer this question. And they decided to create pilot projects for classifying sounds using machine learning algorithms. The article describes what tools we chose, what problems we encountered, how we trained the model for TensorFlow, and how to run our open source solution. We can also upload recognition results to the IoT platform.DeviceHive to use them in cloud services for third-party applications.
Selection of tools and models for classification
First, we needed to choose software for working with neural networks. The first solution that seemed appropriate to us was the Python Audio Analysis library .
The main problem with machine learning is a good dataset. There are a lot of such sets for speech recognition and music classification. With the classification of random sounds, things are not so good, but we, even if not immediately, found a data set with “urban” sounds .
During testing, we encountered the following problems:
- pyAudioAnalysis is not flexible enough. It works with a small range of parameters, and some of them are calculated on the fly. For example, the number of training cycles is based on the number of samples, and this cannot be changed.
- The selected data set contains only 10 classes, and all of them are included in the group of city sounds.
The next solution was the Google AudioSet , which is based on YouTube’s tagged video fragments and is available for download in two formats:
- CSV files containing the following information about each fragment: ID of the video posted on YouTube, start and end time of the fragment, one or more tags assigned to the passage.
- Extracted audio features that are saved as TensorFlow files.
These audio features are compatible with the YouTube-8M models . This solution also suggests using the TensorFlow VGGish model to extract features from an audio stream. This solution met most of our requirements, and we decided to choose it.
Learning model
The next task was to find out how the YouTube-8M interface works. It is designed to work with video, but, fortunately, it can work with audio. This library is quite flexible, but has a fixed number of classes. Therefore, we made some changes so that the number of classes can be passed as a parameter. YouTube-8M can work with two types of data: aggregated features and features for each fragment. Google AudioSet provides feature data for each fragment. Next, we needed to choose a model for training.
Resources, time and accuracy
Graphic processors (GPUs) are better suited for machine learning than central processing units (CPUs). You can find more information here , so we will not dwell on this in detail and immediately proceed to our configuration. For experiments, we used a PC with one NVIDIA GTX 970 4GB graphics card.
In our case, the training time did not have much significance. Note that one or two hours of training was enough to make an initial decision about the chosen model and its accuracy.
Of course, we want to get the highest possible accuracy. But for training a more complex model (which should provide greater accuracy), more RAM (video card memory in case of using a GPU) will be required.
Model selection
A complete list of YouTube-8M models with descriptions is available here . Since our training data is presented as fragmented features, you must use the appropriate model. The Google AudioSet contains a three-part dataset: balanced training, unbalanced train, and evaluation. Read more about this here .
For training and assessment, a modified version of YouTube-8M was used. It can be found here .
Balanced learning
In this case, the command looks like this:
python train.py --train_data_pattern = / path_to_data / audioset_v1_embeddings / bal_train / *. Tfrecord --num_epochs = 100 --learning_rate_decay_examples = 400000 --feature_names = audio_embedding --feature_frames = 128 -batch_size = 512 --num_classes = 527 --train_dir = / path_to_logs --model = ModelName
For LstmModel we changed the base learning speed to 0.001 according to the documentation. We also changed the value of lstm_cells to 256, because we did not have enough RAM.
Let's look at the learning outcomes.
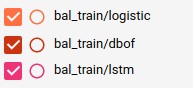
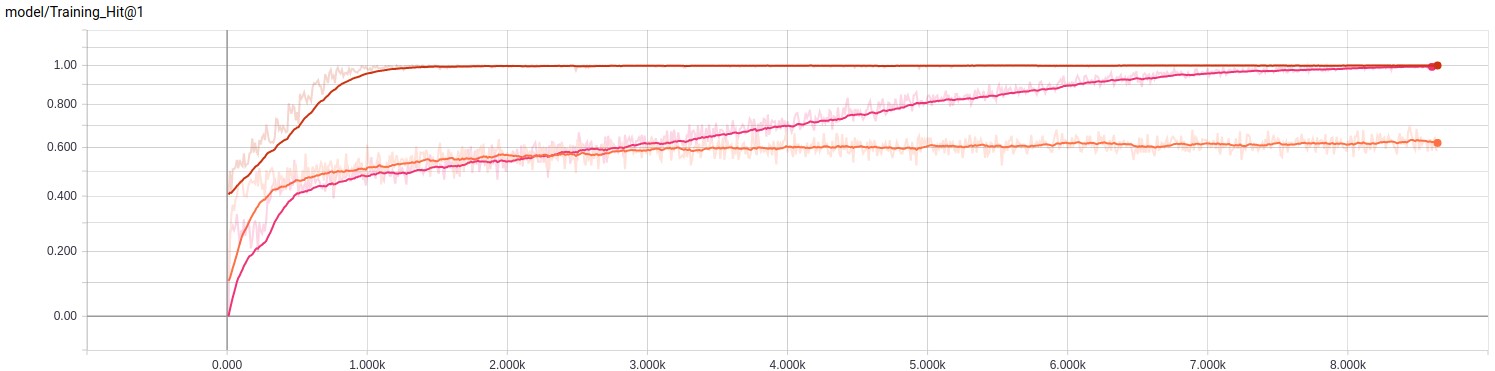
| Model name | Studying time | Last Step Evaluation | average rating |
|---|---|---|---|
| Logistic | 14m 3s | 0.5859 | 0.5560 |
| Dbof | 31m 46s | 1,000 | 0.5220 |
| Lstm | 1h 45m 53s | 0.9883 | 0.4581 |
We managed to get good results at the training stage, but this does not mean that we will achieve similar indicators with a full assessment.
Unbalanced learning
The unbalanced data set has a lot more samples, so we set the number of training cycles to 10 (you should set five because it took a lot of time to learn).
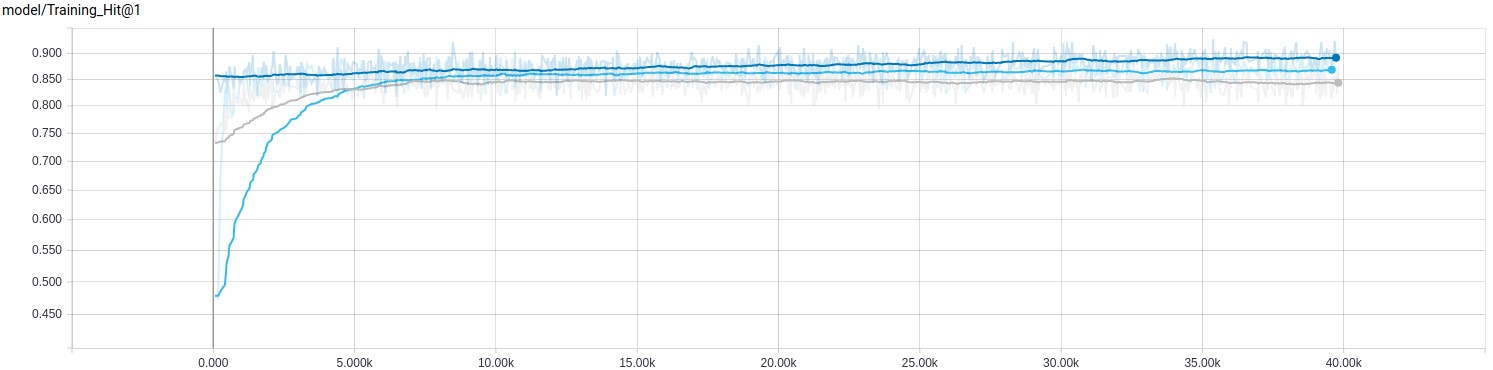
| Model name | Studying time | Last Step Evaluation | average rating |
|---|---|---|---|
| Logistic | 2h 4m 14s | 0.8750 | 0.5125 |
| Dbof | 4h 39m 29s | 0.8848 | 0.5605 |
| Lstm | 9h 42m 52s | 0.8691 | 0.5396 |
Training journal
If you want to study our log files, you can download and extract them by following this link. After loading run tensorboard --logdir / path_to_train_logs / and follow the link .
Learn more about training.
YouTube-8M accepts many parameters, and many of them affect the learning process.
For example, you can adjust the speed of learning and the number of eras, which will greatly change the learning process. There are also three functions for calculating losses and other useful variables that can be adjusted and changed to improve results.
Using a trained model with audio capture devices
When we have trained models, it's time to add code to interact with them.
Microphone Audio Capture
We need to somehow get the audio data from the microphone. We will use the PyAudio library , which has a simple interface and can work on most platforms.
Sound preparation
As mentioned earlier, we use the TensorFlow VGGish model as a feature extraction tool. Here's a brief explanation of the transformation process:
For visualization, we used the Dog bark sample from the UrbanSound dataset.
Convert audio to 16 kHz mono format.
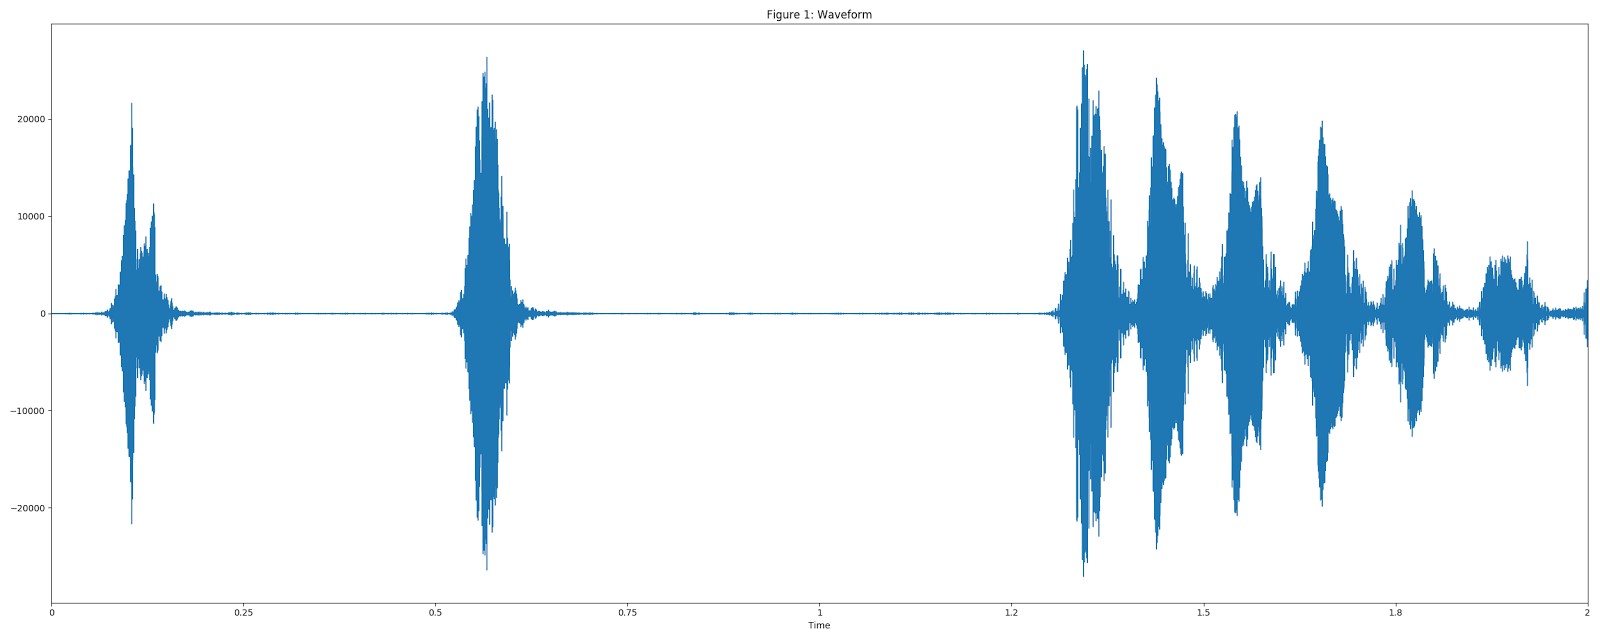
We calculate the spectrogram using the STFT values (Fourier transform at a small time interval) with a window size of 25 ms, a step of 10 ms, and a periodic Hann window .
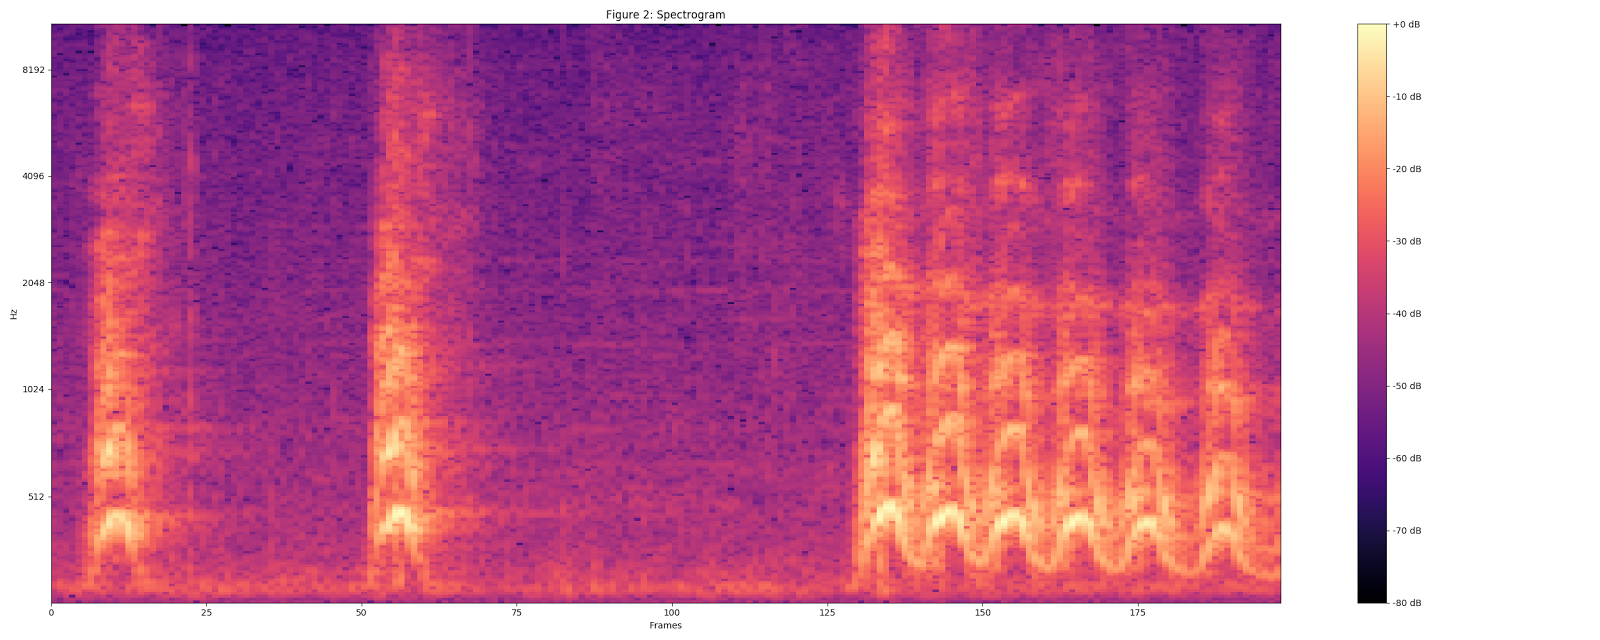
We calculate the chalk spectrogram, bringing the current spectrogram to the 64-bit chalk range.
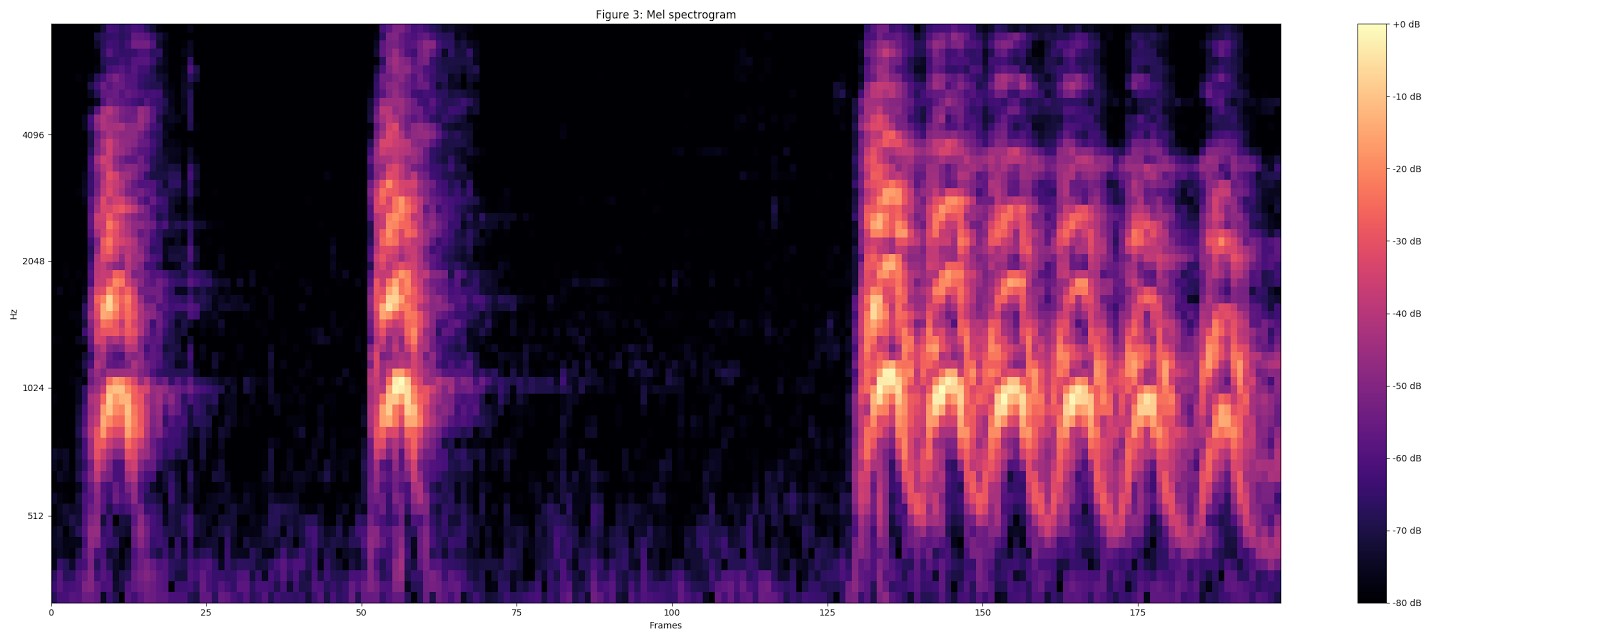
We calculate the stabilized logarithmic spectrogram using log (mel-spectrum + 0.01), where the offset is used to avoid the zero logarithm.

These features are then converted into disjoint fragments in 0.96 seconds, where each of them has a dimension of 64 chalk range for 96 frames of 10 ms each.
The resulting data is then fed into the VGGish model to bring the data into a vectorial form.
Classification
Finally, we need an interface to transfer data to a neural network and obtain results.
We take the YouTube-8M interface as a basis, but change it to remove the serialization / deserialization phase.
Here you can find the results of our work. Let's take a closer look at this point.
Installation
PyAudio uses libportaudio2 and portaudio19-dev, so you need to install these packages to work.
In addition, you will need some Python libraries. You can install them using pip: pip install -r requirements.txt
You also need to download and extract the archive with the saved models to the project root. You can find it here .
Launch
Our project offers the possibility of using one of three interfaces.
Pre-recorded audio file
Just run python parse_file.py path_to_your_file.wav and you will see Speech in the terminal : 0.75, Music: 0.12, Inside, large room or hall: 0.03
The result depends on the source data. These values are derived based on the forecast of the neural network. A higher value means a higher probability that the input data belongs to this class.
Microphone capture and processing
python capture.py launches a process that will continuously capture data from your microphone. It will transmit data for classification every 5-7 seconds (default). You will see the results in the same way as in the previous example. You can run it with the parameter --save_path = / path_to_samples_dir / , in which case all captured data will be saved in the specified folder in .WAV format. This feature is useful if you want to try different models with the same patterns. Use the --help option for more information.
Web interface
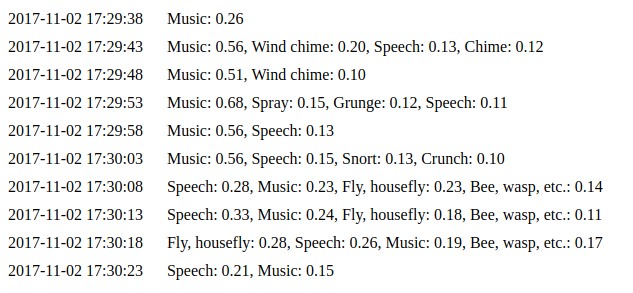
The python daemon.py command implements a simple web interface, which is available by default at http://127.0.0.1:8000 . We use the same code as in the previous example. You can see the last ten forecasts on the events page .
IoT Integration
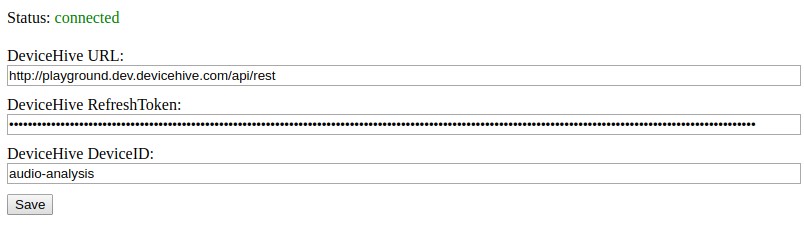
The last very important point is the integration with the IoT infrastructure. If you launch the web interface, which we mentioned in the previous section, on the main page you can find the status of the DeviceHive client connection and its settings. While the client is connected, forecasts will be sent to the specified device in the form of notifications.
Conclusion
TensorFlow is a very flexible tool that can be useful in many machine learning applications for recognizing images and sounds. Using such a tool in tandem with the IoT platform allows you to create an intelligent solution with great potential. In “smart cities”, it can be used to ensure safety - for example, it can recognize the sounds of breaking glass or a shot. Even in tropical forests, such a solution could be used to track the routes of wild animals or birds by analyzing their voices. The IoT platform can be configured to send notifications of sounds within the microphone range. This solution can be installed on local devices (at the same time, it can be deployed as a cloud system) to minimize the cost of traffic and cloud computing, customize it to send only notifications, without attachments with raw audio. Do not forget that this is an open source project, so you can use it to create your own services.