November 7, 2017 at 14:40
Creating a backup copy of a large remote database using YII2
Recently I had a chance to fulfill one small and interesting order. Its essence was to copy a database (its approximate size is almost 800Mb) to a test server by pressing a button from a remote database server and then make a number of changes to the table structures.
It would seem that there is nothing easier, we execute a request of the form on the remote server:
mysqldump -uLogin -pPassword db_name > db_name.sqland then pick up the file, but in my case it turned out to be the database server without the ability to download the file from there, so I had to contrive and write my export mechanism from this remote database using YII2, which I was not so familiar with at that time.
First, I implemented a simple interface described in the views / db / index.php file and shown in Figure 1.
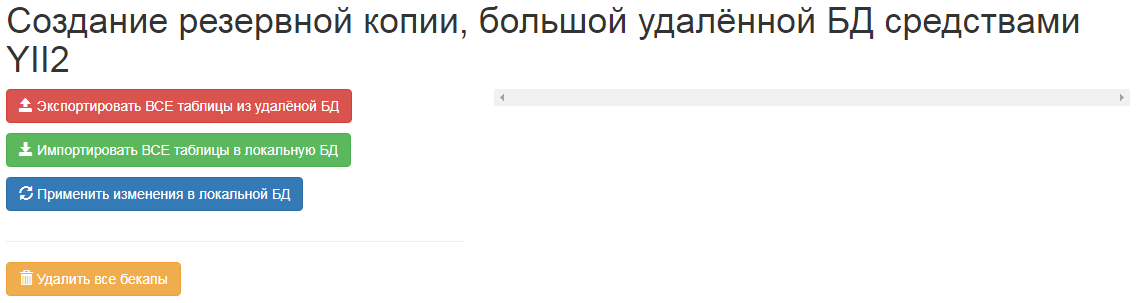
Figure 1. - Appearance
For convenience, all actions were divided into 3 parts:
- DB export;
- Import DB;
- Apply changes
- Delete backup files.
On the right is a block for displaying information on the progress of operations.
Next, jQuery scripts in the web / js / common.js file were described .
To determine the need for detailed logging of master data to the console, the constant DEBUG = false was globally defined .
The variables dbExportAll, dbImportAll were also defined globally, so that you can accurately determine the completion of the import and export process.
For convenience, the constants URL_TABLES, URL_EXPORT, URL_IMPORT, URL_REMOVE, URL_MIGRATE were initialized. From the value described in the views / db / index.php file : 59
For service purposes, the following JS functions have been described:
- isTrue - checks if all elements of the dbExportAll, dbImportAll arrays are true;
- startDB - precedes the start of processing button clicks, and blocks all further actions on the page;
- finishFailDB - called if the action cannot be completed;
- finishSuccessDB - is called in case of successful completion of all actions after clicking on our buttons;
- count - an analogue of the same function PHP;
- logMess - prints an array to the log;
- logMessStr - Logs a line.
Export
Finally, we came to why we all started, to the function,
$('body').on('click', '#dbExportAll', function () {});At the beginning of work, we send a request for a list of all tables in the remote database and fill out the dbExportAll array with the received data. Next, we go through the entire list of tables received and send requests to create backups of each table separately, so that the requests are not too long in time. All received requests are processed in
DbController()->actionExport()and
DbWrap::export($table, $date)An example of the duration of requests is shown in Figure 2. From Figure 2 it can be seen that exporting such a large table requires a minimum of 134 seconds (2.2 minutes), and this does not take into account the time that the request was in the queue for execution.
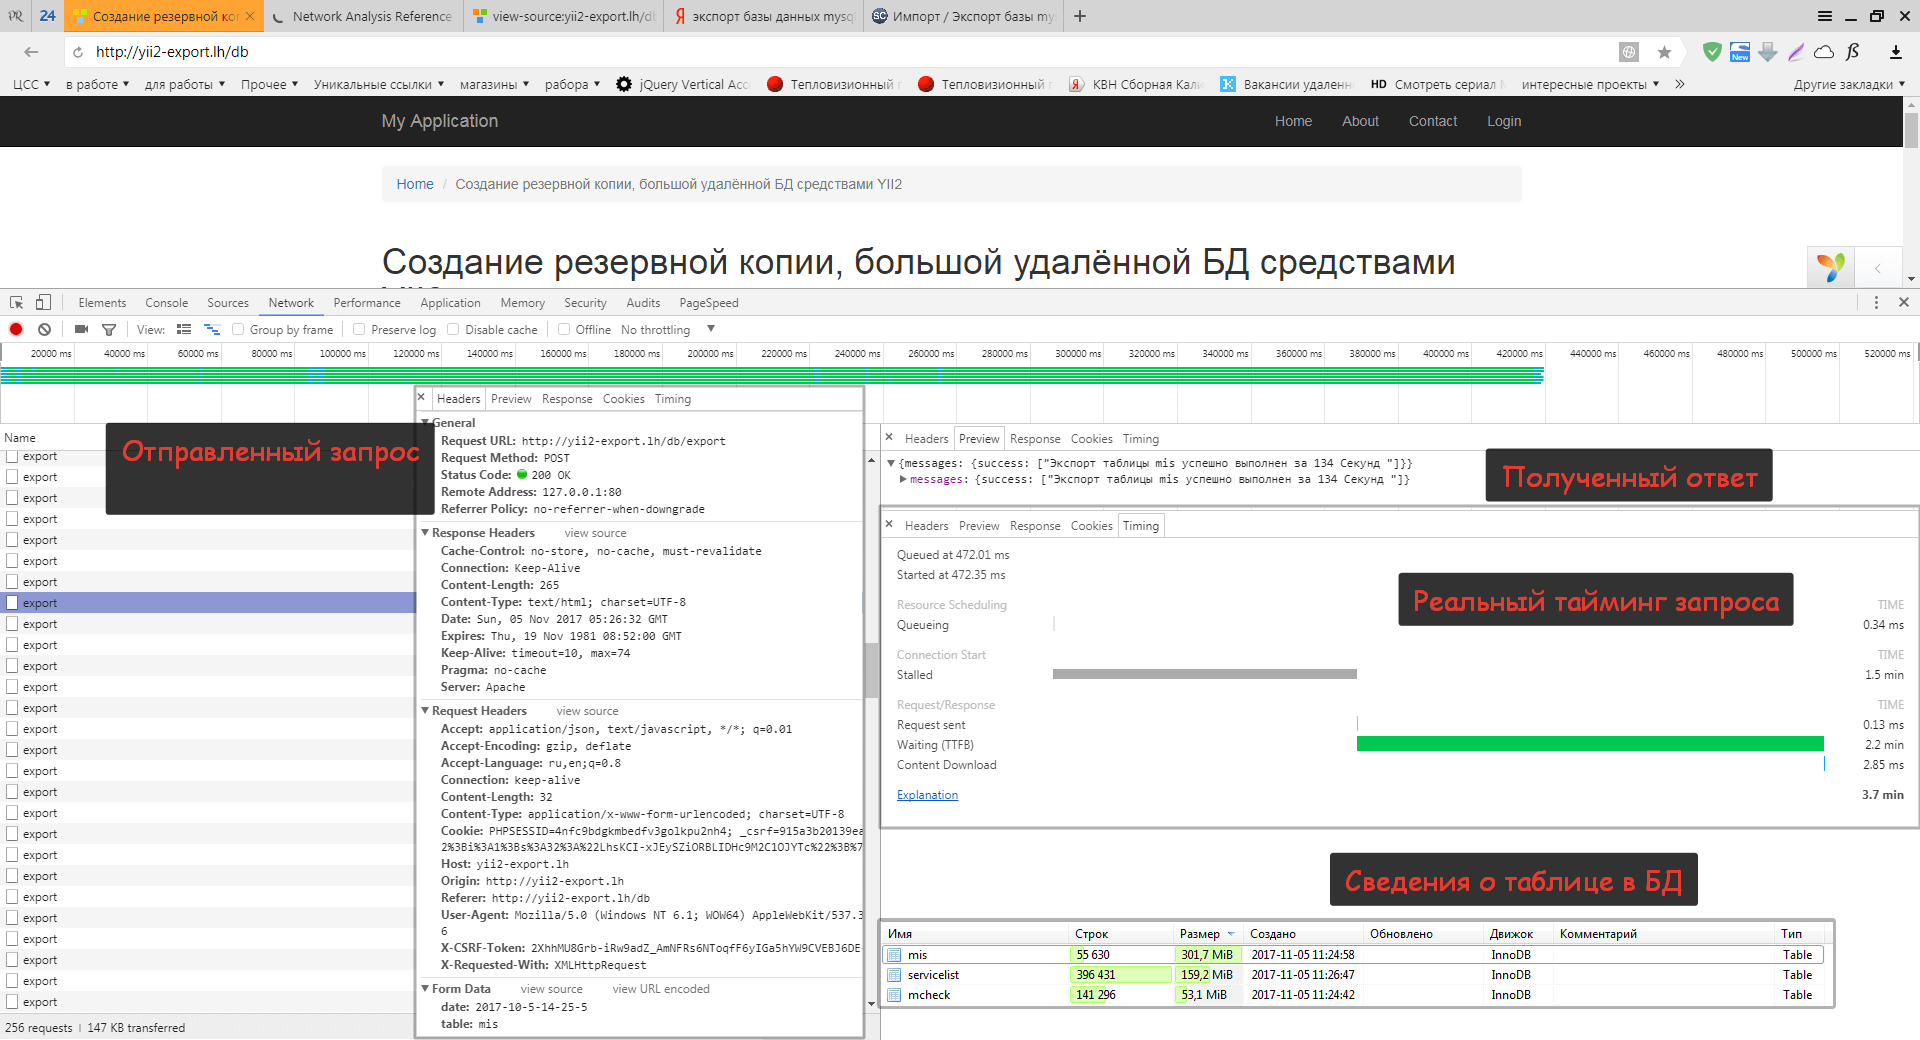
Figure 2. - Information about exporting the mis table
But the log (Figure 3) shows that most tables need very little time to export, less than a second.
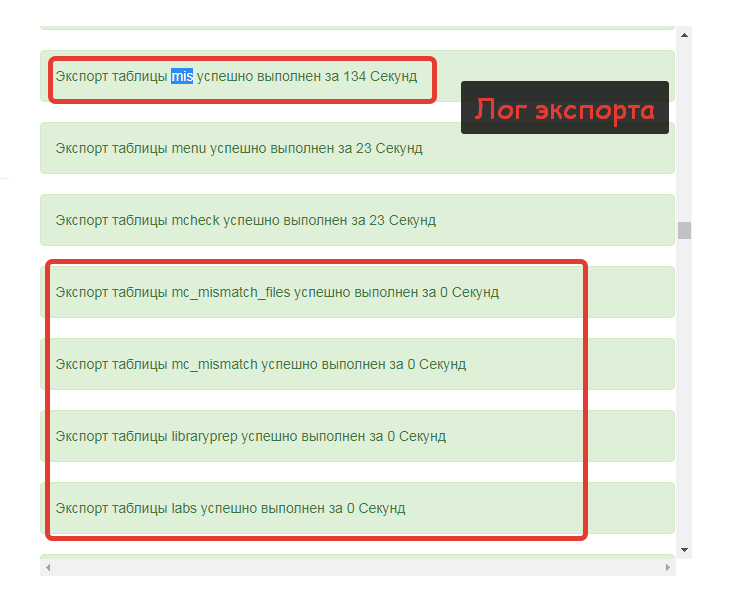
Figure 3. - Export log
And from Figure 4 it is clear that 7 minutes are enough to export all the tables.
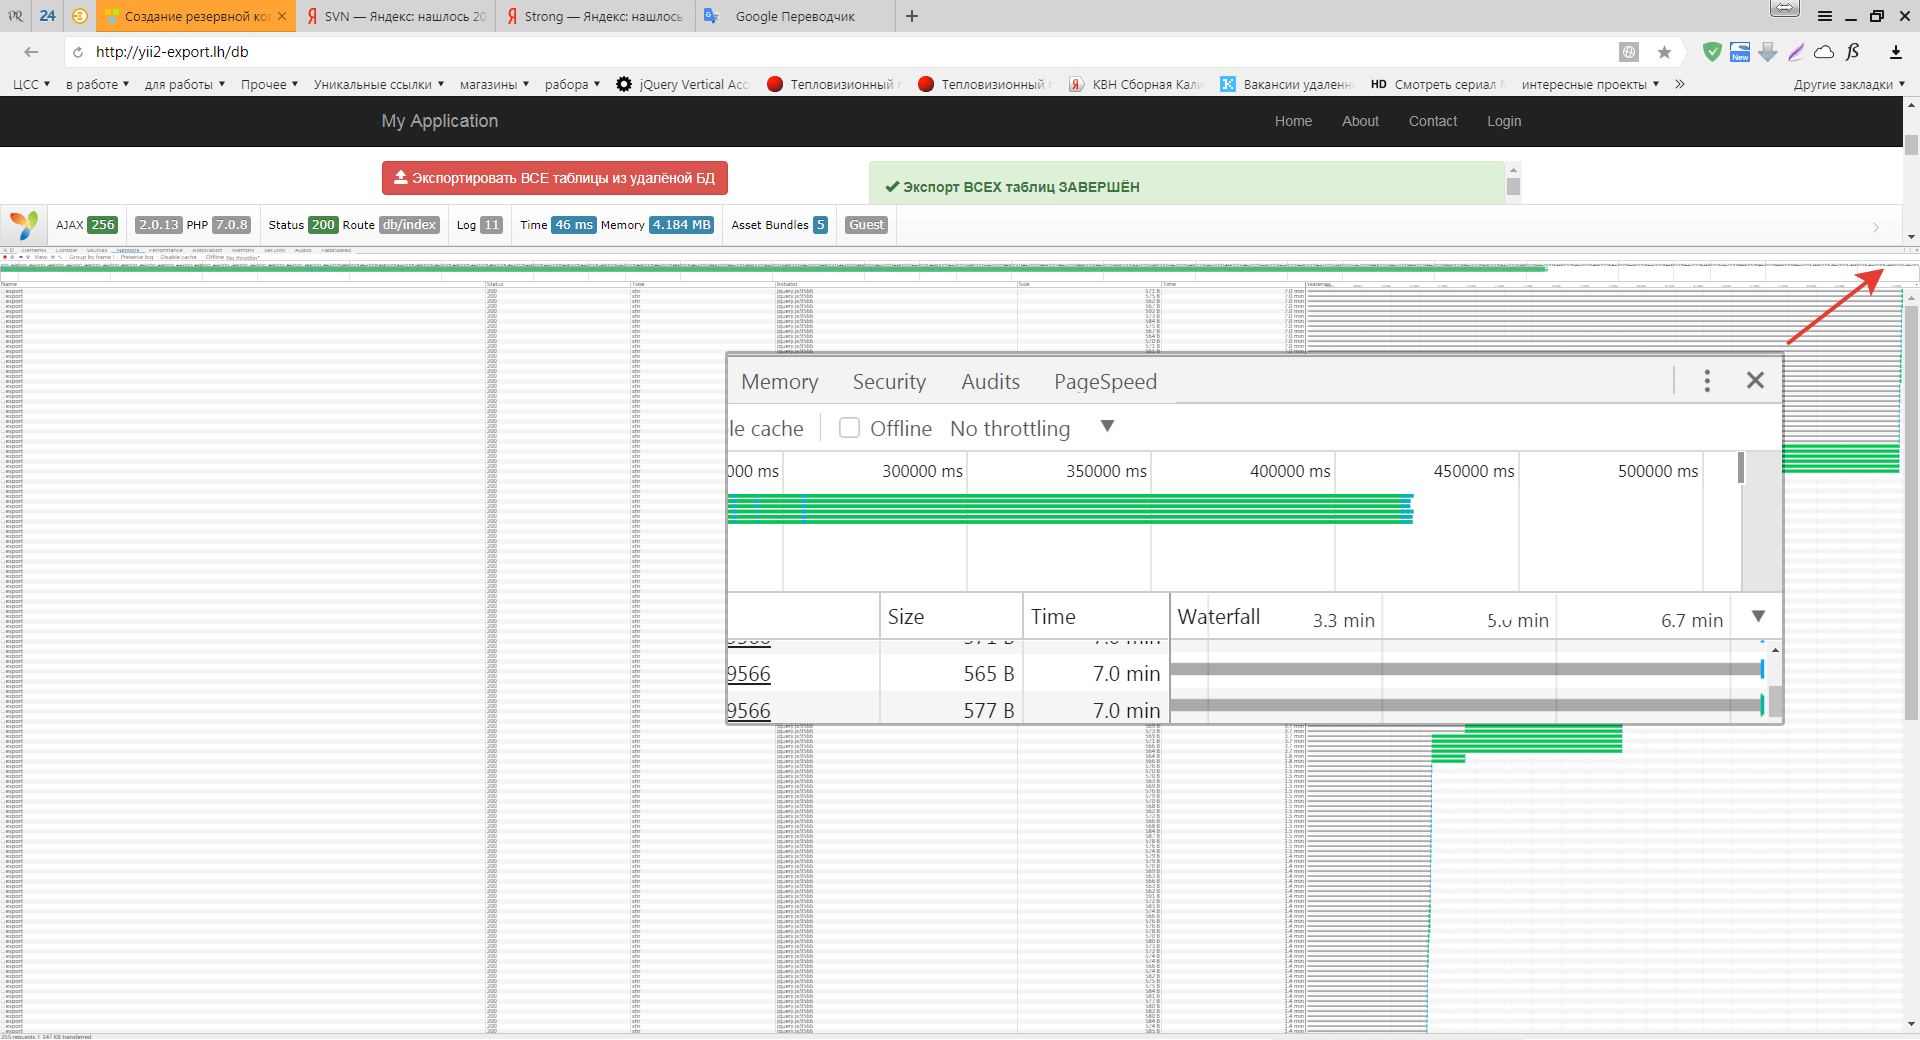
Figure 4. - Export timing
Import
Before importing, you must export if you have not previously exported or if backup files have been deleted.
Import work also begins with the development of the JS script described in the function
$('body').on('click', '#dbImportAll', function () {});Similar to export, a list of all tables is obtained and the dbImportAll variable is initialized. Further, the tables are sent individually by import for which they are responsible
DbController()->actionImport()and
DbWrap::importAll($table)The logic of the script in this place is simple, we find the latest file and execute a command of the form "mysql -uroot -pPass db <file.sql" (if the password is empty then we send the command without specifying a password).
It can be seen from Figure 5 that it takes 5 minutes to complete the import.
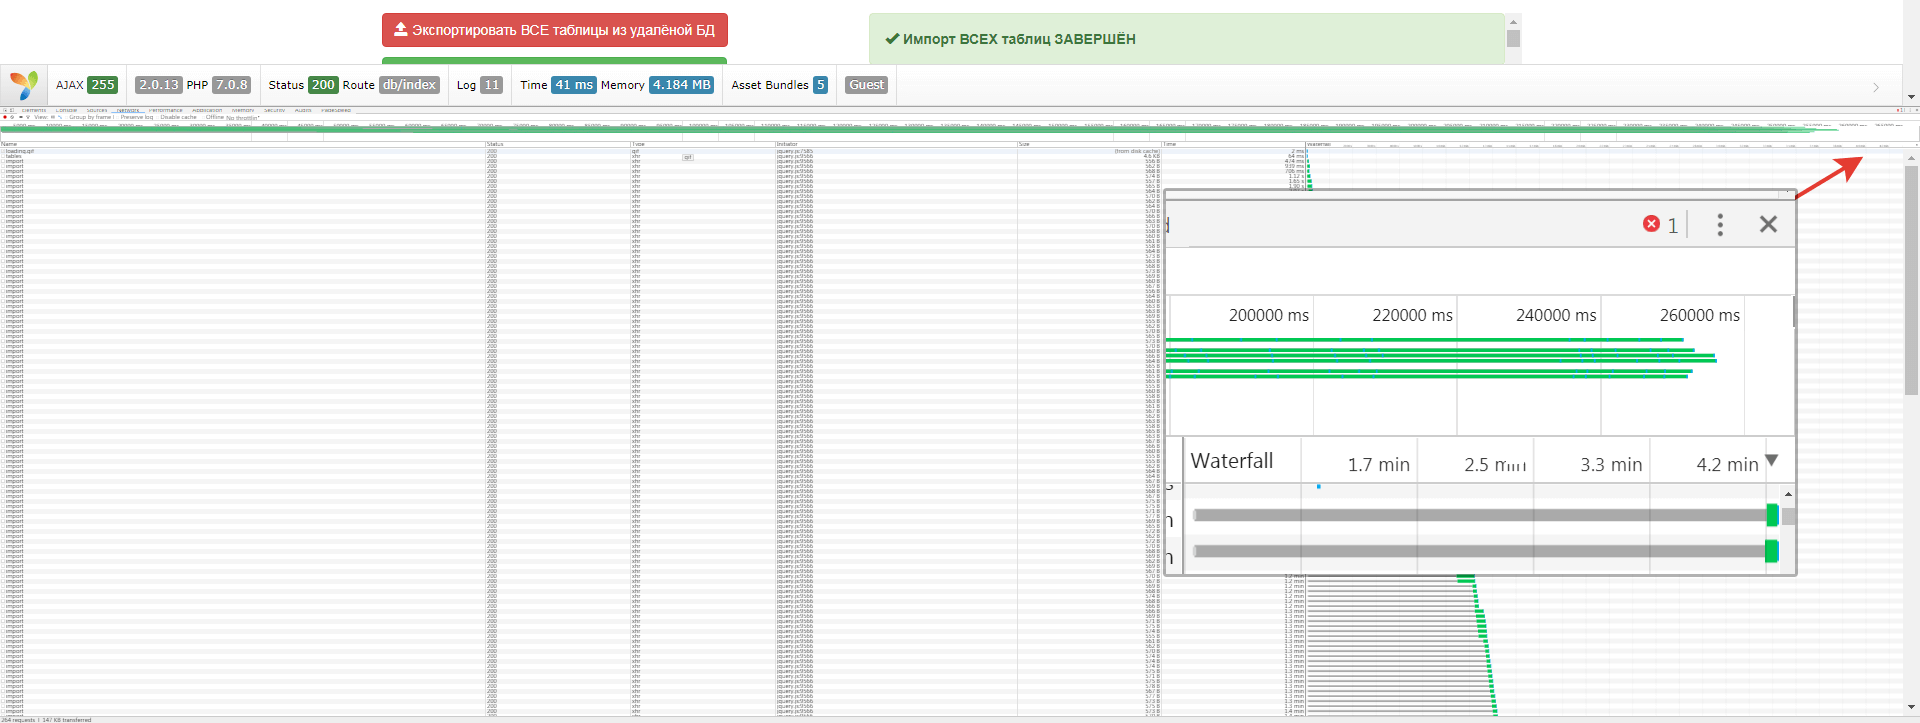
Figure 5. - Timing imports
Apply Changes
The application of changes begins with the development of the JS function
$('body').on('click', '#dbMigrate', function () {...});in which we send a request to the DbController controller and its actionMigrate method, which in turn calls DbWrap :: migrate ($ mess). The migrate function describes a transaction within which a series of table change requests are sent.
After practicing the application of the changes, a corresponding message is displayed with a detailed description in case of an error (in our case, the error is due to the fact that the changes have already been applied earlier), or with the time taken to complete it (see Figure 6).
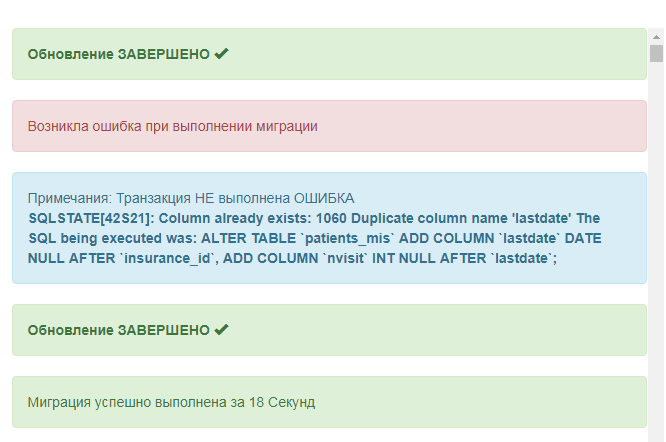
Figure 6 - Migration
Delete
And the removal begins with the development of the JS function
$('body').on('click', '# dbRemove, function () {});in which we send a request to the DbController controller and its actionRemove method, which in turn calls
DbWrap::remove()The m remove function describes the definition of the family of the operating system on which the PHP script is running and executes the rm –rf or RD / S / q commands depending on the OS.
Result
As a result, we got the opportunity to quickly apply the changes on the test server in 3 clicks, or to raise the database if it falls. In addition, we have a blank for other long-term requests, the main principle of which is
Divide and rule
In fairness it is worth noting that all measurements were made on a local server running PHP7 with a relatively powerful processor and 1.5Gb of RAM. Therefore, the performance of this script is likely to be lower on weak servers and hosting.
I remembered in time, for those who want to familiarize themselves with the source in detail, the source code is available on Bitbucket
Literature:
- http://sitear.ru/material/mysql-backups
- http://www.yiiframework.com/doc-2.0/yii-db-connection.html
- http://php.net/manual/ru/function.fopen.php
- http://php.net/manual/ru/function.fwrite.php
- http://php.net/manual/ru/function.shell-exec.php
- https://dev.mysql.com/doc/refman/5.7/en/sql-mode.html
- http://sc-blog.ru/import-export-base-mysql-console/