October 25, 2017 at 16:25
Cocos2d-x - Scenes and Special Types of Nodes
- Tutorial
From translator
Greetings! We continue to translate the documentation for the cocos2d-x engine. This article contains two chapters at once, small in volume. As you may have guessed, in the first we will analyze the ways of working with scenes, and in the end we will consider a few more types of nodes.
I hope you find a lot of useful things for yourself!
What is a scene?
A Scene object is a container containing sprites, labels, nodes, and other objects that your game needs. Scene is responsible for launching the game logic and rendering content in each frame. You will need at least one scene to start the game. Think of your game as a movie. When Scene is running, users see what happens in real time. Your game can have any number of scenes and you can easily switch between them. Cocos2d-x is capable of transitioning between scenes and you can even do it with cool effects.
Scene creation
Creating a scene is very simple:
auto myScene = Scene::create();
Remember the scene graph?
In the first part of the guide, we learned about Scene Graph and how it affects the drawing of our game. It is important to remember that it determines the drawing order of the GUI (graphical user interface) elements . Also remember the z-order!
Simple scene
Let's build a simple scene. Remember that Cocos2d-x uses the right Cartesian coordinate system . This means that the coordinate 0,0 is in the lower left corner of the screen / display. To correctly position the elements of your game, you need to calculate everything in advance. Let's create a simple scene and add some elements to it:
auto dirs = Director::getInstance();
Size visibleSize = dirs->getVisibleSize();
auto myScene = Scene::create();
auto label1 = Label::createWithTTF("My Game", "Marker Felt.ttf", 36);
label1->setPosition(Vec2(visibleSize.width / 2, visibleSize.height / 2));
myScene->addChild(label1);
auto sprite1 = Sprite::create("mysprite.png");
sprite1->setPosition(Vec2(100, 100));
myScene->addChild(sprite1);
If we run this code, we should see a simple scene containing Label and Sprite . It's a little, but just for now.
Transition between scenes
You may need to be able to move between the scenes in your game. Probably at the beginning of a new game, level change or at its completion. Cocos2d-x provides a number of ways to jump between scenes.
Scene Replacement Methods
There are many ways to change your scenes. Each has a certain functionality. Let's go over them.
Given:
auto myScene = Scene::create();
runWithScene () - used only for the first scene. With this method, we set the scene to start the game.
Director::getInstance()->runWithScene(myScene);
replaceScene () - direct replacement of the scene.
Director::getInstance()->replaceScene(myScene);
pushScene () - pauses the current scene, adding it to the stack of paused scenes. Call only when there is an active scene.
Director::getInstance()->pushScene(myScene);
popScene () - this scene will become active. The current scene will be deleted. Call only when there is an active scene.
Director::getInstance()->popScene(myScene);
Change scene with effects
You can add visual effects to change your scenes.
auto myScene = Scene::create();
// Смена выцветанием
Director::getInstance()->replaceScene(TransitionFade::create(0.5, myScene, Color3B(0,255,255)));
// Кувырок по X
Director::getInstance()->replaceScene(TransitionFlipX::create(2, myScene));
// Смена вставкой
Director::getInstance()->replaceScene(TransitionSlideInT::create(1, myScene) );
Other types of nodes
You already use Sprite , Label and Action - objects in your game and this is progress. In addition to the basic node types described in previous chapters, Cocos2d-x provides more advanced node types with special functionality. Maybe you want to make a tile based game ? Or maybe a 2D platformer ? Or maybe you want to add some particle effects to your game? Cocos2d-x provides Node objects to help you with this!
Tilemap
TileMaps are maps made up of tiles (tiles). Each tile can have behavior independent of others. TileMaps are stored in an XML -based map format called TMX . TMX was originally designed for tile maps, but it is also suitable for creating common game levels thanks to the support of various types of objects. TMX objects are easy to create:
// чтение карты тайлов
auto map = TMXTiledMap::create("TileMap.tmx");
addChild(map, 0, 99); // с меткой "99"
Tile maps can have several layers defined by z-order. You can access a specific layer by its name:
// как получить определённый слой
auto map = TMXTiledMap::create("TileMap.tmx");
auto layer = map->getLayer("Layer0");
auto tile = layer->getTileAt(Vec2(1, 63));
Each tile has a unique position and ID. This makes it very easy to select the required tile. You can get any by its identifier (id):
// получение идентификатора конкретного тайла
unsigned int gid = layer->getTileGIDAt(Vec2(0, 63));
Example layers in a tile map:
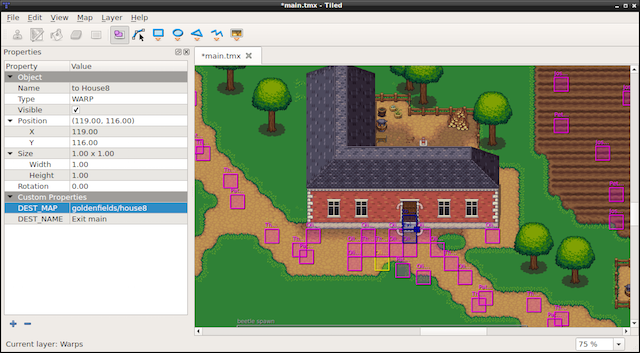
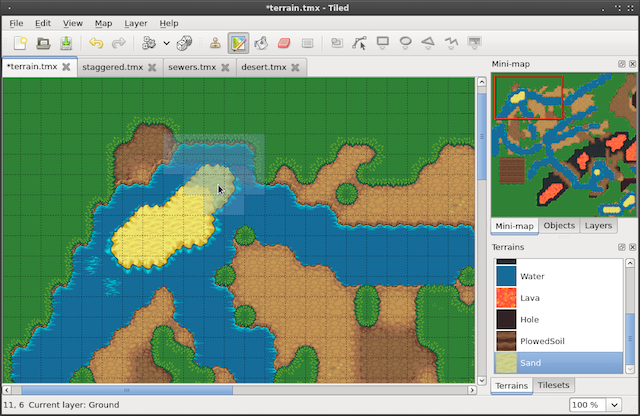
How to make a map from tiles? There are many tools that do this. Tiled is a popular utility. He is actively developing and has an excellent community. The screenshots above are real projects at Tiled .
Particle effects
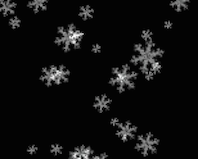
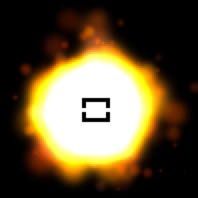
Perhaps your game needs effects like fire, spells, or explosions? How do you implement such complex effects? Is it possible? Of course! Use particle systems . Particle system is a computer graphics technology that uses a large number of very small sprites or other graphic elements to simulate fuzzy objects that are otherwise very difficult to reproduce using conventional rendering methods. Some real-world examples may include very chaotic systems: natural phenomena or processes caused by chemical reactions. Here are a couple of examples of particle effects :
Particle Effect Tools
Although you can create effects manually, pointing each property to your taste, there are several third-party utilities for this. Some of the tools:
- Particle Designer : A very powerful effects editor on Mac.
- V-play particle editor : a cross-platform particle systems editor for Cocos2d-x.
- Particle2dx : An online particle effects designer.
These tools output a .plist file that you can read using Cocos2d-x to use your creation inside your game. As in all other classes we worked with, we use the create () method :
// создание из .plist файла
auto particleSystem = ParticleSystem::create("SpinningPeas.plist");
Built-in particle effects
Are you ready to add effects to your game? Do you find it difficult to create your own effects? For simplicity, there are a number of built-in particle effects from which you can choose. Take a look at this list:
- ParticleFire: a point system of particles. Uses gravity mode.
- ParticleFireworks: a point system of particles. Uses gravity mode.
- ParticleSun: point particle system: Uses gravity mode.
- ParticleGalaxy: point particle system. Uses gravity mode
- ParticleFlower: a point system of particles. Uses gravity mode
- ParticleMeteor: point system of particles. Uses gravity mode
- ParticleSpiral: point system of particles. Uses gravity mode
- ParticleExplosion: a point system of particles. Uses gravity mode
- ParticleSmoke: a point system of particles. Uses gravity mode
- ParticleShow: point particle system. Uses gravity mode
- ParticleRain: a point system of particles. Uses gravity mode
Using, for example, ParticleFireworks , you can easily create built-in effects:
auto emitter = ParticleFireworks::create();
addChild(emitter, 10);
The result is an effect that looks something like this:
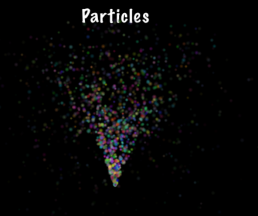
But what if your particle effect is not quite what you would like it to be? Yes, you can manually change it! Take the same fireworks and change its properties:
auto emitter = ParticleFireworks::create();
// зададим длительность
emitter->setDuration(ParticleSystem::DURATION_INFINITY);
// модификация радиуса
emitter->setEmitterMode(ParticleSystem::Mode::RADIUS);
//модификация радиуса: 100 пикселей от центра
emitter->setStartRadius(100);
emitter->setStartRadiusVar(0);
emitter->setEndRadius(ParticleSystem::START_RADIUS_EQUAL_TO_END_RADIUS);
emitter->setEndRadiusVar(0);    // не используется, когда start = end
addChild(emitter, 10);
Parallax
Parallax - is a unique type of nodes that simulates parallax scrolling . Couple .. what? Yes, parallax. Simply put, you can consider the parallax node as a special effect that creates different visibility of the position and direction of the object, depending on the point of view. We meet parallax all the time when we watch TV or shoot something on the camera. You can recall many games that work this way. Super Mario Bros is a classic example. Parallax nodes can be moved by performing a sequence , as well as manually with the mouse, touch, or using the keyboard.
Parallax nodes are a bit more complicated than regular nodes. Why? Because they require several nodes for their work. Parallax nodes cannot work on their own. You need at least 2 nodes to work. As usual, in Cocos2d-x, parallax nodes are easy to create:
// создадим параллаксовый узел
auto paraNode = ParallaxNode::create();
We need several Node objects, they are also easily added:
// создание параллаксового узла
auto paraNode = ParallaxNode::create();
// фон передвигается в соотношении 0.4х, 0.5у
paraNode->addChild(background, -1, Vec2(0.4f,0.5f), Vec2::ZERO);
// средний слой передвигается в соотношении 2.2х, 1.0у
paraNode->addChild(middle_layer, 1, Vec2(2.2f,1.0f), Vec2(0,-200) );
// верхнее изображение передвигается в соотношении 3.0х, 2.5у
paraNode->addChild(top_layer, 2, Vec2(3.0f,2.5f), Vec2(200,800) );
Okay, looks familiar, right? Pay attention to a few things! Each added node is assigned a unique z-order so that they overlap each other. Also note the additional two parameters of type Vec2 in the addChild () call . This ratio and bias . These parameters can be considered as the ratio of the speed of internal nodes to the speed of the parent node.
It is difficult to show the parallax node in the text, but you can try to write this code yourself, or run a test project - Programmer Guide Sample , to see it in action!
Next article: Cocos2d-x - Event Manager