A minute of black magic

In this article, we’ll show you how to learn how to debug and love the little black board Black Magic Probe V2.1. But first, a little about what it is and why it is needed.
The Black Magic Probe Mini V2.1 (BMPM2) board, developed by 1BitSquared in collaboration with Black Sphere Technologies, is a JTAG and SWD adapter, designed to program and debug ARM Cortex-M and ARM Cortex-A microcontrollers. You can add support for other processors. Description of the adding process can be found here . It is also worth noting that any processor with support for ADIv5 (ARM Debug Interface v5) will be determined by the board.
The figures show the processors of the ARM Cortex-M and ARM Cortex-A families supported by the Black Magic Probe Mini V2.1 board.
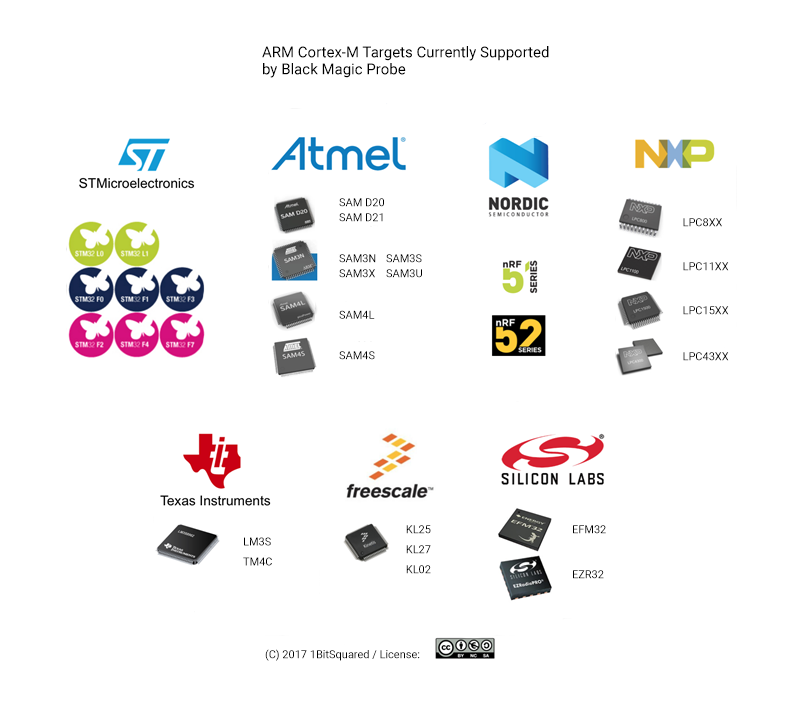
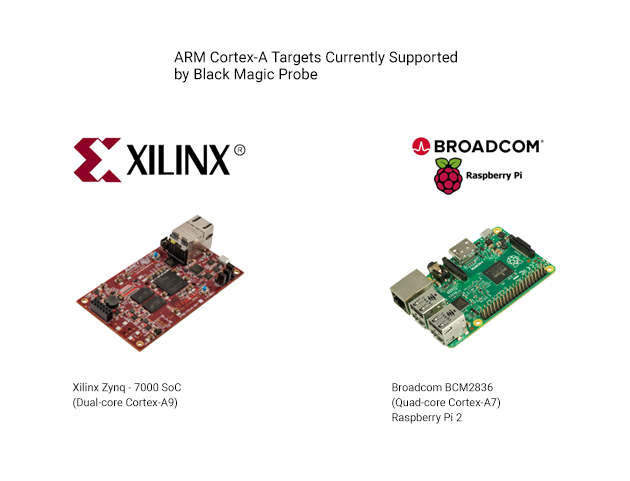
During testing, Black Magic Probe revealed that the supported processors are not limited to the list provided by the manufacturer. Processors not officially supported with ARM Debug Interface v5 are defined, for example, as “Cortex-M0” or “Cortex-A7”. At the same time, full functionality is not guaranteed, but nevertheless it will succeed in producing minimal debugging actions.
What you can do with the Black Magic Probe board:
- interrupt the program execution process;
- observe changes in registers and variables;
- set breakpoints (you can set a breakpoint in the code, which will make the program stop as soon as this point is reached);
- view the call stack (a list of functions and their parameters that led us to the current point and state of the program);
- disassembling (the ability to view machine code and find out what the program does);
- memory dump (saving RAM and / or flash content to a file).
Features of Black Magic Probe that may be useful in researching information security devices:
- development of embedded software and devices for conducting attacks;
- reverse engineering IoT;
- search for vulnerabilities;
- dynamic analysis using IDA and other tools compatible with gdb servers.
BMPM2 has two main features. The first is that a gdb server is launched on the device itself, opening a virtual port, which can be directly connected through the gdb client on your host computer (the gcc-arm-embedded toolkit is recommended ), so you do not need to configure OpenOCD or STLink configurations . A comparison of the debugging interface connection schemes using OpenOCD / STLink and BMPM2 can be seen below. As you can see, the option to connect via BMPM2 is simpler.

The second is the ability to compile the firmware for other boards, while the need for BMPM2 disappears. Compatible boards are presented here .
To study the possibilities of work, four boards were taken: TM32F103C8, STM32vldiscovery, STM32F429I-disc1 and the 1Bitsy V1.0 proposed by the developers.
Work with 1Bitsy and STM32F429I-disc1 will be considered in more detail. The first was chosen on the recommendation of the developers themselves, and the second has a touch screen, which makes the research process more visual.
Discover the world of debugging with Black Magic Probe
It’s convenient to start exploring the operation of Black Magic Probe V2.1 by debugging 1Bitsy. This board was created specifically for working with BMPM2, so there should not be any difficulties.
Connect the Black Magic Probe and 1Bitsy to each other with a JTAG cable and connect them to the computer.
Below we will describe how to work in the GNU / Linux environment, a guide to working in Windows and MacOS is easy to find here .
After connecting BMPM2 to the PC and to the JTAG connector, on 1Bitsy we will execute three commands in gdb to start debugging. It is important that the user is added to the dialout group with the command "sudo adduser $ USER dialout", otherwise nothing will work. The first command “target extended-remote / dev / ttyACMx” connects to BMPM2, where x is the serial port number, then scan all devices connected to the Black Magic Probe using the “monitor jtag_scan” command. If all is well, then a list of found devices will be displayed and with the “attach 1” command we will connect to 1Bitsy.
(gdb) target extended-remote /dev/ttyACM0
Remote debugging using /dev/ttyACM0
(gdb) monitor jtag_scan
Target voltage: 3.3V
Available Targets:
No. Att Driver
 1      STM32F4xx
(gdb) attach 1
Attaching to Remote target
warning: No executable has been specified and target does not support
determining executable automatically.  Try using the "file" command.
0x0800026c in ?? ()
(gdb)
That's it, now we can debug the firmware loaded in 1Bitsy. With 1Bitsy, it’s true, there were no connection problems, everything is simple and quite convenient. Will simplicity and convenience remain while working with another board?
There was a motherboard based on the STM32 microcontroller - STM32F429I-disc1, we’ll use it, at the same time we’ll fill it with some interesting firmware. The main difference in working with this board from working with 1Bitsy is the connection via the SWD interface, not JTAG.
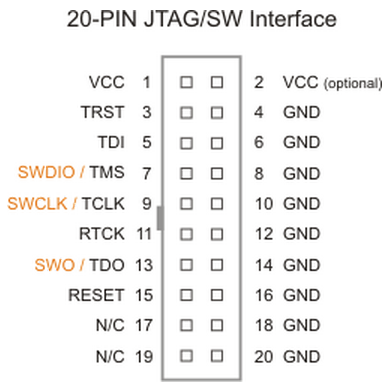
Before starting work, we connect the boards through the JTAG / SWD adapter according to the following scheme:
on the SWD interface (if you count from the output at the top):
- SWCLK
- GND
- SWDIO
- 3V - tVref.
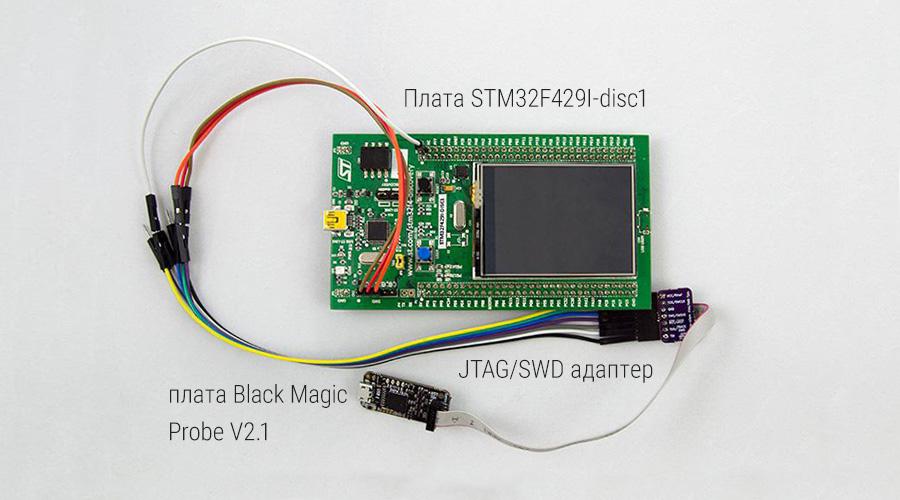
To demonstrate the operability of the debugging process, firmware was used containing several software modules. One of them is the game Reversi, it will be debugged most interestingly.
Fill the firmware onto the board and in gdb we enter almost the same commands as for 1Bitsy, with the only difference being that the board is connected via SWD, so you need to use the swdp_scan command.
(gdb) target extended-remote /dev/ttyACM0
Remote debugging using /dev/ttyACM0
(gdb) monitor swdp_scan
Target voltage: 3.3V
Available Targets:
No. Att Driver
 1      STM32F4xx
(gdb) attach 1
Attaching to Remote target
warning: No executable has been specified and target does not support
determining executable automatically.  Try using the "file" command.
0x0800026c in ?? ()
(gdb)
To our great sorrow, we never managed to win, so I wanted to break something in it. For starters, we looked at the source . The Board variable was found in them, presumably indicating the address of the first cell of the board. Nearby are the lines "Reversi - Player 1" and "Reversi - Player 2".
static void _SetPlayer(int Player) {
  int Score, ValidMoves, PossibleMoves;
  char ac[256];
  _Board.ActPlayer = Player;
  if (Player == 1) {
    FRAMEWIN_SetText(_hFrame, "Reversi - Player 1");
  } else {
    FRAMEWIN_SetText(_hFrame, "Reversi - Player 2");
  }
  FRAMEWIN_SetBarColor(_hFrame, 1, (Player == 1) ? GUI_RED : GUI_BLUE);
  PossibleMoves = _CalcValidMoves(&_Board);
  GUI_Exec();
if (!PossibleMoves) {
    GUI_Exec();
    _Board.ActPlayer = 3 - Player;
We searched these lines in the IDA disassembler. We found out that from the pseudocode you can find the address, which is the starting address of the cells of the board.
  v1 = a1;
  v2002CB74 = a1;
  if ( a1 == 1 )
  {
    sub_D8B3C(v2002CB80, "Reversi - Player 1");
    v2 = 255;
  }
  else
  {
    sub_D8B3C(v2002CB80, "Reversi - Player 2");
    v2 = 16711680;
  }
  sub_E06A8(v2002CB80, 1, v2);
  v3 = sub_DEDF8(0x2002CAF4);
  result = ((int (*)(void))sub_C91B4)();
  if ( v3 )
    return result;
  sub_C91B4(result);
  v2002CB74 = 3 - v1;
  v5 = sub_DEDF8(0x2002CAF4);
Next, we decided to use gdb in order to see what is located at this address.

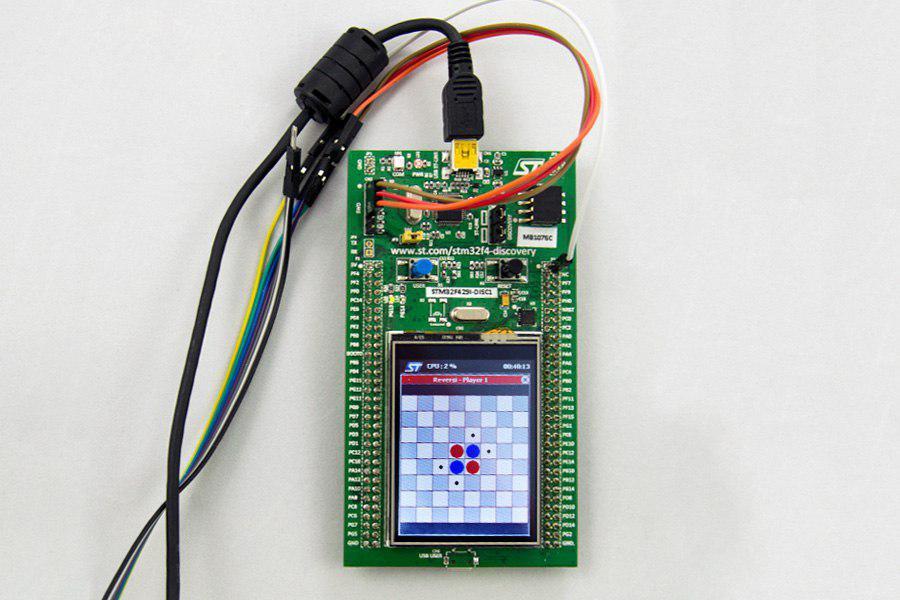
All right. If you carefully study this table and the location of the chips at the beginning of the game, you can see that 001 means a red chip, and 002 - blue. You can try changing the value of one of the cells. To do this, we used the command:
set *(char *) 0x2002CAF4 = 1
Result:

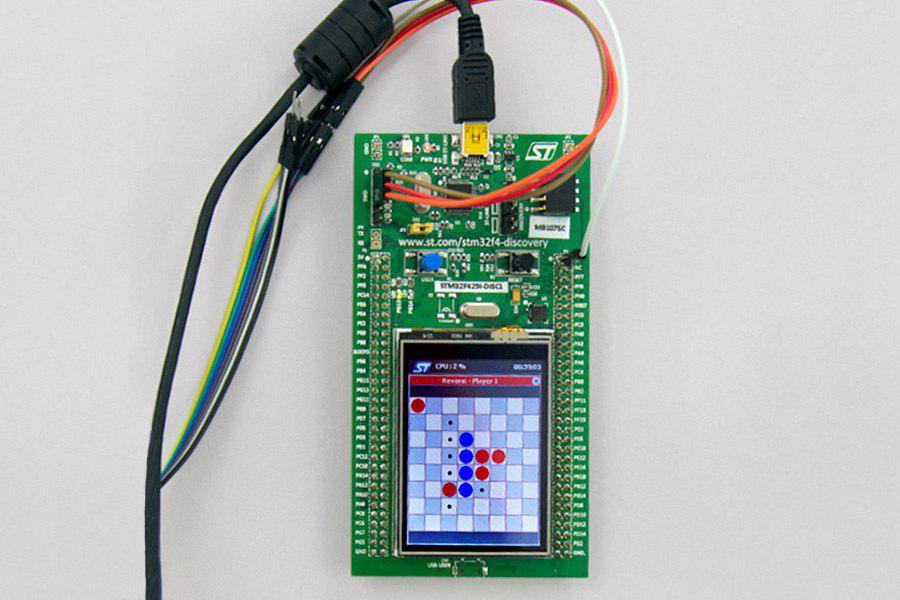
After that, we decided to try to equate the values of all cells to unity, and thereby win the game from the first move.
The result of the script:
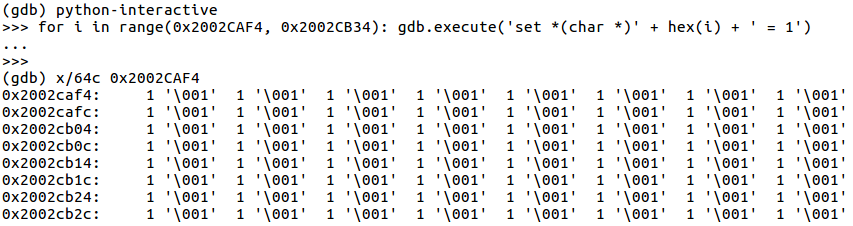
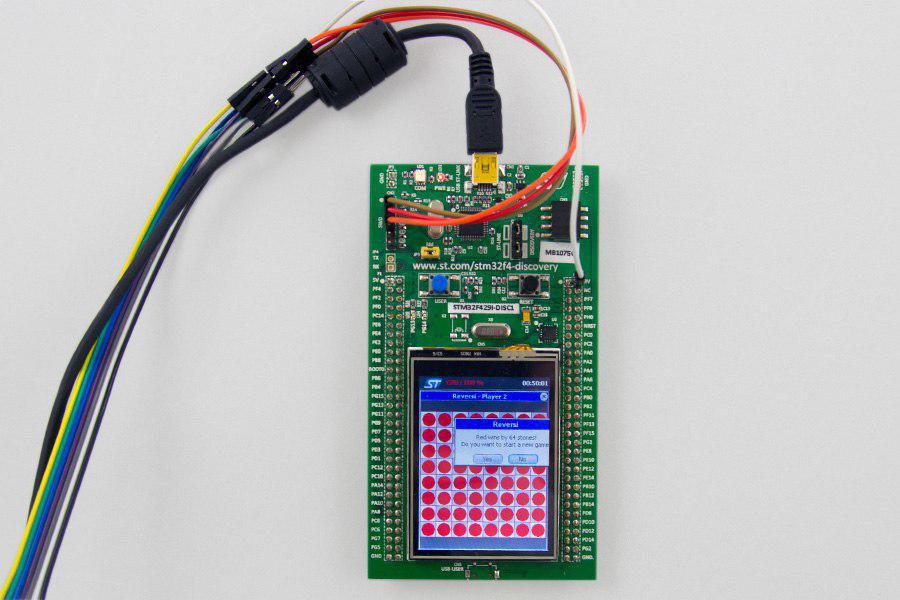
The script worked successfully, we managed to win the game, which means that with the help of the Black Magic Probe Mini V2.1 board through gdb you can successfully debug and “break” the firmware.
And now a few boring examples with blinking lights.
STM32F103C8
We connect the STM32F103C8 to the Black Magic Probe V2.1 via the JTAG interface.
Sources for firmware board can be taken here .
В исходном коде можно попробовать изменять скорость моргания лампочки, уменьшая или увеличивая интервалы времени, когда она горит и когда гаснет.
STM32vldiscovery
Плату STM32vldiscovery подсоединим к Black Magic Probe V2.1 через интерфейс SWD, а именно:
- 3V3 — tVref
- PA13 — SWDIO
- PA14 — SWCLK
- GND — GND
Исходники для прошивки платы можно взять тут.
Здесь все аналогично предыдущей плате, также меняем интервалы времени в исходниках и смотрим на лампочку.
Выводы
Плата Black Magic Probe Mini V2.1 — простая в использовании и имеет набор инструментов и библиотек с открытым исходным кодом, это является ее основными плюсами.
Минусом платы является отсутствие поддержки архитектуры процессоров arm64 и процессоров Texas Instruments.
http://1bitsy.org/overview/introduction/
https://1bitsquared.com/products/black-magic-probe
https://github.com/esden/1bitsy-bmpm-exercises/blob/master/embedded_programming_with_black_magic_and_lights_on-workshop_guide.pdf
https://github.com/blacksphere/blackmagic/wiki
The authors
- Eugene Stories Jokiv
- Valeria Gubareva veneramuholovka