MikroTik - several addresses and several different MACs on one interface

Infrequently, but with enviable frequency, the same question arose in the profile forums: “how to get two IP addresses with different MACs on the same MikroTik router interface?”. Usually this question remains unanswered, or the questioner is answered “no way”. And indeed, the task is not trivial. In the standard configuration, the rule “1 interface = 1 MAC” is respected. In this article I will tell you how to get around this limitation using the advanced MikroTik functionality.
First, recall the RouterBoard materiel. In addition to routing, MikroTik devices can also perform switching. For this, some of them have a separate switch chip, as well as the ability to combine interfaces using a software switch - bridge. Bridge (in the Russian terminology “bridge”) performs packet switching due to the processor resources of the device. Using a bridge, heterogeneous ethernet-shaped interfaces are also interconnected - ethernet, wlan, vlan, eoip, vpls.
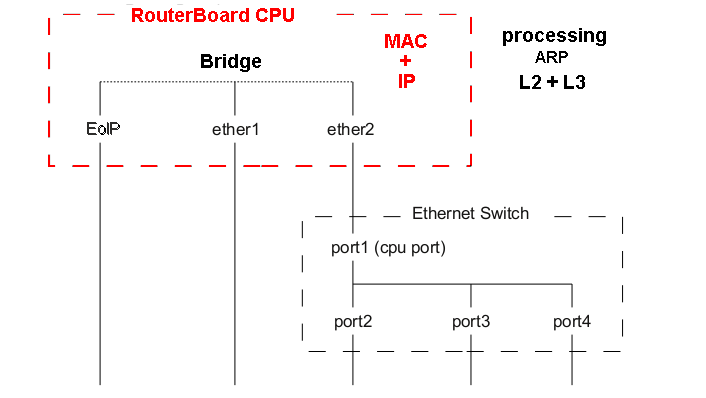
The bridge in the hierarchy of Mikrotik interfaces is a higher, unifying entity. When combining interfaces using a bridge, a MAC address is set on it, which will be broadcast to all slave interfaces. The MAC addresses of the slave interfaces are no longer used and are replaced in the outgoing frames by the MAC address of the bridge.
Accordingly, the IP address and all services associated with the IP protocol should be associated NOT with dependent interfaces, but with a higher bridge .
Due to the fact that the bridge is implemented by CPU resources, it has a very wide functionality for traffic management. Filtering incoming and transit packets, as well as the ability to translate MAC addresses immediately attracted my attention. So, the tool for solving the problem will be bridge, or rather bridge NAT.
Let's get started. Our experimental router has an internal bridge-local bridge, which is assigned the address 192.0.2.1/24 and is the gateway to computers on the local network. For "bridge-local", the administrator is MAC D4: CA: 6D: C7: 11: 11The physical interface of Ether2 is one of the slave ports of the bridge-local bridge and is directly connected to the local network.
Task: add to the router an address from the same IP subnet, but with a different MAC address. For example, the combination of IP 192.0.2.111/24 and MAC: D4: CA: 6D: C7: 22: 22 was chosen.
Since the rule “1 interface = 1 MAC” cannot be overcome forehead, we will bypass it. First, create an auxiliary bridge111 interface where we will hang an additional IP address and MAC:
RouterOS command
/interface bridge add admin-mac=D4:CA:6D:C7:22:22 auto-mac=no name=bridge111 protocol-mode=none
Now we understand what, where and where it will be necessary to replace using a bridge. To do this, take a look at the description of the ARP protocol: en.wikipedia.org/wiki/ARP#.D0.9F.D1.80.D0.B8.D0.BD.D1.86.D0.B8.D0.BF_.D1.80 .D0.B0.D0.B1.D0.BE.D1.82.D1.8B
Obviously, we need to intercept ARP requests from nodes requesting a MAC device with IP 192.0.2.111. There is a separate action “arp-reply" in NAT for this:
RouterOS command
/interface bridge nat add action=arp-reply arp-dst-address=192.0.2.111/32 chain=dstnat dst-mac-address=FF:FF:FF:FF:FF:FF/FF:FF:FF:FF:FF:FF in-bridge=bridge-local mac-protocol=arp to-arp-reply-mac-address=D4:CA:6D:C7:22:22
An attempt to execute the “ping 192.0.2.111” command from the computer did not give an explicit result, however, when viewing the local arp table on the computer, it became clear that the new IP address was mapped to the new MAC. It turns out the ARP protocol we won.
We move on to the next step - we need to achieve IP connectivity. To do this, capture packets going to an additional pair of MAC + IP:
RouterOS command
/interface bridge nat add action=redirect chain=dstnat dst-address=192.0.2.111/32 in-bridge=bridge-local mac-protocol=ip
After this command, a kind of connectivity appears. The local ARP table of the computer contains two entries - one for each pair of MAC + IP. The MAC addresses in it are different, as we wanted. Ping to the address 192.0.2.111 and the responses regularly arrive.
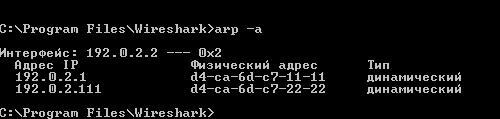
But let's look at the received packets through wireshark:
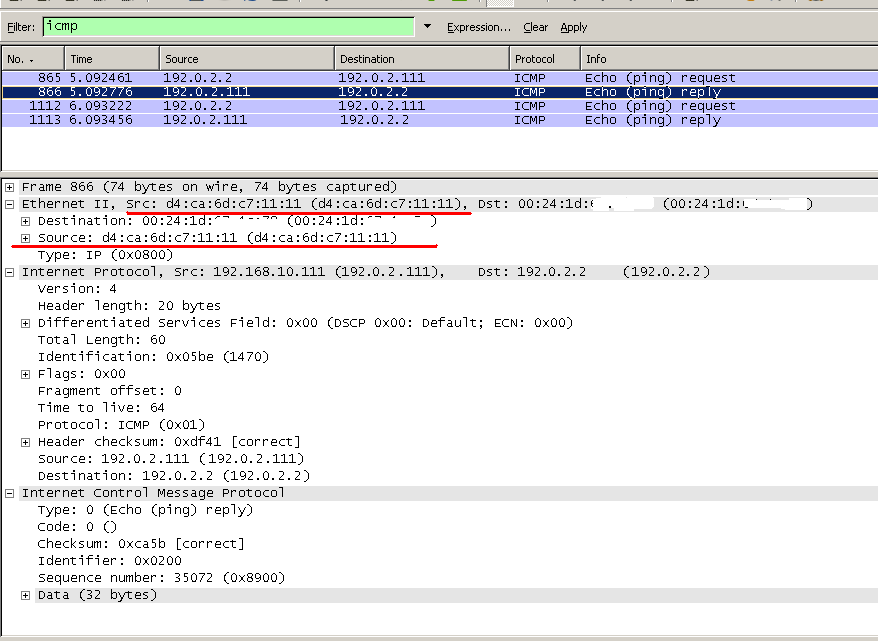
We see that the echo replies come from the D4: CA: 6D: C7: 11: 11 MAC address associated with the first IP address 192.0.2.1. And although there is connectivity, the solution is unfinished. We also need to replace the MAC addresses in outgoing packets from the router that have src-ip 192.0.2.111. Let's do it:
RouterOS command
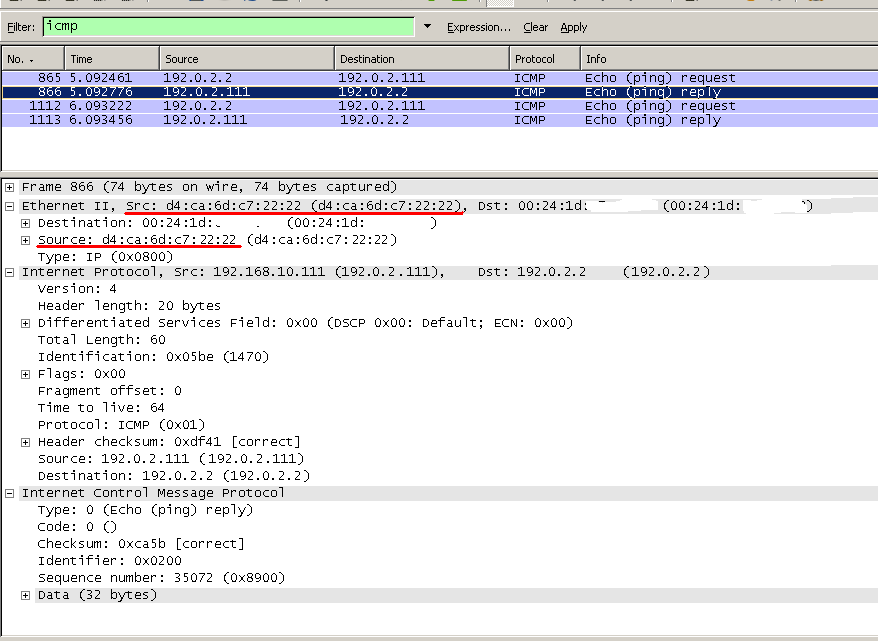
/interface bridge nat add action=src-nat chain=srcnat mac-protocol=ip src-address=192.0.2.111/32 src-mac-address=D4:CA:6D:C7:11:11/FF:FF:FF:FF:FF:FF to-src-mac-address=D4:CA:6D:C7:22:22
So, now the packets on the network look right - they have the correct combination of src-IP and src-MAC:
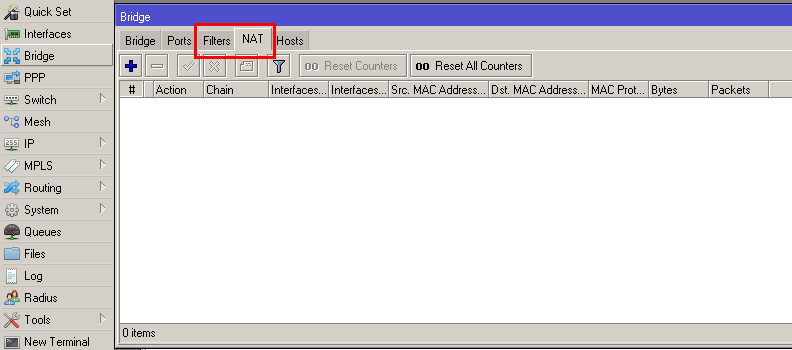
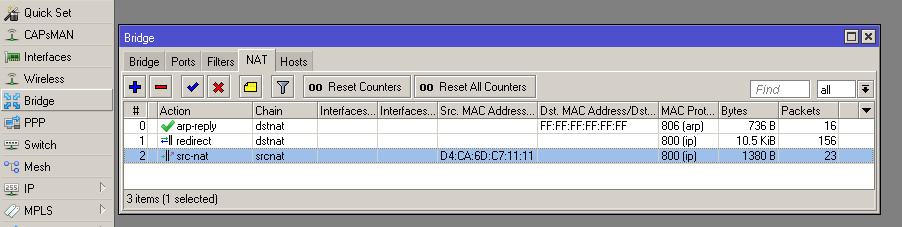
In the winbox window, the configured conversion rules look like this:
In the same way, you can add as many additional IPs to the interface as you need, each with its own MAC, prescribing the appropriate address translation rules. Masquerade to help you.

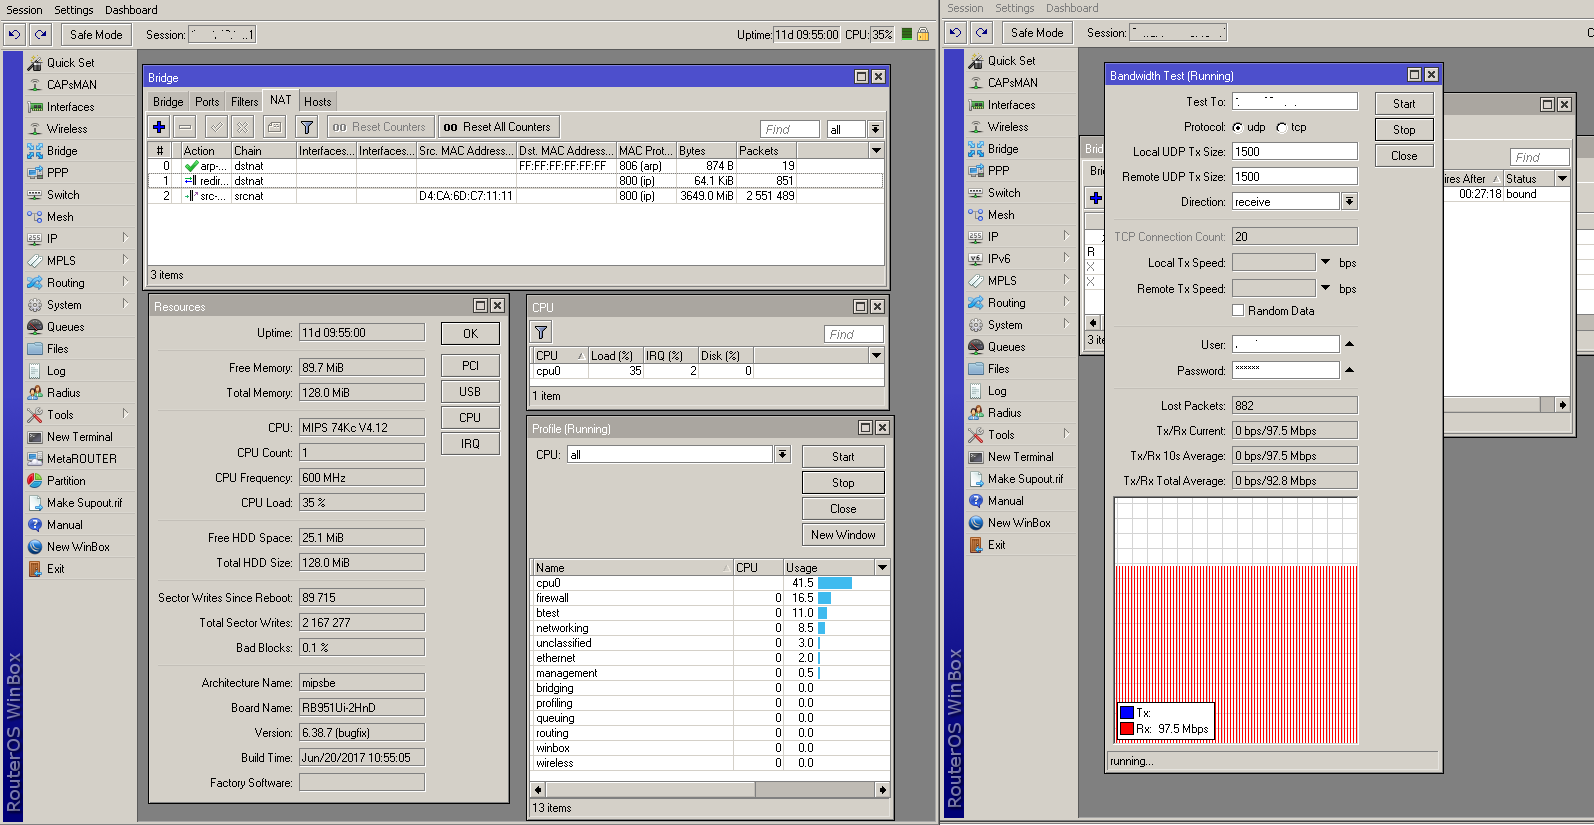
Update: added test results with Bridge L2-NAT turned on and off.
For the test we used RB951Ui-2HnD with an AR9344 processor. The processor load varies slightly, within the error of measuring instruments. The average growth was 2% on the 100M interface.
L2-NAT is off : L2-NAT is on :