Using the System API in Sailfish OS
- Tutorial
Introduction
Voice assistants in mobile devices do not stand still and are constantly evolving. The voice assistant for Sailfish OS, introduced last fall, is no exception and also has new functionality.
In that article, the basic principle of the internal operation of the application was considered. This material opens a series of two articles in which it will be considered in more detail:
- Work with an undocumented API for device management (current);
- Work with D-Bus interfaces provided by the operating system.
This article describes how to control screen brightness and system volume, and how to turn Bluetooth on and off and flight mode.
It is understood that the reader has already installed the Sailfish OS SDK and developed applications using it.
How to get information
During development for Sailfish OS, you can not do without the documentation provided on the official website and in the IDE. The documentation is written with high quality, with examples, but not without a drawback - it is short and covers only the basic functionality available to the programmer.
But Sailfish OS, like other operating systems, hides more than described in the documentation. You just need to know where to look. And you need to look in the source code, as in the most reliable source of information. Fortunately, Sailfish OS is a fairly open source software product based on GNU / Linux.
First you need to connect to the phone via SSH (Figure 1). To do this, enable the remote connection (1), set a password for it (2) and use one of the specified IP addresses (3). After the done steps, go to the directory
/usr/share. This directory contains interface codes and scripts of almost all applications installed on the phone. 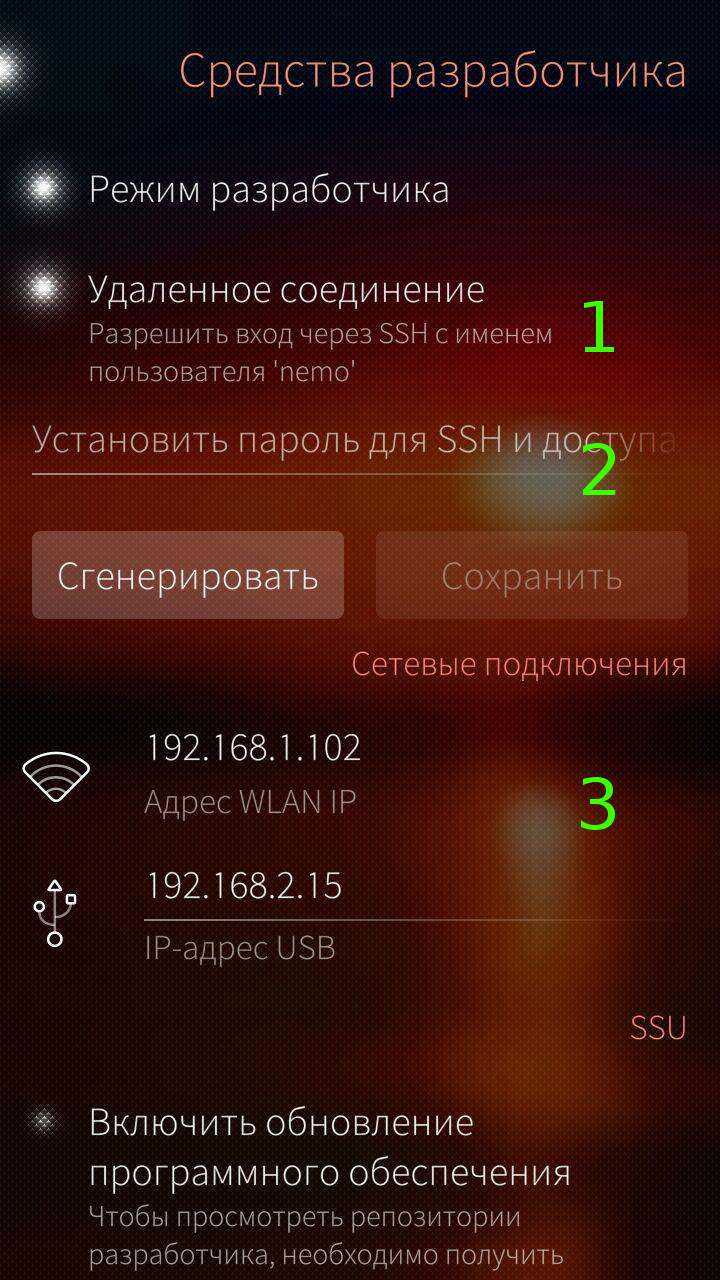
[Figure 1 - Configuring connection to the phone via SSH.]
Third-party application catalogs begin (in most cases) with a prefix
harbourfollowed by the program identifier. This prefix avoids the possible intersection of names with system names. Catalogs of standard applications are accompanied by prefixes jollaand sailfish. The rest relates to system functions.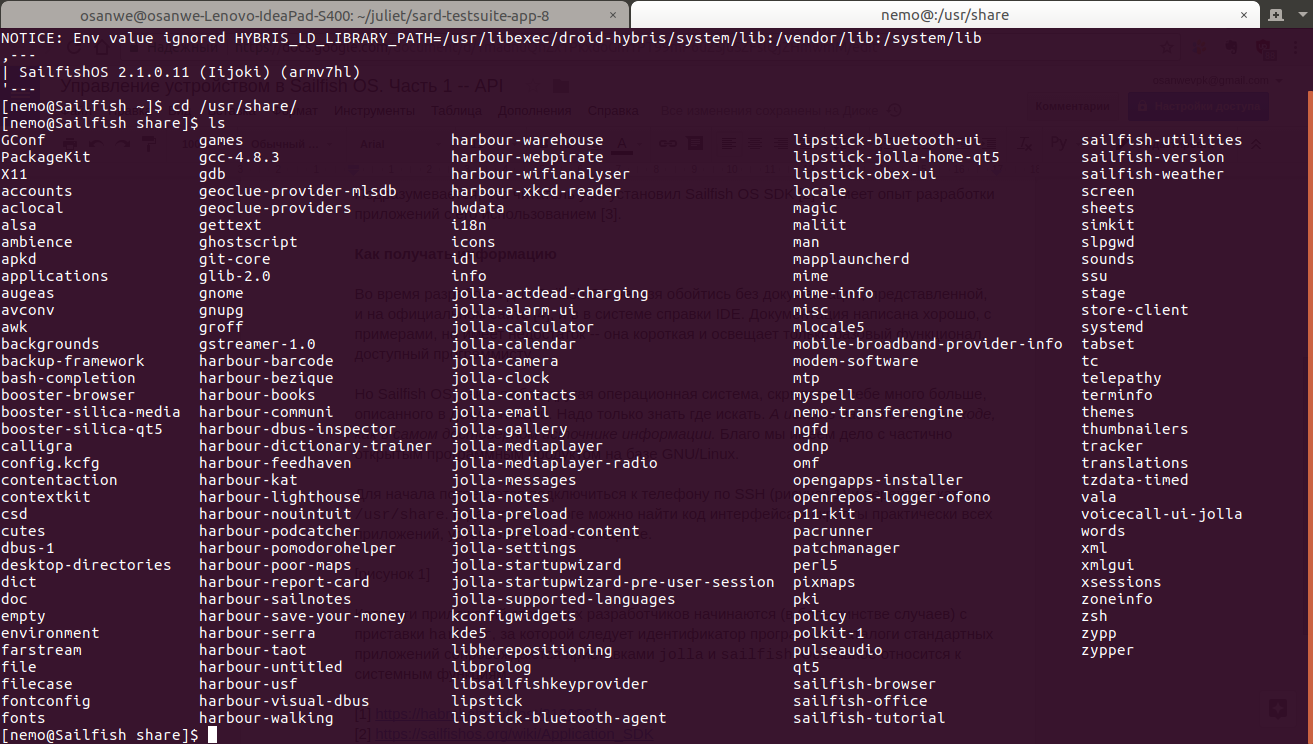
[Figure 2 - Example application directories.]
Screen brightness adjustment
The brightness control of the screen refers to the user settings of the system, therefore, of interest is a directory
/usr/share/jolla-settingsthat contains the following objects:- Directory
entries- stores information about the structure of settings; - Directory
pages- stores pages and settings items; - Directory
widgets- usually not used; - File
settings.qml- the main file for launching the settings application; - File
x-openvpn.xml- stores information about the connection to the VPN server.
It can be seen from the list that in the indicated task it is required to refer to the catalog
pages. It is divided into subfolders according settings type: bluetooth, soundsand other screen settings are located in the directory. display. Therefore, it /usr/share/jolla-settings/pages/displayis the full path regarding which further work will take place. The first step is to search by keyword:
grep -H 'brightness' *
$ cd /usr/share/jolla-settings/pages/display

$ grep -H 'brightness' *

BrightnessSlider.qml: label: qsTrId("settings_display-la-brightness")

BrightnessSlider.qml: value: displaySettings.brightness

BrightnessSlider.qml: onValueChanged: displaySettings.brightness = Math.round(value)

BrightnessSlider.qml: onBrightnessChanged: slider.value = brightness

display.qml: id: brightnessSlider

display.qml: entryPath: "system_settings/look_and_feel/display/brightness_slider"

display.qml: text: qsTrId("settings_display-la-adaptive_brightness")
From the results obtained, it can be seen that the screen brightness adjustment code is in the file
BrightnessSlider.qml. Next, you need to clarify how exactly the control is performed:
grep -C 1 'displaySettings' ./BrightnessSlider.qml
$ grep -C 1 'displaySettings' ./BrightnessSlider.qml

 label: qsTrId("settings_display-la-brightness")

 maximumValue: displaySettings.maximumBrightness

 minimumValue: 1

 value: displaySettings.brightness

 stepSize: 1


onValueChanged: displaySettings.brightness = Math.round(value)


DisplaySettings {

 id: displaySettings

 onBrightnessChanged: slider.value = brightness
After searching the file, it becomes obvious that to control the brightness of the device, you need to create an object
DisplaySettingsand change the field value brightness, taking into account that the minimum brightness value is unity, and the maximum is stored in the field maximumBrightness. The final touch is to determine the necessary import:
grep 'import' ./BrightnessSlider.qml
$ grep 'import' ./BrightnessSlider.qml

import QtQuick 2.0

import Sailfish.Silica 1.0

import com.jolla.settings.system 1.0

import org.nemomobile.systemsettings 1.0QtQuickand Sailfish.Silicaare standard modules for interface development and do not provide access to settings. com.jolla.settings.systemcontains internal objects for the settings application to work and is not of interest to other programs. It remains org.nemomobile.systemsettings, describing the necessary component. Thus, it becomes possible to form your own screen brightness control for subsequent inclusion in the project:
BrightnessControl.qml
import QtQuick 2.0
import org.nemomobile.systemsettings 1.0
Item {
    id: brightnessControl
    /* Установка яркости на указанное значение.
     * @param: value -- число от 1 (минимум) до maximumBrightness (максимум)
     */
    function setBrightness(value) {
        if (value <= 1) setMinimumBrightness();
        else if (value >= displaySettings.maximumBrightness) setMaximumBrightness();
        else displaySettings.brightness = value;
    }
    /* Увеличение яркости.
     * @param: percents -- процент от диапазона яркости.
     */
    function increaseBrightness(percents) {
        setBrightness(displaySettings.brightness + _calcDelta(percents))
    }
    /* Уменьшение яркости.
     * @param: percents -- процент от диапазона яркости.
     */
    function decreaseBrightness(percents) {
        setBrightness(displaySettings.brightness - _calcDelta(percents))
    }
    /* Установка минимальной яркости.
     */
    function setMinimumBrightness() {
        displaySettings.brightness = 1
    }
    /* Установка максимальной яркости.
     */
    function setMaximumBrightness() {
        displaySettings.brightness = displaySettings.maximumBrightness
    }
    /* Расчёт абсолютного значения изменения.
     * @param: percents -- процент от диапазона яркости.
     * @return: Значение изменения яркости в абсолютных единицах.
     */
    function _calcDelta(percents) {
        return Math.round(displaySettings.maximumBrightness / 100 * percents)
    }
    DisplaySettings { id: displaySettings }
}
System Volume Adjustment
It uses the already known method of finding information. We go to the catalog
/usr/share/jolla-settings/pages/soundsand check the keywords:grep -i -C 1 -H 'volume' *
$ cd /usr/share/jolla-settings/pages/sounds

$ grep -i -C 1 -H 'volume' *

SoundsPage.qml-

SoundsPage.qml: VolumeSlider {

SoundsPage.qml: id: volumeSlider

SoundsPage.qml: property string entryPath: "system_settings/look_and_feel/sounds/ringer_volume"

SoundsPage.qml- width: parent.width

--

VolumeSlider.qml- height: implicitHeight + valueLabel.height + Theme.paddingSmall

VolumeSlider.qml: //% "Ringtone volume"

VolumeSlider.qml: label: qsTrId("settings_sounds_la_volume")

VolumeSlider.qml- maximumValue: 100

--

VolumeSlider.qml- if (!externalChange) {

VolumeSlider.qml: profileControl.ringerVolume = value

VolumeSlider.qml- profileControl.profile = (value > 0) ? "general" : "silent"

--

VolumeSlider.qml- slider.externalChange = true

VolumeSlider.qml: slider.value = profileControl.ringerVolume

VolumeSlider.qml- slider.externalChange = false

--

VolumeSlider.qml-

VolumeSlider.qml: onRingerVolumeChanged: {

VolumeSlider.qml- slider.externalChange = true

VolumeSlider.qml: slider.value = profileControl.ringerVolume

VolumeSlider.qml- slider.externalChange = false
The result of the command shows that the maximum allowable volume value is 100, the minimum is 0; and control is performed using an element
profileControl, and requires not only specifying the volume value, but also switching the profile. We will get more detailed information about the mentioned element:grep -C 1 'profileControl' ./VolumeSlider.qml
$ grep -C 1 'profileControl' ./VolumeSlider.qml

 if (!externalChange) {

 profileControl.ringerVolume = value

 profileControl.profile = (value > 0) ? "general" : "silent"

 }

--

 slider.externalChange = true

 slider.value = profileControl.ringerVolume

 slider.externalChange = false

--

 ProfileControl {

 id: profileControl


--

 slider.externalChange = true

 slider.value = profileControl.ringerVolume

 slider.externalChange = false

$ grep 'import' ./VolumeSlider.qml

import QtQuick 2.0

import Sailfish.Silica 1.0

import com.jolla.settings.system 1.0

import org.nemomobile.systemsettings 1.0
Based on the search results and information from the previous section, it becomes possible to implement a module for controlling system volume:
VolumeControl.qml
import QtQuick 2.0
import org.nemomobile.systemsettings 1.0
Item {
    id: volumeControl
    /* Установка громкости на указанное значение.
     * @param: value -- число от 0 (минимум) до 100 (максимум).
     */
    function setVolume(value) {
        if (value <= 0) {
            setMinimumVolume();
        } else if (value >= 100) {
            setMaximumVolume();
        } else {
            profileControl.ringerVolume = value;
            _setProfile();
        }
    }
    /* Увеличение громкости.
     * @param: percents -- процент от диапазона громкости.
     */
    function increaseVolume(percents) {
        setVolume(profileControl.ringerVolume + percents)
    }
    /* Уменьшение громкости.
     * @param: percents -- процент от диапазона громкости.
     */
    function decreaseVolume(percents) {
        setVolume(profileControl.ringerVolume - percents)
    }
    /* Установка минимальной громкости.
     */
    function setMinimumVolume() {
        profileControl.ringerVolume = 0;
        _setProfile();
    }
    /* Установка максимальной громкости.
     */
    function setMaximumVolume() {
        profileControl.ringerVolume = 100;
        _setProfile();
    }
    /* Установка профиля относительно выставленного значения громкости.
     */
    function _setProfile() {
        profileControl.profile = (profileControl.ringerVolume > 0) ? "general" : "silent"
    }
    ProfileControl { id: profileControl }
}
Here it is worth paying attention to the use of keywords
generaland silentto control the sound system profile (basic and quiet respectively). These are two reserved values that determine the behavior of the system depending on the set volume value.Switch flight mode and Bluetooth
The API search principle is absolutely identical to the one described above, so we will go directly to the consideration of ready-made elements.
To control the flight mode, you need to connect the module
MeeGo.Connmanthat provides the component NetworkManagerFactory. By setting the field value of instance.offlineModethis object to trueor false, it becomes possible to turn the specified mode on and off, respectively.FlightControl.qml
import QtQuick 2.0
import MeeGo.Connman 0.2
Item {
    id: flightControl
    /* Включение режима “В самолёте”.
     */
    function turnOnFlightMode() {
        connMgr.instance.offlineMode = true
    }
    /* Выключение режима “В самолёте”.
     */
    function turnOffFlightMode() {
        connMgr.instance.offlineMode = false
    }
    /* Переключение режима “В самолёте”.
     */
    function switchFlightMode() {
        connMgr.instance.offlineMode = !connMgr.instance.offlineMode
    }
    NetworkManagerFactory { id: connMgr }
}
A module is also connected to control the status of Bluetooth
MeeGo.Connman, but it uses a component TechnologyModelwhose field value poweredis trueeither set falseto turn Bluetooth on or off, respectively. It is worth noting that the rest of the work with the interface is done using standard Qt features .BluetoothControl.qml
import QtQuick 2.0
import MeeGo.Connman 0.2
Item {
    id: bluetoothControl
    /* Включение bluetooth.
     */
    function turnOnBluetooth() {
        btTechModel.powered = true
    }
    /* Выключение bluetooth.
     */
    function turnOffBluetooth() {
        btTechModel.powered = false
    }
    /* Переключение bluetooth.
     */
    function switchBluetooth() {
        btTechModel.powered = !btTechModel.powered
    }
    TechnologyModel {
        id: btTechModel
        name: "bluetooth"
    }
}
Conclusion
This article shows one way to search for undocumented features in Sailfish OS and provides code examples for controlling brightness, volume, Bluetooth, and flight mode. You can learn more about the implementation of these and other system settings management modules (as well as how to use them) on GitHub .
However, before looking at the finished code, try to implement and connect some module yourself, and only then compare it with the published example. You can, for example, try changing the design (search by
ambience) or the system font size ( fontSize), controlling Wi-Fi ( wifi) or sharing the Internet ( tethering).The following article will be devoted to what interfaces and functions D-Bus provides Sailfish OS to the programmer.
Questions and ideas that arise during development can always be discussed in the Telegram chat and in the VKontakte group .
I express gratitude to the ragequit habrayuzer for the invite, which made it possible to publish this and subsequent articles.