Track form submissions with GTM

Hello!
Short introduction:
If you have competent developers and the forms on your site can be tracked using the standard “Submit form” trigger in Google Tag Manager or you can embed the event in the handler - I sincerely envy you. Today we are considering another case.
PROBLEM:
Recently, it is becoming less common to meet a situation where, after submitting a form, the user is redirected to a new page. All manipulations usually occur at the same address. That is, AJAX technology is used to send data.
Inaccurate and ineffective ways to track statistics will always exist.
As "mowed" before:
Previously, forms were tracked at the individual page address. If it was not there, they asked developers to change the very logic of the form.
How to "mow" now:
Relatively new technologies allow you to send data without reloading pages. This creates a problem for tracking the submission of forms: instead of the changed links, they track the PRESS on the button, and not the fact of sending.
The advantages of such approaches:
• Easy to set goals. If you do not know how to do this, then you can quickly figure it out.
• More applications * sarcasm *.
Cons:
• Completed goals do not match the number of applications. The error in this case may be on average 20-30%.
• Data on the performance of traffic sources will also not be true.
In addition, difficulties arise when we need to make changes to the site code in order to correctly send the event of the form submission:
• Client developers do not know what / how / where to fix. This problem is quite common.
• The site is located on a third-party platform (nethouse, insales, wix, LPgenerator, etc.). They do not always provide the ability to quickly change the code.
There are many ways to track forms submission online. But often they are too individual or not always working.
I want to tell you about a solution that works on all sites in which we use it. An event is dispatched only if the form is successfully submitted.
DECISION:
1. You need to generate the GTM code and install it on the site in accordance with the requirements of Google Tag Manager: tagmanager.google.com
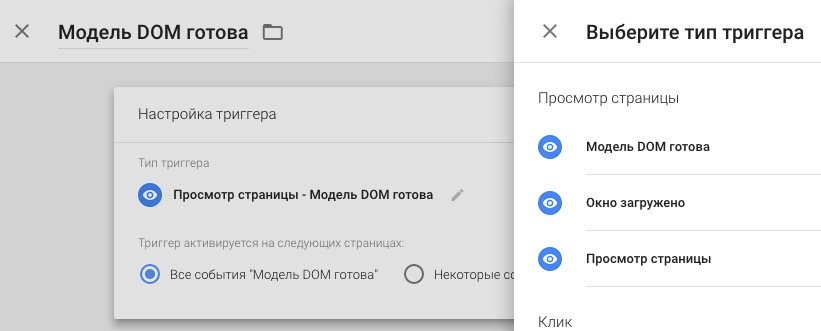
2. On the tab with triggers add a new one - “DOM Model Ready”.
3. On the “Tags” tab , create a new one with the type “Custom HTML”, and select the one created in the previous step as a trigger.
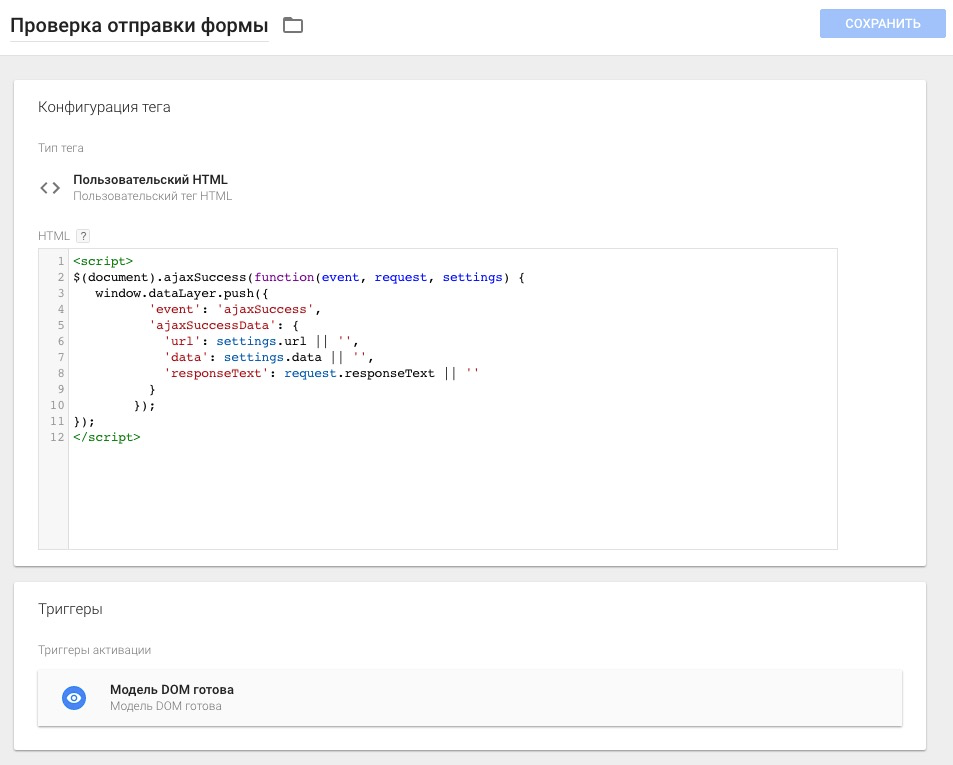
Code itself:
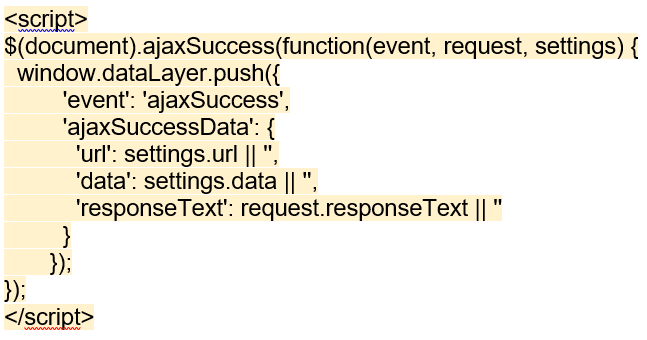
It will help track the submission of forms. You can read more about the code here: vk.cc/6Au3Jj
4. Then create a variable for data about successful sending.
To find out which variable to pull, you must:
- Fill out and submit the form

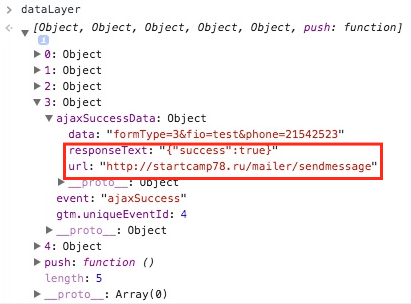
- Open the browser console and send a request to the data level (most likely of the form “dataLayer” without quotes). After that, several objects will appear:
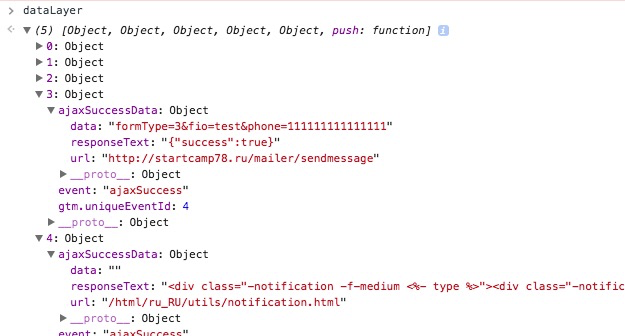
In this particular case, there are two “ajaxSuccessData” objects. The first URL is a “talking link” about sending a message. The second one shows on the page a block with the message “Application sent”.
You have not appeared similar data? It is possible your GTM code just uses a different data level name.
You can check the level name in the GTM code:

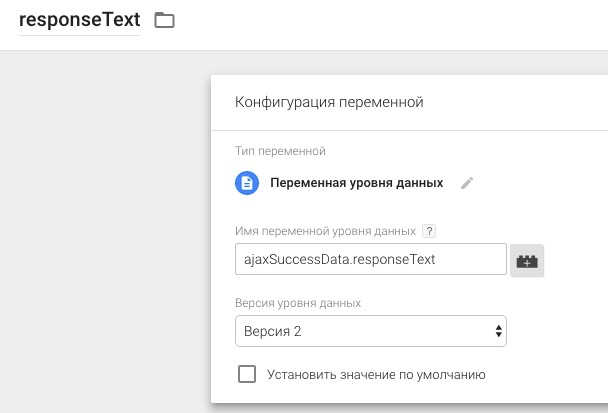
5. Create a variable: GTM → Variables → Create
In the previous screenshot, only the success status is interesting: true in the responseText data level variable, which in turn is inside the ajaxSuccessData container.
How, in this case, check for the success status: true? In the field, the name of the level variable of this level must be entered through the dot of their name:
ajaxSuccessData.responseText
The name of the variable itself can be anything.
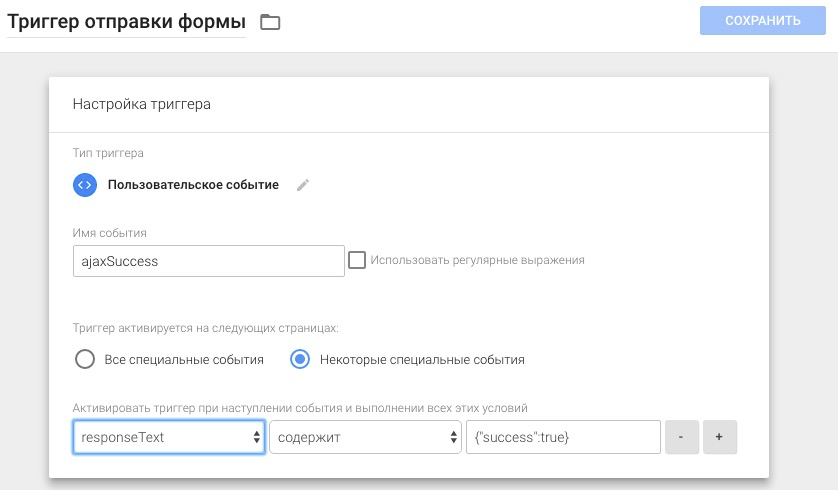
6. Create a trigger.
- The trigger name must be speaking.
- Trigger type “Custom event”
- Event name - “ajaxSuccess”:

- Activation on some pages: only where the variable receives data about the successful submission of the form.
In each case, there may be several forms. If you need to separate them, you can use other data that is transmitted when sending. In our case, it was a landing, and this approach was enough.
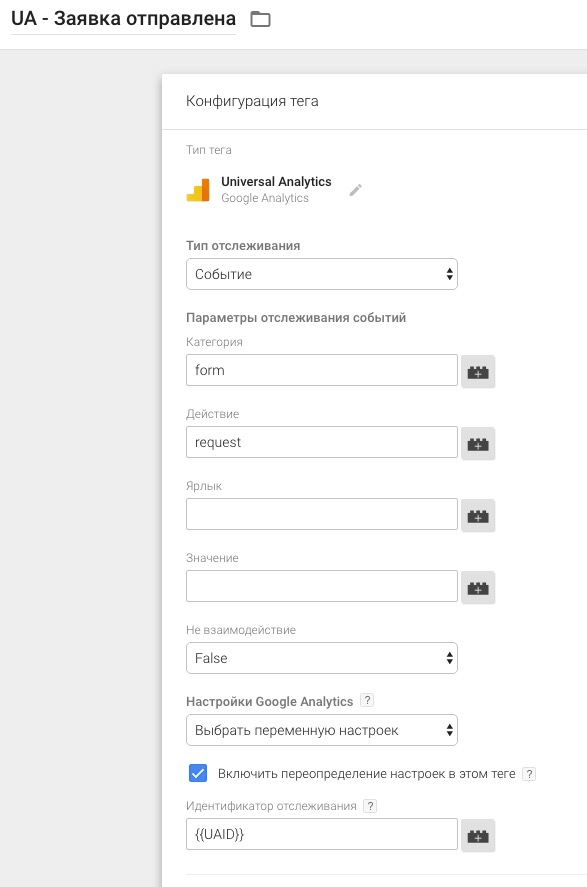
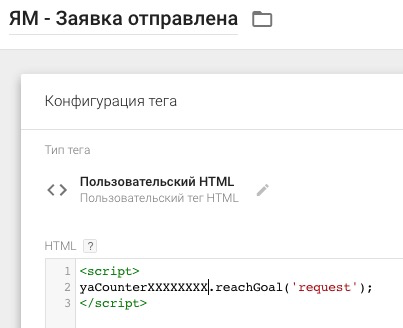
7. After the trigger is created, you can create event sending tags for Metrics and Analytics.
Please note: in the screenshot for Analytics, the tracking identifier is set through a variable, if you use another variable to indicate the identifier, use it or specify the identifier manually. But the last option is not recommended.
The sites are different, but the sequence of actions described above is the same for everyone.
Track your goals correctly and let your sales reach Zen!
Posted by Pavel Mrykin, Head of Automation and Analytics at Digital Agency
