Predictive analytics on the SCP platform
This is the third publication in the framework of assistance to the participants of the contest "SAP Coder-2017" .
Each enterprise in the process of its life generates a significant amount of data, both "large" and not very. These data can often be used to obtain new knowledge, which, in turn, can have a significant impact on a business development strategy or tactics of behavior at some local moments of work. Now, in connection with the development of computer technology and an increase in the volume of accumulated data, numerical methods have been greatly developed, which make it possible to extract useful information from an array of "raw" data and use it in various business scenarios.

The SAP Cloud Platform has, along with other built-in services, a predictive analytics toolkit that allows you to build and use built models in business tasks created on the platform (and outside it). The set of forecasting tools included in the service on the date of publication of the post consists of the following elements:
- Clustering - classic cluster analysis and segmentation of the database of objects with a large number of attribute-classifiers;
- Forecasts - making forecasts based on time series;
- Key Influencers - search for the parameters most influencing the objective function;
- Outliers - search for non-standard patterns in a data set (identification of fraud, input errors, etc.);
- Recommendation - building models of product recommendations based on the history of purchases (checks);
- Scoring Equation - building and extracting an equation that allows you to calculate the objective function analytically and embed it in your own application;
- What If - an “what-if” analysis that allows us to assume the consequences of certain actions based on the history of the object’s behavior
The current list of methods and their description can be found here .
One of the tasks for the SAP Encoder contest involves the use of a recommendation model. Here we show how to build a similar model in the Predictive service of SCP. The first thing to start with is the preparation of data for the "training" of the model. In the case of the Recommendation service, training means finding pairs of goods (sold together) and building a list of recommendations for specific customers (for example, members of the loyalty program).
Initial data
The initial data for building the model is simple - these are cashier's checks of the store. They should contain the following parameters:
- userID - membership number of the loyalty program (unique identifier of the buyer)
- itemID - product code (SKU)
- purchaseDate - date of transaction (check)
It is easiest to download this data to the system without access to the server file system through the Import / Export function in HANA Studio (Eclipse). To do this, you must:
- Prepare data in a CSV file.
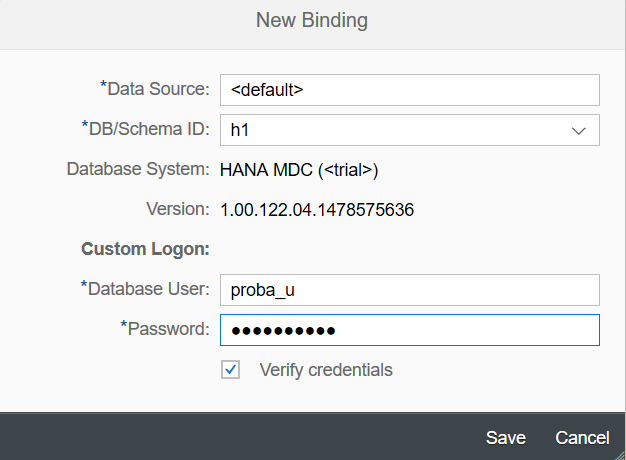
- Create a new HANA MDC database on SCP. In our case, it is called h1
- Create a data scheme in which we will conduct our experiments. We have created a PROBA circuit.
- Create a table to place the source data, here PROBA.SALES_DATA. The table should contain several key fields, in our case, it is RID - the number of the loyalty program participant, RDATE, TRIME, RDATETIME - date and time of the transaction in different formats, only RDATETIME is important, SKU is the article number.

Additionally, our database contains the PRODUCTS table - of two fields - the code and the name of the product. - Unload the SALES_DATA table to the local disk using the Export function. Go down the directory structure to export description files
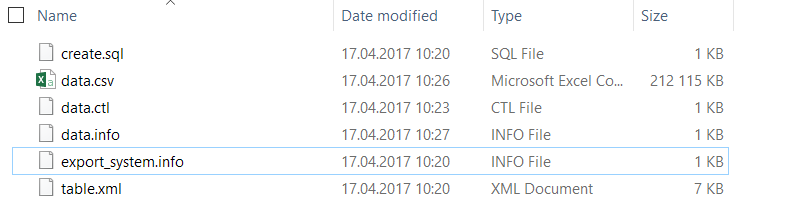
- In the data.csv file, put the data in CSV format
- In the data.ctl file, change the CSV field separator to the required
- In the data.info file, change the data on the size of the data.csv file and the number of lines in it
- Load data using the Import function, replacing an existing object in the database
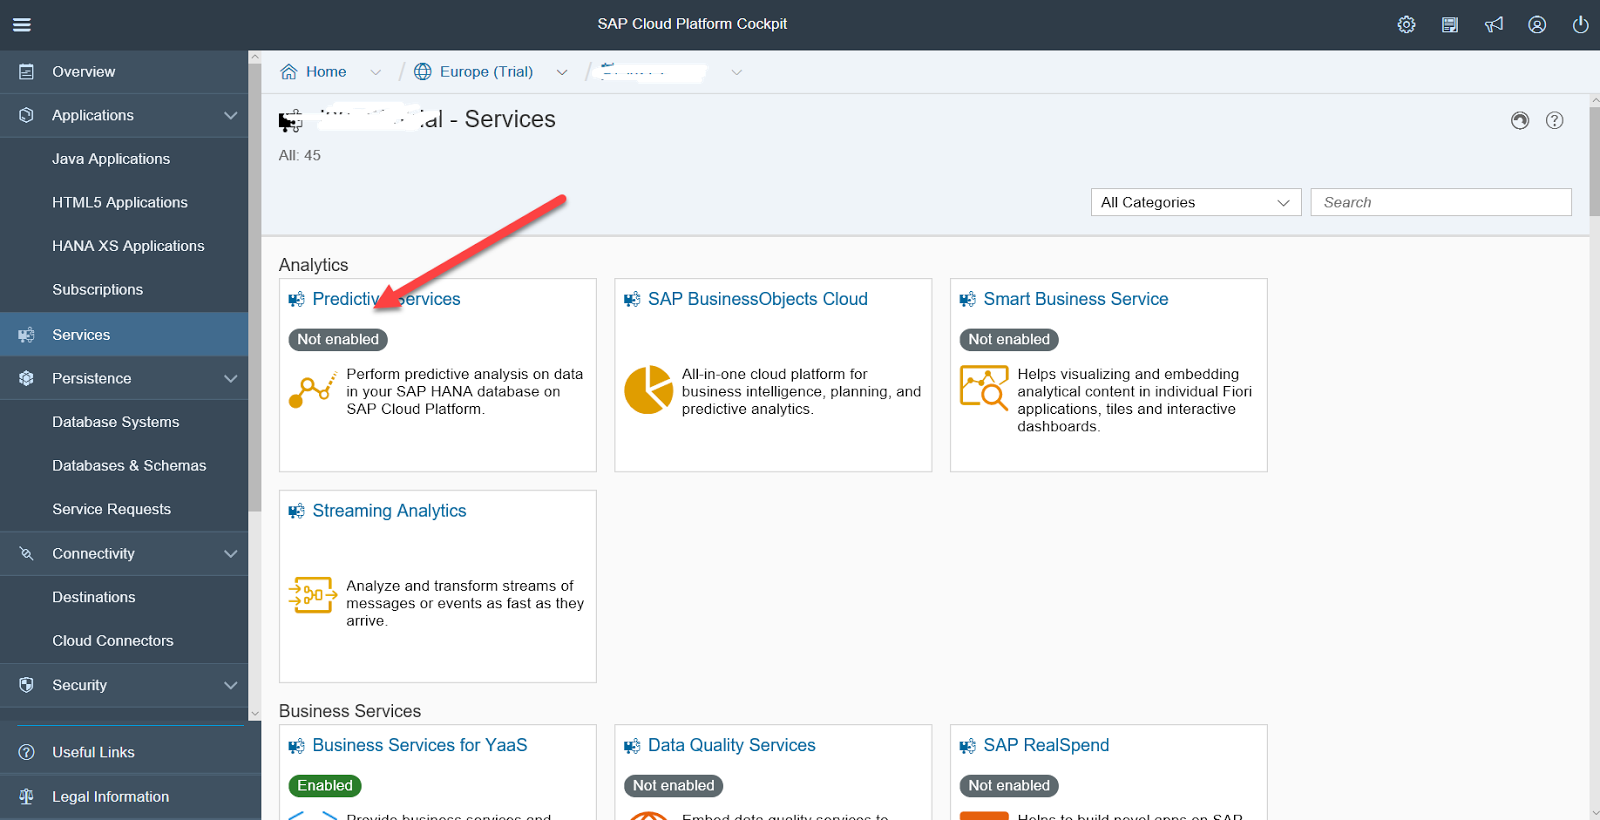
Service Setup
Before you start building the model, you need to make basic settings for the Predictive service. By default, the service is turned off, the first thing to do is to enable the service.
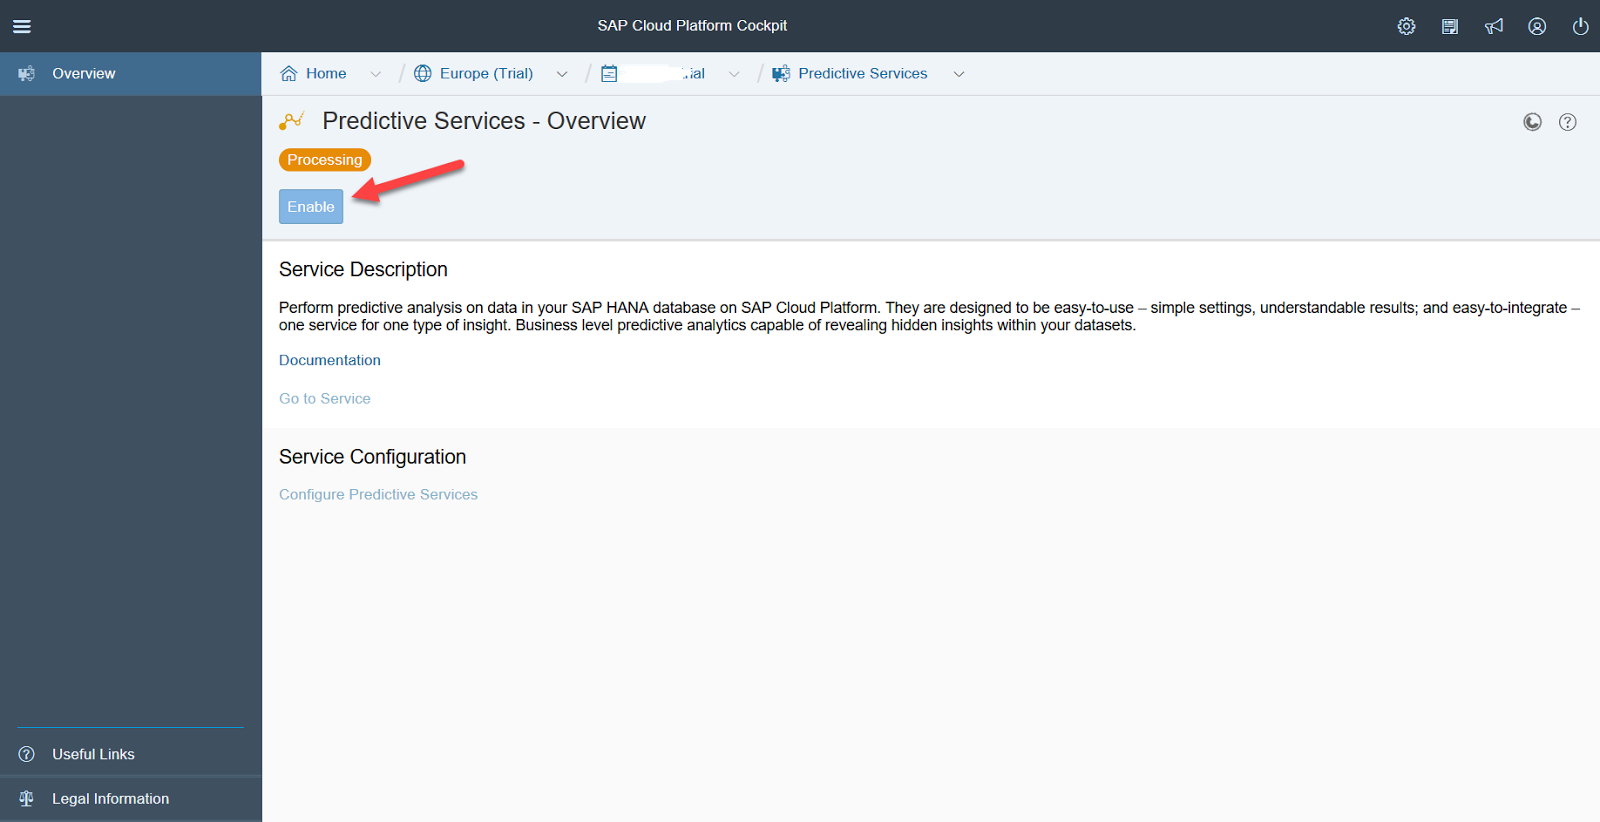
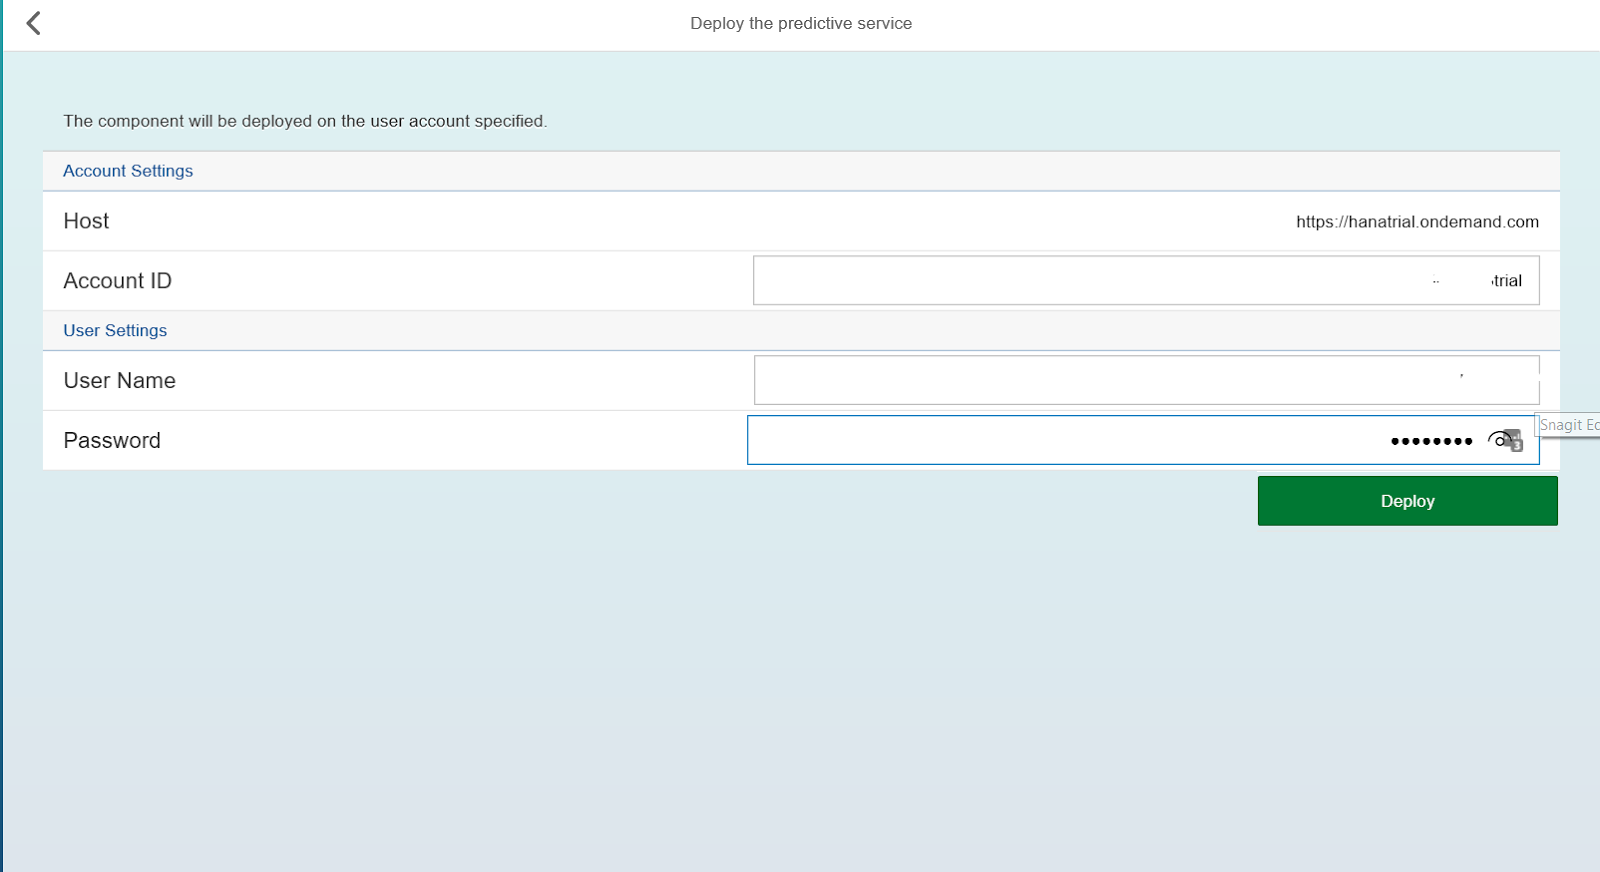
The system will ask if it is worth installing updates. The correct answer is yes. After that, you need to deploy the service on your user account, for this you need to enter the login and password used to log into SCP.
After the service is deployed, click on the Java Dashboard link
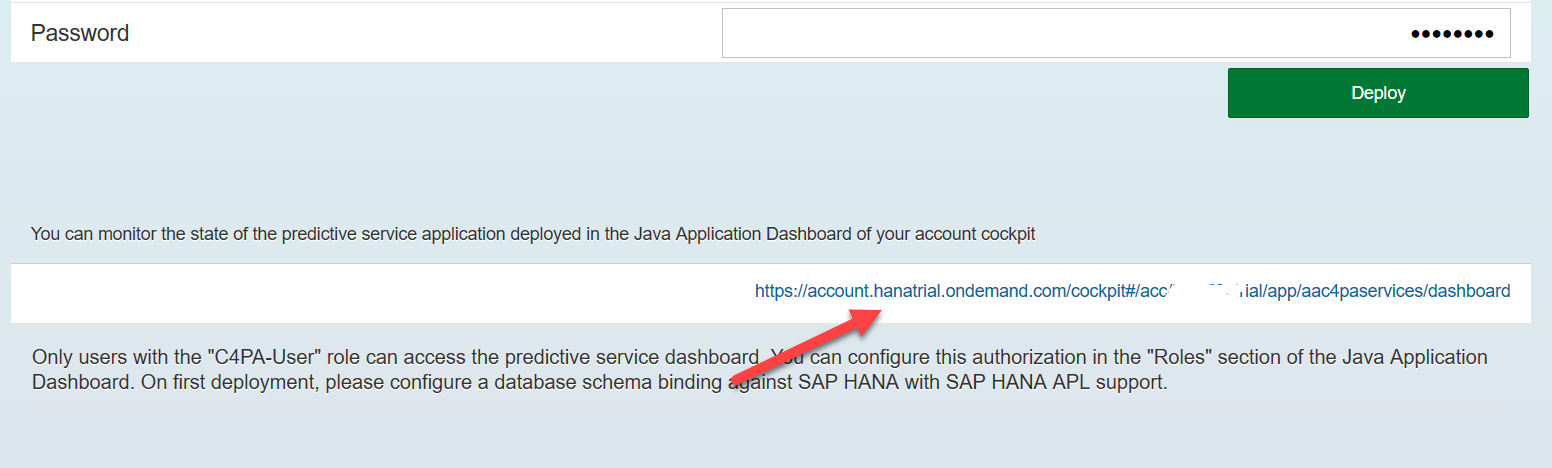
and assign both specified roles to your developer user: C4PA-User, C4PA-Admin.

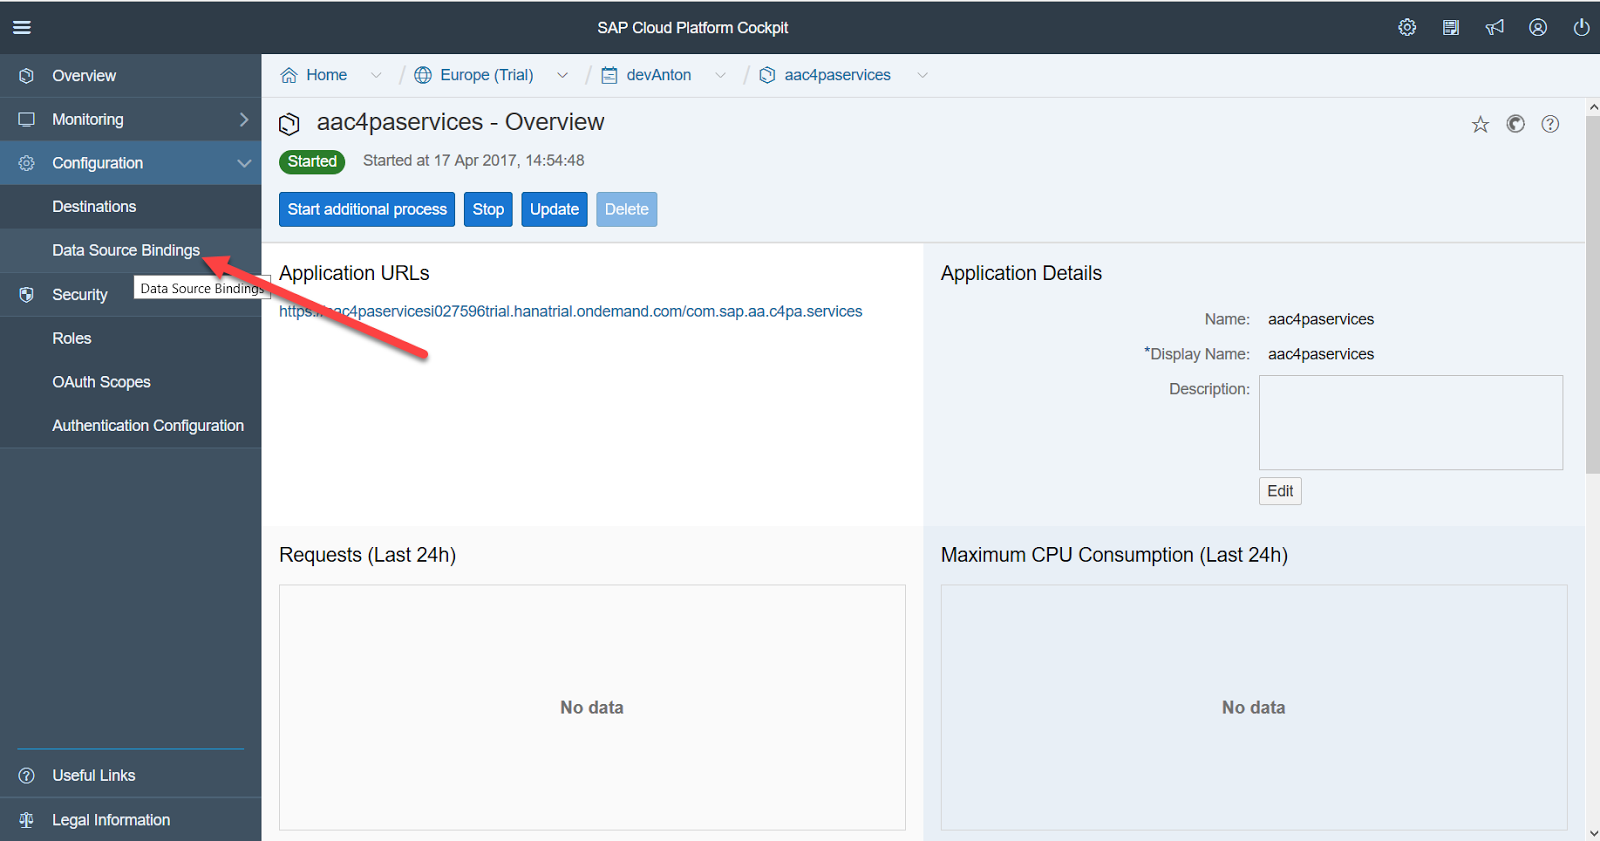
Next, we must associate SCP Predictive service with our database.
For this, it is desirable to create a technical user in the database, in our case PROBA_U
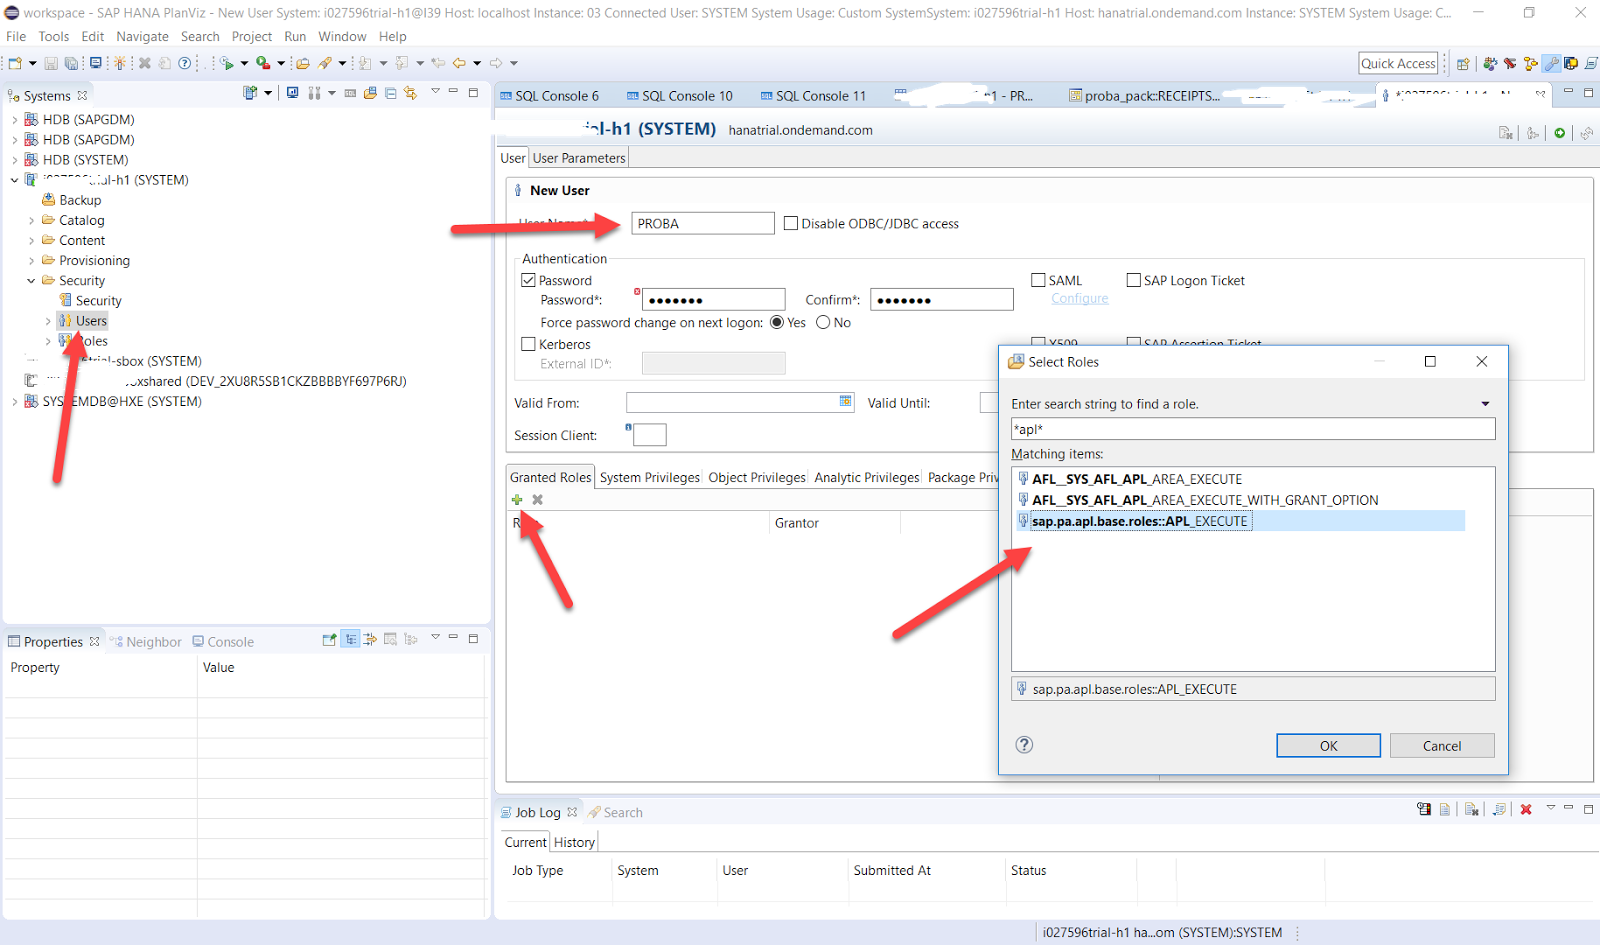
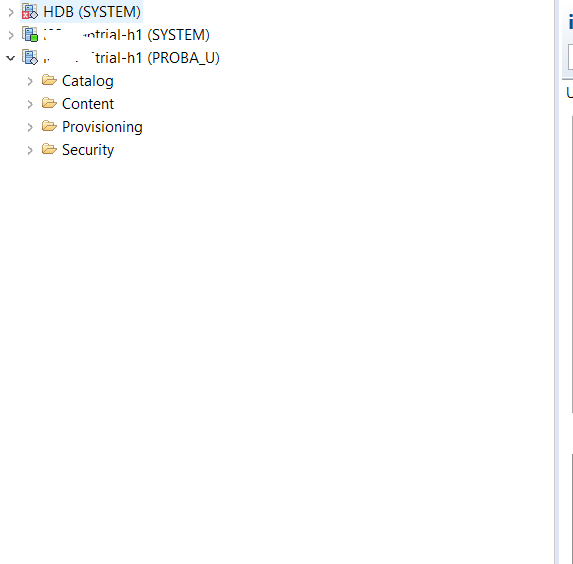
and assign him the necessary authority to run the predictive service. When creating a user, HANA will ask for the initial password, in order to change it (and enter the database automatically on behalf of the Predictive Service), it is necessary to log in once on behalf of this user. To do this, create a new connection to the cloud data source in HANA Studio and enter the database by changing the initial password.
After creating a technical user (or a decision to use an existing one), we bind the service to a specific database schema.
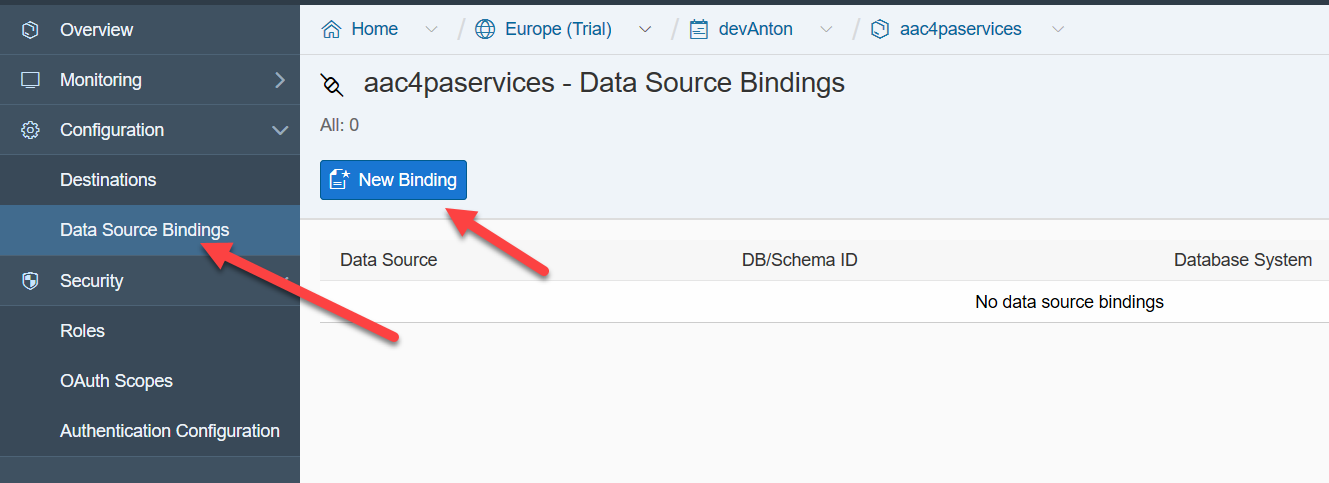
In this case, we use the data of the technical user, we leave the Data Source by default -.
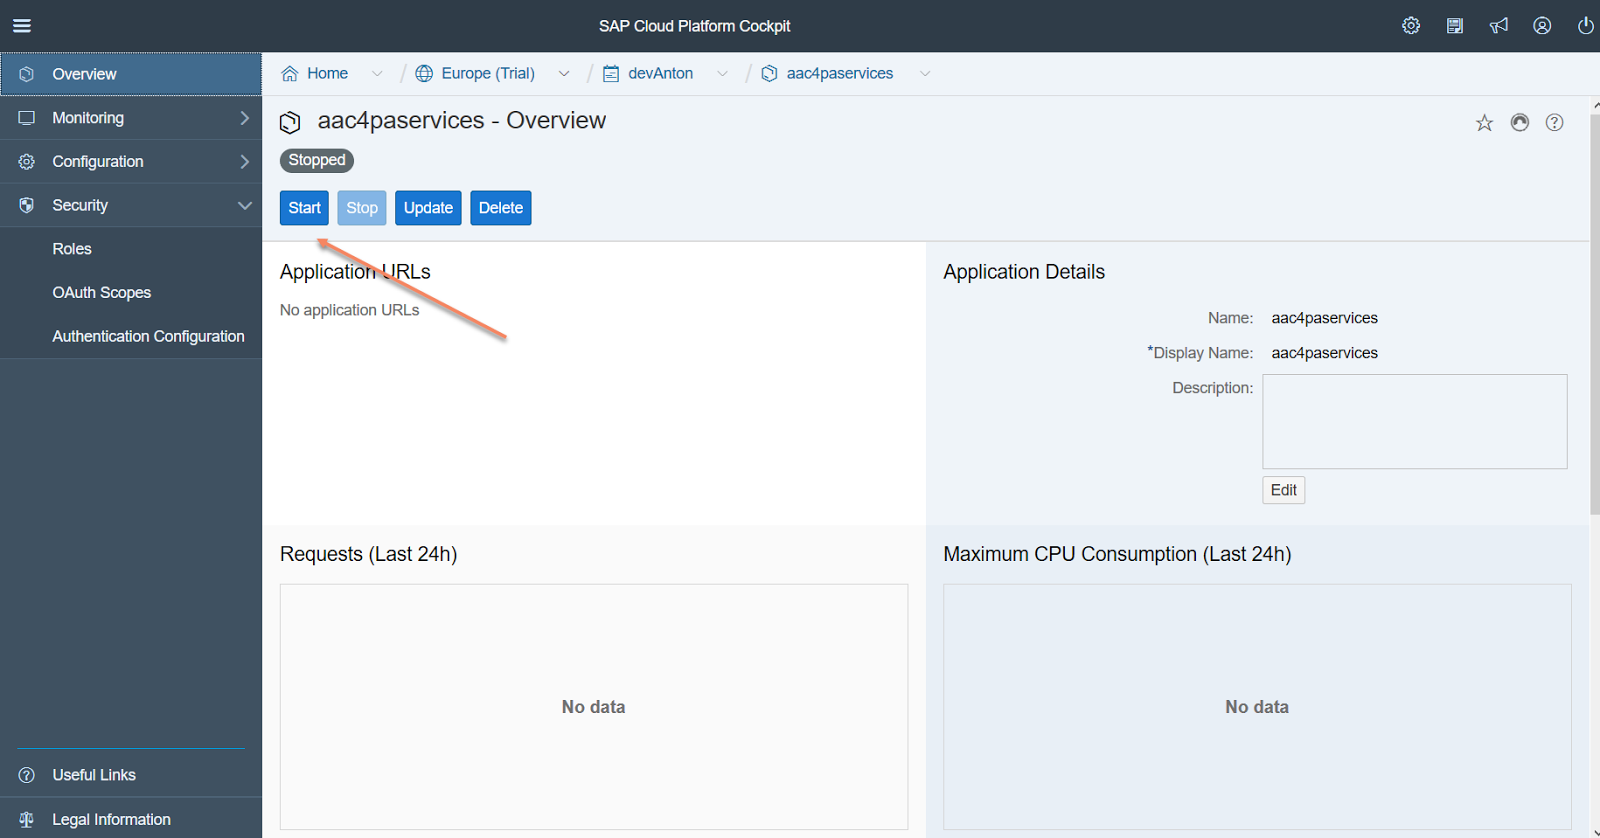
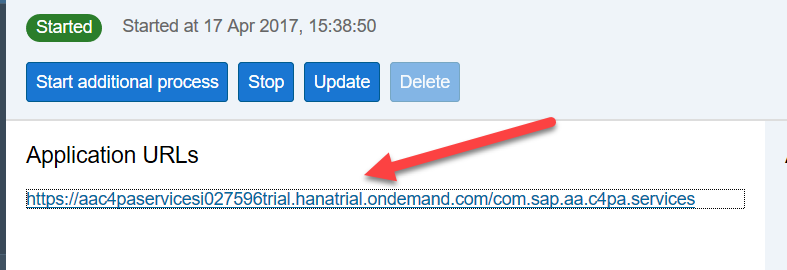
After the service is deployed to the developer account and the database is bound, we restart the service - sequentially click the Stop and Start buttons.
After restarting the service, a link to a java application will appear, allowing you to manage the service, control it and use it in application development.
After the link is called, the system offers us two panels, one for development and one for monitoring the service.

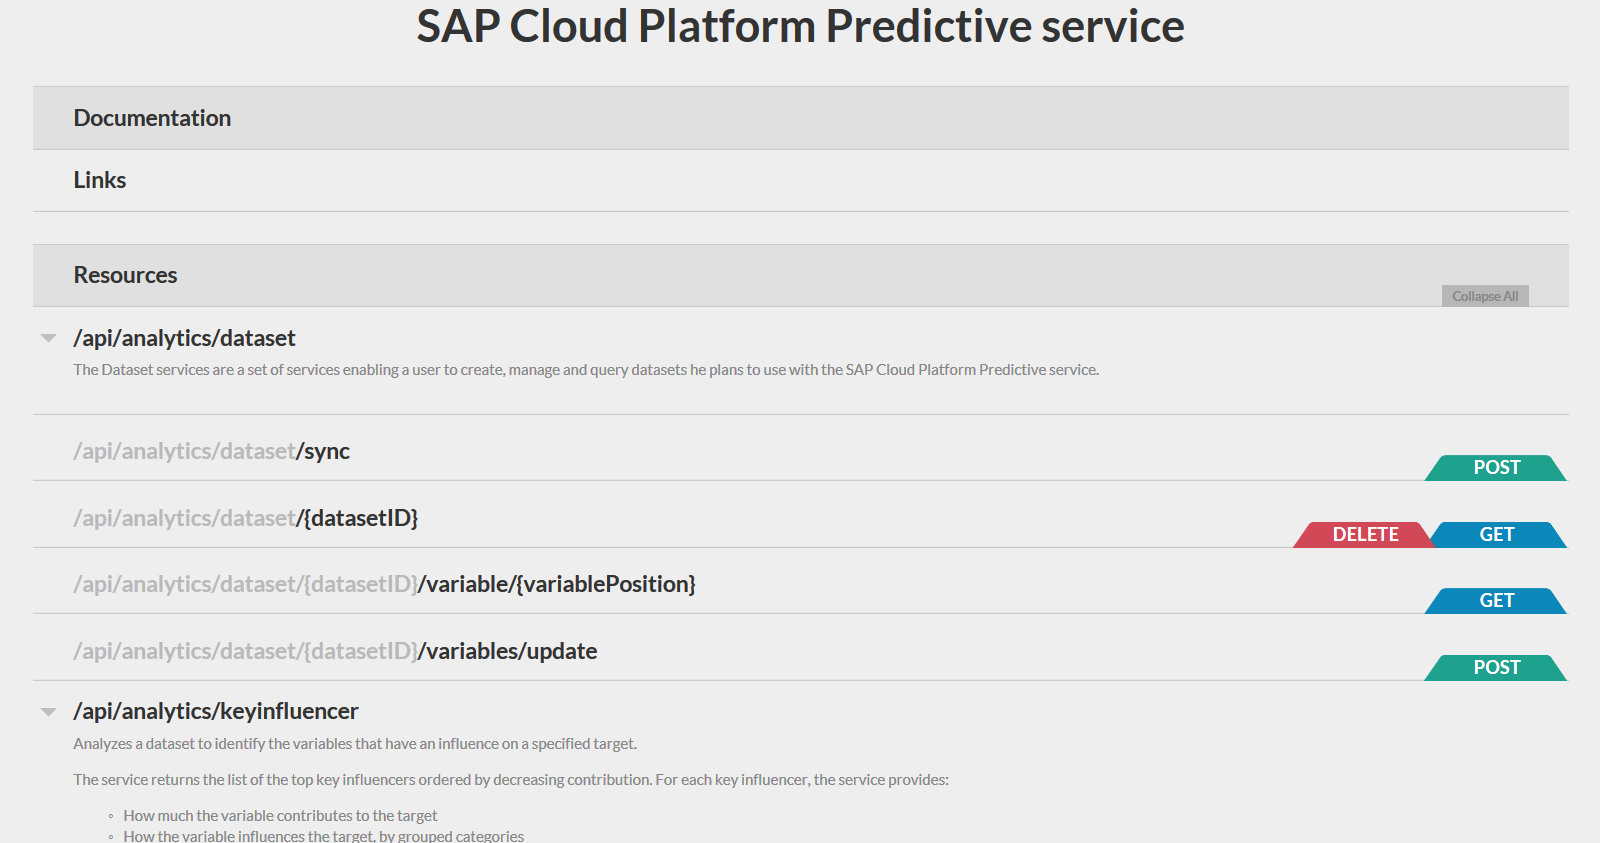
When you click on the Administration panel, the application gives a ton of monitoring information about Predictive service, which can be used for analysis, but for our case, the main panel is the "Predictive Services API Documentation"
Building and using a recommendation model
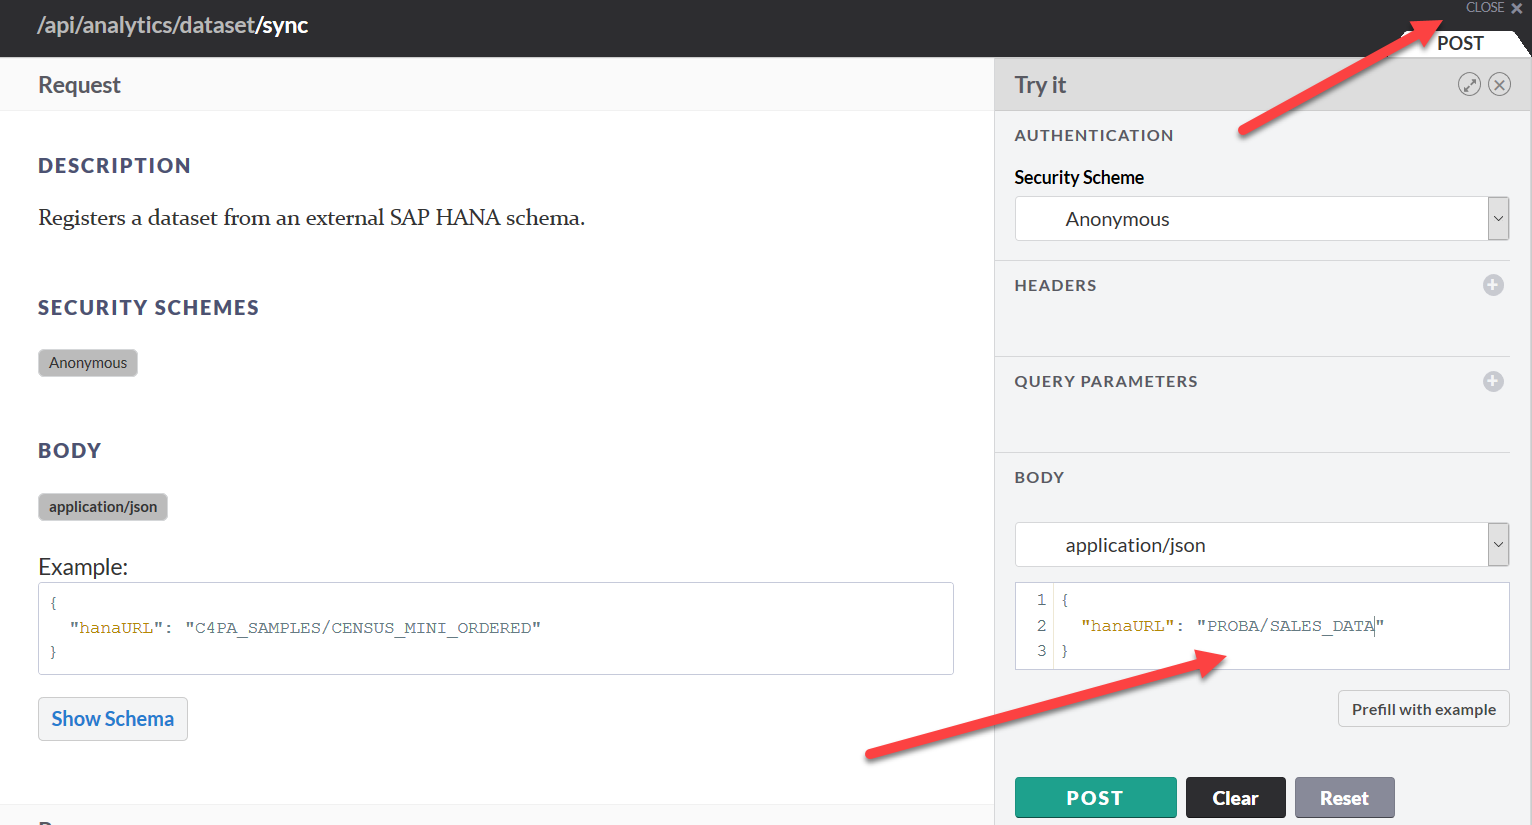
Let's look at our checks in a more adapted form for the human eye. To do this, we will create a data representation in the form This view is not necessary for us to solve our problem, but it allows us to visually see receipts with sales positions (SKUs). We launch the Predictive Services API Documentation. This page of the Predictive Service application contains all the mathematical methods included in it and access points to each of them (endpoints). We start by creating a data source for the predictive model. To do this, click on the POST tab at the access point / api / analytics / dataset
CREATEVIEW "PROBA"."SALESWPROD" ( "RID",

 "USER_ID",

 "RDATE",

 "RTIMESTAMP",

 "ITEMS",

 "SKU_ID",

 "SKU_NAME" ) ASSELECT

 T0."RID" ,

 t0."USER_ID",

 T0."RDATE",

 TO_TIMESTAMP(T0."RDATETIME"),

 T0."ITEMS",

 T0."SKU",

 T1."SKU_NAME"
from "PROBA"."SALES_DATA" T0
innerjoin "PROBA"."PRODUCTS" T1 on T0."SKU" = T1."SKU_ID" WITH READ ONLY

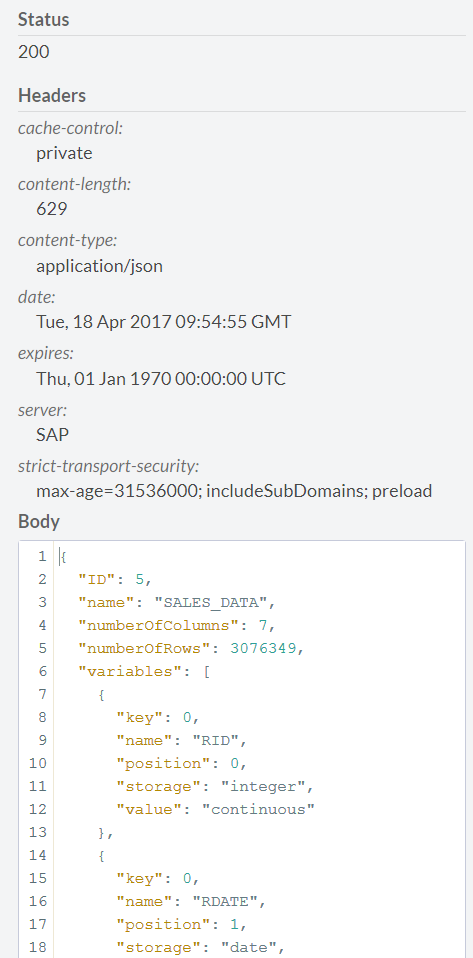
and change the hanaURL parameter in the JSON template, with which all parameters are passed to the Perdictive service. We press POST, we wait for the response of the server with the status 200. In response, the server also returns a JSON file in which it reports information about the connected source (number of lines, number and type of field, etc., and, most importantly, the ID of the dataset. This ID is for us it’s necessary to remember, in the future we will use it when creating the recommendation model, close this form by clicking the close button in the upper right corner.
We return to the main page of the Predictive Service and proceed to the creation of the model. To do this, click the POST tab at the link / api / analytics / recommendations / recommender. The settings page for the recommendation model opens. The parameters for constructing the future model are set in the JSON format. All possible model parameters are described in the documentation at https://help.hana.ondemand.com/c4pa/frameset.htm?ee805144d197482abef88bfad8d895da.html .
it
- UserColumn - field with the number of the loyalty program participant
- itemColumn - SKU
- dateColumn - transaction date
- startDate - start date of data for calculation
- endDate - data end date for calculation
Additionally, you can change the parameters that describe the mathematics of the model. For our model, we take the following parameters:
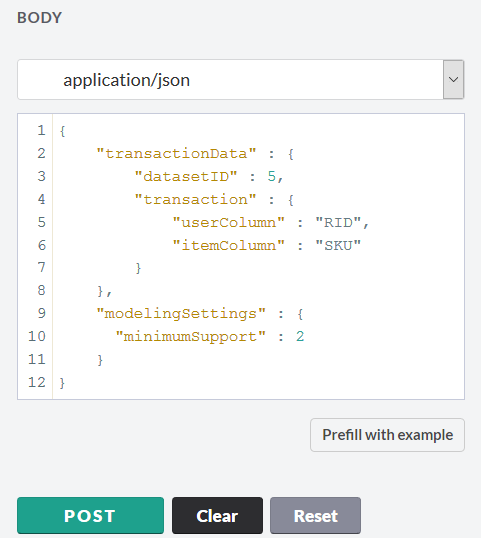
We start building the model and get a response. The key point is to record the model ID.

Using the link / api / analytics / recommendations / recommender / {jobID}, you can see the status of the model built, specifying 15 as the ID. For our model, the status is as follows.
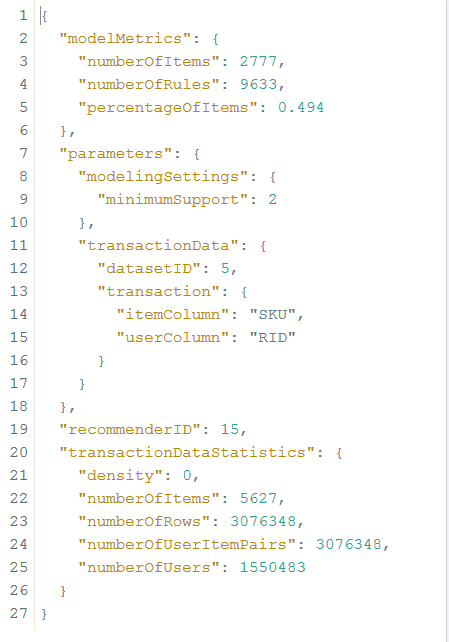
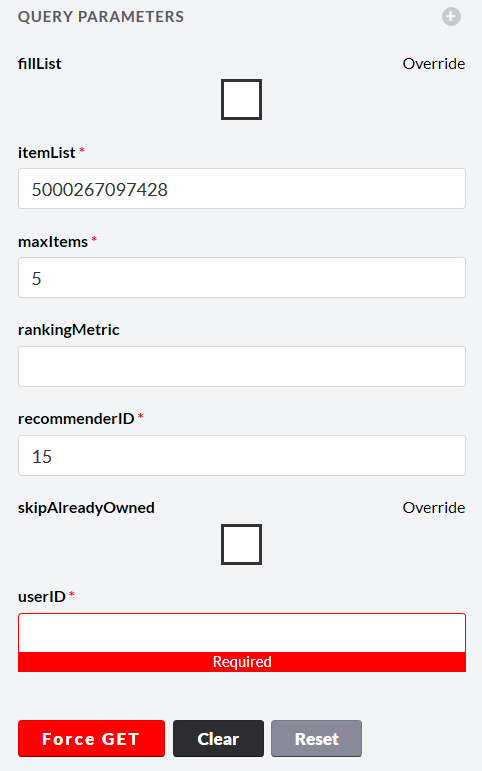
We see that the number of SKUs found in the same basket with others is 2777 units, on the basis of which it was possible to find 9633 recommendation rules. Using the link / api / analytics / recommendations, you can test the resulting model. Here you must enter the following parameters:
- itemList - SKUs already in the basket
- maxItems - maximum number of recommendations returned
- recommenderID - ID of the model built in the previous step
- userID - member number of the loyalty program
You can specify either both the itemList and userID parameters, or only one of them. If you specify only one parameter, the system will issue a warning, but will continue to work.
We will check the model with SKU 5000267097428
in response, we will
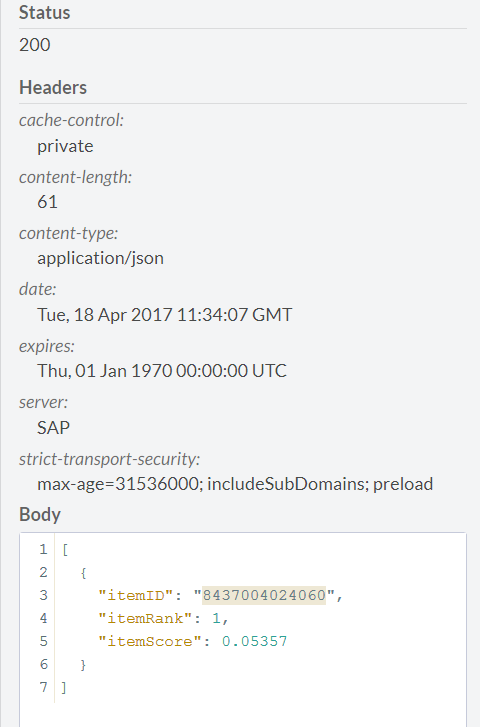
see what it is.
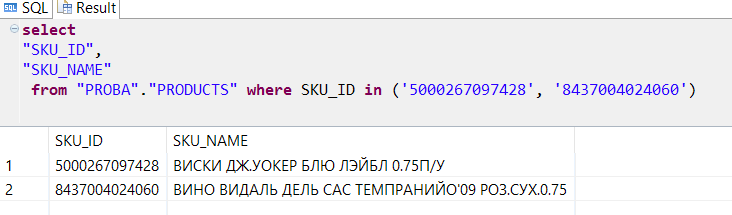
Thus, we get that when buying whiskey it would be nice to recommend dry wine to the buyer.
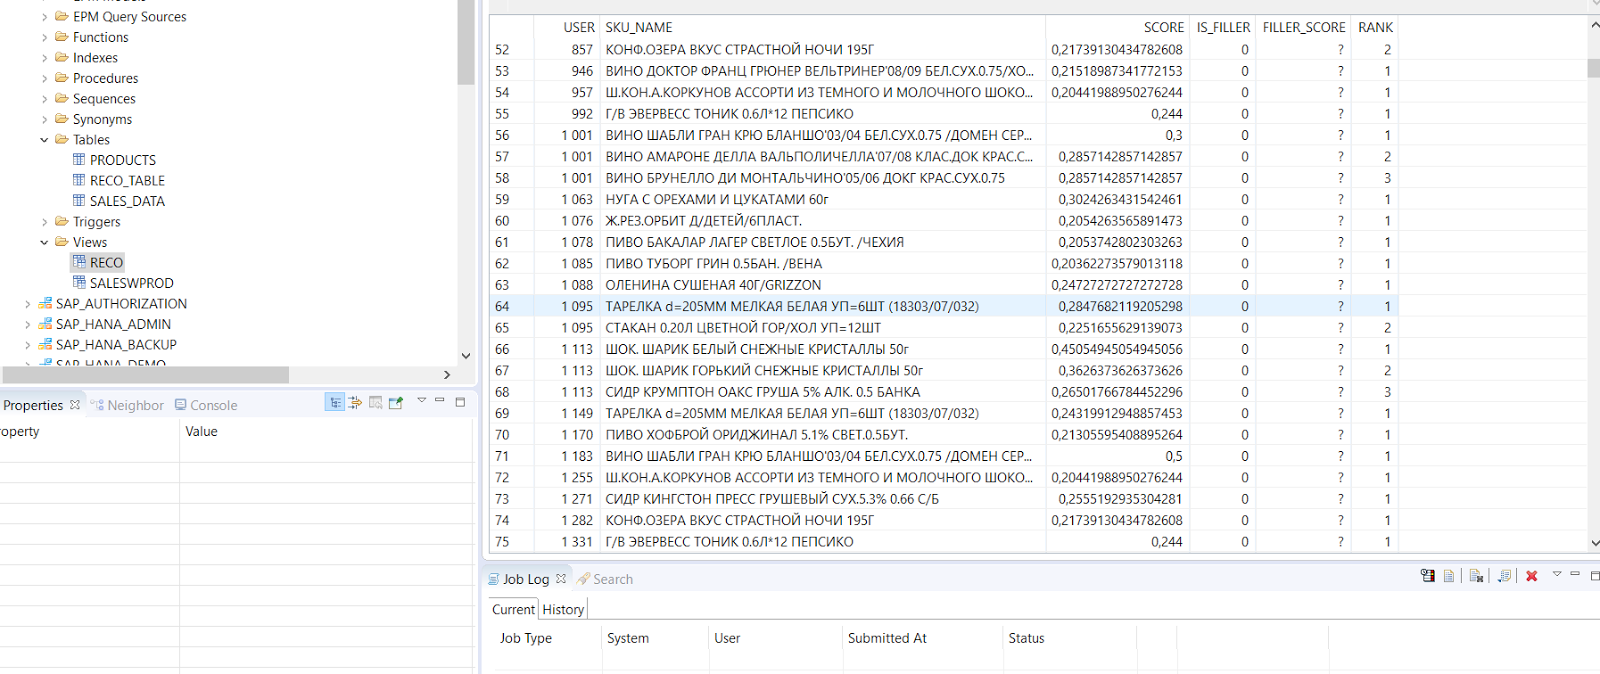
The recommendation model can also be run in batch mode, generating a table of recommendations for all users of the loyalty program. To do this, click the POST tab on the link / api / analytics / recommendations / batch.

Then we indicate the table in which our recommendations should be placed

And we start the calculation. The service creates a table and calculates the recommended product for each user, which can be purchased more likely.
Thus, the Predictive service allows you to very quickly configure and use some of the most commonly used mathematical methods to build predictive models suitable for use in real business.