March 31, 2017 at 12:49
HotSpot organization on MikroTik equipment with authorization via SMS
- Tutorial
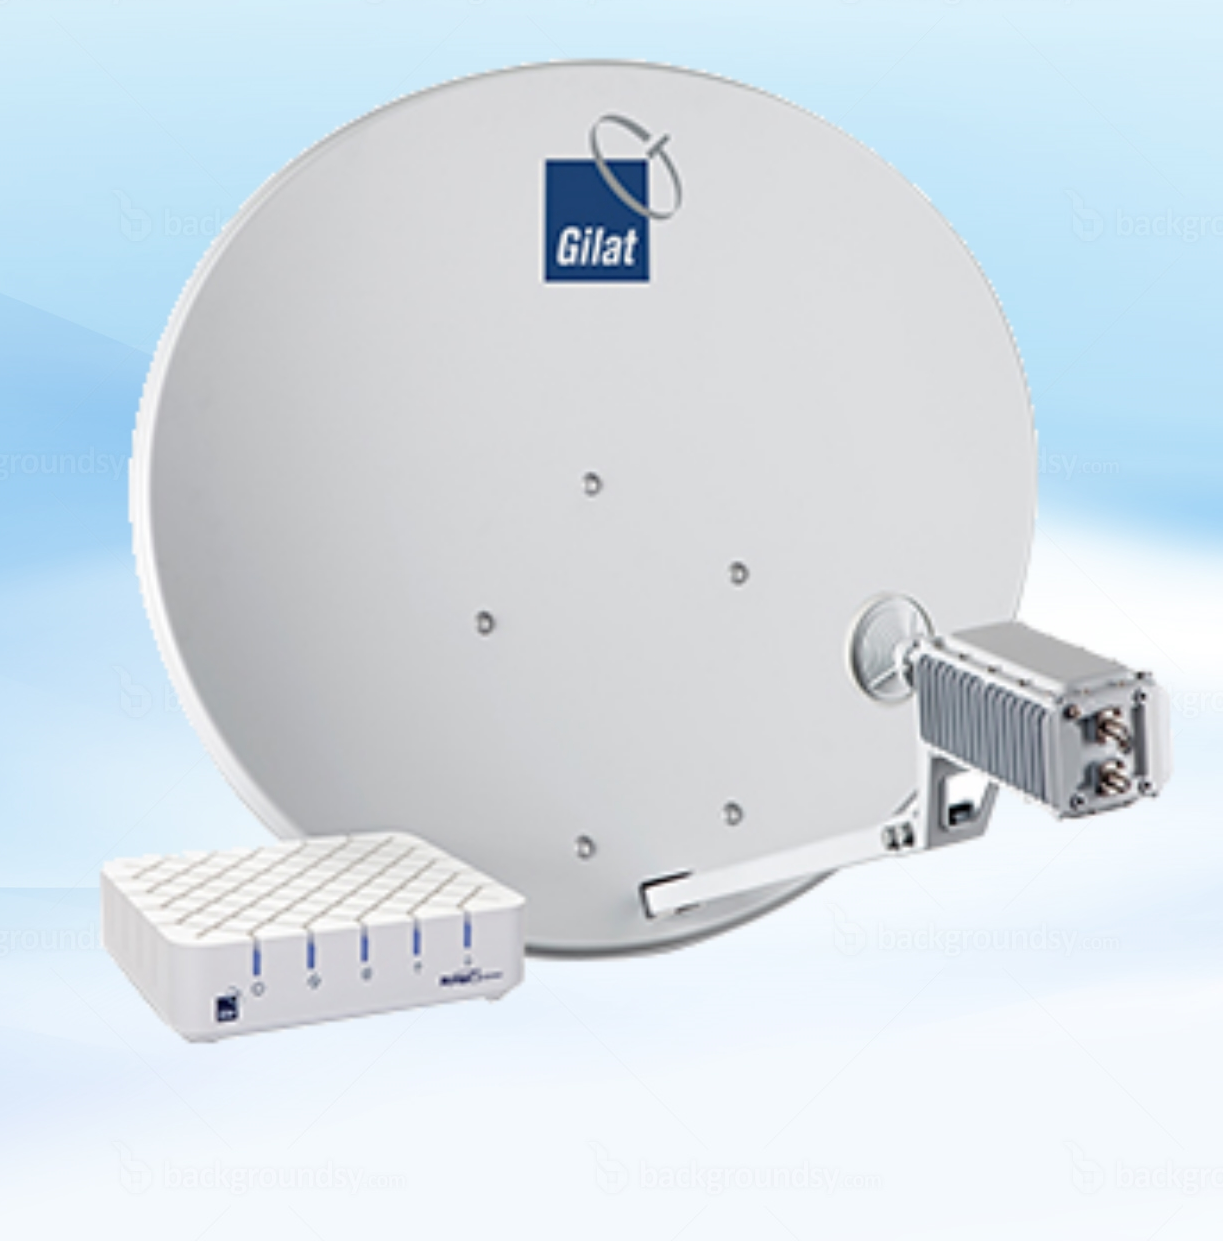
Until recently, low-cost satellite Internet access was exclusively asymmetric (the request went through terrestrial communication networks, the answer was "falling from the sky"). Now, one well-known three-color campaign offers a bidirectional kit at very affordable prices. The scope, first of all, for organizing access to the network in places where laying a landline is either impossible or too expensive.
The customer was tasked with providing Internet access to a hunting base located 60 kilometers from the city. Departure to the place showed the presence of cellular networks, but 3G there was only declared with an icon on the phone’s display, but in fact it was completely absent. An attempt to negotiate with OpSoSami about the transfer of optics from the base station, seen in the distance, led to a proposal of 700 thousand rubles for installation and 69 thousand per month of monthly fee for the channel, which could not but rejoice. In heavy thought, I drove into the search line "Satellite Internet" and, lo and behold, I realized that this was a salvation.
To implement the project, it was purchased:
1) Set for receiving satellite Internet - 50 000.00 rubles.
2) UPS CyberPower UT450EI - 4,500.00 rubles.
3) Router Mikrotik RB951G-2HnD - 3 850.00 rubles.
4) Mounting trifle - 1,500.00 rubles.
5) USB-modem - lying in a desk drawer.
I will not describe the installation process and setting up the kit, because it is not much different from mounting a regular television dish and receiver.
The receiver has a 10/100 RJ-45, which we connect to the router. The process of setting up HotSpot is described in many sources, I did this manual here .
Well, then - the most interesting. Since laziness, as you know, the engine of progress and pens to enter each user was lazy decided to automate the process by sending a Login / password pair via SMS.
First you need to download and install the user-manager package on Mikrotik. Immediately after the reboot, the control panel will be available at http: //IP.of.you.router/userman
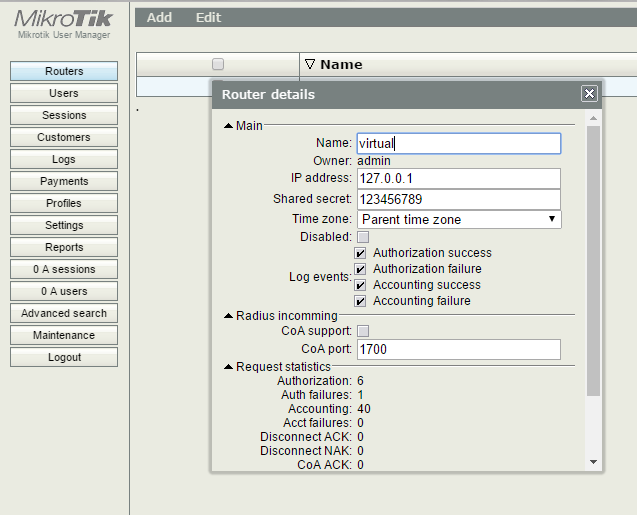
Login: admin without password. Change immediately. To operate the RADIUS server on Mikrotik, we will create a virtual router. Open the terminal and enter
/tool user-manager router add customer=admin disabled=no ip-address=127.0.0.1 name=virtual shared-secret=123456789Result:
Create a trial1 profile
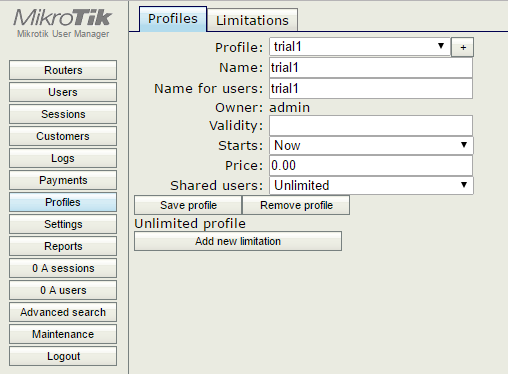
Intentionally made so that each user works at the highest possible speed. The system is very flexible, has a lot of features described in the documentation.
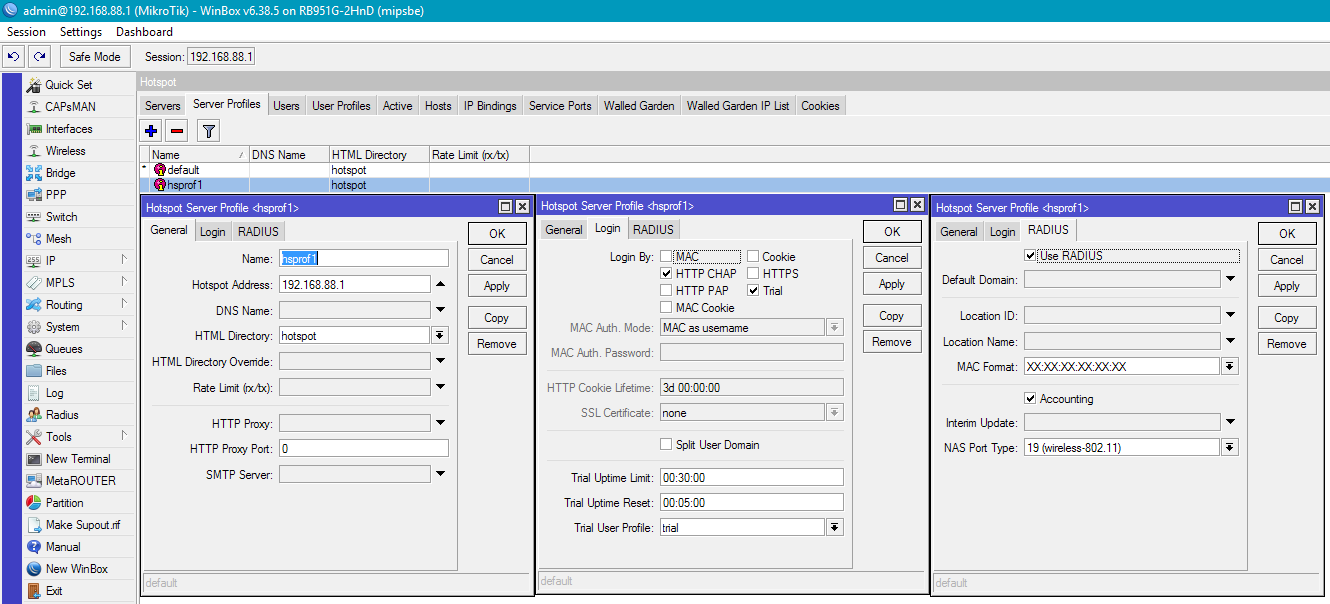
Next, configure the HotSpot-a profile to work with RADIUS
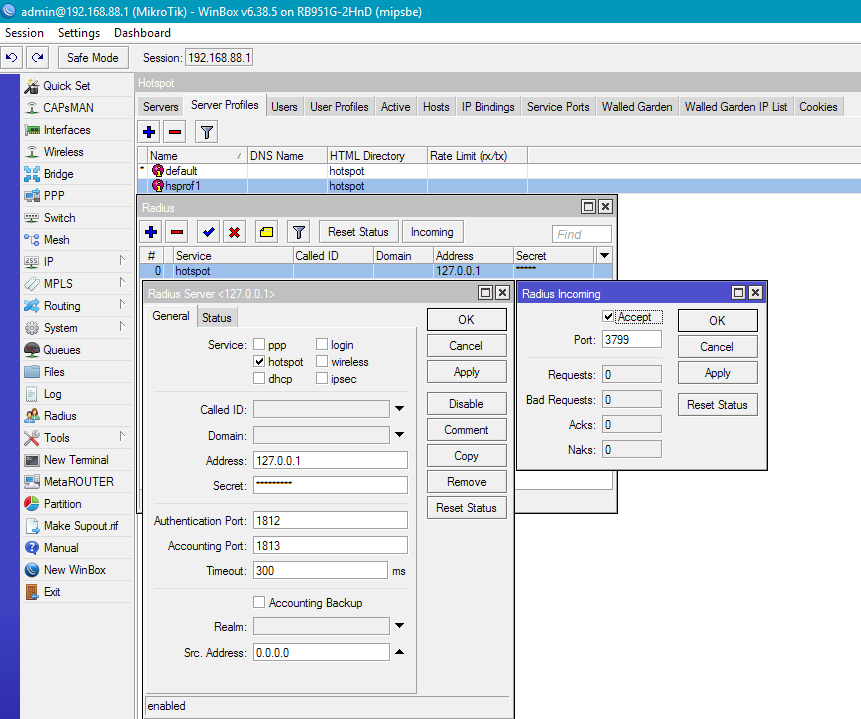
And the RADIUS server of the router itself.
Add a rule to the very top of the NAT table
/ip firewall filter add chain=input comment="allows user manager to work with local hosts" src-address=127.0.0.0/24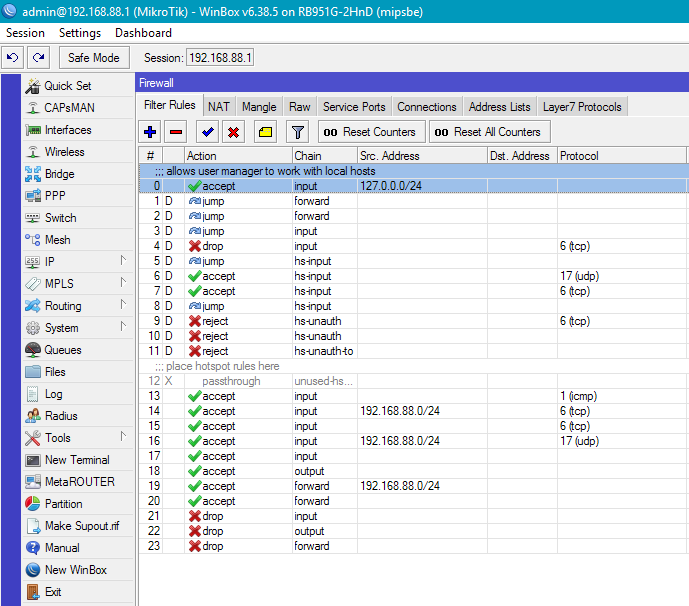
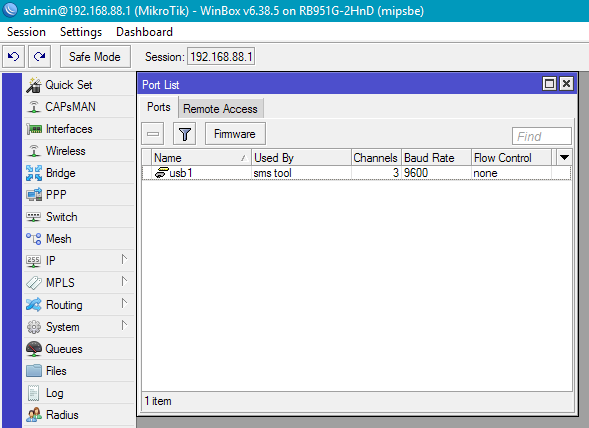
This completes the server setup. Getting to the iron part. We plug in the modem into the USB connector, make sure that the router sees it. System → Ports
Set Secret, turn on the mode of receiving messages. Tools → SMS
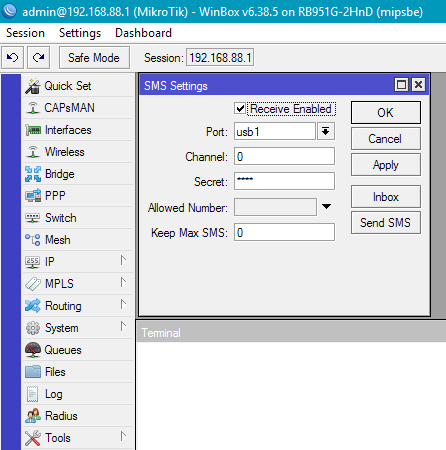
We send a test message to the modem number, make sure that it is accepted
/tool sms inbox print Delete the test message
/tool sms inbox remove 0Add a message processing script. System → Scripts
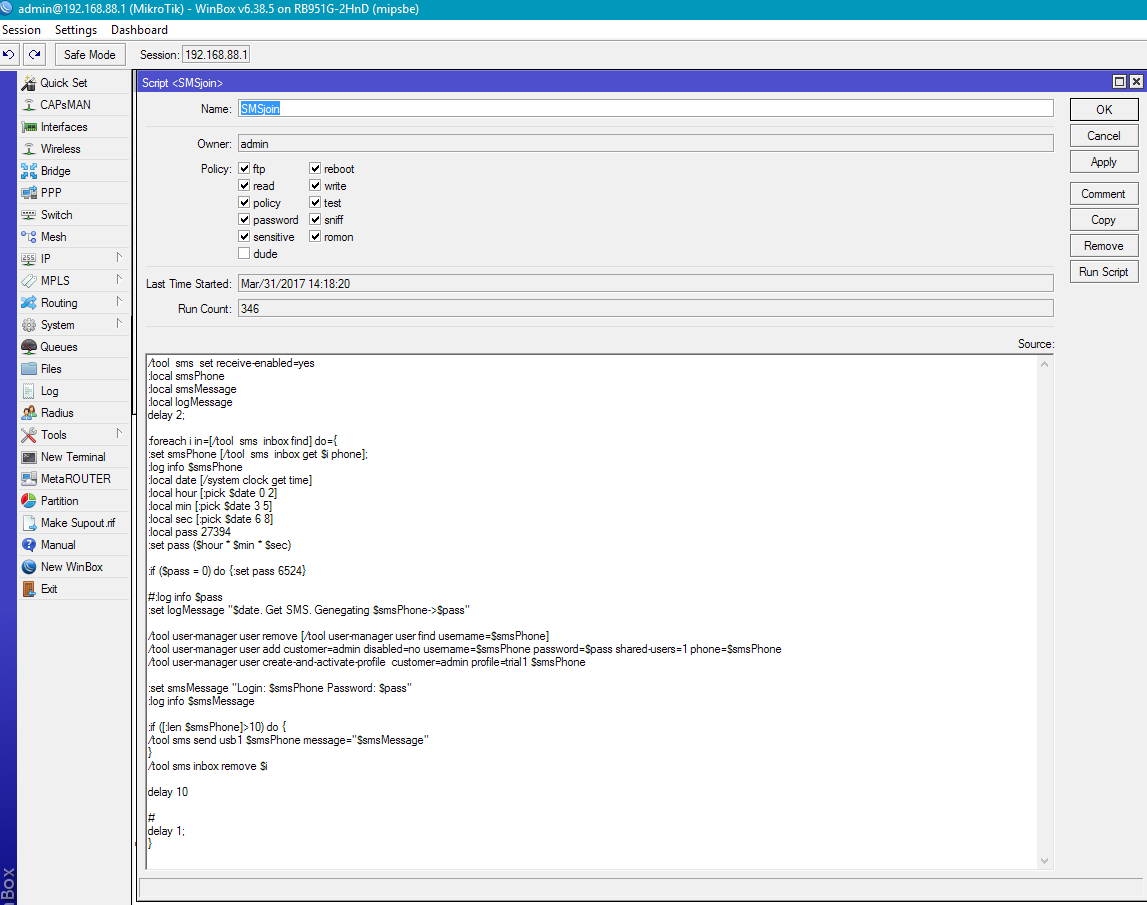
Code
/tool  sms  set receive-enabled=yes
:local smsPhone
:local smsMessage
:local logMessage
delay 2;
:foreach i in=[/tool  sms  inbox find] do={
:set smsPhone [/tool  sms  inbox get $i phone];
:log info $smsPhone
:local date [/system clock get time]
:local hour [:pick $date 0 2]
:local min [:pick $date 3 5]
:local sec [:pick $date 6 8]
:local pass 27394
:set pass ($hour * $min * $sec)
:if ($pass = 0) do {:set pass 6524}
#:log info $pass
:set logMessage "$date. Get SMS. Genegating $smsPhone->$pass"
/tool user-manager user remove [/tool user-manager user find username=$smsPhone]
/tool user-manager user add customer=admin disabled=no username=$smsPhone password=$pass shared-users=1 phone=$smsPhone
/tool user-manager user create-and-activate-profile  customer=admin profile=trial1 $smsPhone
:set smsMessage "Login: $smsPhone Password: $pass"
:log info $smsMessage
:if ([:len $smsPhone]>10) do {
/tool sms send usb1 $smsPhone message="$smsMessage"
}
/tool sms inbox remove $i
delay 10
#
delay 1;
}
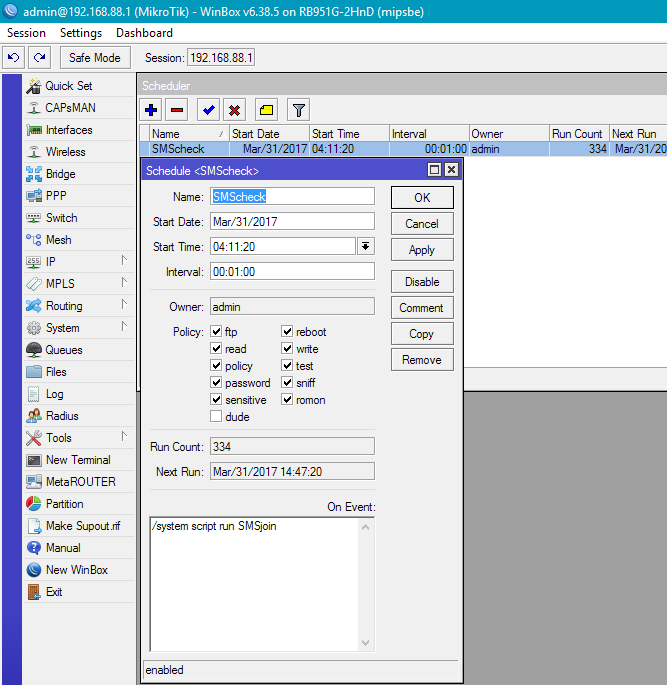
System → Sheduler create a new task that will run this script every minute.
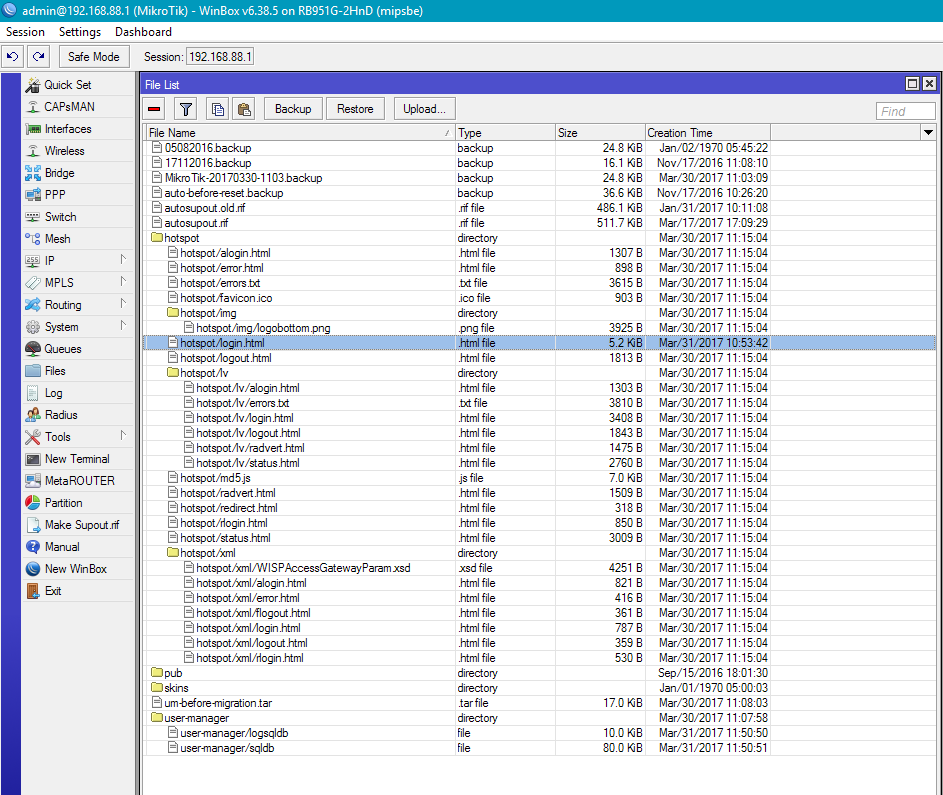
Download the hotspot start page from the router, embed in it information about the number to which you want to send SMS
Check the operation of the system. That, in fact, is all. Made in 15 minutes on the knee but it works, do not kick much.
The plans to figure out how to send SMS from the authorization page, so as not to force the user to enter his cell phone number twice.