Grub penguin color
Introduction
Linux is loaded on the computer, which was once installed there. Then the structure of the hard disk underwent a number of changes: partitions were created, and a bootloader was installed. Judging by most distributions, the most popular in the Linux world is the GRUB bootloader.
The action of this bootloader of the operating system occurs from the user's point of view as follows: after turning on the computer, the user sees a list of operating systems that are installed on his computer. By design, this list is completely different: black and white, multi-colored, with penguins.
In the end, the user chooses to boot the operating system.
The focus of this article is the GRUB graphics mode with animated penguins, which the programmer Steffen Winterfeldt forced to walk back and forth and issue a few other numbers. First of all, penguins, and then gfxboot utility for changes and configuration tests of the graphic bootloader.
There is also a lot of information on specific distributions (Mageia, openSUSE, Ubuntu) with different methods for changing the graphic bootloader. A separate topic is the graphical boot screen based on grub4dos.
Thanks
I want to thank A. Fedorchuk for an article about the VirtualBox virtual machine and images of operating systems from the osboxes.org website, the information from which was very helpful in writing this article.
Penguins and gfxboot
The penguin screensaver includes a number of piggins in the surrounding world, among snow and ice, as well as a background image for a list of operating systems in the form of a frozen rectangular stone.
Physically, this screen saver is a cpio archive, usually it is / boot / message. You can, in principle, view this archive, unzip it into the current directory and repack. But in order to make life easier for you, there is a utility gfxboot.
openSUSE
When GRUB2 is installed on the computer, the real test system will be a return to GRUB when the person implementing it has a lack of knowledge. The following is a block instruction on how to switch to using GRUB as a bootloader.
1. Installing GRUB on your hard drive using the command
sudo zypper in grubends with the message: grub is not the active boot loader.
2. We make GRUB the active bootloader using the GRUB shell as shown in the screenshot. It accepts the assumption that GRUB is installed on the first partition of the first hard drive (hd0,0).
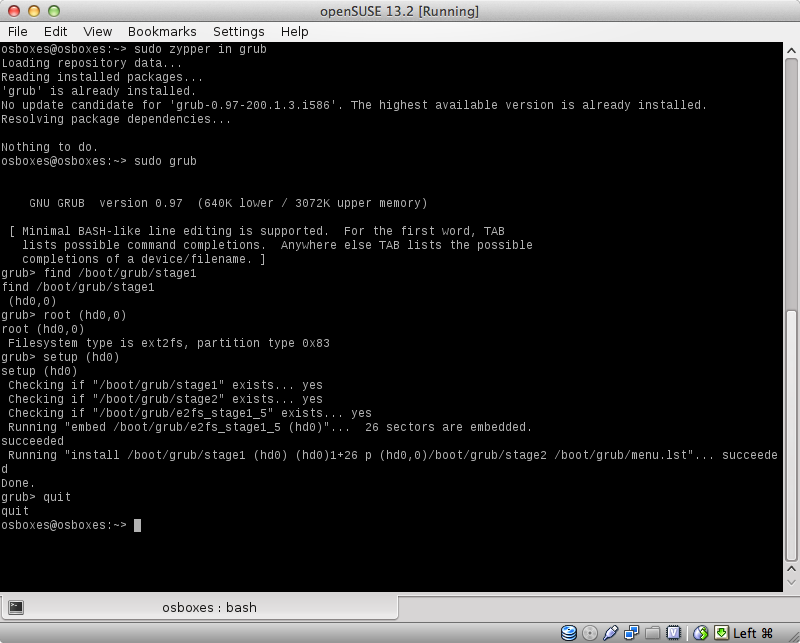
Installing GRUB code in MBR
The GRUB shell in response to the last command contains the file name /boot/grub/menu.lst.
3. Create and edit this file using the command
sudo vi /boot/grub/menu.lstIt will contain the boot menu configuration, similar to the boot menu configuration contained in the /boot/grub2/grub.cfg file. Their syntaxes are essentially related to each other. With some modifications, the text of the GRUB2 configuration file serves as the basis for the text of the GRUB configuration file.
A fragment of the file /boot/grub2/grub.cfg
menuentry 'openSUSE' --class opensuse --class gnu-linux --class gnu --class os $menuentry_id_option 'gnulinux-simple-99d4f445-3170-4ced-a612-fe255dc11b3c' {
 load_video
 set gfxpayload=keep
 insmod gzio
 insmod part_msdos
 insmod ext2
 set root='hd0,msdos1'
 if [ x$feature_platform_search_hint = xy ]; then
  search --no-floppy --fs-uuid --set=root --hint-bios=hd0,msdos1 --hint-efi=hd0,msdos1 --hint-baremetal=ahci0,msdos1 --hint='hd0,msdos1'  99d4f445-3170-4ced-a612-fe255dc11b3c
 else
  search --no-floppy --fs-uuid --set=root 99d4f445-3170-4ced-a612-fe255dc11b3c
 fi
 echo    'Loading Linux 3.16.6-2-default ...'
 linux   /boot/vmlinuz-3.16.6-2-default root=UUID=99d4f445-3170-4ced-a612-fe255dc11b3c   quiet resume=/dev/sda2 splash=silent quiet showopts
 echo    'Loading initial ramdisk ...'
 initrd  /boot/initrd-3.16.6-1-default
}
and the corresponding file fragment /boot/grub/menu.lst
title openSUSE
 root (hd0,0)
 kernel /boot/vmlinuz-3.16.6-2-default root=UUID=99d4f445-3170-4ced-a612-fe255dc11b3c   quiet resume=/dev/sda2 splash=silent quiet showopts
 initrd /boot/initrd-3.16.6-1-default
4. To enable the GRUB graphic mode with animated penguins, using the vi text editor, add the line to the top of the /boot/grub/menu.lst file
gfxmenu (hd0,0)/boot/messageand make the probability of the appearance of penguins equal to 100% with the command
sudo gfxboot --change-config penguin=100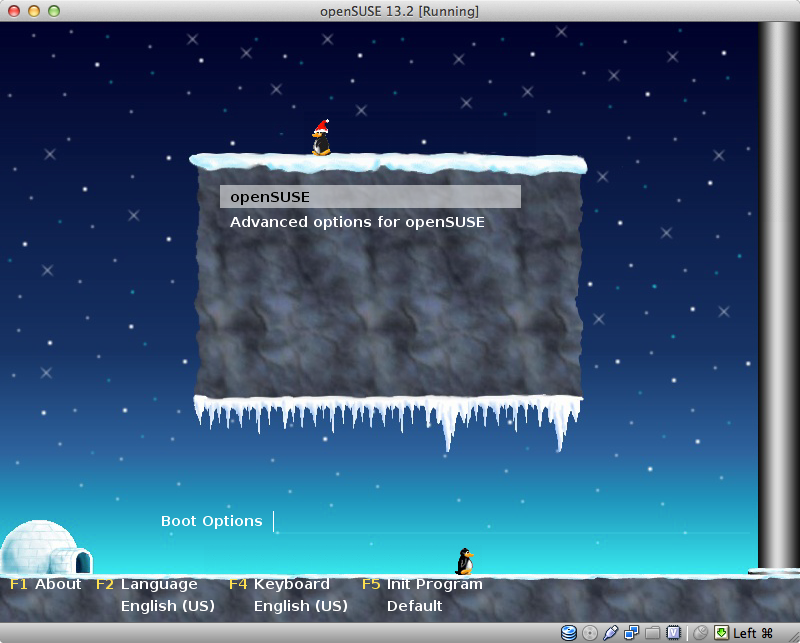
Penguins
Mageia
When GRUB is installed on the computer, the menu with the penguins is done differently. The following is the appropriate instruction.
1. The beginning of the instruction is in the screenshot.
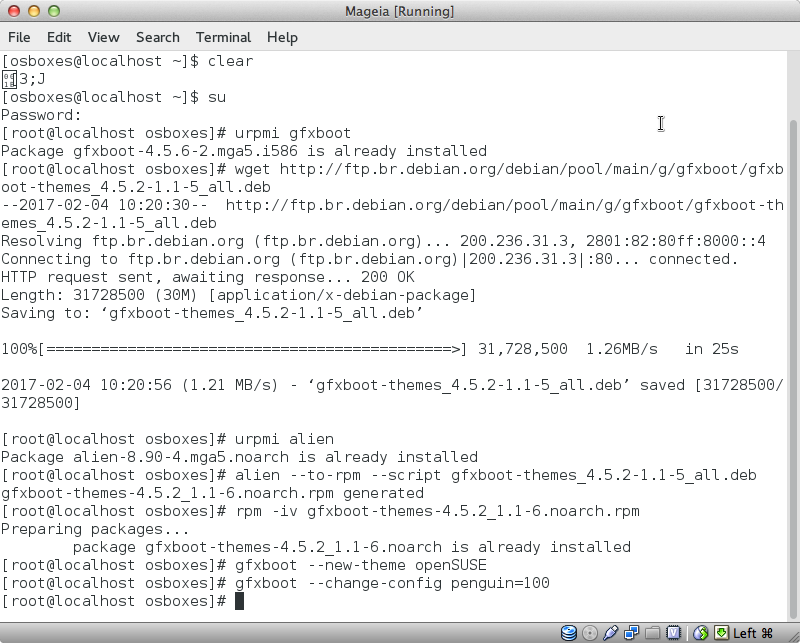
Install gfxboot and gfxboot-themes
2. In the /boot/grub/menu.lst file instead of the line
gfxmenu (hd0,0)/boot/gfxmenuenter the line
gfxmenu (hd0,0)/boot/message
select and customize the theme of the graphic boot screen
gfxboot --new-theme openSUSE
gfxboot --change-config penguin=100
and exit the superuser command shell session using the command
exit
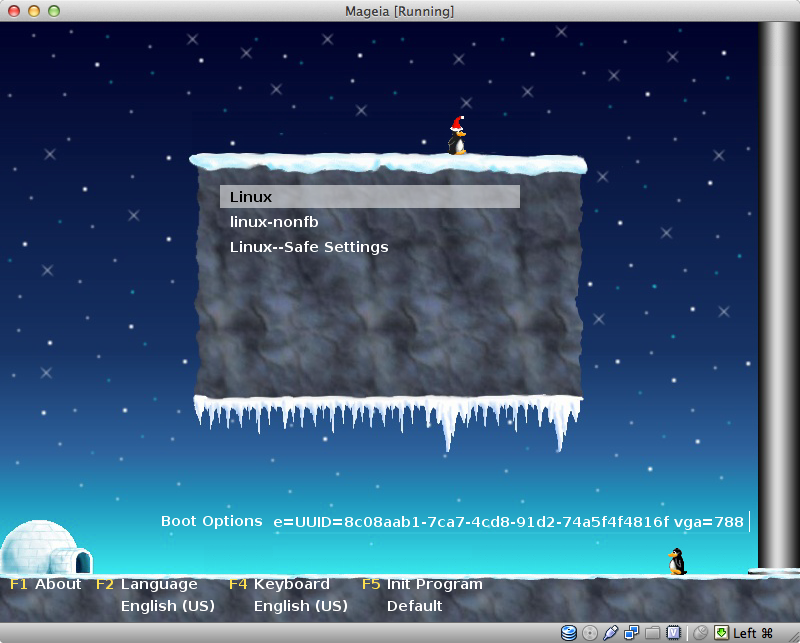
Penguins
Ubuntu
There is gfxboot, gfxboot-themes, grub on this system, but the graphic boot screen does not work in the latter. Instead, it offers static images displayed in the boot menu using the splashimage parameter specified in the GRUB configuration file. In this case, you can use the grub4dos bootloader.
Grub4dos on a bootable USB flash drive and hard drive
The scope of grub4dos is wider than the installation on flash drives, but this is probably the main thing. Listing below is an example procedure or installation procedure.
Install grub4dos on a flash drive
wget https://downloads.sourceforge.net/project/grub4dos/GRUB4DOS/grub4dos%200.4.4/grub4dos-0.4.4.zip
unzip grub4dos-0.4.4.zip
cd grub4dos-0.4.4
sudo ./bootlace.com /dev/sdb
After copying the contents of the grub4dos directory to a flash drive and downloading it using a computer, we see a multi-colored boot menu, as in the screenshot.
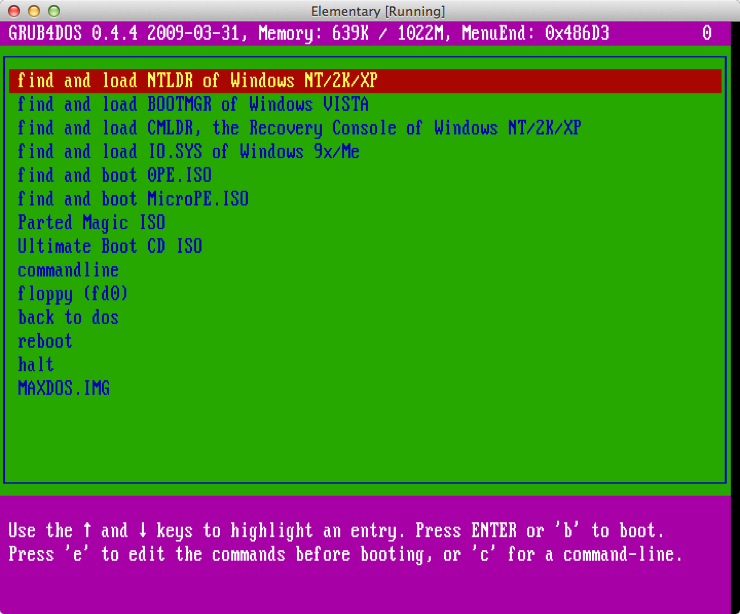
Grub4dos boot menu
After copying the same / boot / message file, obtained by the method described above, and replacing the contents of the menu.lst file with another one containing the line
gfxmenu /messagewe get all the same penguins.
On the hard drive, grub4dos can be called from GRUB by entering the description of the corresponding menu item in its configuration file:
default 0
timeout 0
title grub4dos
 kernel (hd0,5)/grub.exe --config-file="map (rd) (fd0); map --hook; chainloader (fd0)+1; rootnoverify (fd0)"
 initrd (hd0,5)/myfloppy.img
This is true if there are grub.exe and myfloppy.img files on the sixth partition of a hard drive with fat12 or fat32, the last of which is a boot disk image file. It merges files from the grub4dos-0.4.4.zip archive. The following are a few commands, the execution of which provokes the addition of the file myfloppy.img necessary for downloading grub4dos to disk
sudo mkfs.msdos -С myfloppy.img 1440
sudo ./bootlace.com --floppy myfloppy.img
mkdir dos
sudo mount -o loop myfloppy.img dos
sudo cp grub4dos-0.4.4/* dos
sudo vi dos/menu.lst
It remains to add the message file to the grub.exe and myfloppy.img files directory, replace the contents of the dos / menu.lst file with something similar to that reproduced in the following listing and unmount the myfloppy.img image file with the command
sudo unmount /dev/loop0to get the result repeatedly obtained earlier in this article.
The contents of the menu.lst configuration file for grub4dos
default 0
timeout 3
gfxmenu /message
title Ubuntu
 root (hd0,0)
 chainloader +1
title Reboot
 reboot