February 6, 2017 at 11:05
Electronic ink for Wirenboard 5 or draw barcodes on Go
Hello, Habr! During the development process, sometimes you have to invent bicycles tools for testing applications and it happens that some of them can be useful, for example, in home automation. Here is a case from my personal experience. When developing an application for mobile data collection terminals, it became necessary to test laser scanners without printing barcodes on paper. Unfortunately, these scanners cannot read from regular screens. Give them the paper, but they also liked the electronic paper.
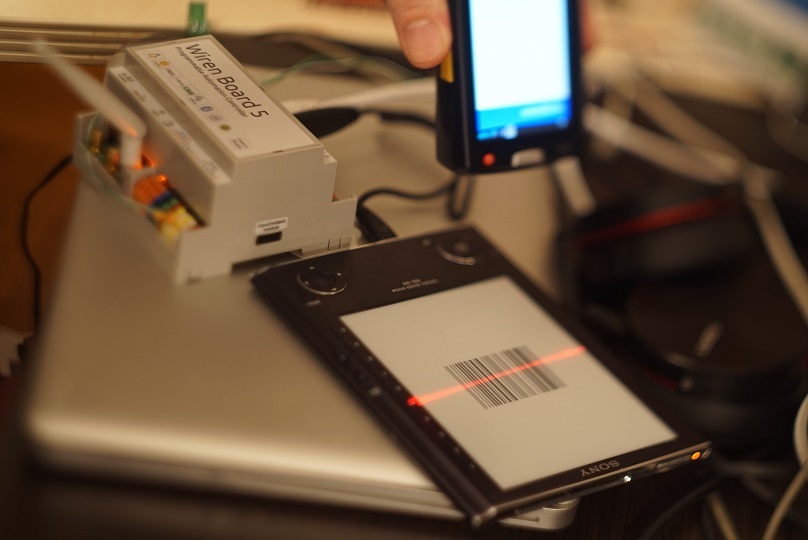
I recalled an article on Habr Electronic book as a display, it was decided to get an old half-dead Sony PRS-505 reader from the shelf and give it a second life as a screen for the automation controller. But sending pictures via flash memory is a bad idea. It was necessary to learn how to work directly with the RAM of an e-book. This increases display speed and reliability. Let me share the experience of drawing in Go with an example of a barcode generator and display on an e-book through the Wirenboar 5 controller.
Sony PRS-505 doesn’t have wi-fi and also only g_file_storage from the USB Gadget kernel modules, so this is the only way to quickly transfer an image. Fortunately, the firmware from PRSPlus can run any script when you turn on the e-book. All we need is just to put the necessary files in the directory / database / system / PRSPlus folder and the prsp.sh script will be launched at boot time.
You can’t use Flash memory as a buffer, so we need a small tmpfs disk in RAM that will be accessible via USB, unload the g_file_storage kernel module and load it with the necessary parameters to publish our created RAM disk via USB. Next, we need to track changes in a given area and display the image on an e-ink display.
Highlights of the psrp.sh script
Now our e-book is able to listen and at the same time, on it, as before, you can read books. The main thing to keep in mind in order for the script to run and we can transfer images, when the USB e-book is turned on, the cable should not be connected. Otherwise, the book will load without our script prsp.sh. That is, first turn on the book, wait for the shell to load, then connect the USB cable. (this feature is registered in the PRSPlus firmware by default, you can also change this if you wish by making your own image)
Click reset on the e-book, wait for the download to finish, connect the USB cable. For verification, we can send a test image. For example, from Ubuntu, this can be done as follows:
If the script started successfully when the reader loads, then when connecting via USB we will see a device with a size of 1 MB.
We find this line:
Now we know, here it is our piece of RAM e-book
To convert from jpeg, we need djpeg, install the necessary packages:
Next, create a JPEG file in your favorite editor, size 600x800 and send it to an e-book.
In this pipeline, we convert jpeg to monochrome pgm, skip the header and transfer 480Kb in a single block to the / dev / sdx device. And then we see the result.
To draw the barcode in Golang, we need additional libraries:
Highlights in the code:
Wirenboard developers provide us with a very convenient cross compilation tool based on the Docker container. But in the framework of this article we will not consider it. Under ARMv5, our simple application can be assembled with one team.
Transfer everything to Wirenboard 5:
Go to Wirenboard, look at the name of the device with a size of 1 MB, in my example / dev / sdd.
We launch:
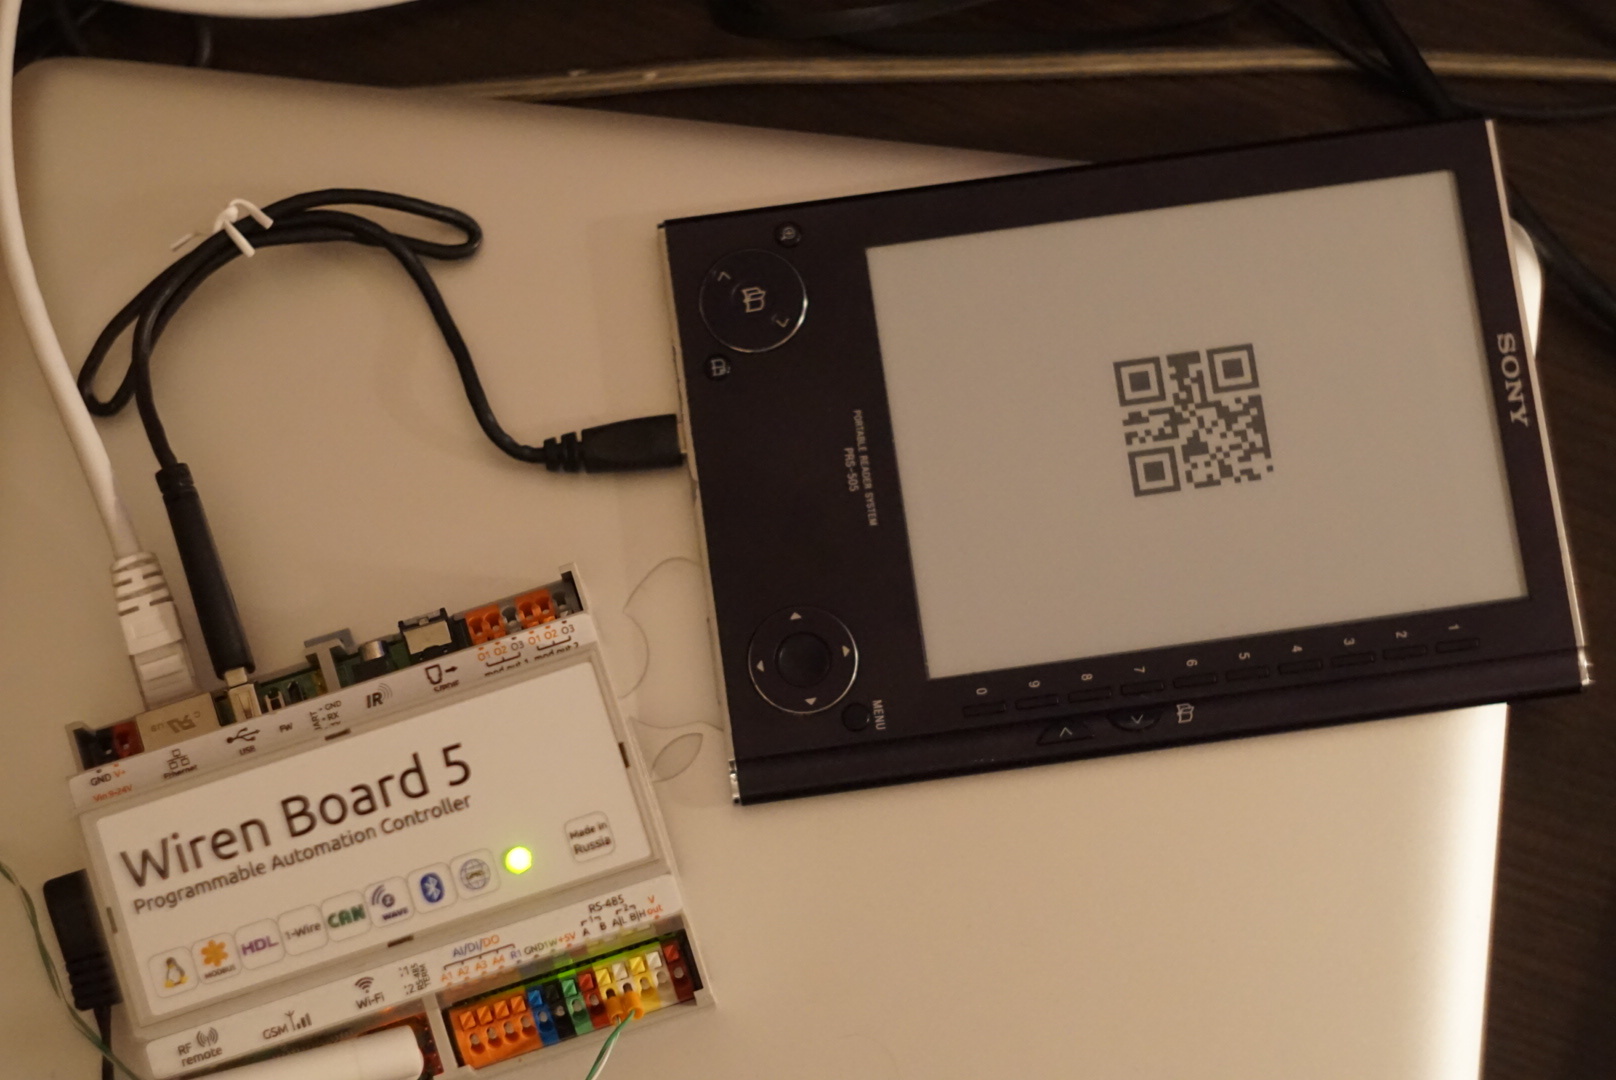
Using an e-book as a screen is real. With its potential, electronic ink technology encourages use in interior design. E-ink screen will look good especially on a light wall. You can display useful information from the home controller.
Thanks for attention!
PS Sources, you can see here and here . Firmware PRSPlus for e-books here .
I recalled an article on Habr Electronic book as a display, it was decided to get an old half-dead Sony PRS-505 reader from the shelf and give it a second life as a screen for the automation controller. But sending pictures via flash memory is a bad idea. It was necessary to learn how to work directly with the RAM of an e-book. This increases display speed and reliability. Let me share the experience of drawing in Go with an example of a barcode generator and display on an e-book through the Wirenboar 5 controller.
Tasks
- Nothing to break. We are only adding a new feature.
- An electronic book should be able to listen to the port and display an image within 1 second
- Work only through the buffer in RAM, no flash memory
- Test the output with the great dd command
- Draw the desired size barcode in Go and place it in the center of the canvas
- Transferring an image to the e-book buffer
- Enjoy the result
RAM Drive via USB
Sony PRS-505 doesn’t have wi-fi and also only g_file_storage from the USB Gadget kernel modules, so this is the only way to quickly transfer an image. Fortunately, the firmware from PRSPlus can run any script when you turn on the e-book. All we need is just to put the necessary files in the directory / database / system / PRSPlus folder and the prsp.sh script will be launched at boot time.
You can’t use Flash memory as a buffer, so we need a small tmpfs disk in RAM that will be accessible via USB, unload the g_file_storage kernel module and load it with the necessary parameters to publish our created RAM disk via USB. Next, we need to track changes in a given area and display the image on an e-ink display.
prsp.sh
#! / bin / sh
echo $ '\ n =============== \ nSTART SCRYPT \ n' >> / dev / console
#TODO "here need Kernel Event instead while and sleep bottom placed »
function waitnewdata
{
echo $ '\ n ================ \ nWait new data \ n' >> / dev / console
#Show only modify time the image file
MODIFYTIMEOLD =` ls -l --full-time /tmp/raw.img | awk '{print $ 9}' `
MODIFYTIMENEW = $ MODIFYTIMEOLD
while [" $ MODIFYTIMEOLD "==" $ MODIFYTIMENEW "]
do
MODIFYTIMENEW =` ls -l --full-time /tmp/raw.img | awk '{print $ 9}' `
sleep 0.2
done
if [" $ MODIFYTIMEOLD "! =" $ MODIFYTIMENEW "
echo $ '\ n =============== \ nNew data received \ n' >> / dev / console
#Generating Back Screen for best clear e-ink (optional)
dd if = / dev / zero of = / tmp / img.raw bs = 1k count = 480
/ tmp / showpic /tmp/img.raw
dd if = / tmp / raw.img of = / tmp / img.raw bs = 1k count = 480
/ tmp / showpic /tmp/img.raw
waitnewdata
}
#ldconfig
PATH = "/ usr / local / bin: / usr / bin: / bin: / usr / bin / X11: / usr / games: / usr / local / sony / bin: / usr / sbin: / sbin "
LD_LIBRARY_PATH =" / Data / opt / sony / ebook / application: / lib: / usr / lib: / usr / local / sony / lib: / opt / sony / ebook / lib "
export PATH LD_LIBRARY_PATH
# set initial date
/ bin / date 0101000007
#Unload kernel module
rmmod g_file_storage
#Create raw file 1Mb
dd if = / dev / zero of = / tmp / raw.img bs = 1k count = 1k
grep Data / proc / mtd> / dev / null
if [$? == 0]; then
NUM = `grep Data / proc / mtd | awk -F: '{print $ 1}' | awk -Fd '{print $ 2}' `
insmod /lib/modules/2.4.17_n12/kernel/drivers/usb/g_file_storage.o file = / dev / mtdblock $ NUM, / dev / sdmscard / r5c807b, / dev / sdmscard / r5c807a, / tmp / raw.img ProductID = $ MODEL VendorSpecific = $ VENDOR sn_select = 0 iSerialNumber = $ ID
else
insmod /lib/modules/2.4.17_n12/kernel/drivers/usb/g_file_storage.o file = / dev / sdmscard / r5c807b, / dev / sdmscard / r5c807a, / tmp / raw.img ProductID = $ MODEL VendorSpecific = $ VENDOR sn_select = 0 iSerialNumber = $ ID
fi
#start kbook application
nohup / opt / sony / ebook / application / tinyhttp> / dev / null &
cp / Data / database / system / PRSPlus / showpic / tmp /
waitnewdata
echo $ '\ n =============== \ nSTART SCRYPT \ n' >> / dev / console
#TODO "here need Kernel Event instead while and sleep bottom placed »
function waitnewdata
{
echo $ '\ n ================ \ nWait new data \ n' >> / dev / console
#Show only modify time the image file
MODIFYTIMEOLD =` ls -l --full-time /tmp/raw.img | awk '{print $ 9}' `
MODIFYTIMENEW = $ MODIFYTIMEOLD
while [" $ MODIFYTIMEOLD "==" $ MODIFYTIMENEW "]
do
MODIFYTIMENEW =` ls -l --full-time /tmp/raw.img | awk '{print $ 9}' `
sleep 0.2
done
if [" $ MODIFYTIMEOLD "! =" $ MODIFYTIMENEW "
echo $ '\ n =============== \ nNew data received \ n' >> / dev / console
#Generating Back Screen for best clear e-ink (optional)
dd if = / dev / zero of = / tmp / img.raw bs = 1k count = 480
/ tmp / showpic /tmp/img.raw
dd if = / tmp / raw.img of = / tmp / img.raw bs = 1k count = 480
/ tmp / showpic /tmp/img.raw
waitnewdata
}
#ldconfig
PATH = "/ usr / local / bin: / usr / bin: / bin: / usr / bin / X11: / usr / games: / usr / local / sony / bin: / usr / sbin: / sbin "
LD_LIBRARY_PATH =" / Data / opt / sony / ebook / application: / lib: / usr / lib: / usr / local / sony / lib: / opt / sony / ebook / lib "
export PATH LD_LIBRARY_PATH
# set initial date
/ bin / date 0101000007
#Unload kernel module
rmmod g_file_storage
#Create raw file 1Mb
dd if = / dev / zero of = / tmp / raw.img bs = 1k count = 1k
grep Data / proc / mtd> / dev / null
if [$? == 0]; then
NUM = `grep Data / proc / mtd | awk -F: '{print $ 1}' | awk -Fd '{print $ 2}' `
insmod /lib/modules/2.4.17_n12/kernel/drivers/usb/g_file_storage.o file = / dev / mtdblock $ NUM, / dev / sdmscard / r5c807b, / dev / sdmscard / r5c807a, / tmp / raw.img ProductID = $ MODEL VendorSpecific = $ VENDOR sn_select = 0 iSerialNumber = $ ID
else
insmod /lib/modules/2.4.17_n12/kernel/drivers/usb/g_file_storage.o file = / dev / sdmscard / r5c807b, / dev / sdmscard / r5c807a, / tmp / raw.img ProductID = $ MODEL VendorSpecific = $ VENDOR sn_select = 0 iSerialNumber = $ ID
fi
#start kbook application
nohup / opt / sony / ebook / application / tinyhttp> / dev / null &
cp / Data / database / system / PRSPlus / showpic / tmp /
waitnewdata
Highlights of the psrp.sh script
- First we unload the module:
rmmod g_file_storage - Create an empty file in / tmp with a size of 1 MB. Having previously connected to the UART console of the reader, I had the opportunity to make sure that / tmp was mounted in tmpfs specifically. That's what we need.
dd if=/dev/zero of=/tmp/raw.img bs=1k count=1k - We load the g_file_storage module by adding /tmp/raw.img
insmod /lib/modules/2.4.17_n12/kernel/drivers/usb/g_file_storage.o file=/dev/mtdblock$NUM,/dev/sdmscard/r5c807b,/dev/sdmscard/r5c807a,/tmp/raw.img - Launch the tinyhttp native shell, unfortunately without this drives will not be shared via USB
nohup /opt/sony/ebook/application/tinyhttp > /dev/null & - We start the waitnewdata function , it in a cycle with a pause of 200ms monitors changes in the image file of our virtual disk. By time change
while [ "$MODIFYTIMEOLD" == "$MODIFYTIMENEW" ]
do
MODIFYTIMENEW=`ls -l --full-time /tmp/raw.img | awk ' {print $9} '`
sleep 0.2
done'
Yes, I agree, a noble bike, but unfortunately there is no inotify in the firmware, and I was lazy to deal with Kernel Event. Moreover, fps in 1 second will suit me. - If changes are found, then we display the image with the binary obtained by cross compilation with a special toolchain for the armv4l architecture (for more information in the article mentioned above, you can also find the finished binary and source here .)
Now our e-book is able to listen and at the same time, on it, as before, you can read books. The main thing to keep in mind in order for the script to run and we can transfer images, when the USB e-book is turned on, the cable should not be connected. Otherwise, the book will load without our script prsp.sh. That is, first turn on the book, wait for the shell to load, then connect the USB cable. (this feature is registered in the PRSPlus firmware by default, you can also change this if you wish by making your own image)
Check
Click reset on the e-book, wait for the download to finish, connect the USB cable. For verification, we can send a test image. For example, from Ubuntu, this can be done as follows:
If the script started successfully when the reader loads, then when connecting via USB we will see a device with a size of 1 MB.
fdisk -lWe find this line:
Disk /dev/sdx: 1 MB, 1048576 bytesNow we know, here it is our piece of RAM e-book
/dev/sdx. To convert from jpeg, we need djpeg, install the necessary packages:
apt-get install libjpeg-turbo-progsNext, create a JPEG file in your favorite editor, size 600x800 and send it to an e-book.
djpeg -pnm -grayscale test.jpg | dd bs=1 skip=15 | dd of=/dev/sdx bs=480kIn this pipeline, we convert jpeg to monochrome pgm, skip the header and transfer 480Kb in a single block to the / dev / sdx device. And then we see the result.
Barcode generator and sending it to the device
To draw the barcode in Golang, we need additional libraries:
go get github.com/boombuler/barcode
go get golang.org/x/image/bmp
main.go
package main
import (
	"bytes"
	"fmt"
	"image"
	"log"
	"os"
	"image/color"
	"image/draw"
	"golang.org/x/image/bmp"
	"syscall"
	"github.com/boombuler/barcode"
	"github.com/boombuler/barcode/ean"
	"github.com/boombuler/barcode/qr"
)
func main() {
	switch string(os.Args[2]) {
	case "qr":
		base64 := os.Args[3]
		log.Println("Original data:", base64)
		code1pixel, err := qr.Encode(base64, qr.L, qr.Unicode)
		if err != nil {
			log.Fatal(err)
		}
		log.Println("Encoded data: ", code1pixel.Content())
		if base64 != code1pixel.Content() {
			log.Fatal("data differs")
		}
		log.Println("Encoded data: ", code1pixel.Content())
		if base64 != code1pixel.Content() {
			log.Fatal("data differs")
		}
		codeScalled, err := barcode.Scale(code1pixel, 300, 200)
		if err != nil {
			log.Fatal(err)
		}
		drtest(codeScalled)
	case "ean":
		// code, err := ean.Encode("123456789012")
		code1pixel, err := ean.Encode(os.Args[3])
		if err != nil {
			log.Fatal(err)
		}
		log.Println("Encoded data: ", code1pixel.Content())
		codeScalled, err := barcode.Scale(code1pixel, 300, 300)
		if err != nil {
			log.Fatal(err)
		}
		drtest(codeScalled)
	}
}
func drtest(imgSrc image.Image) {
	// create a new Image with the same dimension of image
	newImg := image.NewGray(image.Rect(0, 0, 600, 800))
	// we will use white background to replace background
	// you can change it to whichever color you want with
	// a new color.RGBA{} and use image.NewUniform(color.RGBA{}) function
	draw.Draw(newImg, newImg.Bounds(), &image.Uniform{color.White}, image.Point{}, draw.Src)
	// paste image OVER to newImage
	draw.Draw(newImg, newImg.Bounds().Add(image.Point{150, 300}), imgSrc, imgSrc.Bounds().Min, draw.Over)
	buf := new(bytes.Buffer)
	err := bmp.Encode(buf, newImg)
	if err != nil {
		fmt.Println(err)
		os.Exit(1)
	}
	send_s3 := buf.Bytes()
	fmt.Println("OK")
	if os.Args[1] != "false" {
		devout(send_s3[1078:])
	}
}
func devout(buffer []byte) {
	// disk := "/dev/sde"
	disk := os.Args[1]
	var fd, numread int
	var err error
	fd, err = syscall.Open(disk, syscall.O_RDWR, 0777)
	if err != nil {
		fmt.Print(err.Error(), "\n")
		return
	}
	//WRITE
	numread, err = syscall.Write(fd, buffer)
	if err != nil {
		fmt.Print(err.Error(), "\n")
	}
	fmt.Printf("Numbytes write: %d\n", numread)
	// fmt.Printf("Buffer: %x\n", buffer[:1000])
	err = syscall.Close(fd)
	if err != nil {
		fmt.Print(err.Error(), "\n")
	}
}
Highlights in the code:
- Using the EAN example, we first draw a 1-pixel-thick barcode:
code1pixel, err := ean.Encode(os.Args[3]) - Stretch it to the desired size:
codeScalled, err := barcode.Scale(code1pixel, 300, 300) - Create a canvas 600x800 for the screen size:
newImg := image.NewGray(image.Rect(0, 0, 600, 800)) - Fill it with the desired color:
draw.Draw(newImg, newImg.Bounds(), &image.Uniform{color.White}, image.Point{}, draw.Src) - Add a barcode image to our canvas:
draw.Draw(newImg, newImg.Bounds().Add(image.Point{150, 300}), imgSrc, imgSrc.Bounds().Min, draw.Over) - Next, we open the device for recording and send the data there excluding the BMP header:
devout(send_s3[1078:])
Cross compilation under Wirenboard 5
Wirenboard developers provide us with a very convenient cross compilation tool based on the Docker container. But in the framework of this article we will not consider it. Under ARMv5, our simple application can be assembled with one team.
GOOS=linux GOARCH=arm GOARM=5 go build main.goTransfer everything to Wirenboard 5:
scp main [email protected]:/tmpGo to Wirenboard, look at the name of the device with a size of 1 MB, in my example / dev / sdd.
We launch:
/tmp/main /dev/sdd qr "Privet Habr"conclusions
Using an e-book as a screen is real. With its potential, electronic ink technology encourages use in interior design. E-ink screen will look good especially on a light wall. You can display useful information from the home controller.
Thanks for attention!
PS Sources, you can see here and here . Firmware PRSPlus for e-books here .