December 16, 2016 at 10:49
We integrate two video surveillance systems: Axxon Next and SureView
Edison Software programmers were tasked with developing software components that provide the interface between Axxon Next and Immix. The SureView service is very popular in the UK, and in order to strengthen their position in the video surveillance market, Axxon Next (ITV) developers decided to take a tricky strategic move and integrate, giving the execution of the order to Edison Software outsourcing. It took 316 hours to develop and debug the integration plugin. Axxon Next
software is a product of the Russian company ITV, which is a developer of software for security systems and video surveillance.
Axxon Next is a high-performance video surveillance system with an intuitive user interface that supports more than 6,000 names of IP devices and allows you to build easily scalable video surveillance systems of any complexity. It should be noted that the full functionality of the system is included in any license, even if it has only one camera.
Immix software is a product of the American company SureView systems and is a video-oriented software platform designed to receive disturbing events from video surveillance systems, access control, automation platforms and situational information systems.
The result of the development was to be a plug-in for SureView software, providing the ability to use the following features of Axxon Next software from SureView software.
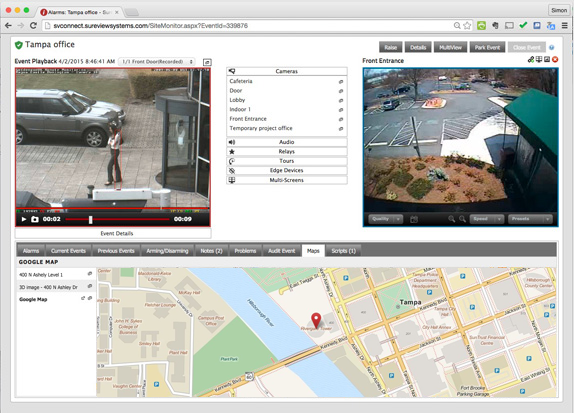
To implement plugins for SureView software, SureviewSystems provides an API with documentation and an application for testing the plug-in under development.
An API is a large number of different interfaces that describe the various functionality of an integrated device.
Examples.
1) In order for SureView software to connect to an integrated device, the following interface must be implemented.
2) In order for SureView software to play a live video stream from an integrated device, such an interface must be implemented.
To speed up development, the StreamCam base class is delivered with the SDK, which already implements some of the necessary interfaces and can play the RTSP stream, just specify a link to the video stream being played.
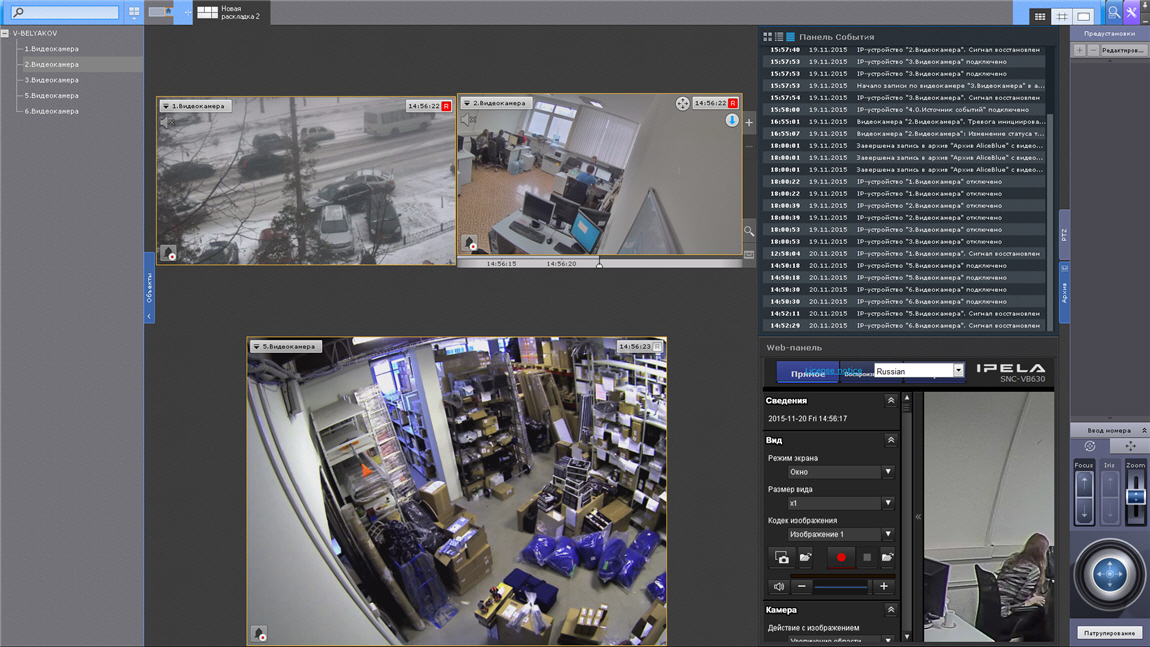
To manage devices connected to the Axxon Next server, the latter provides a fairly convenient and simple API.
API description can be found here .
Device management takes place via HTTP, Http Basic authentication is used to ensure security.
All AxxonNext server responses are sent in Json format.
Consider an example of live stream playback and telemetry control. To get a list of connected devices, just send a request: GET / video-origins.
In response to this request, the Axxon server will send a list of connected devices.
In addition to the name of the device, the answer also contains additional information about the device: device status - field
The device name consists of three components.
To request all the video sources of the device, you must send a request that looks like this:
where
To receive a live stream (in RTSP format) from a specific signal source, the following request must be sent.
In response, we will get a link to the RTSP stream we need.
To get a list of telemetry devices for the original video source, you need to send a request of the form:
where
In response, we get a list of telemetry devices available on the device.
The device name also consists of three components, the last of which is the telemetry device name, and the first two are the host name and device name described earlier.
Before starting device management, it is necessary to request information on the control methods that are supported by the device. This is done using a query of the following form.
In response, we obtain information on the degrees of freedom, limit values, and device control methods.
Each degree of freedom contains a list of supported control methods:
To start the telemetry device control session, it is necessary to capture the control session by sending a request of the form:
where n is a number from 1 to 5, the priority of the control session.
If at the moment the telemetry device is free or it is controlled by another user with a lower priority, then control is captured, and the following response comes from the server:
where
To maintain the relevance of the management session, it is necessary to send requests at least once every 10 seconds.
To free a session, you need to send a request of the following form.
To send a command to change one of the degrees of freedom of telemetry, you must send a request of the form:
Where:
The main difficulty in the implementation of the project was the implementation of the transmission of alarm messages from AxxonNext to SureView.
Difficulties.
To overcome this situation, it was decided to implement a separate service in the form of a Windows service, which is engaged in periodically reading the list of alarms and sending them via SMTP to SureView software.
For more precise control of the sent alarm list, the ability to flexibly configure the parameters of the launched service with the ability to filter by device and event type was implemented.
In addition, to prevent re-sending events, the service performs a control function: whether the event was sent earlier or not.

How to create software for the
SDK microtomograph for 5233 man-hours to implement support for e-books in the FB2 format
Managing access to electronic documents. From DefView to Vivaldi We
integrate two video surveillance systems: Axxon Next and SureView.
More about the development of software for X-ray tomograph
“Sphere”: how to monitor billions of kilowatt hours.
Developing a simple plug-in for JIRA to work with the database.
To help DevOps: firmware builder for network devices on Debian for 1008 hours
Auto-update Windows service through AWS for the poor
software is a product of the Russian company ITV, which is a developer of software for security systems and video surveillance.
Axxon Next is a high-performance video surveillance system with an intuitive user interface that supports more than 6,000 names of IP devices and allows you to build easily scalable video surveillance systems of any complexity. It should be noted that the full functionality of the system is included in any license, even if it has only one camera.
Immix software is a product of the American company SureView systems and is a video-oriented software platform designed to receive disturbing events from video surveillance systems, access control, automation platforms and situational information systems.
The result of the development was to be a plug-in for SureView software, providing the ability to use the following features of Axxon Next software from SureView software.
- Display live video from Axxon Next software in SureView software.
- Play and control playback in SureView software of an archive of video stored under Axxon Next software.
- Management of SureView PTZ devices connected to Axxon Next software, including the use of Presets.
- Receiving events in SureView software about alarm messages from Axxon Next software.
SureviewSystems
To implement plugins for SureView software, SureviewSystems provides an API with documentation and an application for testing the plug-in under development.
An API is a large number of different interfaces that describe the various functionality of an integrated device.
Examples.
1) In order for SureView software to connect to an integrated device, the following interface must be implemented.
 public interface IDeviceConnectDisconnect : IDevice
    {
        void DeviceConnect();
        void DeviceDisconnect();
    }
2) In order for SureView software to play a live video stream from an integrated device, such an interface must be implemented.
public interface ICamera : IDevice
    {
        void CameraStartLive();
        void CameraStop();
    }
To speed up development, the StreamCam base class is delivered with the SDK, which already implements some of the necessary interfaces and can play the RTSP stream, just specify a link to the video stream being played.
Axxonnext
To manage devices connected to the Axxon Next server, the latter provides a fairly convenient and simple API.
API description can be found here .
Device management takes place via HTTP, Http Basic authentication is used to ensure security.
All AxxonNext server responses are sent in Json format.
Consider an example of live stream playback and telemetry control. To get a list of connected devices, just send a request: GET / video-origins.
In response to this request, the Axxon server will send a list of connected devices.
{
      "HOSTNAME/DeviceIpint.4/SourceEndpoint.video:0:0":
      {
        "origin": "SALES/DeviceIpint.4/SourceEndpoint.video:0:0"
        ,"state": "signal_restored"
        ,"friendlyNameLong": "4.IP устройство [4]"
        ,"friendlyNameShort": "IP устройство [4]"
      }
      ,"HOSTNAME/DeviceIpint.5/SourceEndpoint.video:0:0":
      {
        "origin": "SALES/DeviceIpint.5/SourceEndpoint.video:0:0"
        ,"state": "disconnected"
        ,"friendlyNameLong": "5.IP устройство [5]"
        ,"friendlyNameShort": "IP устройство [5]"
      }
    }
In addition to the name of the device, the answer also contains additional information about the device: device status - field
state, its name - field friendlyName. The device name consists of three components.
- The host name on which the AxxonNext server is installed. In the presented example, this
HOSTNAME. This information is necessary due to the fact that many Axxon servers can be combined into a single domain, and device management is possible through one single Axxon server. - The name of the connected device. In this example, these are DeviceIpint.4 and DeviceIpint.5.
- The name of the original video source. In this example, this is SourceEndpoint.videocript index.
- One device can have several video sources, for example, with different quality.
To request all the video sources of the device, you must send a request that looks like this:
GET /video-sources/HOSTNAME/DeviceName/OriginSourcewhere
HOSTNAME, DeviceNameand OriginSourceare the previously described 3 components of the device name. To receive a live stream (in RTSP format) from a specific signal source, the following request must be sent.
GET /live/media/HOSTNAME/DeviceName/VideoSource?format=rtspIn response, we will get a link to the RTSP stream we need.
{
     "rtsp":{
        "description":"RTP/UDP or RTP/RTSP/TCP",
        "path":"hosts/SALES/DeviceIpint.4/SourceEndpoint.video:0:0",
        "port":"554"
        }
    }
To get a list of telemetry devices for the original video source, you need to send a request of the form:
GET /control/telemetry/list/HOSTNAME/DeviceNamewhere
HOSTNAMEand DeviceNameare the host and device names described earlier. In response, we get a list of telemetry devices available on the device.
[
        "SALES/DeviceIpint.5/TelemetryControl.0"
    ]
The device name also consists of three components, the last of which is the telemetry device name, and the first two are the host name and device name described earlier.
Before starting device management, it is necessary to request information on the control methods that are supported by the device. This is done using a query of the following form.
GET /control/telemetry/info/HOSTNAME/DeviceName/TelemetryNameIn response, we obtain information on the degrees of freedom, limit values, and device control methods.
{
        "degrees": {
            "tilt": {
                "relative": {"min": "-45", "max": "45"},
                "continuous": {"min": "-10", "max": "10"}
            },
            "pan": {
                "absolute": {"min": "-170", "max": "170"},
                "continuous": {"min": "-10", "max": "10"}
            },
            "zoom": {
                "absolute": {"min": "0", "max": "20"}
            }
        },
    "feature": ["autoFocus", "areaZoom", "pointMove"]
    }
Degrees - information on degrees of freedom with maximum permissible values in degrees: tilt- control the tilt of the camcorder;pan- control the rotation of the camcorder;zoom- zoom control;focus- focus control;iris- iris control.
Each degree of freedom contains a list of supported control methods:
absolute- absolute - camera rotation at a given angle relative to the camera installation;relative- relative - rotation of the camera at a given angle relative to the current position of the camera;continuous- continuous - continuous rotation of the camera while the control button is pressed;feature- a list of supported functions, the task of implementing these functions in the integration plugin was not.
To start the telemetry device control session, it is necessary to capture the control session by sending a request of the form:
GET /control/telemetry/session/acquire/HOSTNAME/DeviceName/TelemetryName?session_priority=nwhere n is a number from 1 to 5, the priority of the control session.
If at the moment the telemetry device is free or it is controlled by another user with a lower priority, then control is captured, and the following response comes from the server:
    {
        "session_id" : [id]
    }
where
idis the session identifier. To maintain the relevance of the management session, it is necessary to send requests at least once every 10 seconds.
GET /control/telemetry/session/keepalive/HOSTNAME/DeviceName/TelemetryName?session_id=idTo free a session, you need to send a request of the following form.
GET /control/telemetry/session/release/HOSTNAME/DeviceName/TelemetryName?session_id=[id]To send a command to change one of the degrees of freedom of telemetry, you must send a request of the form:
GET /control/telemetry/DEGREE/HOSTNAME/DeviceName/TelemetryName?mode=MODE
&value=VAL&session_id=id
Where:
DEGREE- name of the degree of freedom: tilt, pan, zoom, focus, iris;MODE- control method: absolute, relative, continuous;VAL- the value by the value of which it is necessary to change or establish the degree of freedom;id- identifier of the management session.
The main difficulty in the implementation of the project was the implementation of the transmission of alarm messages from AxxonNext to SureView.
Difficulties.
- The SureView integration plugin cannot query the list of alarm messages; the corresponding functionality is simply not provided in the SDK. Instead, the SDK assumes that alarm messages will be sent to the SureView software via the SMTP protocol, and only then the integration plug-in will (in accordance with the SDK) analyze the message body and extract the necessary information from it, such as: camera number and name or the sensor on which the alarm was generated.
- AxxonNext software does not send lists of alarm events, but sends them on request via the HTTP API. Events are sampled for a given period of time. To the credit of AxxonNext software, it can send events via the SMTP protocol, but this action is configured manually, individually for each connected device, otherwise, with a large number of devices and alarms, you will receive spam mailing.
To overcome this situation, it was decided to implement a separate service in the form of a Windows service, which is engaged in periodically reading the list of alarms and sending them via SMTP to SureView software.
For more precise control of the sent alarm list, the ability to flexibly configure the parameters of the launched service with the ability to filter by device and event type was implemented.
In addition, to prevent re-sending events, the service performs a control function: whether the event was sent earlier or not.
More projects:
How to create software for the
SDK microtomograph for 5233 man-hours to implement support for e-books in the FB2 format
Managing access to electronic documents. From DefView to Vivaldi We
integrate two video surveillance systems: Axxon Next and SureView.
More about the development of software for X-ray tomograph
“Sphere”: how to monitor billions of kilowatt hours.
Developing a simple plug-in for JIRA to work with the database.
To help DevOps: firmware builder for network devices on Debian for 1008 hours
Auto-update Windows service through AWS for the poor