How I accelerated image processing on Android 15 times
How to optimize image processing in runtime, when you need to create 6 images, each of which consists of sequentially superimposed 15-16 PNG, without getting an OutOfMemoryException on the way?

While developing my pet-application I ran into an image processing problem. I couldn’t provide good Google boxing, so I had to go over my own rake and reinvent the wheel by myself.
Also during the development there was a migration from Java to Kotlin, so the code at some point will be transferred.
Task
Application for training in the gym. It is necessary to build a map of muscle work according to the results of training in the runtime of the application.
Two sexes: M and J. Consider option M, since for F, everything is the same.
It should be simultaneously built 6 images: 3 periods (one workout, per week, per month) x 2 types (front, back)

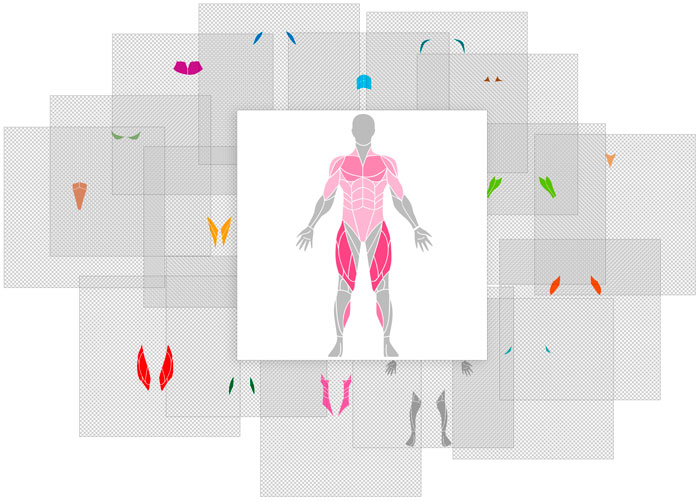
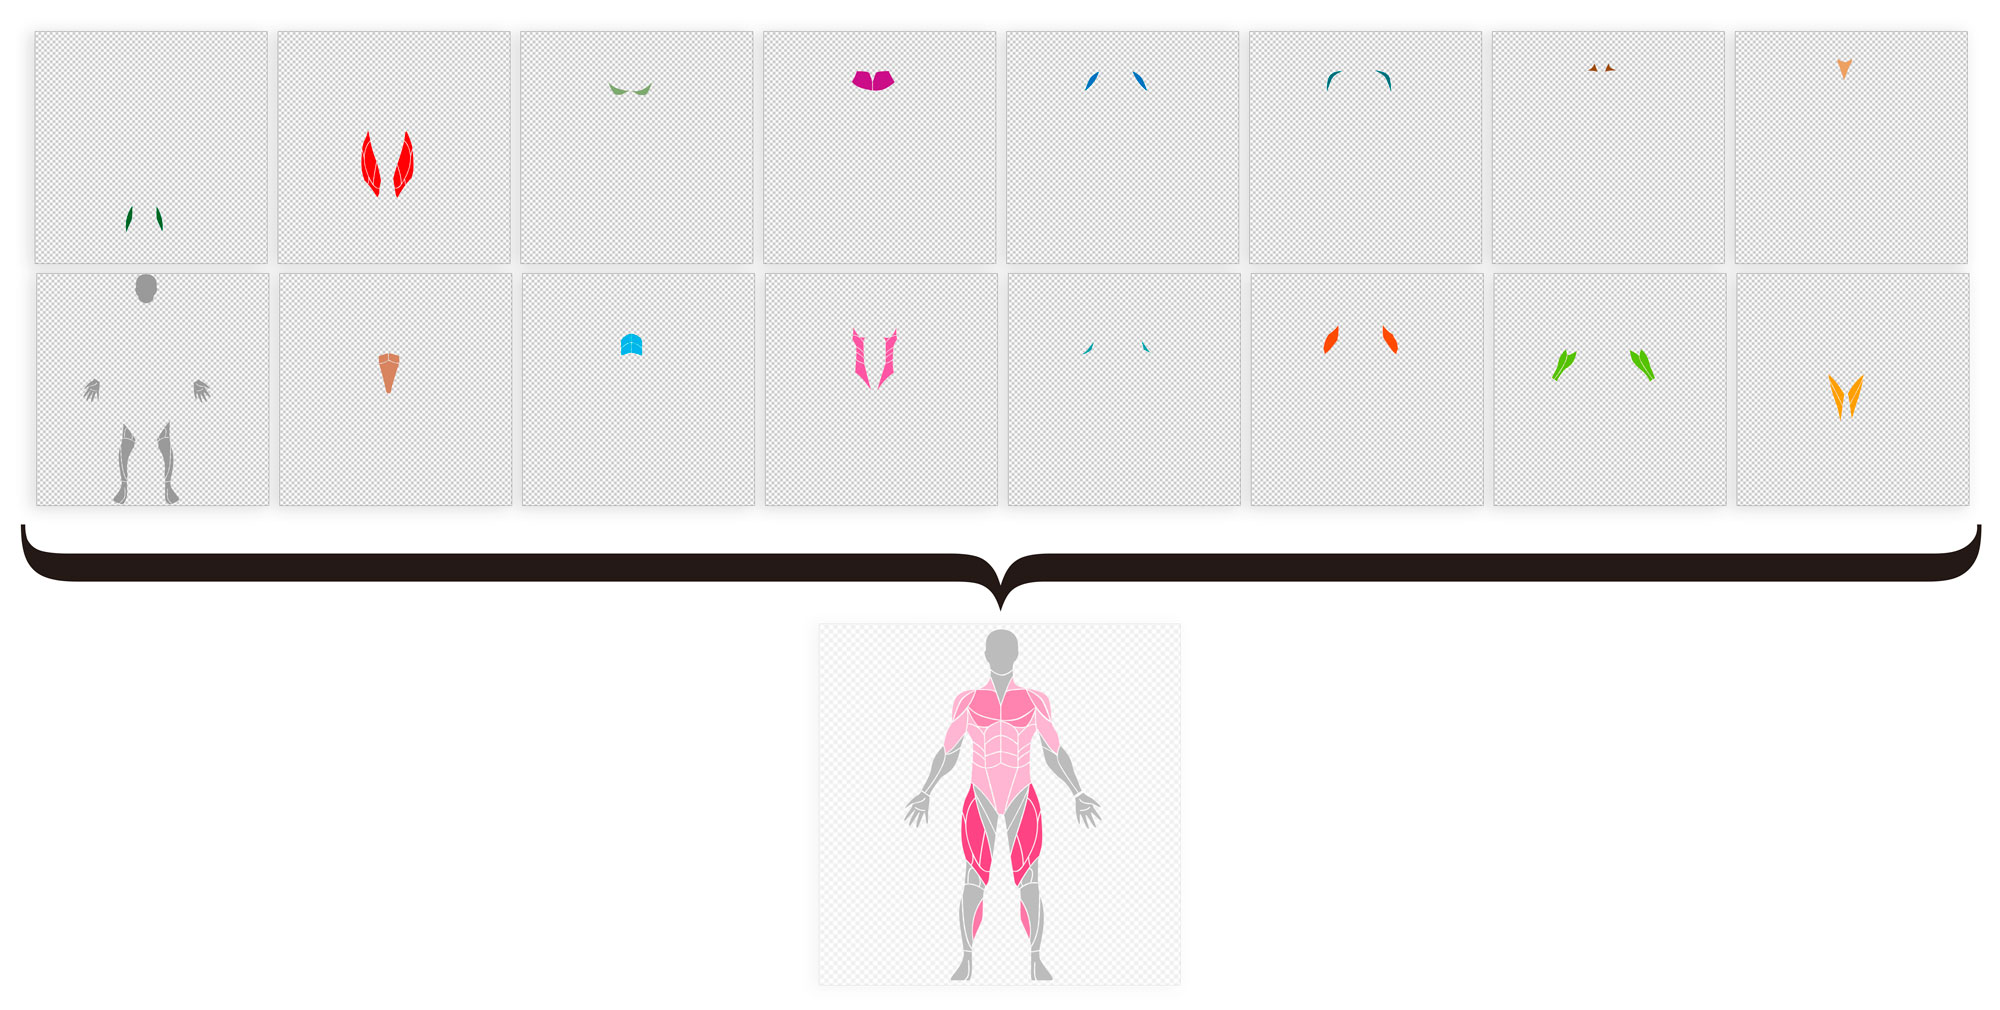
Each such image consists of 15 images of muscle groups for the front view and 14 for the rear view. Plus 1 image of the base (head, hands and feet). In total, in order to collect the front view, 16 images must be superimposed, and 15 behind.
Only 23 muscle groups for both sides (for those with 15 + 14! = 23, a small explanation - some muscles are “visible” on both sides).
Blending algorithm as a first approximation:
- Based on the data of completed workouts, HashMap <String, Float> is built, String is the name of the muscle group, Float is the load degree from 0 to 10.
- Each of the 23 muscles is repainted to a color ranging from 0 (not involved) to 10 (max. Load).
- We superimpose the repainted images of the muscles in two images (front, rear).
- Save all 6 images.

To store 31 (16 + 15) images of 1500x1500 px in 24-bit mode, 31x1500x1500x24bit = 199 MB of RAM is required. Approximately when ~ 30–40 MB is exceeded, you get an OutOfMemoryException. Accordingly, at the same time you can not download all the images from the resources, because you need to free up resources for non-receipt of the action. This means that you need to sequentially overlay images. The algorithm is transformed into the following:
Based on the data of completed trainings, HashMap <String, Float> is built, String is a muscle, and Float is a load degree from 0 to 10.
Cycle for each of 6 images:
- Got the resource BitmapFactory.decodeResource ().
- Each of the 23 muscles is repainted to a color ranging from 0 (not involved) to 10 (max. Load).
- We superimpose the repainted images of the muscles on one Canvas.
- Bitmap.recycle () freed resource.
We perform the task in a separate thread using AsyncTask. In each TASK two images are created successively: front and back view.
privateclassBitmapMusclesTaskextendsAsyncTask<Void, Void, DoubleMusclesBitmaps> {private final WeakReference<HashMap<String, Float>> musclesMap;
        BitmapMusclesTask(HashMap<String, Float> musclesMap) {
            this.musclesMap = new WeakReference<>(musclesMap);
        }
        @Override
        protected DoubleMusclesBitmaps doInBackground(Void... voids){
            DoubleMusclesBitmaps bitmaps = new DoubleMusclesBitmaps();
            bitmaps.bitmapBack = createBitmapMuscles(musclesMap.get(), false);
            bitmaps.bitmapFront = createBitmapMuscles(musclesMap.get(), true);
            return bitmaps;
        }
        @Override
        protectedvoidonPostExecute(DoubleMusclesBitmaps bitmaps){
            super.onPostExecute(bitmaps);
            Uri uriBack = saveBitmap(bitmaps.bitmapBack);
            Uri uriFront = saveBitmap(bitmaps.bitmapFront);
            bitmaps.bitmapBack.recycle();
            bitmaps.bitmapFront.recycle();
            if (listener != null)
                listener.onUpdate(uriFront, uriBack);
        }
}
publicclassDoubleMusclesBitmaps {public Bitmap bitmapFront;
        public Bitmap bitmapBack;
}
The DoubleMusclesBitmaps helper class is only needed to return two Bitmap variables: a front and a back view. Looking ahead, the Java class DoubleMusclesBitmaps is replaced by Pair <Bitmap, Bitmap> in Kotlin.
Drawing
Colors colors.xml in resource values.
<?xmlversion="1.0" encoding="utf-8"?>
<resources>
    <colorname="muscles_color0">#BBBBBB</color>
    <colorname="muscles_color1">#ffb5cf</color>
    <colorname="muscles_color2">#fda9c6</color>
    <colorname="muscles_color3">#fa9cbe</color>
    <colorname="muscles_color4">#f890b5</color>
    <colorname="muscles_color5">#f583ac</color>
    <colorname="muscles_color6">#f377a4</color>
    <colorname="muscles_color7">#f06a9b</color>
    <colorname="muscles_color8">#ee5e92</color>
    <colorname="muscles_color9">#eb518a</color>
    <colorname="muscles_color10">#e94581</color>
</resources>
Create one view
public Bitmap createBitmapMuscles(HashMap<String, Float> musclesMap, Boolean isFront){
        Bitmap musclesBitmap = Bitmap.createBitmap(1500, 1500, Bitmap.Config.ARGB_8888);
        Canvas resultCanvas = new Canvas(musclesBitmap);
        for (HashMap.Entry entry : musclesMap.entrySet()) {
            int color = Math.round((float) entry.getValue());
            //получение цвета программным способом из ресурсов цвета по названию
            color = context.getResources().getColor(context.getResources()
                    .getIdentifier("muscles_color" + color,
                            "color", context.getPackageName()));
            drawMuscleElement(resultCanvas, entry.getKey(), color);
        }
        return musclesBitmap;
}
Overlay single muscle
privatevoiddrawMuscleElement(Canvas resultCanvas, String drawableName, @ColorInt int color){
        PorterDuff.Mode mode = PorterDuff.Mode.SRC_IN;
        Paint paint = new Paint(Paint.ANTI_ALIAS_FLAG);
        Bitmap bitmapDst = BitmapFactory.decodeResource(context.getResources(),
                context.getResources().getIdentifier(drawableName, "drawable", context.getPackageName()));
        bitmapDst = Bitmap.createScaledBitmap(bitmapDst, 1500, 1500, true);
        paint.setColorFilter(new PorterDuffColorFilter(color, mode));
        resultCanvas.drawBitmap(bitmapDst, 0, 0, paint);
        bitmapDst.recycle();//освобождение ресурса
}
We start the generation of 3 pairs of images.
private BitmapMusclesTask taskLast;
private BitmapMusclesTask taskWeek;
private BitmapMusclesTask taskMonth;
privatevoidstartImageGenerating(){
        taskLast = new BitmapMusclesTask(mapLast);
        taskLast.execute();
        taskWeek = new BitmapMusclesTask(mapWeek);
        taskWeek.execute();
        taskMonth = new BitmapMusclesTask(mapMonth);
        taskMonth.execute();
}
Run startImageGenerating ():
> start   1549350950177
> finish  1549350959490  diff=9313 ms
It should be noted that it takes a lot of time to read resources. For each pair of images, 29 PNG files from resources are decoded. In my case, of the total cost of creating images, the BitmapFactory.decodeResource () function spends ~ 75% of time: ~ 6960 ms.
Minuses:
- Periodically I receive OutOfMemoryException.
- Processing takes more than 9 seconds, and it is on the emulator (!) On the "average" (my old) phone it reached 20 seconds.
- AsyncTask with all the leakages [memory].
Pros:
With probability (1-OutOfMemoryException) images are drawn.
AsyncTask to the IntentService
To leave AsyncTask, it was decided to switch to IntentServiсe, in which the task of creating images was performed. After the service is completed, if there is a running BroadcastReceiver, we get Uri of all six generated images, otherwise the images were saved, so that the next time the user opens the application, there is no need to wait for the creation process. While working at the same time has not changed, but with one drawback - memory leaks figured out, there are still two minuses.
To make users expect to create images so much time, of course, is impossible. Need to optimize.
I plan ways to optimize:
- Image processing.
- Adding LruCache.
Image processing
All source PNG resources are 1500x1500 nx. Reduce them to 1080x1080.
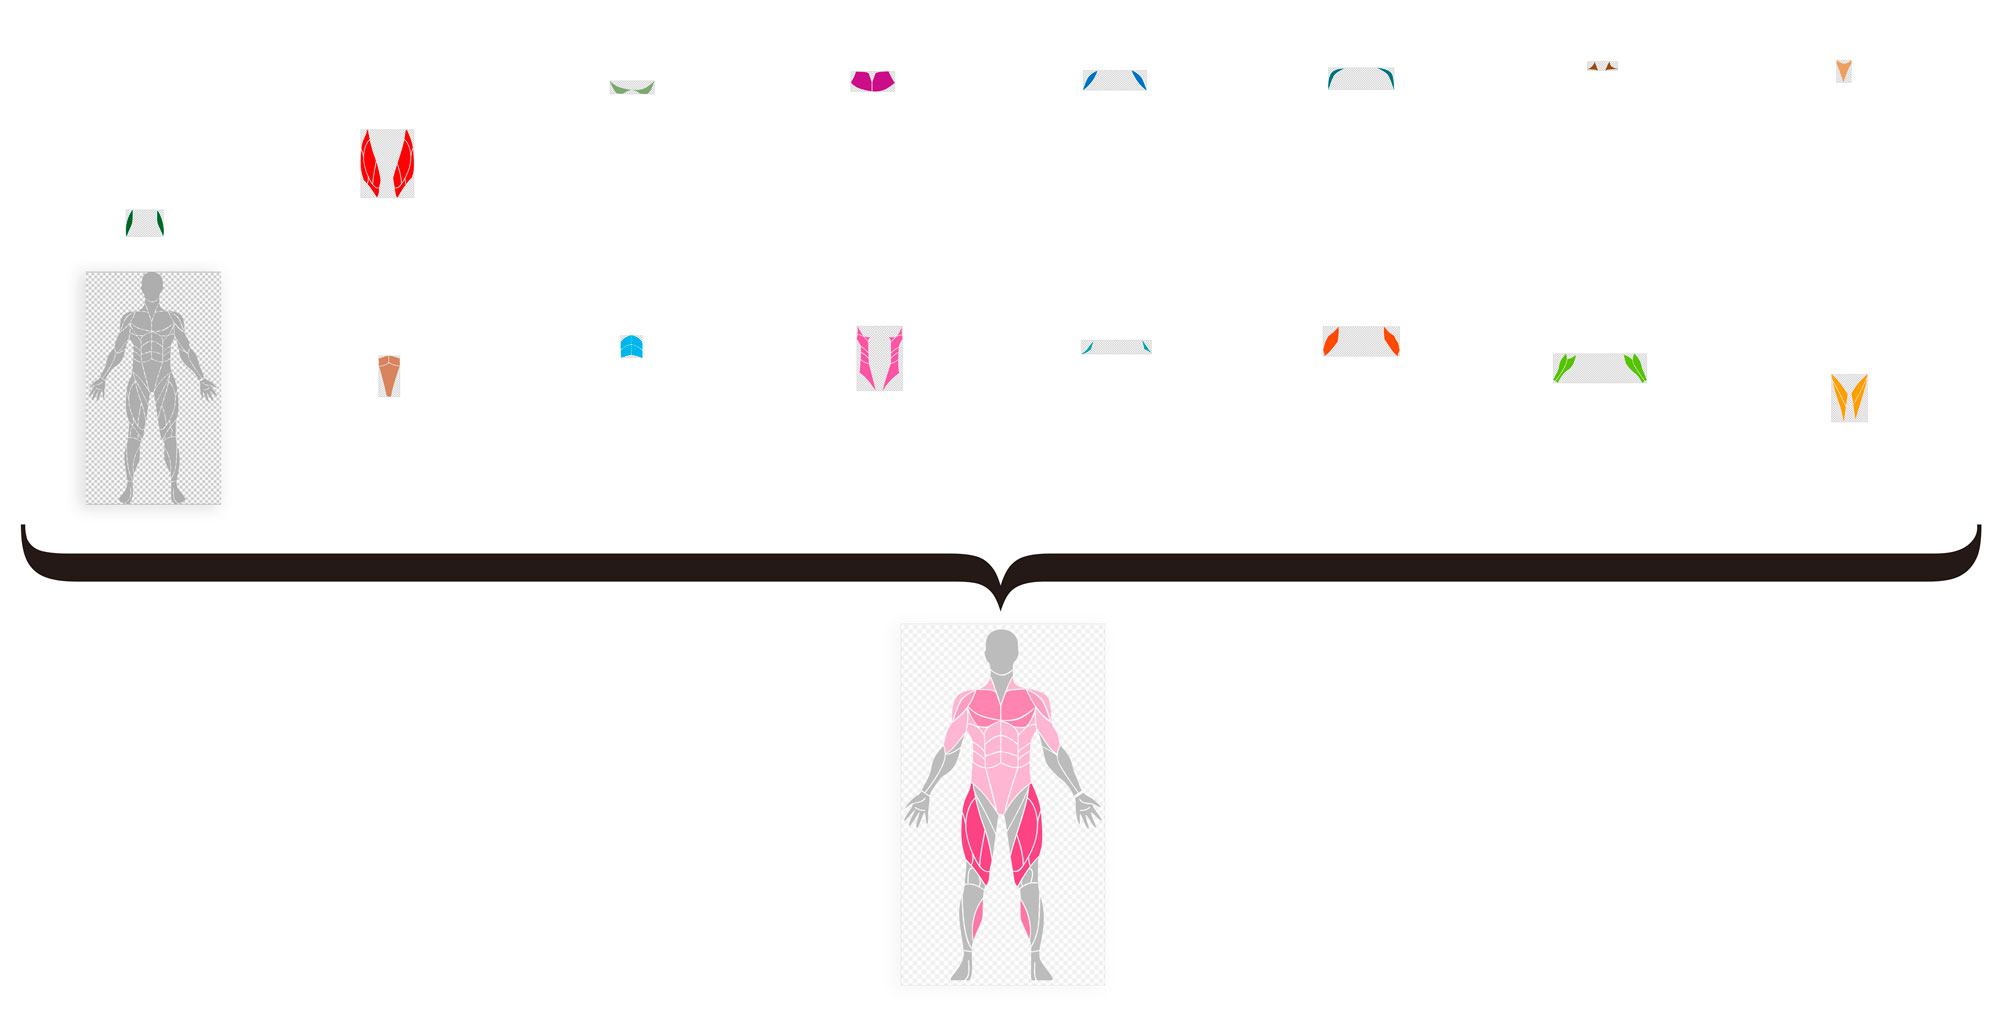
As you can see in the second photo, all the source codes are square, the muscles are in place, and the real useful pixels occupy a small area. The fact that all muscle groups are already in place is convenient for the programmer, but not rational for performance. We sprinkle (cut off) the excess in all source codes, recording the position (x, y) of each muscle group, in order to put it in the right place.
In the first approach, all 29 images of muscle groups were repainted and superimposed on the base. The base included only the head, hands and parts of the legs. We change the basis: now it includes in addition to the head, arms and legs, all other muscle groups. All color gray color_muscle0. This will allow not to repaint and not to impose those muscle groups that were not involved.
Now all source codes look like this:

Lrucache
After additional processing of the original images, some began to take up some memory, which led to the idea of reuse (do not release them after each overlay using the .recycle () method) using LruCache. Create a class for storing source images, which simultaneously takes over the function of reading from resources:
class LruCacheBitmap(val context: Context){
    private val lruCache: LruCache<String, Bitmap>
    init {
        val maxMemory = (Runtime.getRuntime().maxMemory() / 1024).toInt()
        val cacheSize = maxMemory / 4
        lruCache = object : LruCache<String, Bitmap>(cacheSize) {
            override fun sizeOf(key: String, bitmap: Bitmap): Int {
                return bitmap.byteCount
            }
        }
    }
    fun getBitmap(drawableName: String): Bitmap? {
        returnif (lruCache.get(drawableName) != null) lruCache.get(drawableName) else decodeMuscleFile(drawableName)
    }
    fun clearAll() {
        lruCache.evictAll()
    }
    private fun decodeMuscleFile(drawableName: String): Bitmap? {
        val bitmap = BitmapFactory.decodeResource(context.resources,
                context.resources.getIdentifier(drawableName, "drawable", context.packageName))
        if (bitmap != null) {
            lruCache.put(drawableName, bitmap)
        }
        return bitmap
    }
}
Images are prepared, resource decoding is optimized.
We will not discuss a smooth transition from Java to Kotlin, but it happened.
Korutiny
The code using the IntentService works, but the code readability with callbacks cannot be called pleasant.
Add a desire to look at Kortina Korutin in the work. Add an understanding that in a couple of months it will be more pleasant to read your synchronous code than to search for the place where Uri files of the generated images will be returned.
Also, the acceleration of image processing prompted the idea to use the feature in several new places of the application, in particular in the description of the exercises, and not just after the workout.
private val errorHandler = CoroutineExceptionHandler { _, e ->  e.printStackTrace()}
private val job = SupervisorJob()
private val scope = CoroutineScope(Dispatchers.Main + job + errorHandler)
private var uries: HashMap<String, Uri?> = HashMap()
fun startImageGenerating() = scope.launch {
            ...
            val imgMuscle = ImgMuscle()
            uries = withContext(Dispatchers.IO) { imgMuscle.createMuscleImages() }
            ...
}
Standard binding errorHandler, job and scope - skorut korutin with handler errors, if korutin breaks.
uries - HashMap, which stores 6 images for later output in the UI:
uries ["last_back"] = Uri?
uries ["last_front"] = Uri?
uries ["week_back"] = Uri?
uries ["week_front"] = Uri?
uries ["month_back"] = Uri?
uries ["month_front"] = Uri?
classImgMuscle {
    val lruBitmap: LruCacheBitmap
    suspend fun createMuscleImages(): HashMap<String, Uri?> {
        return suspendCoroutine { continuation ->
                val resultUries = HashMap<String, Uri?>()
                ... //создаем и сохраняем изображения
                continuation.resume(resultUries)
        }
    }
}
Measure the processing time.
>start   1549400719844
>finish  1549400720440 diff=596 ms
From 9313 ms, the processing has decreased to 596 ms.
If there are ideas for additional optimization - well in the comments.
