Deploy Wordpress on VPS with Windows Server 2012. Walkthrough
- Tutorial

Recently, many of our clients have encountered various kinds of problems when deploying their site to a virtual server running Windows Server 2012 R2. In this regard, we decided to write the most detailed guide in which users can find answers to their questions.
In this guide, we will deploy WordPress on a bunch of IIS + PHP + MySQL, and also provide some recommendations for setting up each of these components. We will do this on VPS from RUVDS with a configuration of 2CPU, 2GB RAM, 20GB SSD. So, let's get started ...
Install and configure MySQL
First, install the redistributable packages for Visual Studio 2013 ( https://www.microsoft.com/en-us/download/details.aspx?id=40784 )
Next, download the MySQL installer from here ( mysql-installer-community-5.6.28.0.msi ) and run. We will need to install the server and editor.


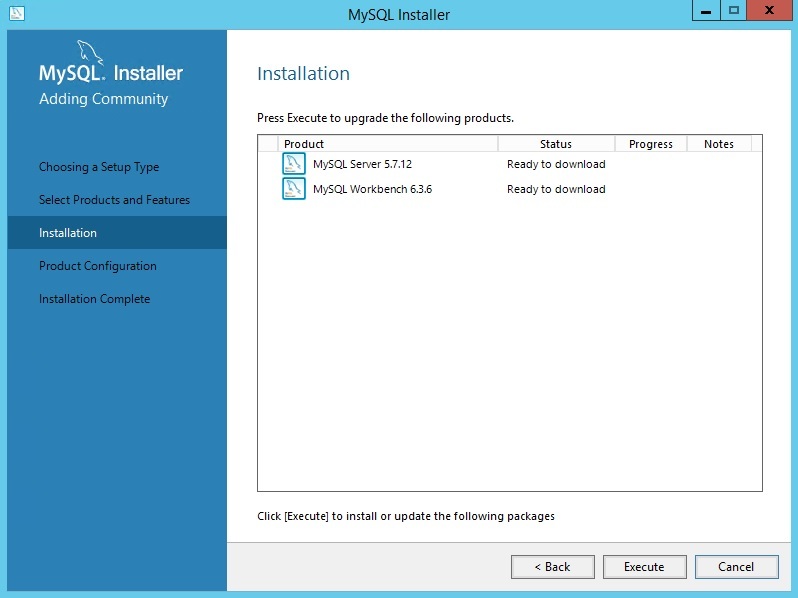


Getting started with the setup. MySQL developers recommend using the “Server Machine” configuration type when installing MySQL on a server on which the web server will also be running. This option primarily affects the amount of memory consumed. We remove the flag from “Open Firewall port for network access”, since the web server will also be located on this server, and we will work with the database using the local visual database editor MySQL Worbench, which we also installed on this server. On the next window, create the wp user. Under this account, our site will work with a database.


On all the following windows, just click "Next". At the moment, the default settings offered there are suitable for us.


In the configuration file C: \ ProgramData \ MySQL \ MySQL Server 5.7 \ my.ini, add the bind-address = localhost field in the [mysqld] section so that mysql accepts TCP connections only to the ring interface port.
We restart the MySQL57 service in the services management.msc snap-in.
Run the command line interpreter (cmd.exe) and execute: So, the server is started and listens to the port we need. Let's create the db1 database using the MySQL Workbench installed by us : Done!
C:\Users\Administrator>sc queryEx MySQL57 && netstat -nao | findstr 3306


SERVICE_NAME: MySQL57

 TYPE : 10 WIN32_OWN_PROCESS

 STATE : 4 RUNNING

 (STOPPABLE, PAUSABLE, ACCEPTS_SHUTDOWN)

 WIN32_EXIT_CODE : 0 (0x0)

 SERVICE_EXIT_CODE : 0 (0x0)

 CHECKPOINT : 0x0

 WAIT_HINT : 0x0

 PID : 1196

 FLAGS :

 TCP 127.0.0.1:3306 0.0.0.0:0 LISTENING 1196


Install IIS + PHP + FastCGI
Installing IIS
Now we need to install IIS with the FastCGI module. Open the server control panel and click "Add new roles and features":


Now we need to activate the CGI service (the FastCGI module is also activated with it)

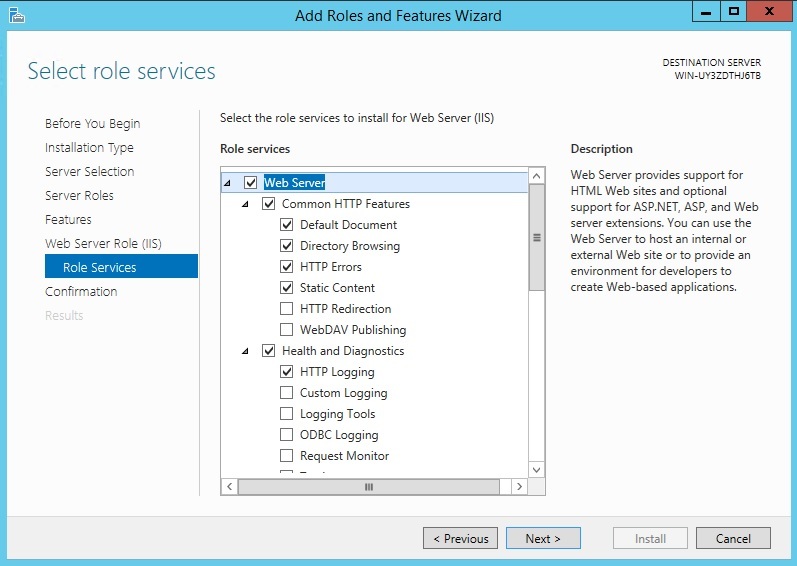


Install PHP5.6
Download php 5.6 ( php-5.6.22-nts-Win32-VC11-x86.zip ). We will use the Non-thread safe version, since FastCGI itself provides single-threaded execution.
Also, for php to work correctly, we need the C ++ Redistributable 2012 package ( https://www.microsoft.com/en-us/download/details.aspx?id=30679 ).
Unpack php into the c: \ PHP folder. Next, rename the php.ini-production file to php.ini, open and set the following parameters: Verify the configuration by executing on the command line:
cgi.force_redirect = 0 - рекомендуется отключить, так как не поддерживается IIS (http://php.net/manual/ru/security.cgi-bin.force-redirect.php)

 open_basedir="c:\inetpub\wwwroot\wordpress"; - директория с вашим сайтом на wordpress

 error_log = c:\PHP\php_errors.log - Лог файл, в котором будет отражена информация об ошибках

 date.timezone = UTC

 php_mysqli.dll - это расширение необходимо wordpress для работы с бд
php -i
We create a site in IIS
First, configure the handler for requests to your site.


Now you need to make some settings for the FastCGI module.


Set the default document:


Now create the site in IIS. First, delete the default website (Default Web Site).
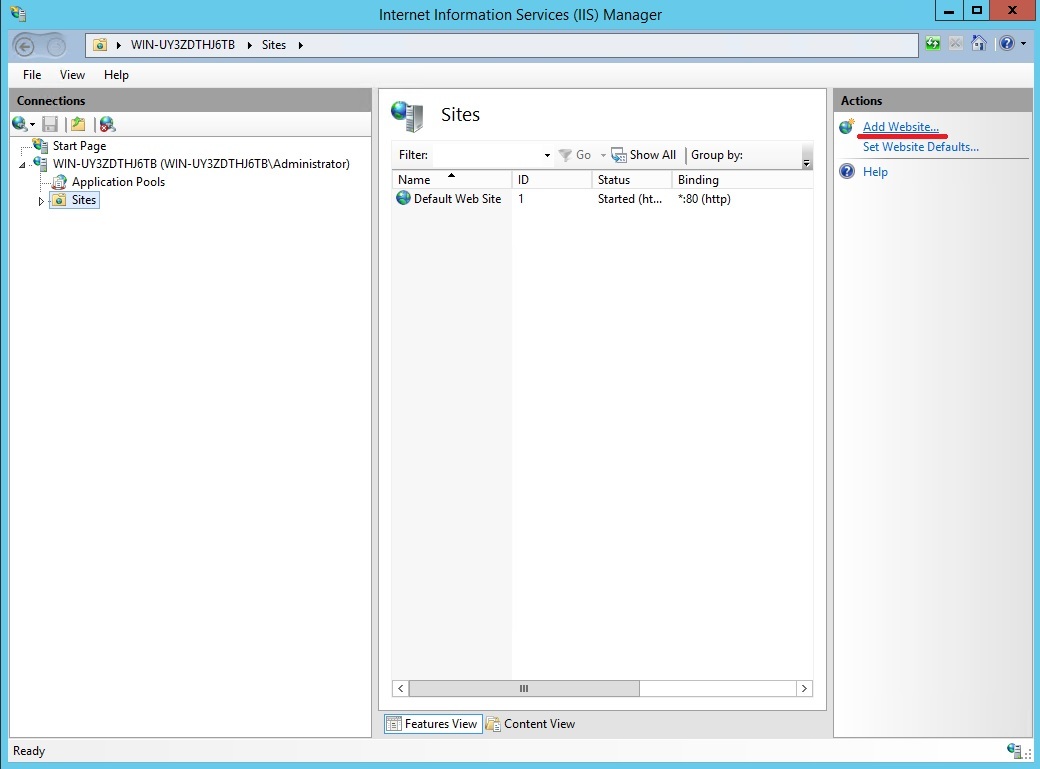


Our site is ready. But before trying to access it via http, we need to open the 80 TCP port.
Open the firewall.cpl snap-in and add the corresponding rule for incoming connections:


Rule added!
Next, create a test.php file with the following contents:
Поместим этот файл в корневую директорию вашего сайта (c:\inetpub\wwwroot\wordpress) и откроем в браузере ваш «сайт»: ip_вашего_сервера
Должны получить примерно следующее:
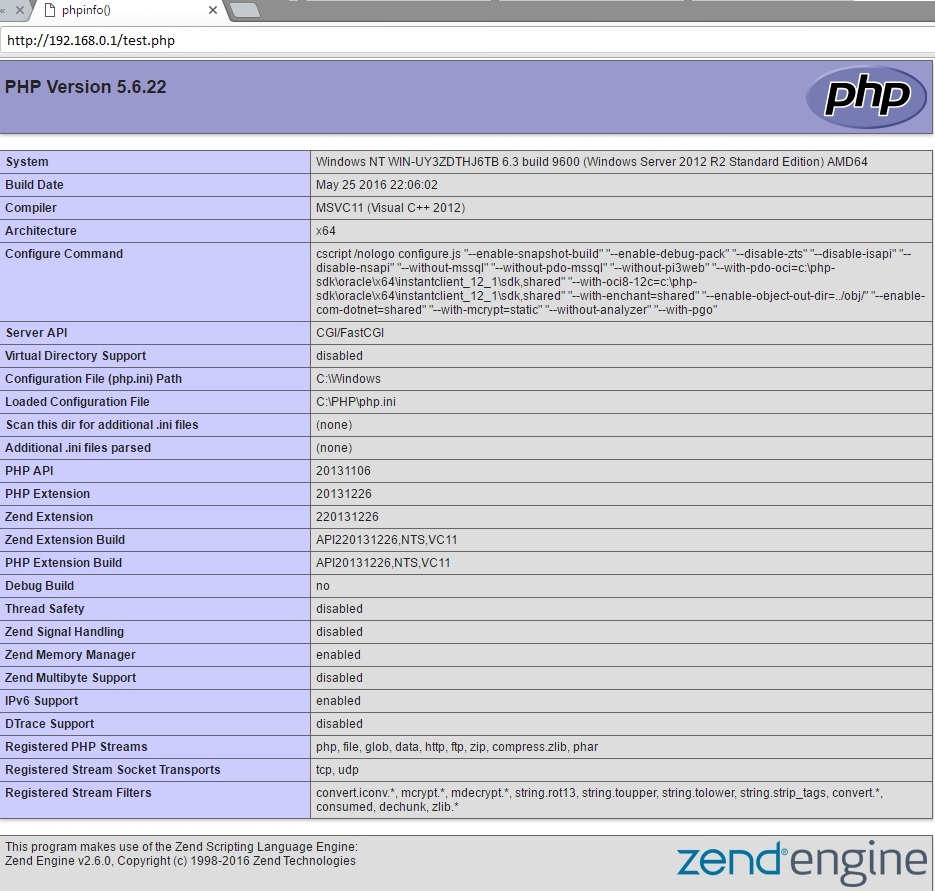
Удаляем файл test.php. Теперь можно наконец-то устанавливать Wordpress.
Установка Wordpress
Скачиваем Wordpress (wordpress-4.5.2-ru_RU.zip).
Распаковываем архив и копируем содержимое папки wordpress в нашу корневую директорию (c:\inetpub\wwwroot\wordpress).
Теперь предоставим права на запись в директорию c:\inetpub\wwwroot\wordpress и её поддиректории группе IIS_USRS

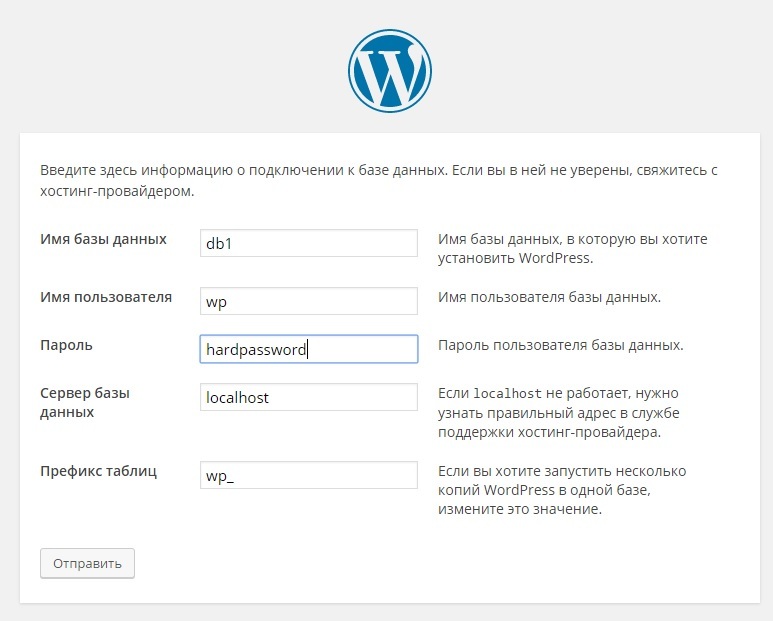
Открываем в браузере наш сайт по адресу ip_вашего_сервера и идём по шагам установки:



Авторизуемся и попадаем в личный кабинет CMS Wordpress!

Теперь откроем главную страницу по адресу ip_вашего_сервера.

Задача решена!








