May 31, 2016 at 22:06
Configuring D-link DFL-260E / 860E / 1660/2560 / 2560G firewalls to work with 3CX Phone System
- Tutorial
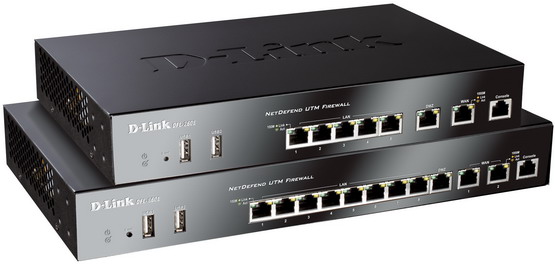
D-link DFL-260E / 860E / 1660/2560 / 2560G NetDefend UTM firewalls provide protection against viruses, unauthorized access and inappropriate content, as well as advanced management, monitoring and maintenance of the enterprise network.
Consider configuring these firewalls to work with the 3CX Phone System located on the local network behind NAT. Configuration is carried out according to the recommendations of 3CX, in particular, the required ports of 3CX Phone System services are published .
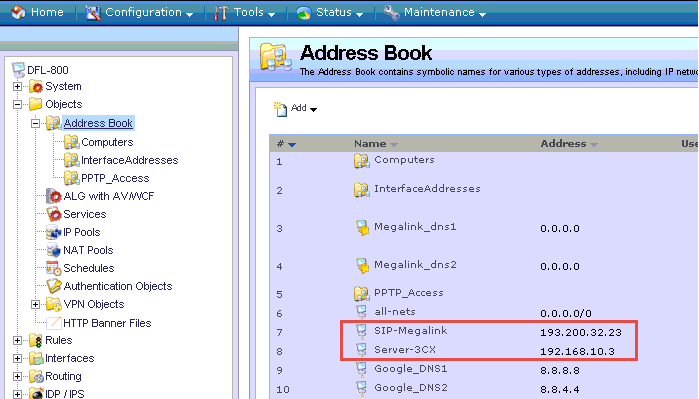
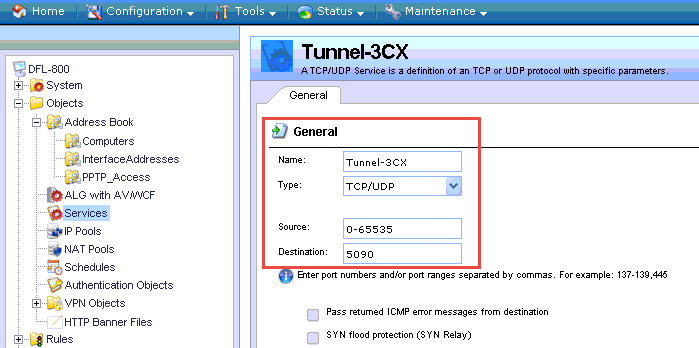
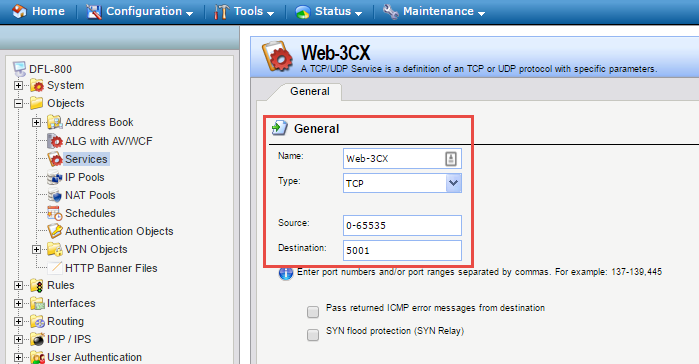
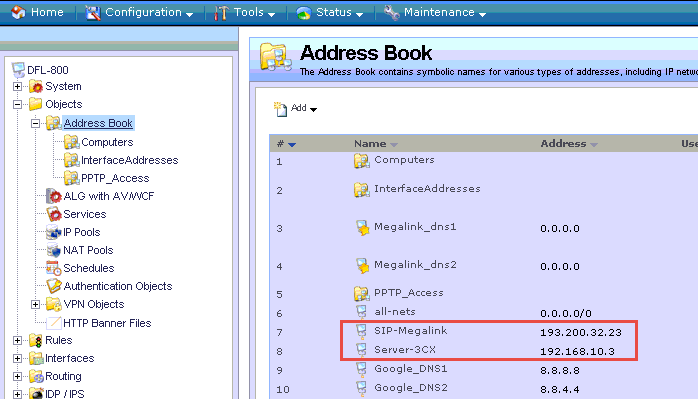
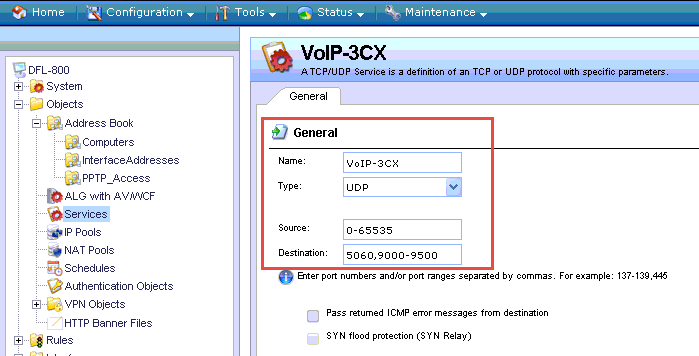
Add the IP addresses of the 3CX server (in our example 192.168.10.3 ) and the SIP server of the provider (in our example 193.200.32.23 ) into the Address Book D-link address book . Add a new type of service to the Services section . Describe in it the type of protocol and the ports used. The picture below shows the configuration of the SIP and RTP services. Also create a service for 3CX Tunnel. And finally, create a service for the 3CX HTTPS service. If the IIS web server is used in the installation, rather than Abyss, you can use the predefined description of the HTTPS service.


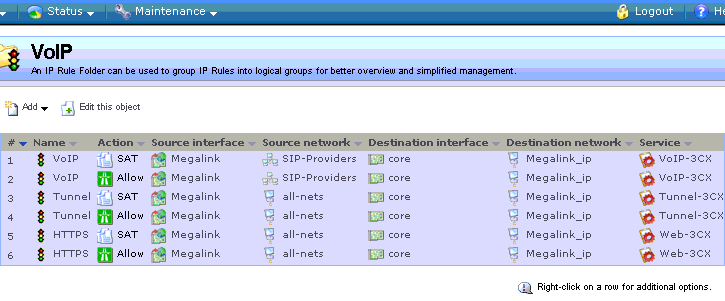
In the IP Rules section, create a folder, for example, VoIP , and there are six rules in it for passing VoIP traffic through the D-link DFL:
Consider the rules creation procedure using one of them as an example, for SIP and RTP traffic.
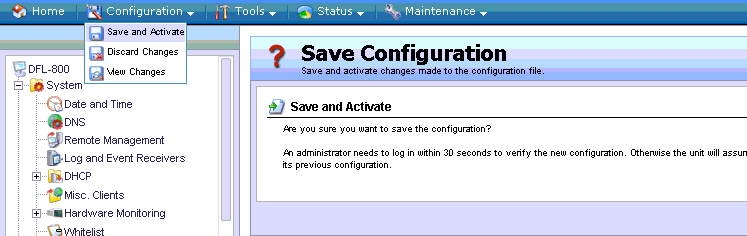
The first rule defines the SAT conversion. The second rule is similar to the first, but just allows this SAT conversion. The rules for the 3CX Tunnel and HTTPS services are similar, but with one difference - traffic is allowed from any network, and not just from the IP address of the SIP provider. This is done so that the 3CX Client user can connect to the system through 3CX Tunnel from anywhere in the world. To reduce the size of the article, we give an example only for the 3CX Tunnel service publishing rule. The rule for HTTPS is created in the same way. At the end of the setup, do not forget to save the changes and quickly reconnect to the device. Otherwise, the new configuration will not be saved!


Consider configuring these firewalls to work with the 3CX Phone System located on the local network behind NAT. Configuration is carried out according to the recommendations of 3CX, in particular, the required ports of 3CX Phone System services are published .
Defining Hosts and Services
Add the IP addresses of the 3CX server (in our example 192.168.10.3 ) and the SIP server of the provider (in our example 193.200.32.23 ) into the Address Book D-link address book . Add a new type of service to the Services section . Describe in it the type of protocol and the ports used. The picture below shows the configuration of the SIP and RTP services. Also create a service for 3CX Tunnel. And finally, create a service for the 3CX HTTPS service. If the IIS web server is used in the installation, rather than Abyss, you can use the predefined description of the HTTPS service.


Service Publishing
In the IP Rules section, create a folder, for example, VoIP , and there are six rules in it for passing VoIP traffic through the D-link DFL:
- 2 rules for SIP traffic from the host of the SIP provider. Do not open the SIP service of your 3CX server for the whole world!
- 2 rules for 3CX Tunnel traffic from any network
- 2 rules for HTTPS traffic from any network (server management and status and presence information for 3CX Clients)

Consider the rules creation procedure using one of them as an example, for SIP and RTP traffic.
The first rule defines the SAT conversion. The second rule is similar to the first, but just allows this SAT conversion. The rules for the 3CX Tunnel and HTTPS services are similar, but with one difference - traffic is allowed from any network, and not just from the IP address of the SIP provider. This is done so that the 3CX Client user can connect to the system through 3CX Tunnel from anywhere in the world. To reduce the size of the article, we give an example only for the 3CX Tunnel service publishing rule. The rule for HTTPS is created in the same way. At the end of the setup, do not forget to save the changes and quickly reconnect to the device. Otherwise, the new configuration will not be saved!