Static analysis of mobile applications

One of the stages of testing a mobile application is static analysis. Static application analysis is an application analysis without performing any application functions. The most convenient for me from open source frameworks is MobSF. Who cares, welcome under cat.
MobSF performs static analysis of applications: Android, Apple iOS and Windows Phone and dynamic analysis: Android applications only. How to conduct a dynamic analysis will tell in the next article dedicated to MobSF. A more detailed description and installation manual can be found at the link .
After installing MobSF - run the following batnichek to start the server (I wrote for myself, therefore, drive D).
d:
cd .\MobSF\
python .\manage.py runserver
Next you need to go to the address http [:] // 127.0.0.1:8000 and the main page opens (Fig. 1). There is not much functionality here:
- file upload;
- view reports on past scans;
- go to API documentation;
- transition to the GitHub project.

Fig. 1. Main page
After the file has been downloaded and analyzed, a page appears with the result of the analysis (Fig. 2). On the left is a menu that allows you to navigate quickly across the entire page (the result is simply volume). What useful information is in this screenshot:
- application hash sum;
- supported OS versions of Android;
- the number and types of components (exported or not) is important, as exported components can lead to critical vulnerabilities;
- the ability to view and download java- and smali-files that can be analyzed by other tools or manually;
- view the manifest file for analysis.
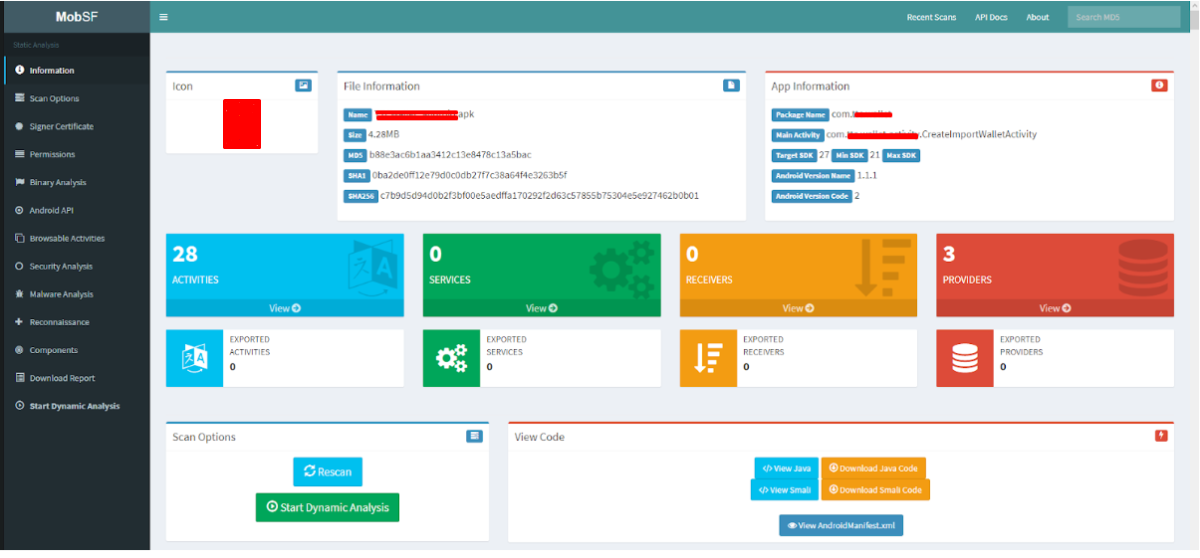
Fig. 2. The result of the analysis.
We go further. In fig. 3 shows information on the certificate that signed the application.
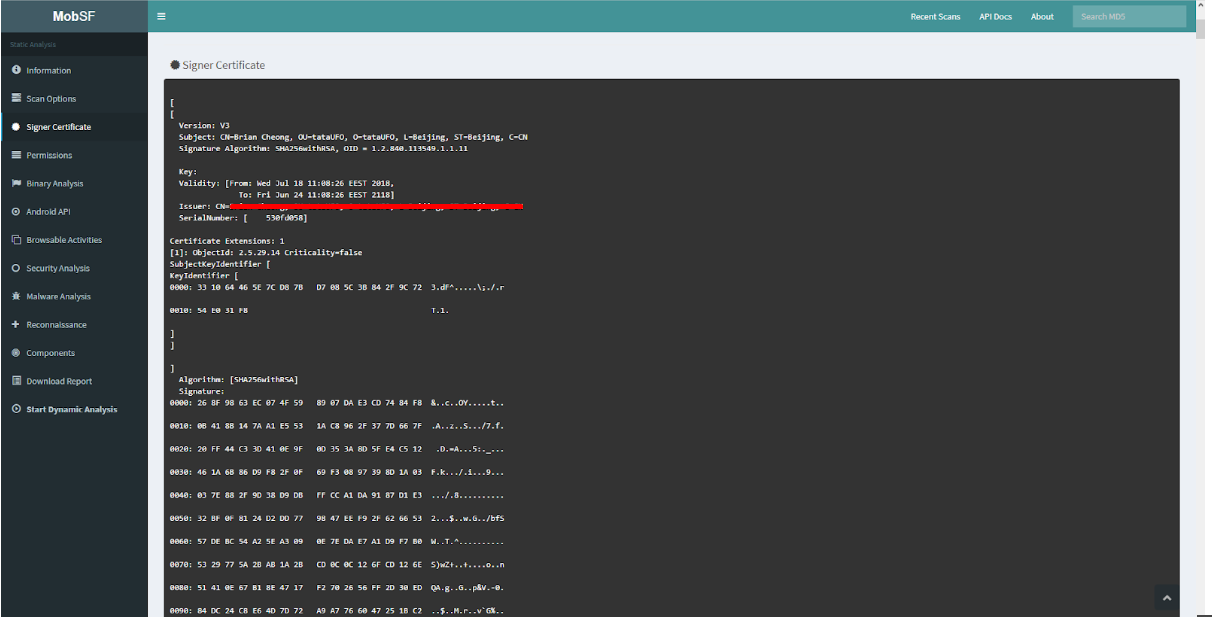
Fig. 3. Certificate Information
Next comes the description of permissions analysis, which are described in the AndroidManifest.xml file (Fig. 4). MobSF analyzes the permissions of the application, determines its status, for criticality and the description of permissions. Here you need to understand the architecture of the Android OS for the actual criticality of the application.
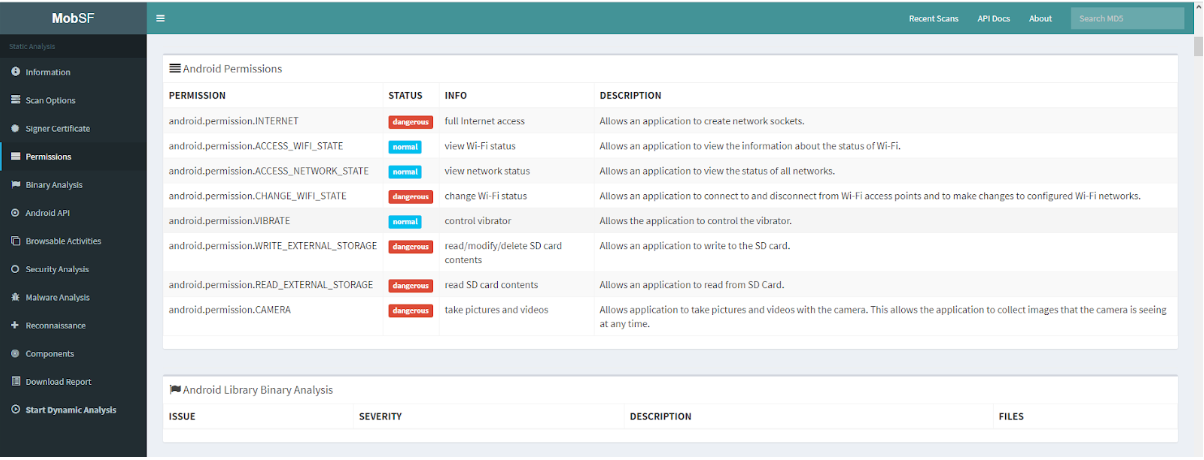
Fig. 4. Analysis of Android Permissions
The Security Analysis -> Code Analysis tab (Figure 5) shows the result of the analysis of java-code by a static analyzer, which identifies potential vulnerabilities, determines their severity and the files in which this type of vulnerability was found. In many ways, these results are false-positive, but you need to recheck it all.
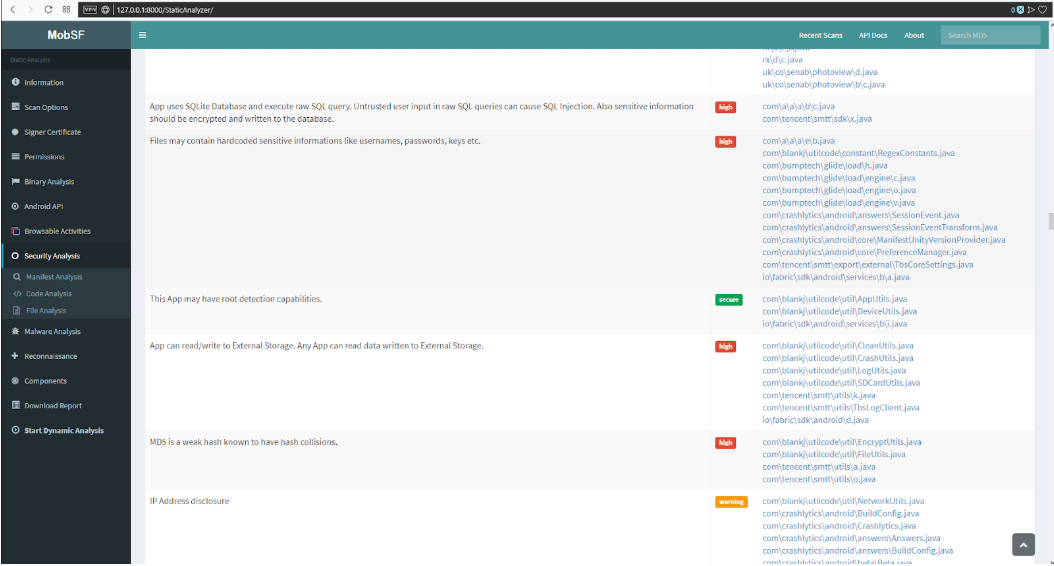
Fig. 5. Code analysis
The next tab (Fig. 6) is the analysis of files on the virustotal.com service. In this case, the file was not detected as infected.
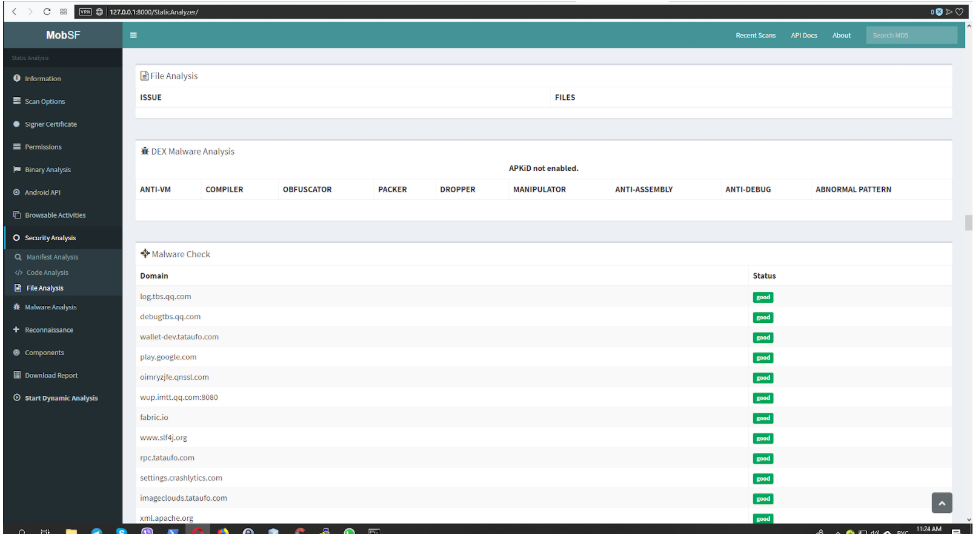
Fig. 6. File Analysis
The URLs tab (Fig. 7) displays the list of URLs, IP addresses and the files in which they are stored or called. This section analyzes where the application sends the data or where it stores the information.
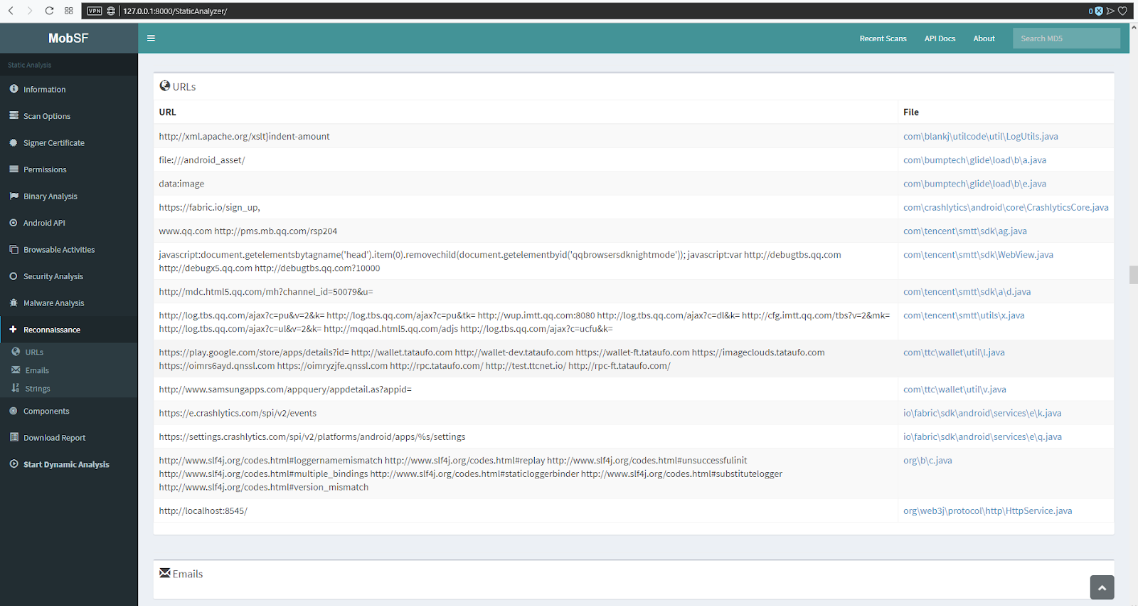
Fig. 7. URLs tab
The “Strings” tab (Fig. 8) analyzes text files that are located in the res directory. When analyzing an application, these files may contain hard-to-find accounts and other sensitive data. Although in my memory this was not.

Fig. 8. Analysis of text files
The “Components” tab (Fig. 9) displays a complete list of components (activity, service, content provider and receives), imported libraries and files without definition of the extension.
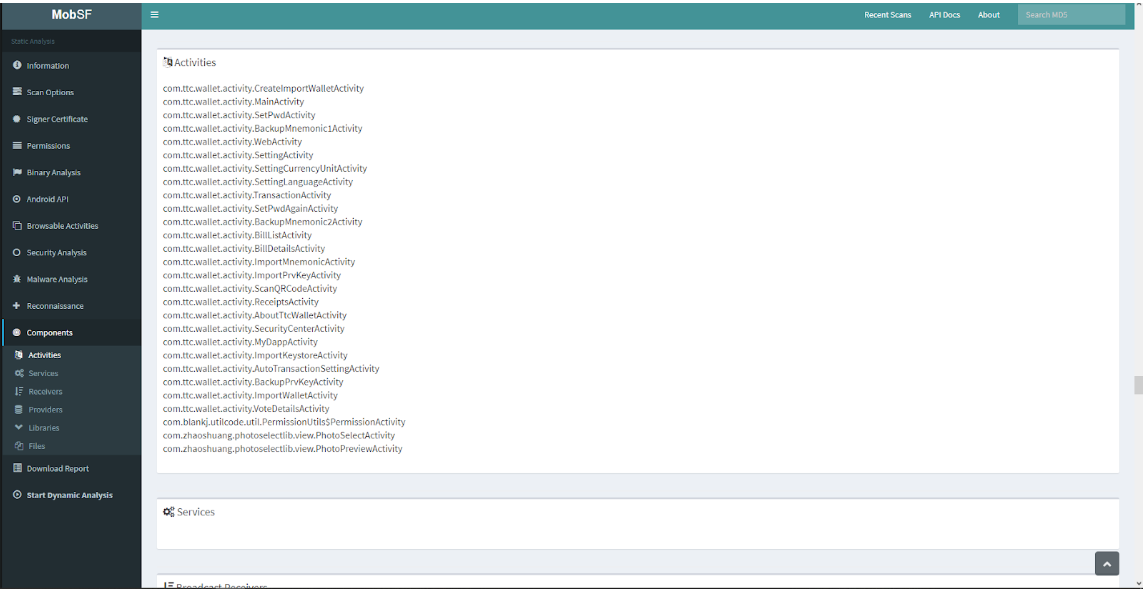
Fig. 9. List of components
Additionally, source code analysis can be performed using the VCG scanner static analyzer. VCG needs source code. The source code can be downloaded via the Download Java Code button (Figure 10). The file is downloaded in a zip archive. Next you need to extract the folder with the files from the archive (Fig. 11).
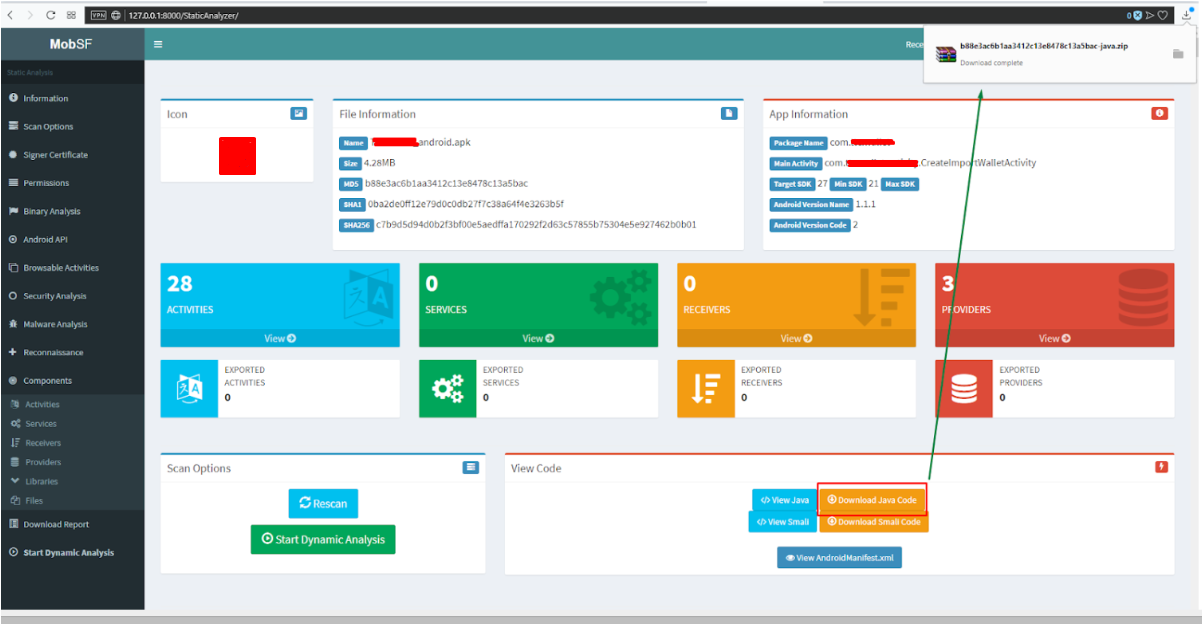
Fig. 10. Downloading the source code
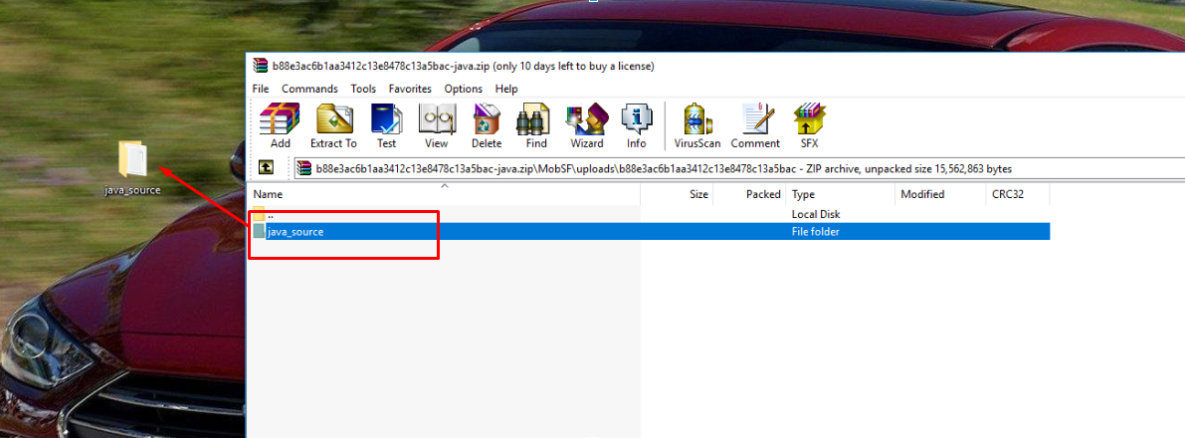
. 11. Source Code Extraction
Scanning the source code is done as follows:
- In the “Settings” tab, select “Java” - Figure 12.
- In the “File” tab, select “New Target Directory” - Figure 13.
- In the “Scan” tab, select “Full scan” - Figure 14.
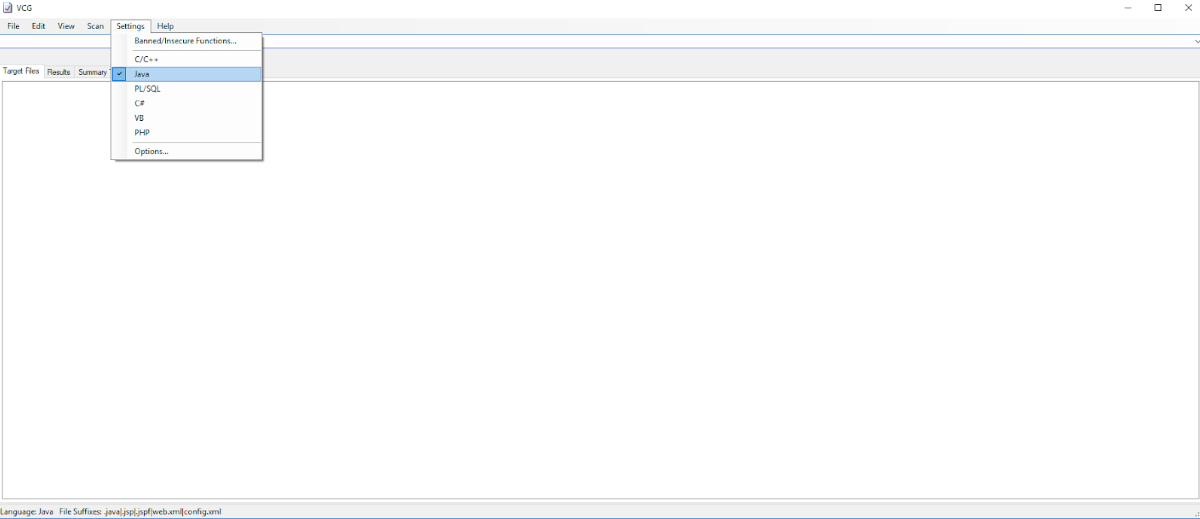
Fig.

Figure 12. Source code selection . 13. Uploading the file directory
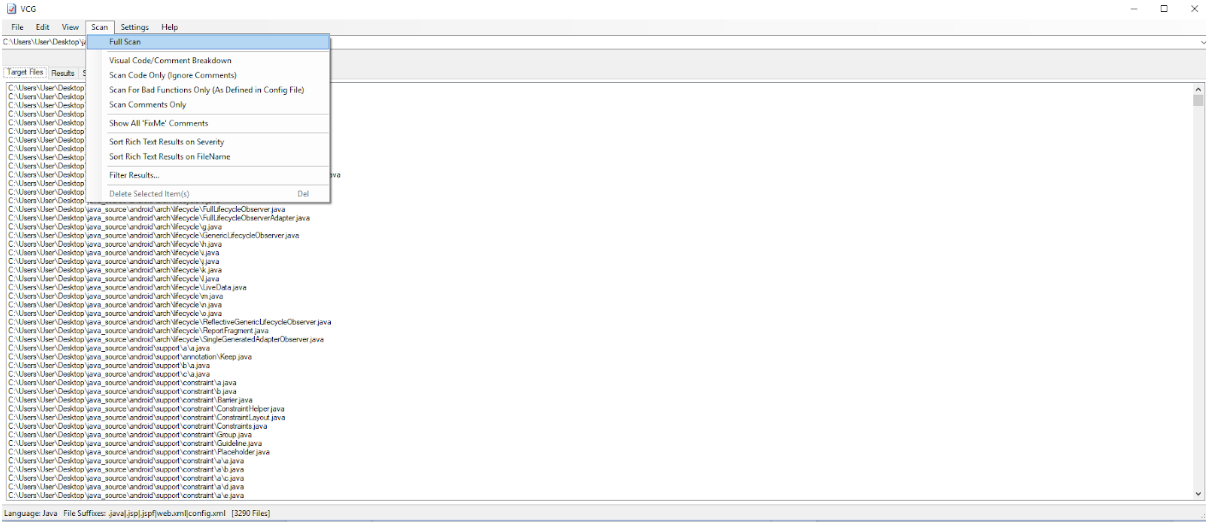
Fig. 14. Starting a scan.
After the scan is completed, the scanner issues the names of the vulnerability, its criticality, a brief description and a place in the source code (Fig. 15). You can get a complete list of vulnerabilities and sort them by their criticality (Fig. 16).

Fig. 15. Description of vulnerabilities
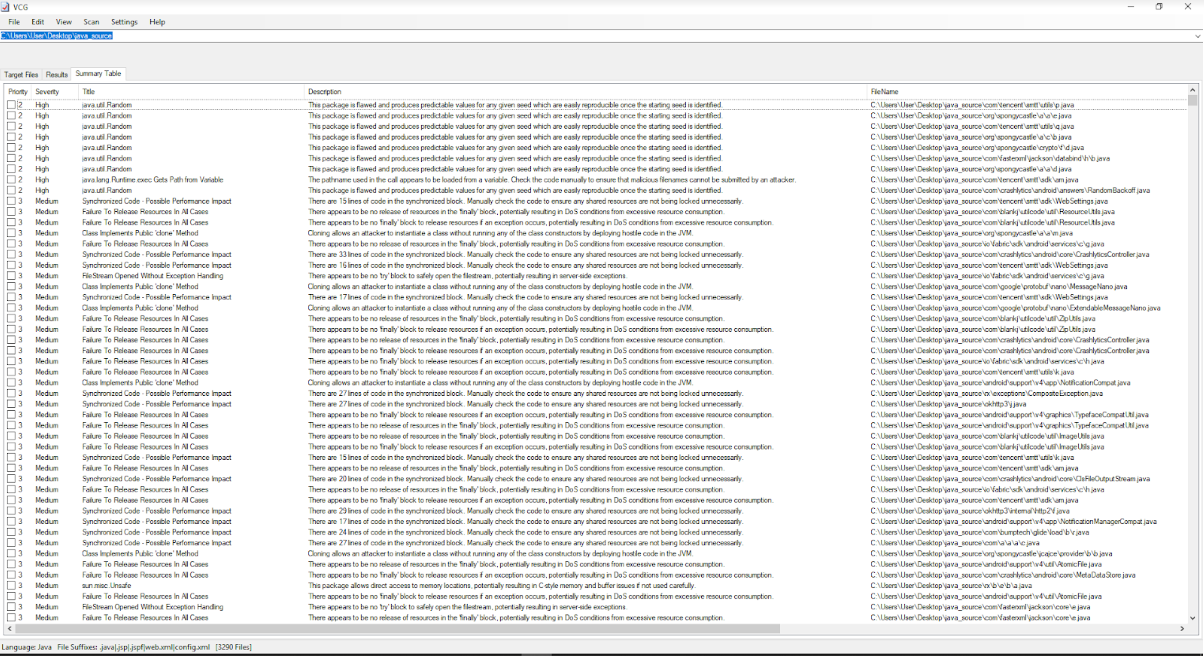
. 16. A complete list of vulnerabilities
Conclusion
Static analysis of an application and source code provides basic concepts about the application architecture and potential attack vectors. According to the methodology used in the company Hacken , it begins with the analysis of any applications from the client who came to Pentest.
