Qook: Port an old toy to Android and share it with the world

In fact, I really like logic toys. No, “three in a row”, “find a similar one” and other “feed the dog” I have little interest. But a truly complex contraption can calmly drag out for a couple of weeks. This is exactly what happened to me in 2004, when a brand new Sony mobile phone came into my hands. The ability of this T68I to make excellent calls, display color pictures and, according to rumors, even send its contacts via BT passed me unnoticed. But Q - no. And how many hours I sat behind the small display, frantically chasing the balls back and forth I no longer remember. But, I remember very well that the idea of writing a port of this game for any of the modern platforms has not let me go since the very first Hello World. True, all my attempts to rivet at least some kind of game engine in those good old days crashed about ... in general, they crashed about something. But now I have been writing Java and for a long time, and from some (very recent) times for Android, so the idea of a toy port finally found the opportunity to be realized. Want to see what it is and how it came about? Then - under cat.
What is the meaning of the game?
Q is a very complex logic game, the meaning of which is to roll all the colored balls on the playing field into the holes of the same color. Almost like billiards, yeah. And just like in billiards, balls move only in a straight line and only until the first obstacle, which can be either a motionless brick or another ball. Moreover, all levels are built in such a way as to exclude the simplest solutions - this is the beauty.
Still do not understand? Okay, here's a picture of the first level. Think, by the way, at your leisure how to pass this very level.

That's better? Then let's understand how to write it.
What are we writing on?
The first desire that occurred to me was to use some kind of physical engine. Well, Unity, for example. However, after I looked at how much such toys weigh and how much they eat batteries - the idea of using a whole engine just to beautifully roll the balls across the field died immediately. But the idea came up to write your own little engine specifically for this game, especially since it was this part that I didn’t get in my childhood. So we will reinvent our bike: with balls and low power consumption. By the way, we will invent it in Java, since Android. Go?
Select game elements
This is the first thing to do when writing code for anything. Let's see what we have ... so, look at the picture again ...
Yeah! On the field we have ... elements! Is it logical?
public abstract class Item implements Serializable {
    private Color color;
    public Item(Color color) {
        setColor(color);
    }
    public Color getColor() {
        return color;
    }
    private void setColor(Color color) {
        this.color = color;
    }
    @Override
    public String toString() {
        return "Item{" +
                "color=" + color +
                '}';
    }
}
What, where are the coordinates? How does the ball know where it is? Not his business.
Now go down a little deeper and see what kind of elements we have here
Block . Everything is simple with him: he is square, gray and does not move anywhere. Neither give nor take - the economy of some not very developed country. True, we must not forget that the block is an element.
public class Block extends Item {
    public Block() {
        super(Color.GRAY);
    }
}
Ball . A ball is a little more complicated: it is round, multi-colored and always rolls somewhere. And also an element.
public class Ball extends Item {
    public Ball(Color color) {
        super(color);
    }
}
Hole . Well, or a pocket - as you like best. We have something in between the ball and the block: it seems to be square and motionless, but also multi-colored.
public class Hole extends Item {
    public Hole(Color color) {
        super(color);
    }
}
So, we have already figured out the basic elements. Now, think about where they all lie
Writing level
We will deal with the levels themselves a little later, but for now we need a class that will be responsible for the arrangement of elements inside the field, since you and I decided that they themselves know nothing but color and name.
public class Level implements Serializable {
    private Item[][] field;
    private int ballsCount;
    public Level(Item[][] field) {
        this.field = field;
    }
}
Well, the beginning is good. We have some level that stores some kind of two-dimensional array of elements. Since all the balls-blocks-holes we have elements, so it is possible. We need the second variable in order not to count the number of balls remaining on the field each time. However, once honestly, you still have to count this business
private int countBallsOnLevel(Item[][] field) {
    int ballsCount = 0;
    for (Item[] aField : field) {
        for (int j = 0; j < field[0].length; j++) {
            if (aField[j] != null && aField[j].getClass().equals(Ball.class)) {
                ballsCount++;
            }
        }
    }
    return ballsCount;
}
Quadratic complexity, yeah. That is why I do not want to recount this value after the next move. Well, add one line to the constructor
this.ballsCount = countBallsOnLevel(field);
So, the level is ready. Now the plan is the most interesting
Writing an engine
Let all the game mechanics have a special class for us. Well, for example, Field, which will store a variable level configuration, as well as the number of balls remaining on the field
private Level level;
private int ballsCount;
public Field(Level level) {
    this.level = level;
    this.ballsCount = level.getBallsCount();
}
Excellent. Now briefly distract from the engine and write a small enum
public enum Direction {
    LEFT,
    RIGHT,
    UP,
    DOWN,
    NOWHERE
}
Yeah, the direction the ball is moving. Now let’s digress again and write a very small classic that will store the coordinates of the desired element on the field. What for? And then to write less
public class Coordinates {
    private int horizontal;
    private int vertical;
    public Coordinates(int horizontal, int vertical) {
        this.horizontal = horizontal;
        this.vertical = vertical;
    }
}
Hooray, you can finally go back to the engine and continue our overwork.
The first thing you want to do is to teach our field to move balls.
private Coordinates moveRight(int xCoord, int yCoord) {
    try {
        while (level.getField()[yCoord][xCoord + 1] == null) {
            level.getField()[yCoord][xCoord + 1] = level.getField()[yCoord][xCoord];
            level.getField()[yCoord][xCoord++] = null;
        }
    } catch (ArrayIndexOutOfBoundsException ex) {
    }
    return new Coordinates(xCoord, yCoord);
}
This method, for example, will roll the ball until there is some decent obstacle. Well, or until the field ends. By the way, this is perhaps the only case when the suppression of exceptions in general is somehow justified.
No more complicated than this - other methods are written to move the ball to the left, up and down. You just need to learn how to call these methods somewhere a level higher.
private Coordinates moveItem(Coordinates coordinates, Direction direction) {
    int horizontal = coordinates.getHorizontal();
    int vertical = coordinates.getVertical();
    if (direction.equals(Direction.NOWHERE) || level.getField()[vertical][horizontal] == null) {
        return null;
    }
    Class clazz = level.getField()[vertical][horizontal].getClass();
    if (!clazz.equals(Ball.class)) {
        return null;
    }
    switch (direction) {
        case RIGHT:
            return moveRight(horizontal, vertical);
        case LEFT:
            return moveLeft(horizontal, vertical);
        case UP:
            return moveUp(horizontal, vertical);
        case DOWN:
            return moveDown(horizontal, vertical);
    }
    return null;
}
Well, here are our coordinates come in handy. I told you to write less.
So, more or less learned to ride. Now we will learn to roll. All the same, only the method will also return the result of the operation - did you manage to eat the ball or not
private boolean acceptRight(Coordinates coordinates) {
    try {
        int horizontal = coordinates.getHorizontal();
        int vertical = coordinates.getVertical();
        Item upItem = level.getField()[vertical][horizontal + 1];
        Item item = level.getField()[vertical][horizontal];
        if (upItem == null || !upItem.getClass().equals(Hole.class) || !(upItem.getColor().equals(item.getColor()))) {
            return false;
        }
        level.getField()[vertical][horizontal] = null;
    } catch (ArrayIndexOutOfBoundsException ex) {
    }
    return true;
}
And exactly the same wrapper level up
private boolean acceptHole(Coordinates coordinates, Direction direction) {
    boolean isAccepted = false;
    switch (direction) {
        case UP:
            isAccepted = acceptUp(coordinates);
            break;
        case DOWN:
            isAccepted = acceptDown(coordinates);
            break;
        case RIGHT:
            isAccepted = acceptRight(coordinates);
            break;
        case LEFT:
            isAccepted = acceptLeft(coordinates);
            break;
    }
    if (!isAccepted) {
        return false;
    }
    catchBall();
    return checkWin();
}
After the ball turned out to eat, you still need to count the number of remaining. No, there is not O (N).
private void catchBall() {
    ballsCount--;
}
Why? Because in one move we can only move one ball, which means we can’t roll anymore. Checking that the level is completed is no more difficult
private boolean checkWin() {
    return ballsCount == 0;
}
Well, now we can roll and roll balls around the field. It remains to learn how to walk
public boolean makeTurn(Coordinates coordinates, Direction direction) {
    Coordinates newCoordinates = moveItem(coordinates, direction);
    return newCoordinates != null && acceptHole(newCoordinates, direction);
}
Nothing new: they took the coordinates with the direction, if it turned out, moved the ball to a new place and drove it into the hole, if it was found there. If found, return true.
Well, that's the whole engine. And was it worth clinging to some unity here because of this?
Now we just need to teach the phone to display the whole thing on the screen.
Writing Your View
The main element of the application interface for Android is View. View, that is. This is a button, and an input field and ... our playing field. True, it is strange to hope that someone has already written it for us. So you have to do it yourself. To do this, we will create a whole class and inherit it from the built-in View of the android to gain access to its life cycle, the ability to place this business on the screen, and much more
public class FieldView extends View {
    private final double ROUND_RECT_SIZE = 0.15;
    private final int PADDING_DIVIDER = 4;
    int paddingSize = 0;
    private int elementSize;
    private Field field;
    private Size fieldSize;
    private Size maxViewSize;
    public FieldView(Context context, AttributeSet attrs) {
        super(context, attrs);
    }
}
Why constants are needed here, we will figure it out later, but for now we’ll think about how large the view should be. It is clear that it should occupy as much space as possible on the screen, but not crawl out of it. And it is clear that the size of the elements must be proportional to the size of the view itself. At the same time, we can’t ask something constant - we can’t write our view under a couple of thousand different phones. But we can do something with the view when placing it on the screen. Since we will have math_parent dimensions in XML markup, we can determine runtime for this very size.
public Size countFieldSize() {
    if (maxViewSize == null) {
        maxViewSize = new Size(this.getWidth(), this.getHeight());
    }
    int horizontalElementsNum = field.getField()[0].length;
    int verticalElementsNum = field.getField().length;
    int maxHorizontalElSize = maxViewSize.getWidth() / horizontalElementsNum;
    int maxVerticalElSize = maxViewSize.getHeight() / verticalElementsNum;
    this.elementSize = (maxHorizontalElSize < maxVerticalElSize) ? maxHorizontalElSize : maxVerticalElSize;
    int newWidth = this.elementSize * horizontalElementsNum;
    int newHeight = this.elementSize * verticalElementsNum;
    return new Size(newWidth, newHeight);
}
Our size is about the same as the coordinates, only needed to store the sizes according to Ox and Oy. The algorithm is simple: we looked if someone had determined these sizes before us, got the height and width in pixels, figured out how much one element will occupy horizontally and vertically, chose the smaller one, and recalculated the size of the view itself by multiplying the element size by their number by row and column.
And, well, do not forget to call this thing:
@Override
protected void onLayout(boolean changed, int left, int top, int right, int bottom) {
    super.onLayout(changed, left, top, right, bottom);
    Size countedFieldSize = countFieldSize();
    if (fieldSize == null || !fieldSize.equals(countedFieldSize)) {
        this.fieldSize = countedFieldSize;
        setFieldSize(this.fieldSize);
        paddingSize = (int) (Math.sqrt(elementSize) / PADDING_DIVIDER);
    }
}
What does setFieldSize do? Yes please!
public void setFieldSize(Size size) {
    LinearLayout.LayoutParams params = new LinearLayout.LayoutParams(size.getWidth(), size.getHeight());
    params.gravity = Gravity.CENTER_HORIZONTAL;
    this.setLayoutParams(params);
}
They took a view, and attached dimensions to it. What do you want?
So, with the sizes we decided. Now we need to somehow draw the playing field. It is not complicated and is done in onDraw. True, before drawing something, one would have to find the game elements themselves somewhere.
Draw
The first thing that occurred to me was to get a whole bunch of markup files in drawable and put them on canvas in coordinates. Unfortunately, this ingenious idea broke about the impossibility of setting the relative sizes of the elements. That is, I can make the block rounded corners and set them in dp. And they will actually be rounded. The only problem is that the size of the element in us varies depending on the number of these same elements on the field. And if we have a field of 6 * 6 (the minimum size in the game), the blocks will be square with slightly rounded corners. And if the field we have is already 13 * 13 (maximum size) - it will be slightly square balls. Ugly.
However, I like the idea of drawing on canvas with ready-made elements more than bothering with some kind of low-level drawing, like drawRect. Let's do a bunch of elements?
We will have a separate method for generating Drawable (although for some reason I wanted to take it to a separate factory) selectDrawable, which takes an instance of the element, finds out who it is and makes drawable for it. For example, a block will be drawn like this:
Class clazz = item.getClass();
Color color = item.getColor();
if (clazz.equals(Block.class)) {
    GradientDrawable bgShape = new GradientDrawable();
    bgShape.setColor(ContextCompat.getColor(getContext(), R.color.gray));
    bgShape.setCornerRadius((float) (elementSize * ROUND_RECT_SIZE));
    return bgShape;
}
Well, the constants came in handy. Now the rounding radius for us depends on the size of the element itself. Just what we wanted.
Now let's look at how drawable is built for a ball, which we have multi-colored:
if (clazz.equals(Ball.class)) {
    GradientDrawable bgShape = new GradientDrawable();
    bgShape.setColor(ContextCompat.getColor(getContext(), R.color.gray));
    bgShape.setCornerRadius(elementSize);
    switch (color) {
        case GREEN:
            bgShape.setColor(ContextCompat.getColor(getContext(), R.color.green));
            return bgShape;
        case RED:
            bgShape.setColor(ContextCompat.getColor(getContext(), R.color.red));
            return bgShape;
        case BLUE:
            bgShape.setColor(ContextCompat.getColor(getContext(), R.color.blue));
            return bgShape;
        case YELLOW:
            bgShape.setColor(ContextCompat.getColor(getContext(), R.color.yellow));
            return bgShape;
        case PURPLE:
            bgShape.setColor(ContextCompat.getColor(getContext(), R.color.purple));
            return bgShape;
        case CYAN:
            bgShape.setColor(ContextCompat.getColor(getContext(), R.color.cyan));
            return bgShape;
    }
}
Yes, not much more complicated. First they drew a ball, and then they poured it with the necessary paint. Why is there a switch and why you can’t just set the color with what we got out of the ball?
Because these are different colors. The color that is stored in the element is a regular enum, which is from Java, and what accepts drawable as the color is a normal android resource with a normal string value. For example, here's a little red one:
#D81B60 Gluing one another is a bad idea, because one day it will come to my mind that red is not blue enough and it’s time to play around with fonts in general and have to rewrite the whole thing instead of just fixing the resource file.
Well, for starters - build a drawable from a hole:
if (clazz.equals(Hole.class)) {
    GradientDrawable bgShape = new GradientDrawable();
    bgShape.setCornerRadius((float) (elementSize * ROUND_RECT_SIZE));
    switch (color) {
        case GREEN:
            bgShape.setColor(ContextCompat.getColor(getContext(), R.color.green));
            return bgShape;
        case RED:
            bgShape.setColor(ContextCompat.getColor(getContext(), R.color.red));
            return bgShape;
        case BLUE:
            bgShape.setColor(ContextCompat.getColor(getContext(), R.color.blue));
            return bgShape;
        case YELLOW:
            bgShape.setColor(ContextCompat.getColor(getContext(), R.color.yellow));
            return bgShape;
        case PURPLE:
            bgShape.setColor(ContextCompat.getColor(getContext(), R.color.purple));
            return bgShape;
        case CYAN:
            bgShape.setColor(ContextCompat.getColor(getContext(), R.color.cyan));
            return bgShape;
    }
}
Again, nothing new: they drew a hole, painted it and gave it to the supplicant.
So, didn’t you forget anything? Hmm ... Holes, balls, blocks ... And an empty place? What, for example, will happen if null is encountered in the array?
if (item == null) {
    GradientDrawable bgShape = new GradientDrawable();
    bgShape.setColor(ContextCompat.getColor(getContext(), android.R.color.transparent));
    bgShape.setCornerRadius((float) (elementSize * ROUND_RECT_SIZE));
    return bgShape;
}
Yes, there will be nothing new, because this is exactly the same beautiful rounded square. Sorry, just invisible.
Done, we are able to build elements. What did we stop there? Ah ... yes! On how to draw them
@Override
protected void onDraw(Canvas canvas) {
    if (field == null) {
        return;
    }
    for (int i = 0; i < field.getField().length; i++) {
        for (int j = 0; j < field.getField()[0].length; j++) {
            Drawable d = selectDrawable(field.getField()[i][j]);
            d.setBounds(j * elementSize + paddingSize, i * elementSize + paddingSize, (j + 1) * elementSize - paddingSize, (i + 1) * elementSize - paddingSize);
            d.draw(canvas);
        }
    }
}
Here you go. We walked around the field, for each element we will find its graphical representation, set its sizes and indents from each other and draw it on the canvas. By the way, it’s interesting that here it is drawable that draws on canvas, and not canvas draws drawable on itself. In order to do this, you would have to convert drawable to bitmap each time, and this is a long time.
Let's look at what happened? To do this, we’ll write some kind of test level, where the elements are set directly in the constructor (remove, remove, do not worry)
But you don’t need to write like that
public class Level {
    private Item[][] field;
    public Item[][] getField() {
        return field;
    }
    public Level() {
        field = new Item[6][6];
        field[0][0] = new Block();
        field[0][1] = new Block();
        field[0][2] = new Hole(Color.RED);
        field[0][3] = new Block();
        field[0][4] = new Block();
        field[0][5] = new Block();
        field[1][0] = new Block();
        field[1][1] = new Ball(Color.RED);
        field[1][2] = new Ball(Color.GREEN);
        field[1][3] = new Ball(Color.YELLOW);
        field[1][4] = new Ball(Color.CYAN);
        field[1][5] = new Block();
        field[2][0] = new Block();
        field[2][1] = new Hole(Color.GREEN);
        field[2][2] = new Hole(Color.YELLOW);
        field[2][3] = new Hole(Color.PURPLE);
        field[2][4] = new Hole(Color.CYAN);
        field[2][5] = new Hole(Color.BLUE);
        field[3][0] = new Block();
        field[3][1] = new Ball(Color.PURPLE);
        field[3][5] = new Block();
        field[4][0] = new Block();
        field[4][1] = new Block();
        field[4][3] = new Ball(Color.BLUE);
        field[4][5] = new Block();
        field[5][1] = new Block();
        field[5][2] = new Block();
        field[5][3] = new Block();
        field[5][4] = new Block();
    }
}
And now we will attach our view to some activity and start this business.
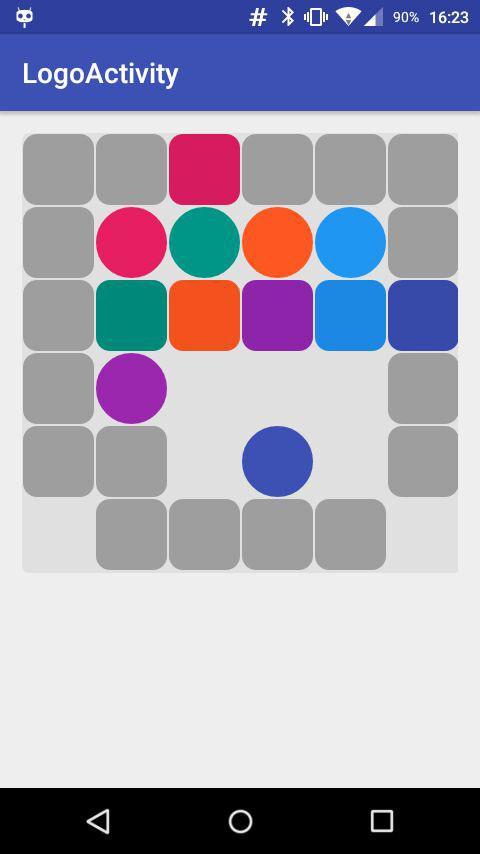
Finally, it shows something!
And now, inspired by such a beautiful picture, we will teach our view of interactivity
We drive balls
Since we already have an engine that knows how to move elements, we only have to find a way to call the appropriate methods somehow interacting with the view.
Interact with the playing field in different ways. If users are not at all sorry, you can even make the control the same as in the original game - attach a virtual joystick and click on it until blue. And you can recall that the native gesture for the touch screen is still swipe and swipe balls in the right direction. Got it, what were we going to do? Then let's go
In general, there is a built-in GestureManager for Android, but either I didn’t understand how to use it, or it worked on my test device anyway, but for some reason I didn’t launch it so that it would recognize my curved handles came out. So now let's take and write your own.
So, our balls can move in exactly four directions: up, down, left and right. True, besides this, they may not move anywhere at all, but this is not at all interesting. So in order to determine the direction of movement of the ball, we need to recognize only 4 simple gestures.
Without really bothering, we begin to write another method:
public Direction getSwipeDirection(float downHorizontal, float upHorizontal, float downVertical, float upVertical) {
    float xDistance = Math.abs(upHorizontal - downHorizontal);
    float yDistance = Math.abs(upVertical - downVertical);
    double swipeLength = getSwipeLength(xDistance, yDistance);
    if (swipeLength < elementSize / 2) {
        return Direction.NOWHERE;
    }
    if (xDistance >= yDistance) {
        if (upHorizontal > downHorizontal) {
            return Direction.RIGHT;
        }
        return Direction.LEFT;
    }
    if (yDistance > xDistance) {
        if (upVertical > downVertical) {
            return Direction.DOWN;
        }
        return Direction.UP;
    }
    return Direction.DOWN;
}
Direction is Enum, which we described above, and everything else is quite simple: we got 4 coordinates (where we got them from isn’t important yet) and calculated the distance both vertically and horizontally. Then they remembered the geometry course from high school and found the length of the swipe itself. If it’s very small, we’ll think that the user has nothing to do with it and we won’t do anything. If the svayp was good, we will determine where it was so good and return the direction to the user. Cool? I like it too.
Well, let's say we learned to determine the direction of the swipe in half with grief. And which of the balls we, sorry, svaypnul? Let's get it right.
So, we have the coordinates of the point of tangency (we also have the coordinates of the separation point, but what will we do with them?) And by these coordinates we need to find the element ... Hmm.
public Coordinates getElementCoordinates(float horizontal, float vertical) {
    float xElCoordinate = horizontal / elementSize;
    float yElCoordinate = vertical / elementSize;
    return new Coordinates((int) xElCoordinate, (int) yElCoordinate);
}
Nothing unusual. If all the elements are of the same size, the size of which we know (we determined ourselves), and we already calculated the size of the field, all that remains is to take and divide. And working with an element by its coordinates is the task of the engine.
Now we know for sure that we swiped and even guess where. It remains only to convey the whole thing to the engine and let it rumble. But this is not the task of the view. Her business is to show, and, to process some actions, it would be necessary either in fragments or in activity. We’re sparse with fragments, but there is some activity. We’ll hang it on the onTouchLictener view.
private OnTouchListener onFieldTouchListener = new OnTouchListener() {
    @Override
    public boolean onTouch(View v, MotionEvent event) {
        switch (event.getAction()) {
            case MotionEvent.ACTION_DOWN:
                downHorizontal = event.getX();
                downVertical = event.getY();
                break;
            case MotionEvent.ACTION_UP:
                upHorizontal = event.getX();
                upVertical = event.getY();
                boolean isWin = fieldView.getField().makeTurn(
                        fieldView.getElementCoordinates(downHorizontal, downVertical),
                        fieldView.getSwipeDirection(downHorizontal, upHorizontal, downVertical, upVertical)
                );
}
Here you go. When touching, we will save the coordinates, when you release the display, we will get a couple more coordinates, and then - collect everything in a heap and pass it to the view - let it understand it. View will give the whole thing further, get a Boolean result, which is neither more nor less, but the sign of completion of the level will return to us. It remains only to process it well and do not forget to tell the view that you need to redraw.
Add to the listener:
fieldView.invalidate();
        if (isWin) {
            animateView(fieldView);
            try {
                levelManager.finishLevel();
                openLevel(levelManager.getCurrentLevelNumber());
            } catch (GameException ex) {
                onMenuClick();
            }
        }
}
return true;
We checked and even did something. What exactly we did, we will understand a little later, but for now, let's play around. We will remove everything superfluous from our Level, leave only two balls and try to drive one of them into the pocket
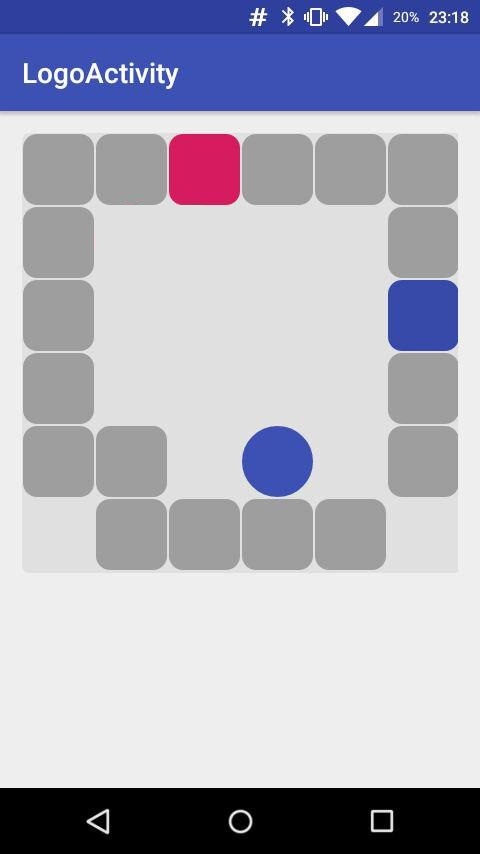
Hehe. It even works. Then move on
Looking for levels
Here you go. We wrote a working engine, we learned to draw it beautifully, now it remains only to decide what exactly we learned to draw. With levels, yeah.
Initially, I was not going to draw the levels myself, because our goal is to port the game, and not write a new one. So, you need to take the original Q somewhere, shake it well, unhook three or four Sony lawyers (well, it's still her toy) and voila - you're done.
That's just the search for the original toy did not end there. The T68 itself has long been gone, for some reason there were no pictures on the network, and finding another original device in 2016 ... it is difficult to find, in general. Tragedy.
However, while I was looking for the original, I accidentally stumbled upon the port of this toy under Windows 98. And how great was my surprise when I realized that the levels for this toy are not only stripped from the original, but also lie in ordinary txt files, where each symbol denotes either a block, a ball, or a hole. After talking with the author and securing his consent to use, I took them to myself with a clear conscience and even tried to understand what to do with them.
Just like that, you can certainly take and put txt files into a toy, whoever would be against it. But to get my engine to work with them - we still have to try. It must be so. We will try
Writing Level Manager
It sounds beautiful, in practice - another class that will make normal level objects from txt files and give them to someone they say. And at the same time it will deal with what level we have at the current level, how many of them all are there and other amenities of life.
Since the manager keeps some state in us (for example, the number of the current level), it will be unpleasant if, at some point, we foolishly make a new one in which this state itself will not exist (the old manager will be especially unpleasant, which the system will shoot safely). So let's make it better singleton, out of harm's way
public class  LevelManager {
    private static final String LEVELS_FOLDER = "levels";
    private static final String LEVEL_FILE_EXTENSION = ".lev";
    private static final int EMPTY_CELL = 0;
    private static final int BLOCK_CELL = 1;
    private static final int GREEN_BALL_CELL = 2;
    private static final int RED_BALL_CELL = 3;
    private static final int BLUE_BALL_CELL = 4;
    private static final int YELLOW_BALL_CELL = 5;
    private static final int PURPLE_BALL_CELL = 6;
    private static final int CYAN_BALL_CELL = 7;
    private static final int GREEN_HOLE_CELL = 22;
    private static final int RED_HOLE_CELL = 33;
    private static final int BLUE_HOLE_CELL = 44;
    private static final int YELLOW_HOLE_CELL = 55;
    private static final int PURPLE_HOLE_CELL = 66;
    private static final int CYAN_HOLE_CELL = 77;
    private static Context context;
    private static SharedSettingsManager sharedSettingsManager;
    private static LevelManager instance;
    private LevelManager() {
    }
    public static LevelManager build(Context currentContext) {
        context = currentContext;
        sharedSettingsManager = SharedSettingsManager.build(currentContext);
        if (instance == null) {
            instance = new LevelManager();
        }
        return instance;
    }
What is this bunch of constants? These are elements of the legend. In fact, a

And each digit means something. And in order not to get into the help of the game every time, we will introduce constants that are clear to the eye and will work only with them. About sharedSettingsManager, which for some reason is there, I'll tell you another time, but for now, let's teach our manager to open a level and build a decent object from it.
First, let's try to get the level from the file and somehow parse it. To pull various numbers and letters from the data stream, we have a Scanner, so we will set it on a file
private Scanner openLevel(int levelNumber) throws IOException {
    AssetManager assetManager = context.getAssets();
    InputStream inputStream = assetManager.open(
            LEVELS_FOLDER +
                    "/" +
                    String.valueOf(levelNumber) +
                    LEVEL_FILE_EXTENSION);
    BufferedReader bufferedReader =
            new BufferedReader
                    (new InputStreamReader(inputStream));
    return new Scanner(bufferedReader);
}
Yes, I almost forgot. All levels we have are stored to the android assets, getting them out of there is no problem, however, only if we have a context. And they are called by their numbers. Therefore, we only need to transfer the number of the required level to get a ready-made scanner that works with the desired file.
Now - we will convert the legend element to Item.
private Item convertLegendToItem(int itemLegend) {
    switch (itemLegend) {
        case EMPTY_CELL:
            return null;
        case BLOCK_CELL:
            return new Block();
        case GREEN_BALL_CELL:
            return new Ball(Color.GREEN);
        case RED_BALL_CELL:
            return new Ball(Color.RED);
        case BLUE_BALL_CELL:
            return new Ball(Color.BLUE);
        case YELLOW_BALL_CELL:
            return new Ball(Color.YELLOW);
        case PURPLE_BALL_CELL:
            return new Ball(Color.PURPLE);
        case CYAN_BALL_CELL:
            return new Ball(Color.CYAN);
        case GREEN_HOLE_CELL:
            return new Hole(Color.GREEN);
        case RED_HOLE_CELL:
            return new Hole(Color.RED);
        case BLUE_HOLE_CELL:
            return new Hole(Color.BLUE);
        case YELLOW_HOLE_CELL:
            return new Hole(Color.YELLOW);
        case PURPLE_HOLE_CELL:
            return new Hole(Color.PURPLE);
        case CYAN_HOLE_CELL:
            return new Hole(Color.CYAN);
    }
    return null;
}
One big-big switch and nothing complicated.
And finally, we’ll learn how to process the entire level:
public Level getLevel(int levelNumber) throws IOException {
    Scanner scanner = openLevel(levelNumber);
    int levelWidth = scanner.nextInt();
    int levelHeight = scanner.nextInt();
    Item levelMatrix[][] = new Item[levelHeight][levelWidth];
    for (int i = 0; i < levelHeight; i++) {
        for (int j = 0; j < levelWidth; j++) {
            levelMatrix[i][j] = convertLegendToItem(scanner.nextInt());
        }
    }
    Level level = new Level(levelMatrix);
    sharedSettingsManager.setCurrentLevel(levelNumber);
    return level;
}
We took the number - returned the level. Wonders. But, in addition to opening the level, it is also necessary to “complete” it at the moment when there are no balls left. To determine whether the balls remained there or not is the task of the engine, but we will process the level that has suddenly ended
public void finishLevel() {
    sharedSettingsManager.setCurrentLevel(
            sharedSettingsManager.getCurrentLevel() + 1
    );
    if (sharedSettingsManager.getCurrentLevel() > sharedSettingsManager.getMaxLevel()) {
        throw new GameException(GameExceptionCodes.INCORRECT_LEVEL);
    }
}
Yeah, they made a note that this level was passed, changed the number of the current level and, if all levels ended, they spat an exception. Cute? Then try to run our toy on, for example, the second level
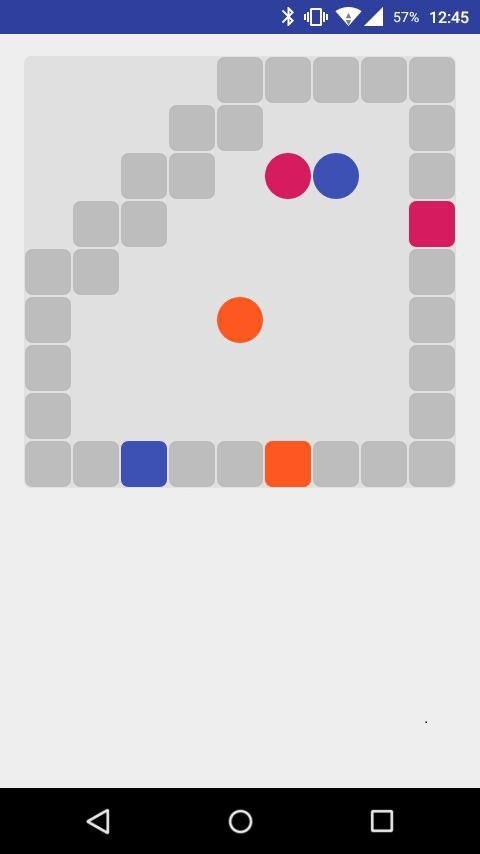
Xe! And the truth is, it works. Then it's time to learn how to save user achievements
Another manager
If the user is forced to go through all the levels every time, the user will be angry and dissatisfied. So you have to somehow store the value of the current and last available levels so that the data is not lost between starts.
To store such simple gizmos, Android has SharedSettings. Usually, it is used to store settings, but it will do for us too. So get another manager
public static final String LAST_LEVEL = "current_level";
public static final String MAX_LEVEL = "max_level";
public static final String WAS_RAN_BEFORE = "was_ran_before";
private static final String APP_PREFS = "qook_prefs";
public static Context context;
public static SharedSettingsManager instance;
SharedPreferences sharedPreferences;
private SharedSettingsManager() {
    sharedPreferences = context.getSharedPreferences(APP_PREFS, Context.MODE_PRIVATE);
}
Also singleton, yeah. Because you never know where we plunge into, and find out whether threadsafe themselves sharedsettings for some reason have no particular desire.
Now, we will learn to give out the current and maximum level.
Time
public int getMaxLevel() {
    return sharedPreferences.getInt(MAX_LEVEL, 1);
}
And two
public int getCurrentLevel() {
    return sharedPreferences.getInt(LAST_LEVEL, 1);
}
Now, try to write them back. There is no particular desire to call somewhere above two separate methods, so let's do this
private void setMaxLevel(int maxLevel) {
    SharedPreferences.Editor editor = sharedPreferences.edit();
    editor.putInt(MAX_LEVEL, maxLevel);
    editor.apply();
}
public void setCurrentLevel(int currentLevel) {
    SharedPreferences.Editor editor = sharedPreferences.edit();
    editor.putInt(LAST_LEVEL, currentLevel);
    editor.apply();
    if (getMaxLevel() < currentLevel) {
        setMaxLevel(currentLevel);
    }
}
Now, at the end of the next level, it’s enough to just change the current one, and if it is the last or not, the manager will figure it out without us. Otherwise, why is he even sitting here?
Add markup
The toy is already playing, it’s good. There is nothing but this in it - bad. But you really want to press the button "first" and go to the menu and at what level we look. So we
’ll add just such a dice over the playing field. Buttons cannot be easier to code, so I don’t want to tell how it works. Moreover, there is nothing there other than calls to managers or a transition to another activity
But it makes sense to show how the markup itself is interesting.
Well, we figured out the toy itself. All that’s left is to add another couple of screens, make a choice of an arbitrary level, add landscape markup and put this thing to the side. Little things sir!
We write a menu for levels
A separate screen will be responsible for this business, which will look more than boring: each level is a small square, open and not yet open levels of different colors, you can’t click on open ones. Create markup?
The headline and a small gridview are nothing new. Now, we’ll figure out how to fill this view with something useful.
For this, we will have to write an adapter that will create a new view, fill it with data, attach a clickListener to it and stuff it into the parent. Like that:
public View getView(int position, View convertView, ViewGroup parent) {
    LayoutInflater vi;
    vi = LayoutInflater.from(getContext());
    @SuppressLint("ViewHolder") View view = vi.inflate(R.layout.level_item, null);
    Integer currentLevelNumber = getItem(position);
    if (currentLevelNumber != null) {
        Button levelButton = (Button) view.findViewById(R.id.level_item_button);
        if (levelButton != null) {
            levelButton.setText(String.valueOf(currentLevelNumber));
            if (position < maxOpenedLevel) {
                levelButton.setBackgroundResource(R.drawable.opened_level_item);
                levelButton.setClickable(true);
                levelButton.setOnClickListener(clickListener);
                levelButton.setId(currentLevelNumber);
            } else {
                levelButton.setBackgroundResource(R.drawable.closed_level_item);
                levelButton.setClickable(false);
            }
        }
    }
    return view;
}
Wow. Only we want all the level buttons to be square. To do this, create your own Button heir and add some magic:
public class LevelButton extends Button {
@Override
    public void onMeasure(int widthMeasureSpec, int heightMeasureSpec) {
        super.onMeasure(widthMeasureSpec, widthMeasureSpec);
    }
}
Hehe. What a width, such a height. No one noticed. It remains only to call it all when creating activity
@Override
public void onResume() {
    super.onResume();
    manager = LevelManager.build(getBaseContext());
    View.OnClickListener levelClick = new View.OnClickListener() {
        @Override
        public void onClick(View v) {
            Intent intent = new Intent(getBaseContext(), LevelActivity.class);
            intent.putExtra(DESIRED_LEVEL, v.getId());
            intent.addFlags(Intent.FLAG_ACTIVITY_NO_ANIMATION);
            startActivity(intent);
        }
    };
    LevelGridAdapter adapter = new LevelGridAdapter(this, R.layout.level_item, getListOfLevelNumbers(), manager.getMaximalLevelNumber(), levelClick);
    adapter.setNotifyOnChange(false);
    levelGrid.setAdapter(adapter);
    levelGrid.setVerticalScrollBarEnabled(false);
}
Clicked on the button - the level has opened. Beauty.
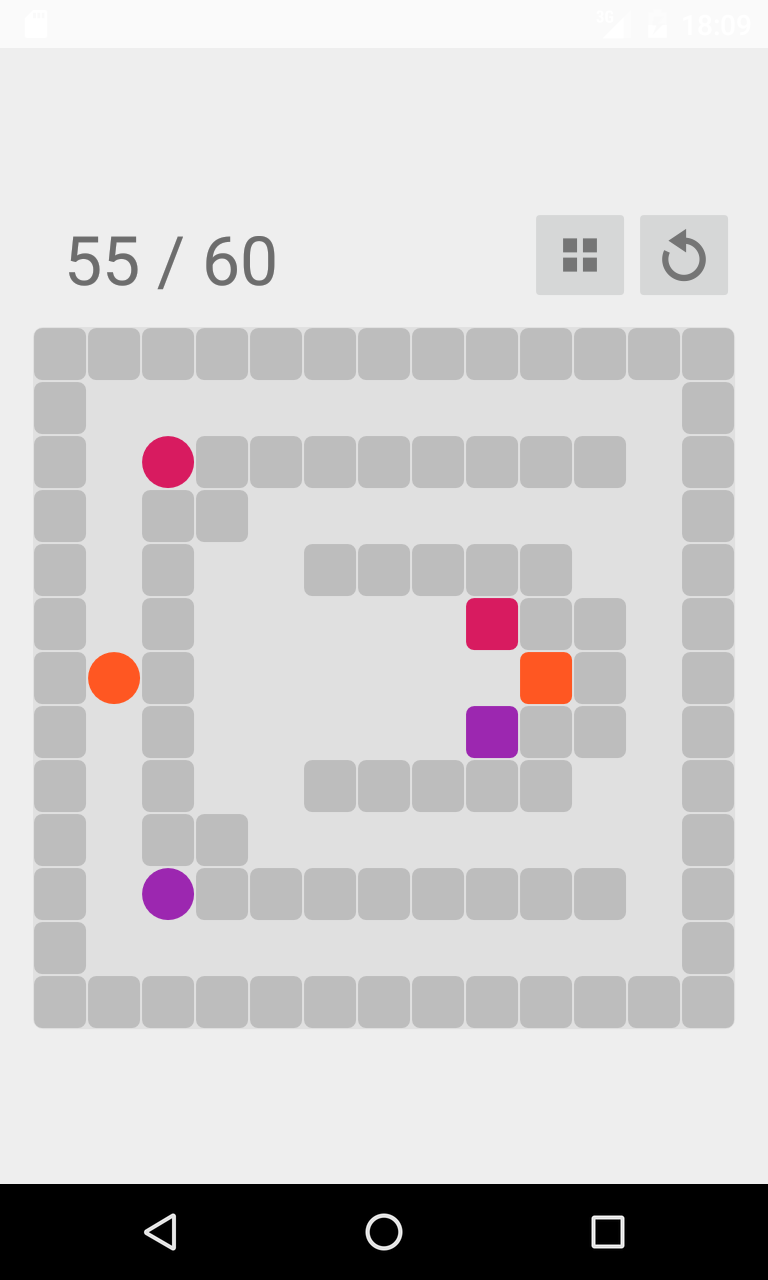
Play
After we added the main menu, help and, of course, “about the author” to the game, it's time to try to play what we got there.
It’s my first three levels that bounce off my teeth - I’ve gotten into colic. But it works: the levels are saved and the display flip does not drop the application, like three more assemblies back, and the whole thing looks nice - you feel right like a person.
Okay, since this thing works - we’ll post this good on Google Play, you will see who we like and
register, pay $ 25 google, wait a little while, create a project, fill in the data fields and ... we get the whole page in the "Puzzles" section, and at the same time , such a cute die
Here you go. We wrote a toy. It remains only to go through it and mark another childhood dream realized. And now, with your permission, I’ll nevertheless go to finish writing the “cancel last move” button, until especially keen acquaintances tear me apart for its absence completely
Sincerely yours, porting Tetris to the washing machine, GrakovNe