The “Ordering” component in the new version of the 1C-Bitrix platform (part 1)
- Tutorial
- Recovery mode
So, you already know that the release of the new e-commerce platform “1C-Bitrix” has recently taken place. A lot of improvements and changes were introduced with it, which will be revealed to you after the transition to the new component of " Ordering ". Let's take a closer look at the transition process itself and the innovations we made. But before you start, I want to thank the developer of 1C-Bitrix Orlando Vilasek for the great work on creating a new component. It was written using the D7 core.
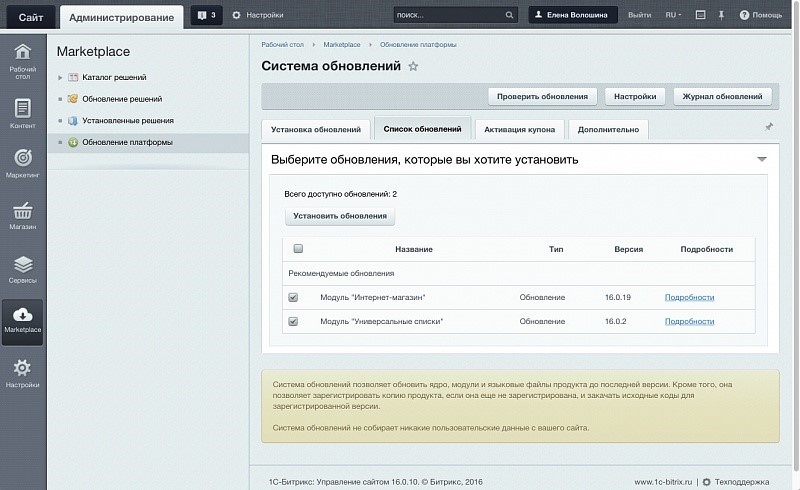
So, after making a backup copy, install the updates on the combat project.
After the installation is complete, let's see how the component on the site has changed and whether there are problems with the display. As a demonstration, we recorded a short video:
In our example, the previous component was customized, in addition, in the old scheme, some blocks were displayed differently and did not look too good. We tried to reflect all these problem areas in the video:
In general, everything went well and there are no special problems. We will correct minor nuances in the course of the narration.
Let's look under the hood of the component, and open its settings:
What has been changed in the component:
With the help of small settings within the component, it was possible to fix almost all the main nuances that arose immediately after the update.
If you do not like that in the profile the file property is higher than the profile properties, then this can be changed. In the administrative section, go to the list of order properties:
The new component of ordering perfectly understands the sorting of properties, and you can customize the desired sequence. And in this example, the files are moved to the very bottom.
Now let's see where you can get descriptions for payments to add them to those orders where there are no descriptions. And at the same time, we’ll fix the sorting and sort the payments differently.
We go to the administrative section:

Fill in the missing descriptions and change the sorting.
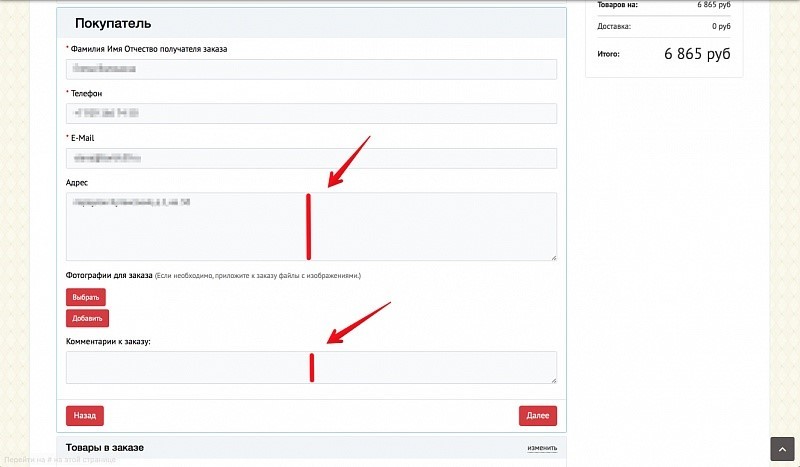
There is one more trifle: to reduce the height of the address block and bring it into line with the size of the comment. This is how it looks before tuning:
Now we go to setting the “Address” property and set the height of the input field:
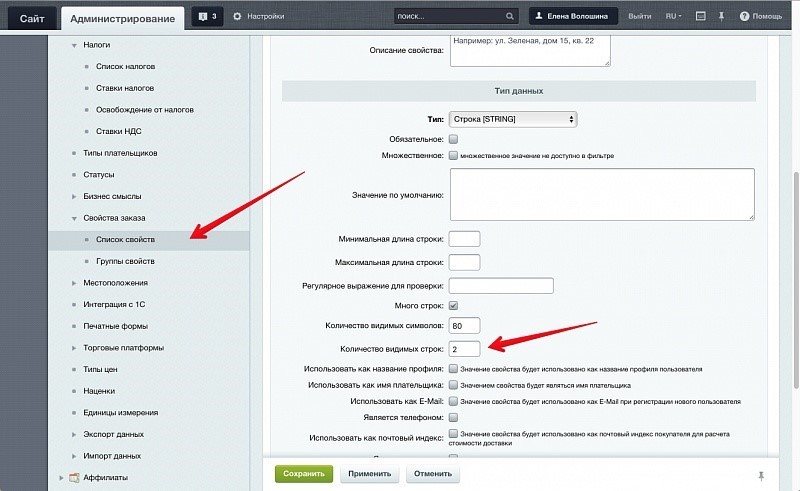
Set the “Address” property to “two lines” in height and see what we get:
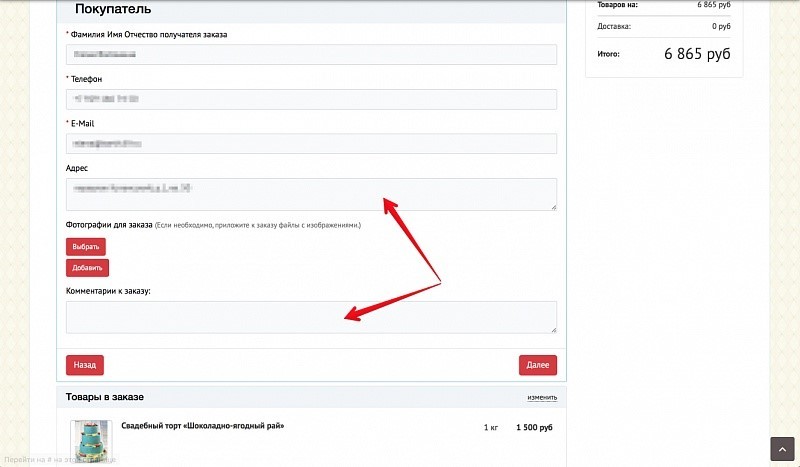
Great, now it looks beautiful.
On this note, we conclude our introductory article. In the next article, we will describe how to use the new features of the component and the platform. Have an opportunity:
We will also analyze how to include the output of only the necessary properties that are required for cash payment or a certain delivery, and a number of other innovations.
So, after making a backup copy, install the updates on the combat project.
After the installation is complete, let's see how the component on the site has changed and whether there are problems with the display. As a demonstration, we recorded a short video:
In our example, the previous component was customized, in addition, in the old scheme, some blocks were displayed differently and did not look too good. We tried to reflect all these problem areas in the video:
- The color of the buttons does not match the color scheme of the site. This is not a component problem, it just has not been configured. The default color is blue.
- Not all payment methods have a description, and now it makes no sense to show the name under the payment pictures. The new component displays the name and description on the right. We will set it up too.
- Previously, when receiving files from clients, they were displayed in a separate block with a description. Now there is no description, but the files are displayed at the top. This happened because there was no need to set the sorting of properties in the previous component. The setup is not complicated, and then we will do it too.
- The sizes of the address input field and the comment field are somewhat not logical. It was impossible to adjust the height of the previous component, and the current one is clearly set incorrectly. Also easy to fix.
- Product images did not appear. In this example, customization was done and pictures were displayed manually. A bit later the field display setting was implemented, but since it was not set up, there were no pictures either. This is also easy to fix.
In general, everything went well and there are no special problems. We will correct minor nuances in the course of the narration.
Let's look under the hood of the component, and open its settings:
What has been changed in the component:
- The buttons were assigned a color corresponding to the color of the template.
- The names of the blocks of payments are removed, everything is clear from the pictures. Additional information is displayed on the right.
- The settings indicate where to get pictures for all the information blocks that are being worked on. After that, the pictures are displayed.
With the help of small settings within the component, it was possible to fix almost all the main nuances that arose immediately after the update.
If you do not like that in the profile the file property is higher than the profile properties, then this can be changed. In the administrative section, go to the list of order properties:
The new component of ordering perfectly understands the sorting of properties, and you can customize the desired sequence. And in this example, the files are moved to the very bottom.
Now let's see where you can get descriptions for payments to add them to those orders where there are no descriptions. And at the same time, we’ll fix the sorting and sort the payments differently.
We go to the administrative section:
Fill in the missing descriptions and change the sorting.
There is one more trifle: to reduce the height of the address block and bring it into line with the size of the comment. This is how it looks before tuning:
Now we go to setting the “Address” property and set the height of the input field:
Set the “Address” property to “two lines” in height and see what we get:
Great, now it looks beautiful.
On this note, we conclude our introductory article. In the next article, we will describe how to use the new features of the component and the platform. Have an opportunity:
- withdraw additional services (for example, whether change is needed with cash payment),
- move goods on top of the component,
- change, without customizing, the names of sections and interface blocks.
We will also analyze how to include the output of only the necessary properties that are required for cash payment or a certain delivery, and a number of other innovations.