 April 19, 2016 at 12:50
Deploying a Django Stack on Ubuntu in a Microsoft Azure Cloud
You already know that we have launched a new project dedicated to open source projects - linuxloves.ms . You can find details about the project in our publication on Habré , which has already caused a fierce flame :-).

Developers who create solutions in the Django stack can easily host their solutions on the Microsoft Azure cloud platform. The easiest way to do this is with virtual machines.
To simplify working with virtual machines in the Azure cloud, the Azure Marketplace is offered, in which there are hundreds of pre-configured virtual machines with different environments and installed tools, including operating systems, databases, environments, frameworks, CMS and so on. You can learn much more about the Azure Marketplace on our Russian-language portal .
Consider how any Azure user can deploy a Django stack in minutes.
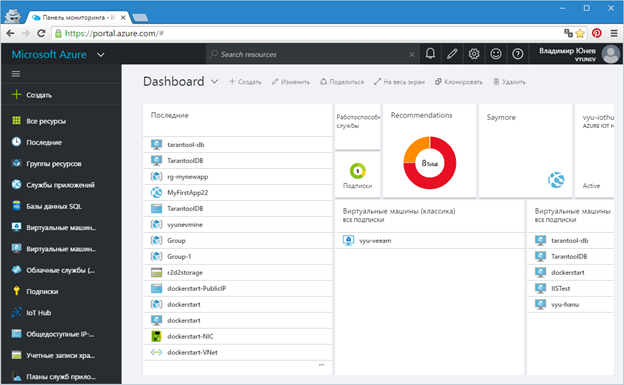
Fig. 1 - Microsoft Azure Portal
Click on the “Create” button to add a new component to your account. In our case, we intend to add a virtual machine with a Django stack. Type Django in the search bar. You will get a complete list of Django configurations available in the Azure Marketplace to choose from (Figure 2).
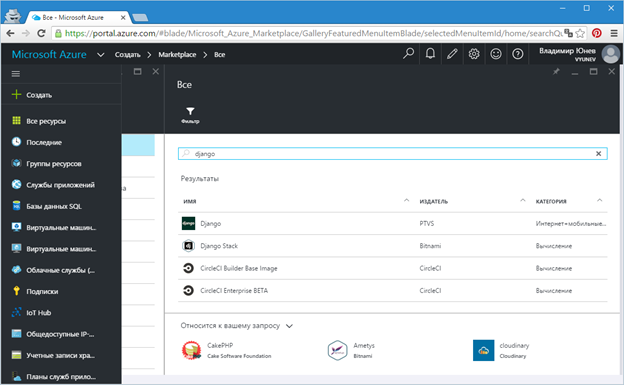
Fig . 2. - Django List on the Azure Marketplace
Select Django Stack and in the new information window click the "Create" button. Now you will go on to directly create a virtual machine selected from the Azure Marketplace (Figure 3).
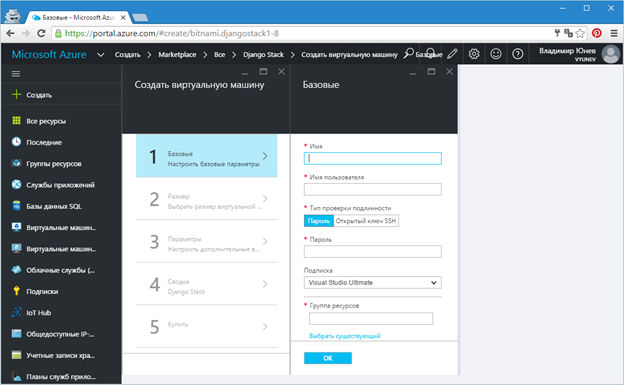
Fig. 3. - Creating a virtual machine
To create a virtual machine, in our case with Django on board, you need to specify a number of parameters. First enter the name of the virtual machine. Then the username (administrator) and access password. Choose an Azure subscription if you have several.
An important parameter to specify is the resource group. In general, a resource group is simply a combination of different cloud resources - VM, storage, networks - under one name to simplify administration. Therefore, at this point, simply enter a name for the group.
The last parameter that you need to specify in the first step - the location of the virtual machine - is essentially the choice of one of the Microsoft Azure data centers located around the world. The data centers closest to Russia are Northern or Western Europe. Select one of them (Figure 4).
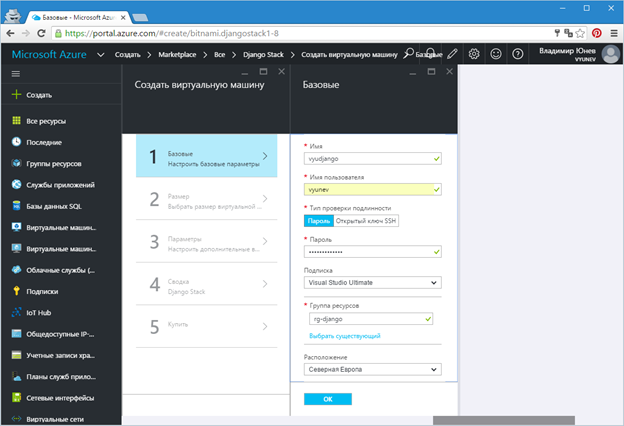
Fig. 4. - Parameters of the first step of creating a virtual machine
Click "OK" after entering all the parameters. In the second step, you will be asked to choose the size of the virtual machine. By default, several types of machines that are recommended for this type of solution will be presented. But you can always choose a different size by clicking on “View All” (Figure 5).
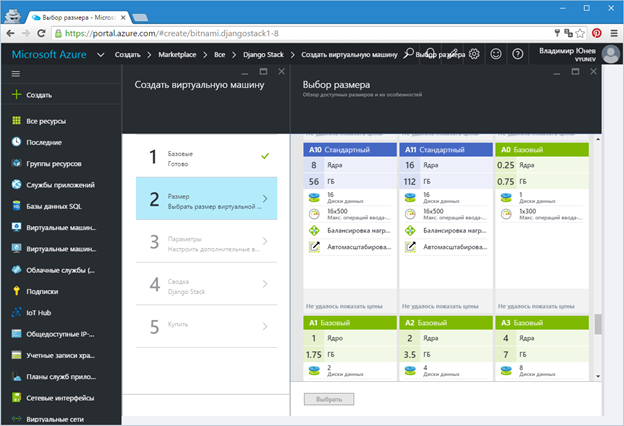
Fig. 5. - Choosing the size of the virtual machine
I suggest choosing the size “A1 Basic” as suitable for testing. After selection, click the “Select” button to go to the third step.
The third step is to fine-tune the deployment. Here, all parameters can be left by default and nothing can be changed at all. But if it is required that you can choose the SSD storage for the VM, configure the virtual network, security, enable monitoring, create an availability group for VM fault tolerance (Figure 6).

Fig. 6. - Fine-tune VM deployment settings
Click OK after fine-tuning to go to the final steps and start the virtual machine.
You will receive an information window listing your settings (Figure 7).

Fig. 7. - Information window with settings
Read the information and click "OK" in order to proceed with the acquisition of a virtual machine for your subscription.

Fig. 8. - Purchasing a virtual machine
Click the “Purchase” button to start the process of deploying your virtual machine with Django on board.
You will see the information message “Deployment started ...” (Figure 9).

Fig. 9. - Deployment is started
As soon as the VM is ready, you will receive another informational message, and the control panel of the created VM will open on the portal (Figure 10). In general, creating a virtual machine takes several minutes.
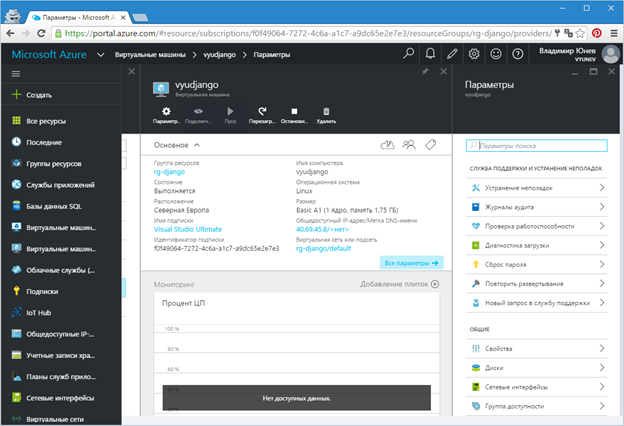
Fig. 10. - Virtual machine control panel
Congratulations! You deployed your machine with a ready-made Django stack.
In order to make sure that the virtual machine is operational, the first thing we can do is go to its public address.
You can find the public address in the header of the administration panel. In my case, this is http://40.69.45.8/ . Going to this address, we will see a standard greeting (Figure 11).
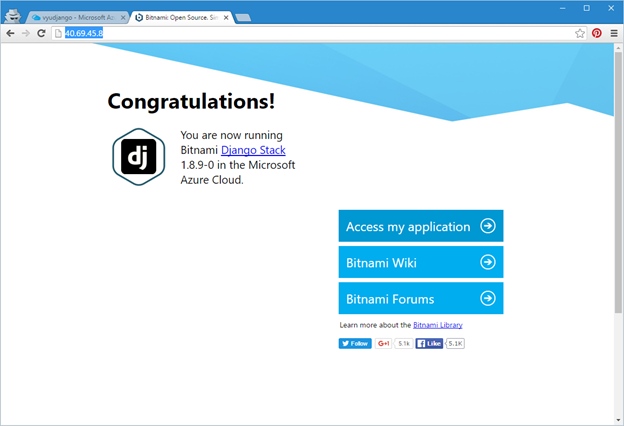
Fig. 11 - A standard greeting from a machine running in Azure with Django
This virtual machine was prepared by Bitnami, a well-known assembler of ready-made environments. To see the actual Django application, you can click on “Access my application” (Figure 12).

Fig. 12. - Running Django app
You may be wondering how to get the FQDN address for your machine as a domain name. By default, the VM address is not mapped, but it can be easily obtained. To do this, go to VM settings (All settings) in the configuration panel. Then select “Configuration” and in the settings panel specify the name for your VM, which will be included in the FDQN path (Figure 13).
After saving the settings, you can follow the link, which will be presented in the form (my case) http://vyudjango.northeurope.cloudapp.azure.com/ .
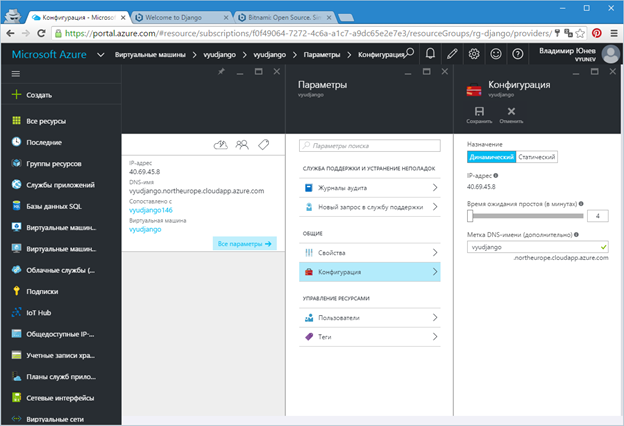
Fig. 13. - Adding the FDQN path for the virtual machine
You can now use the same address for SSH access to your virtual machine (Figure 14), for example:
SSH [email protected]
where vyunev is the username (administrator) that you provided when creating the VM.
Or just using the address in your favorite tool (Figure 13).
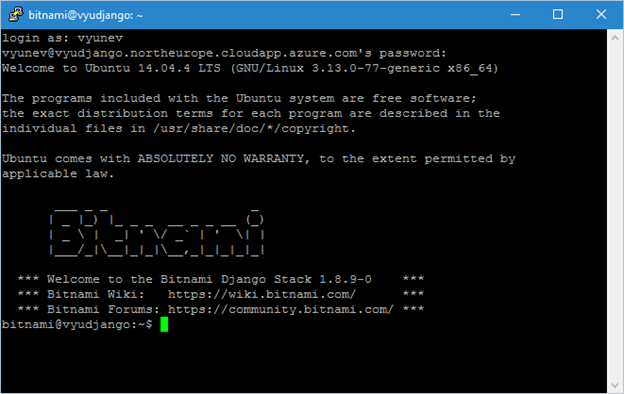
Fig. 14. - Connecting to a virtual machine via SSH
Now you can configure your VM with Django as your heart desires!
We’ve looked at a simple example of how to use Azure and the Azure Marketplace in a few minutes to deploy a Django environment and gain access to a finished working virtual machine.
Azure and Azure Marketplace offer to launch any solutions built on any technology, including for Linux and Windows. Here is just a short list of what you can find: Red Hat Enterprise Linux, Oracle Linux, CentOS, CoreOS, Ubuntu, Suse, WordPress, Moodle, MEAN, Jboss, Redmine, SEO Panel, Parse, Git, GitLab, Django, ModX, Memcached, LAMP Stack, Jenkins, Node.js, SugarCRM, Ruby Stack, Ghost, Subversion, ActiveMQ, Nginx Stack, Solr, Tomcat, JRuby, OwnCloud, MySQL, Drupal, MongoDB, Piwik, Dolibarr, LAAP Stack, OpenProject, Plone, eXo, Mahara, Zurmo, RoundCube, Mautic, ThinkUp, Prestashop, Tracks, phpBB, eZ Publish, Joomla ...
Continue to use Azure and host your opensource solutions in the cloud. The detailed section with documentation and resources on this link will help you with this .
Developers who create solutions in the Django stack can easily host their solutions on the Microsoft Azure cloud platform. The easiest way to do this is with virtual machines.
To simplify working with virtual machines in the Azure cloud, the Azure Marketplace is offered, in which there are hundreds of pre-configured virtual machines with different environments and installed tools, including operating systems, databases, environments, frameworks, CMS and so on. You can learn much more about the Azure Marketplace on our Russian-language portal .
Consider how any Azure user can deploy a Django stack in minutes.
Search for Django in the Azure Marketplace
It is understood that you already have a Microsoft Azure account . If this is not the case, then use the free trial offer at this link .Go to the Microsoft Azure portal at http://portal.azure.com , you will open the Microsoft Azure cloud capabilities control panel, provided to you upon request (Figure 1).
Fig. 1 - Microsoft Azure Portal
Click on the “Create” button to add a new component to your account. In our case, we intend to add a virtual machine with a Django stack. Type Django in the search bar. You will get a complete list of Django configurations available in the Azure Marketplace to choose from (Figure 2).
Fig . 2. - Django List on the Azure Marketplace
Select Django Stack and in the new information window click the "Create" button. Now you will go on to directly create a virtual machine selected from the Azure Marketplace (Figure 3).
Fig. 3. - Creating a virtual machine
Creating VM with Django
To create a virtual machine, in our case with Django on board, you need to specify a number of parameters. First enter the name of the virtual machine. Then the username (administrator) and access password. Choose an Azure subscription if you have several.
An important parameter to specify is the resource group. In general, a resource group is simply a combination of different cloud resources - VM, storage, networks - under one name to simplify administration. Therefore, at this point, simply enter a name for the group.
The last parameter that you need to specify in the first step - the location of the virtual machine - is essentially the choice of one of the Microsoft Azure data centers located around the world. The data centers closest to Russia are Northern or Western Europe. Select one of them (Figure 4).
Fig. 4. - Parameters of the first step of creating a virtual machine
Click "OK" after entering all the parameters. In the second step, you will be asked to choose the size of the virtual machine. By default, several types of machines that are recommended for this type of solution will be presented. But you can always choose a different size by clicking on “View All” (Figure 5).
Fig. 5. - Choosing the size of the virtual machine
I suggest choosing the size “A1 Basic” as suitable for testing. After selection, click the “Select” button to go to the third step.
The third step is to fine-tune the deployment. Here, all parameters can be left by default and nothing can be changed at all. But if it is required that you can choose the SSD storage for the VM, configure the virtual network, security, enable monitoring, create an availability group for VM fault tolerance (Figure 6).
Fig. 6. - Fine-tune VM deployment settings
Click OK after fine-tuning to go to the final steps and start the virtual machine.
You will receive an information window listing your settings (Figure 7).
Fig. 7. - Information window with settings
Read the information and click "OK" in order to proceed with the acquisition of a virtual machine for your subscription.
For information. Acquisition in this case means creating a VM with free software on it. There are products in the Azure Marketplace that may require a license to purchase them.Read the purchase information (Figure 8). In our case, the content of a virtual machine costs 0 rubles. The cost of the VM chosen by us, which is provided by Microsoft Azure, is about 3 p. at one o'clock.
Fig. 8. - Purchasing a virtual machine
Click the “Purchase” button to start the process of deploying your virtual machine with Django on board.
You will see the information message “Deployment started ...” (Figure 9).
Fig. 9. - Deployment is started
As soon as the VM is ready, you will receive another informational message, and the control panel of the created VM will open on the portal (Figure 10). In general, creating a virtual machine takes several minutes.
Fig. 10. - Virtual machine control panel
Congratulations! You deployed your machine with a ready-made Django stack.
Manage a deployed virtual machine
In order to make sure that the virtual machine is operational, the first thing we can do is go to its public address.
You can find the public address in the header of the administration panel. In my case, this is http://40.69.45.8/ . Going to this address, we will see a standard greeting (Figure 11).
Fig. 11 - A standard greeting from a machine running in Azure with Django
This virtual machine was prepared by Bitnami, a well-known assembler of ready-made environments. To see the actual Django application, you can click on “Access my application” (Figure 12).
Fig. 12. - Running Django app
You may be wondering how to get the FQDN address for your machine as a domain name. By default, the VM address is not mapped, but it can be easily obtained. To do this, go to VM settings (All settings) in the configuration panel. Then select “Configuration” and in the settings panel specify the name for your VM, which will be included in the FDQN path (Figure 13).
After saving the settings, you can follow the link, which will be presented in the form (my case) http://vyudjango.northeurope.cloudapp.azure.com/ .
Fig. 13. - Adding the FDQN path for the virtual machine
You can now use the same address for SSH access to your virtual machine (Figure 14), for example:
SSH [email protected]
where vyunev is the username (administrator) that you provided when creating the VM.
Or just using the address in your favorite tool (Figure 13).
Fig. 14. - Connecting to a virtual machine via SSH
Now you can configure your VM with Django as your heart desires!
Conclusion
We’ve looked at a simple example of how to use Azure and the Azure Marketplace in a few minutes to deploy a Django environment and gain access to a finished working virtual machine.
Azure and Azure Marketplace offer to launch any solutions built on any technology, including for Linux and Windows. Here is just a short list of what you can find: Red Hat Enterprise Linux, Oracle Linux, CentOS, CoreOS, Ubuntu, Suse, WordPress, Moodle, MEAN, Jboss, Redmine, SEO Panel, Parse, Git, GitLab, Django, ModX, Memcached, LAMP Stack, Jenkins, Node.js, SugarCRM, Ruby Stack, Ghost, Subversion, ActiveMQ, Nginx Stack, Solr, Tomcat, JRuby, OwnCloud, MySQL, Drupal, MongoDB, Piwik, Dolibarr, LAAP Stack, OpenProject, Plone, eXo, Mahara, Zurmo, RoundCube, Mautic, ThinkUp, Prestashop, Tracks, phpBB, eZ Publish, Joomla ...
Continue to use Azure and host your opensource solutions in the cloud. The detailed section with documentation and resources on this link will help you with this .
Only registered users can participate in the survey. Please come in.
What environments are you most interested in when deploying in the cloud?
- 14.7% LAMP 14
- 9.4% MEAN 9
- 11.5% Java / Oracle 11
- 76.8% Django / Python 73
- 18.9% Others 18









