500 laser pointers in one place
Hi, Habr. In this article I will talk about my recent creation, created from 500 laser modules of the type of cheap low-power laser pointers. Under the cut a lot of clickable images.
Attention! Even low-power laser emitters can, under certain conditions, be harmful to health or damage photographic equipment. Do not try to repeat the experiments described in the article.
Note. Youtube has a video with the same name, in which you can see more. However, the article describes in more detail the process of creation and here is more qualitative picture (especially when you click).
Laser modules
I will begin with a description of the laser modules themselves. They are now selling a lot of different options, differing in the wavelength, the power and shape of the output radiation, the design of the optical system and mounting, as well as the build quality and price. I chose the cheapest modules, sold in China in batches of 100 pieces worth about 1000 rubles per lot. According to the description of the seller, they give 50 mW at a wavelength of 650 nm. I doubt about 50 mW, most likely there is not even 5 mW. I bought several similar modules in Russia for the price of 30 rub apiece. In online stores, they are called LM6R-dot-5V. Shine like red laser pointers, sold in different variations in any stall with knickknacks.
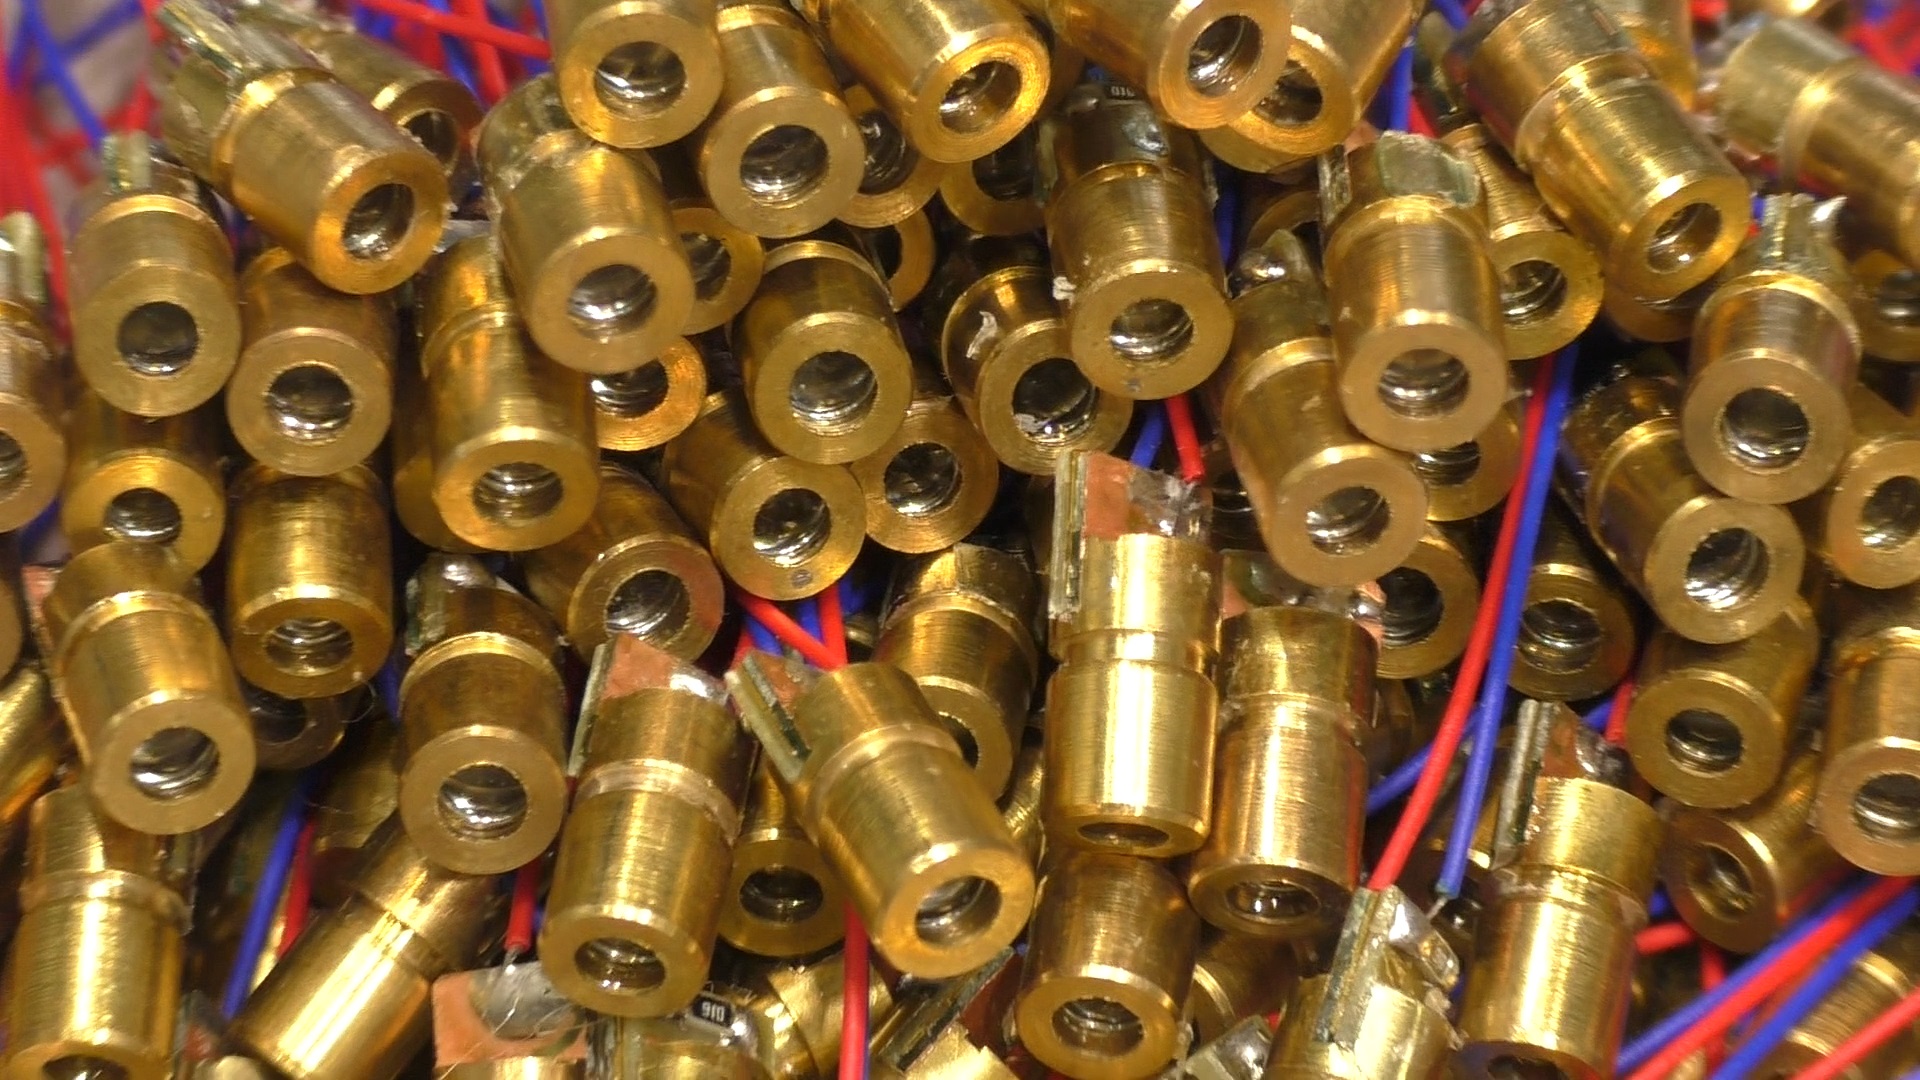
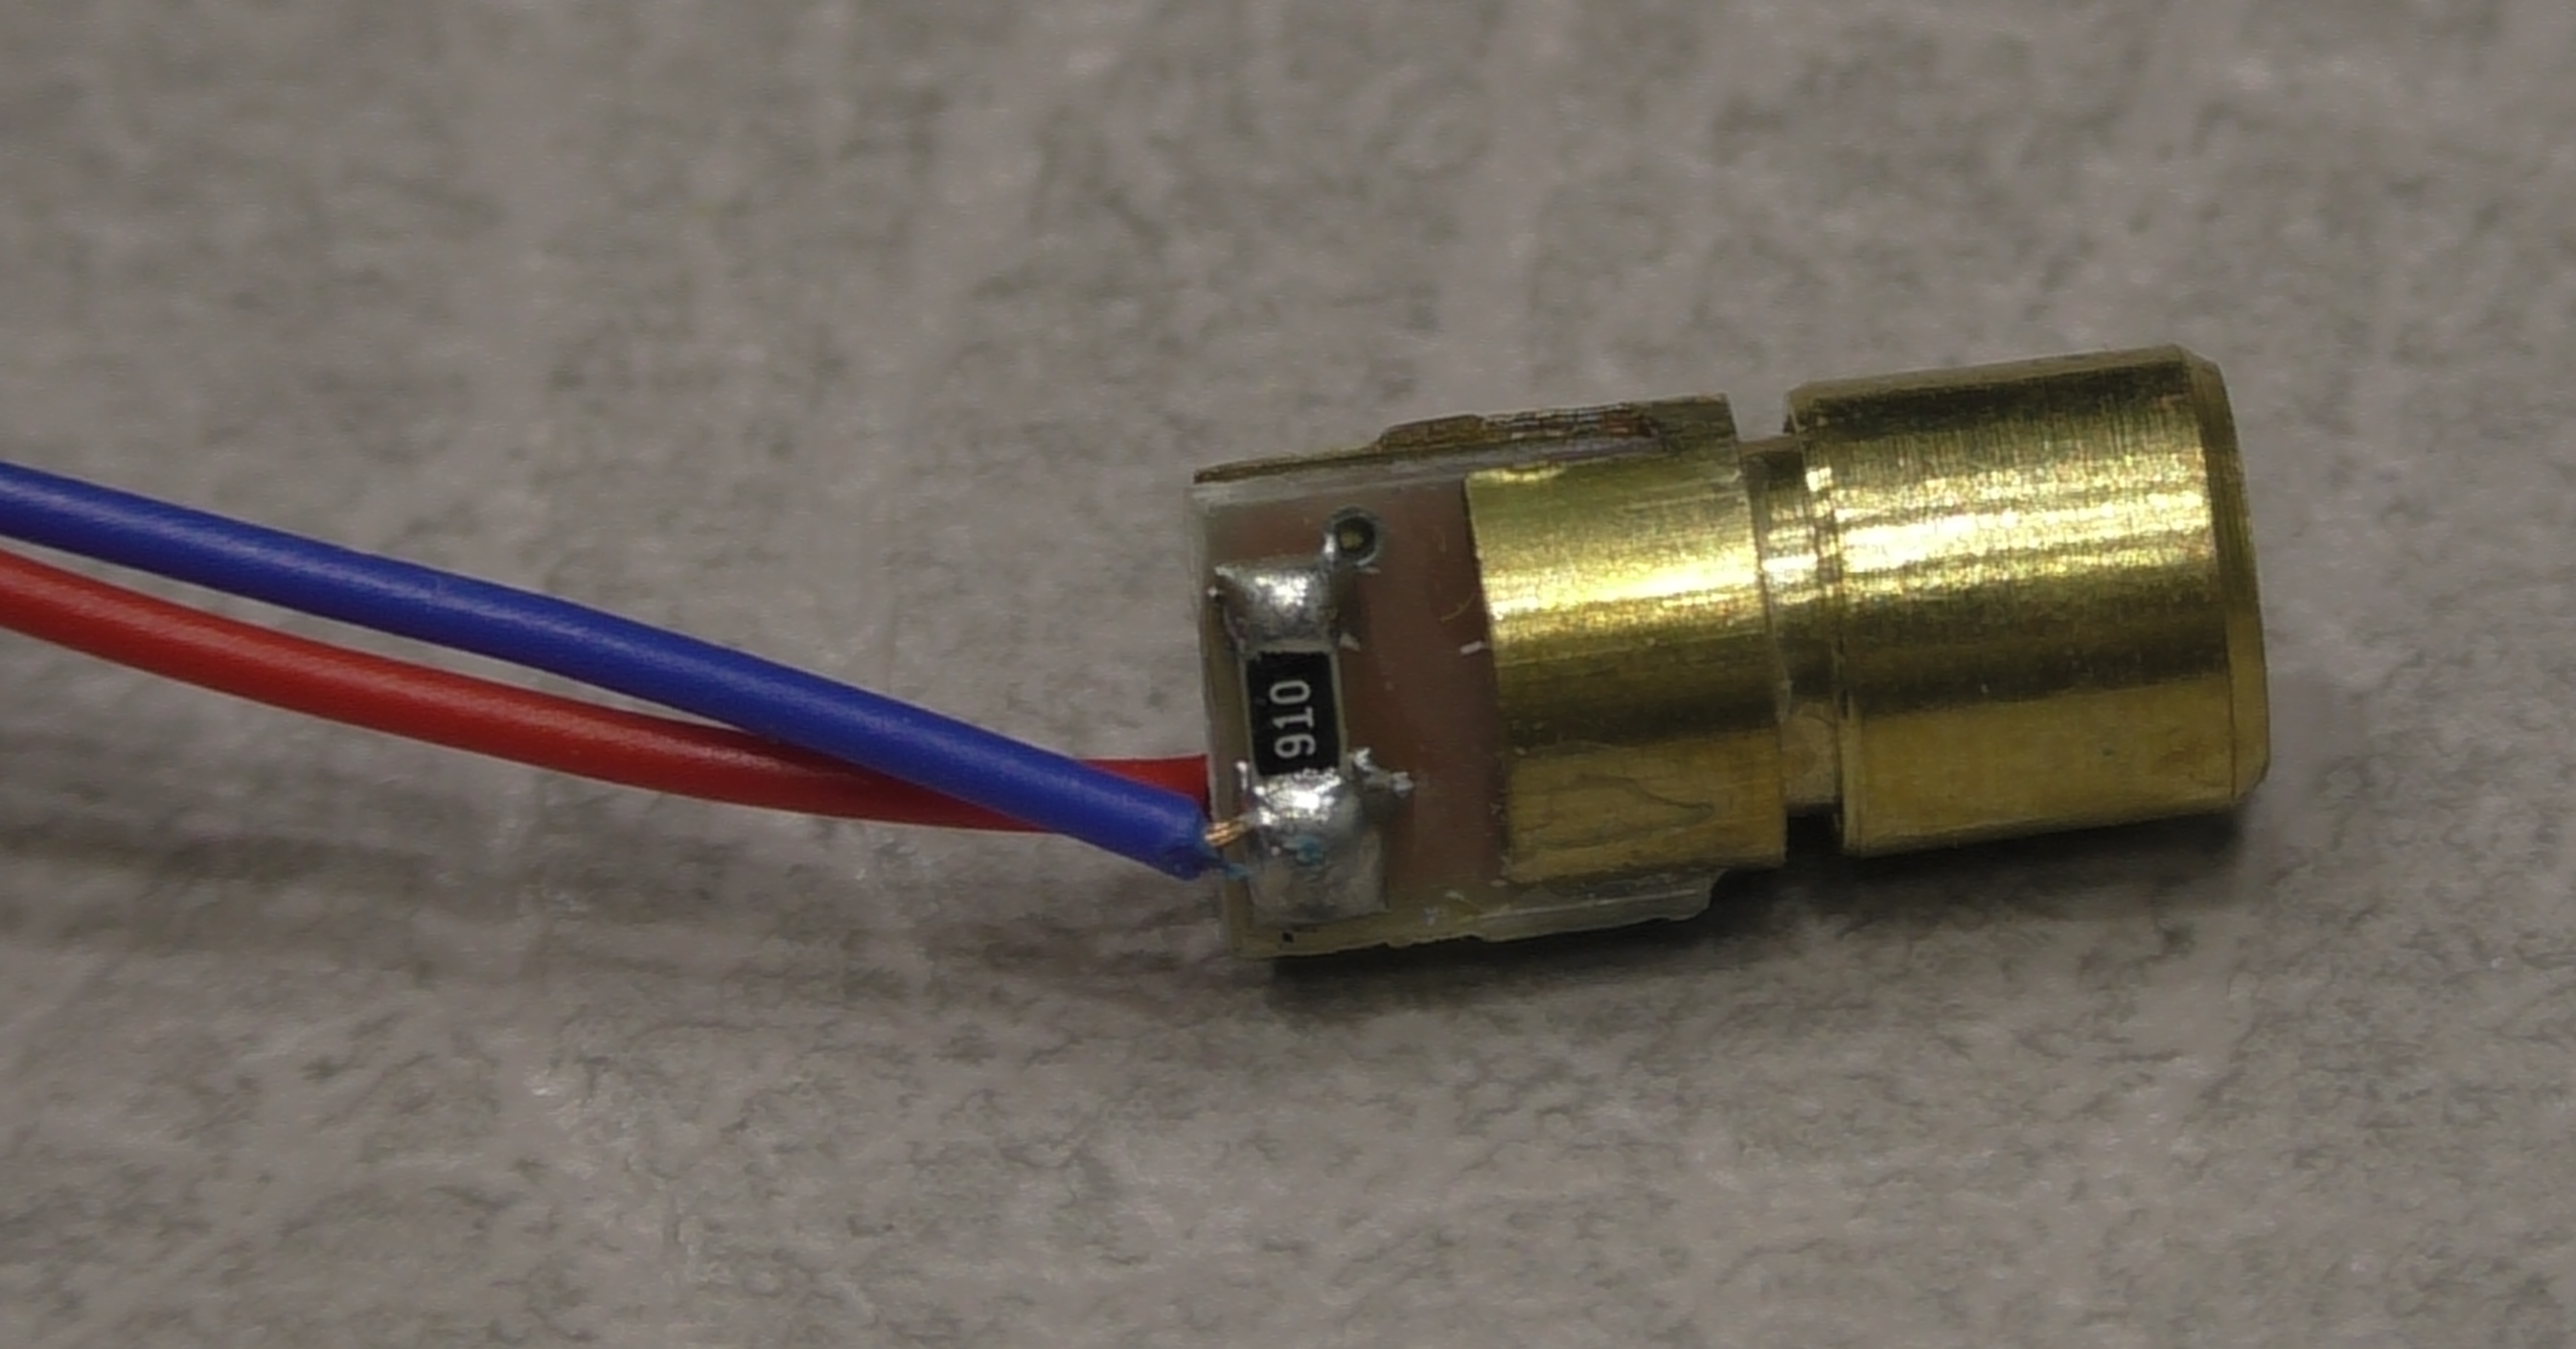
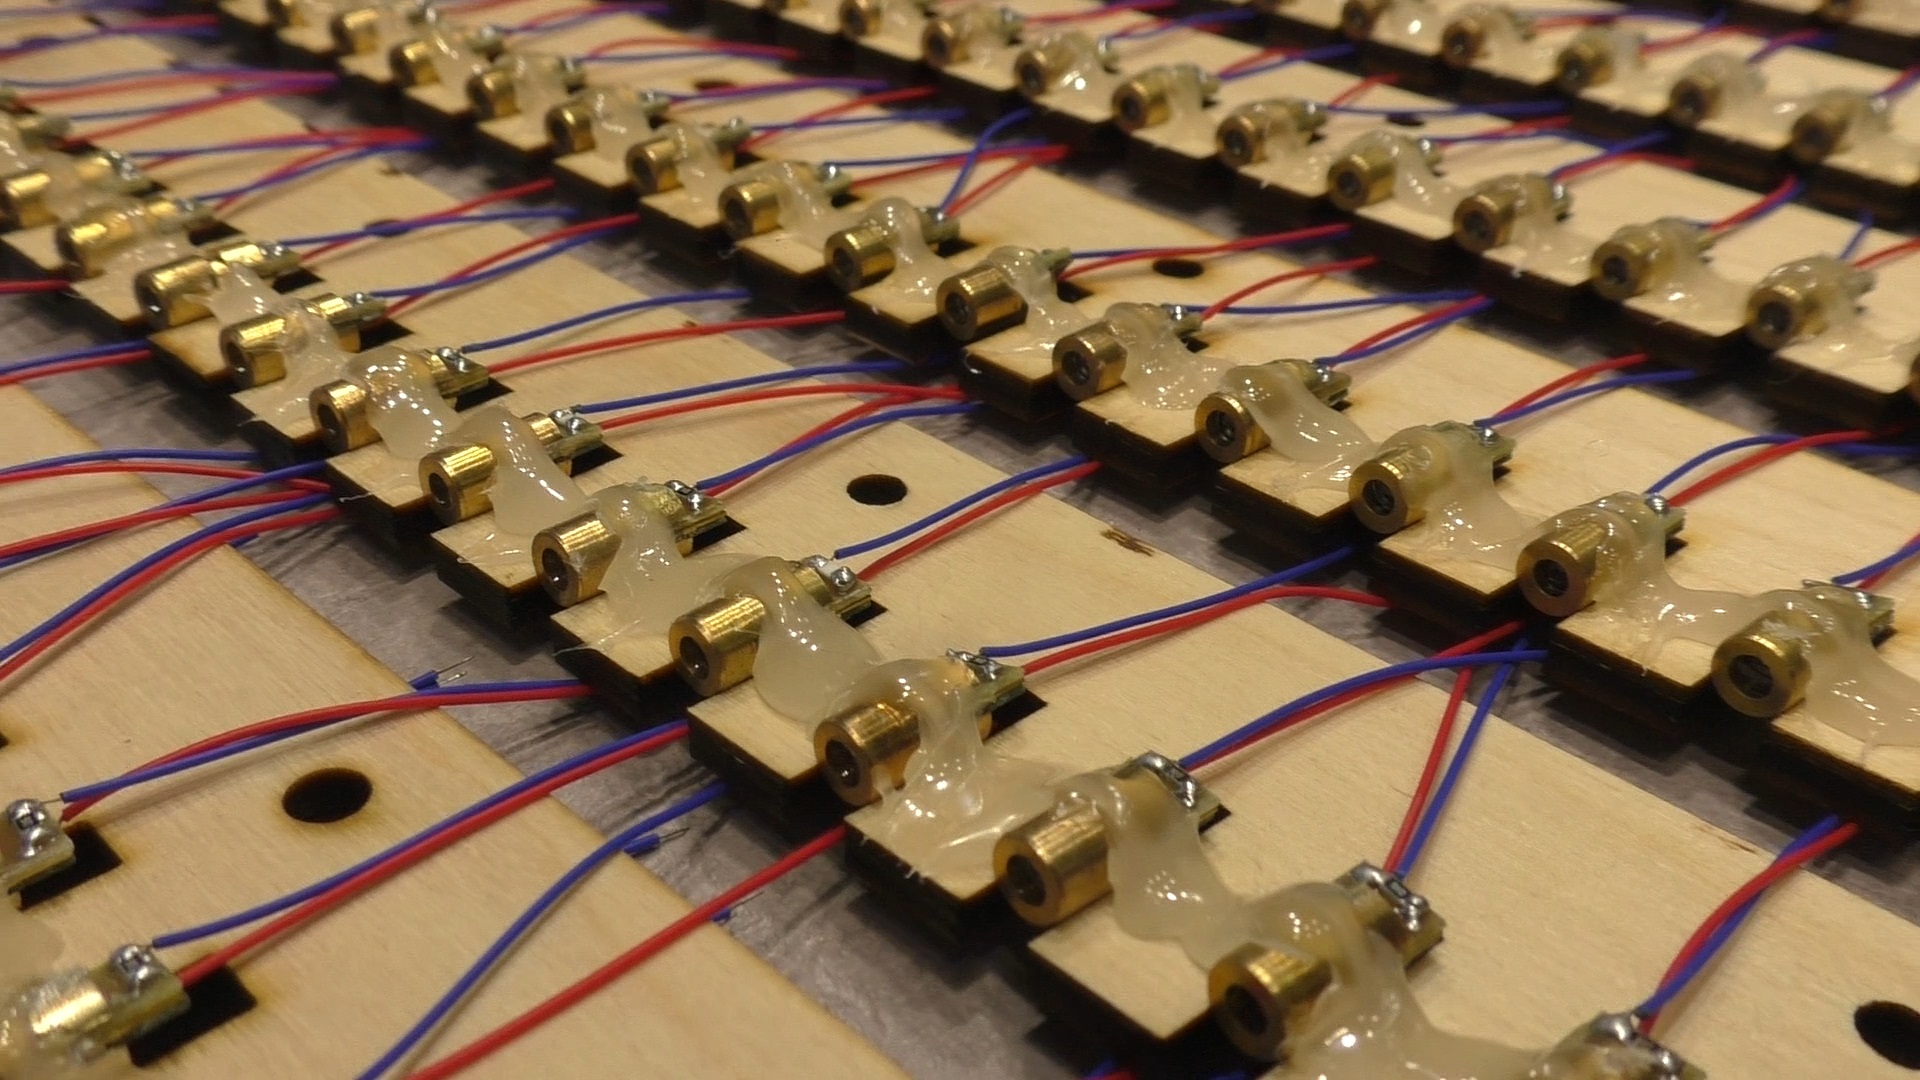
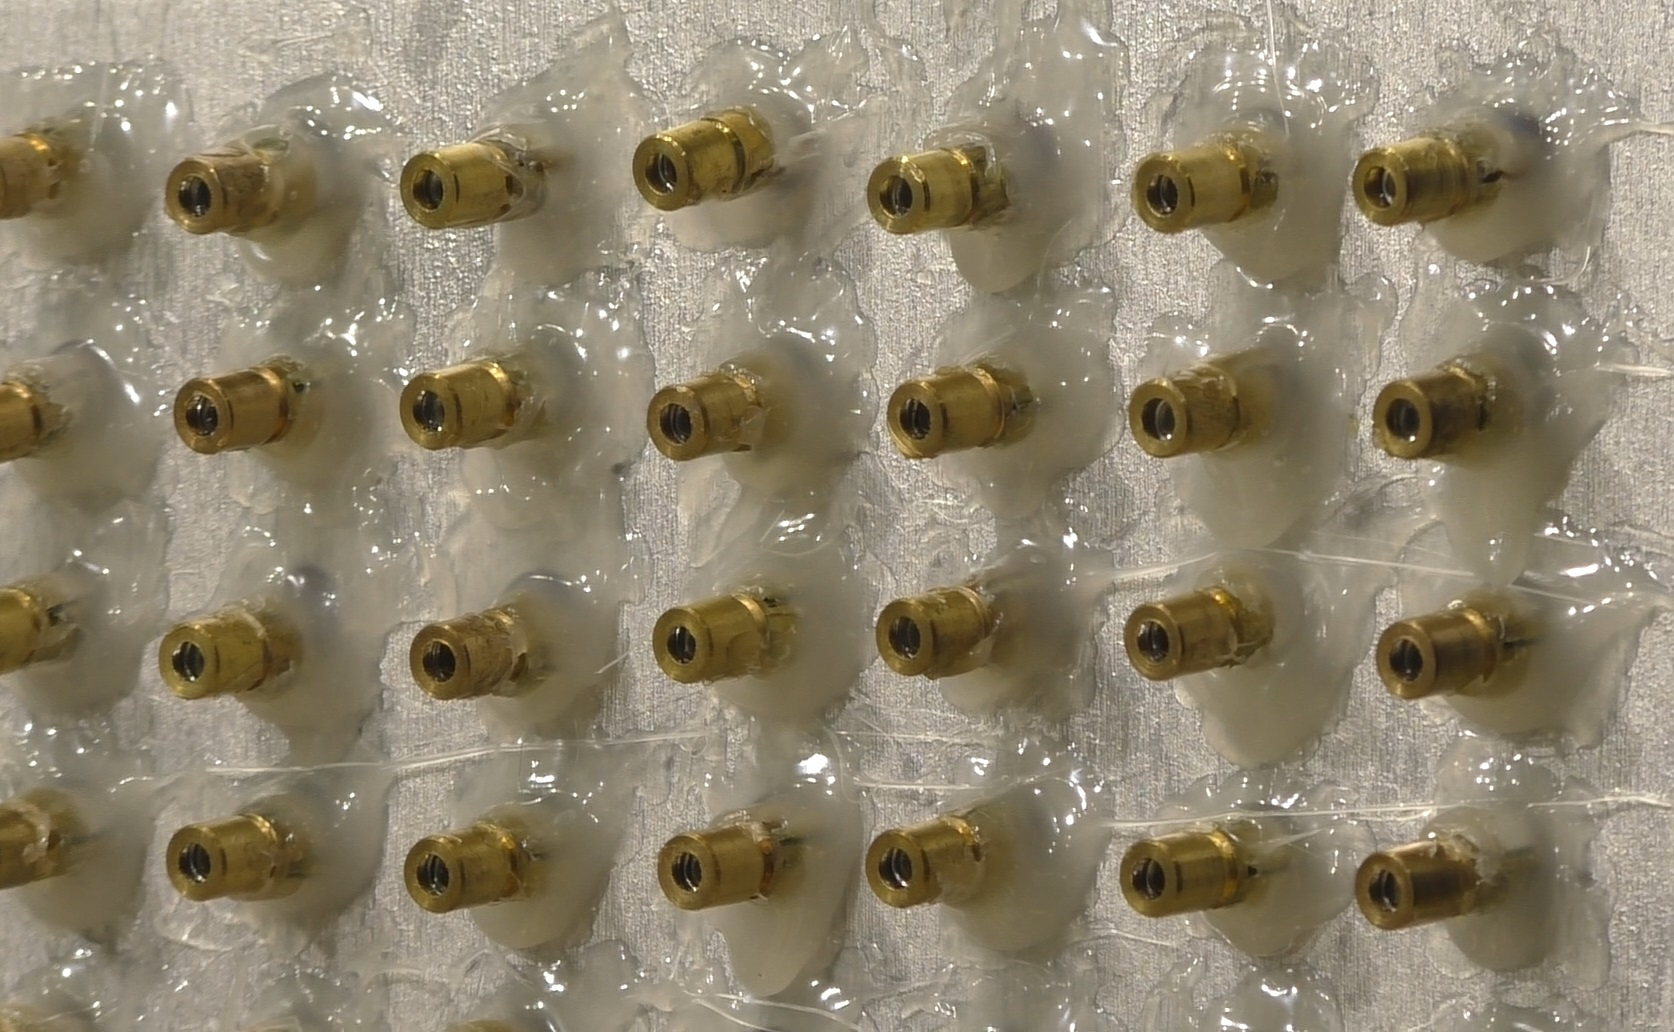
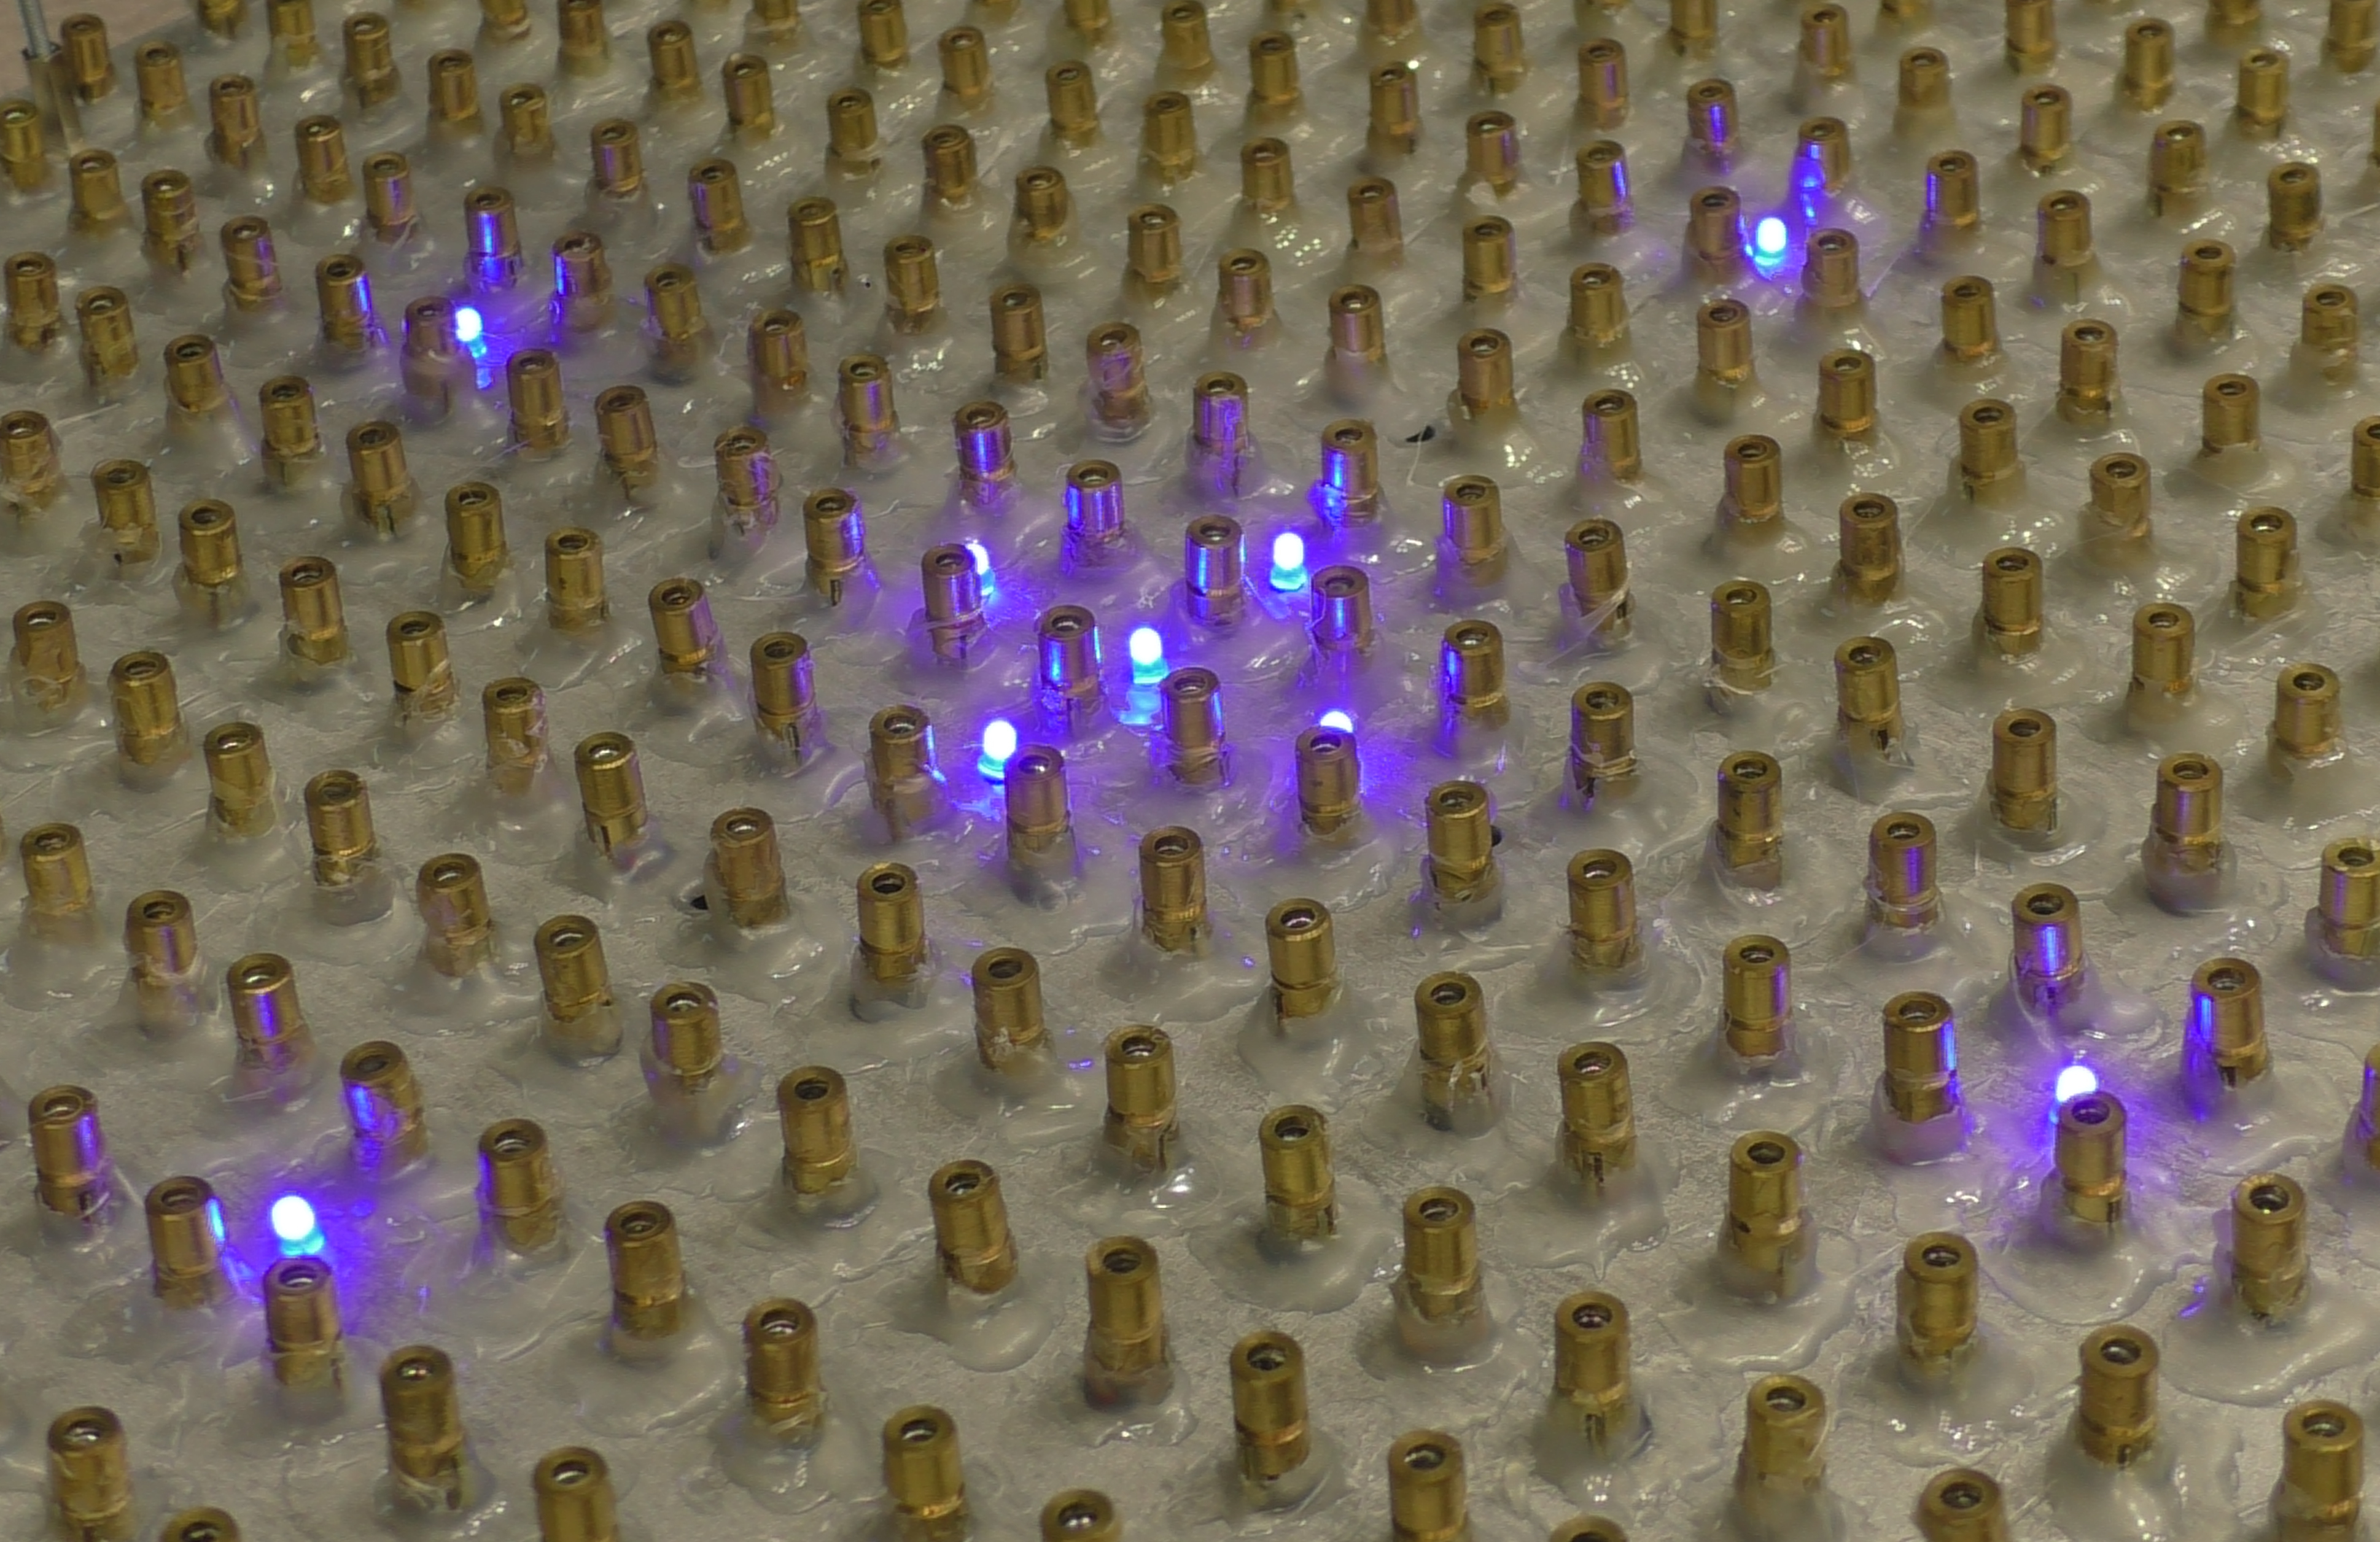
Structurally, this module looks like a metal cylinder with a diameter of 6 mm and a length of 14 mm (together with the board). Case material, most likely, steel, as it has good magnetic properties. The housing is connected to the positive contact.

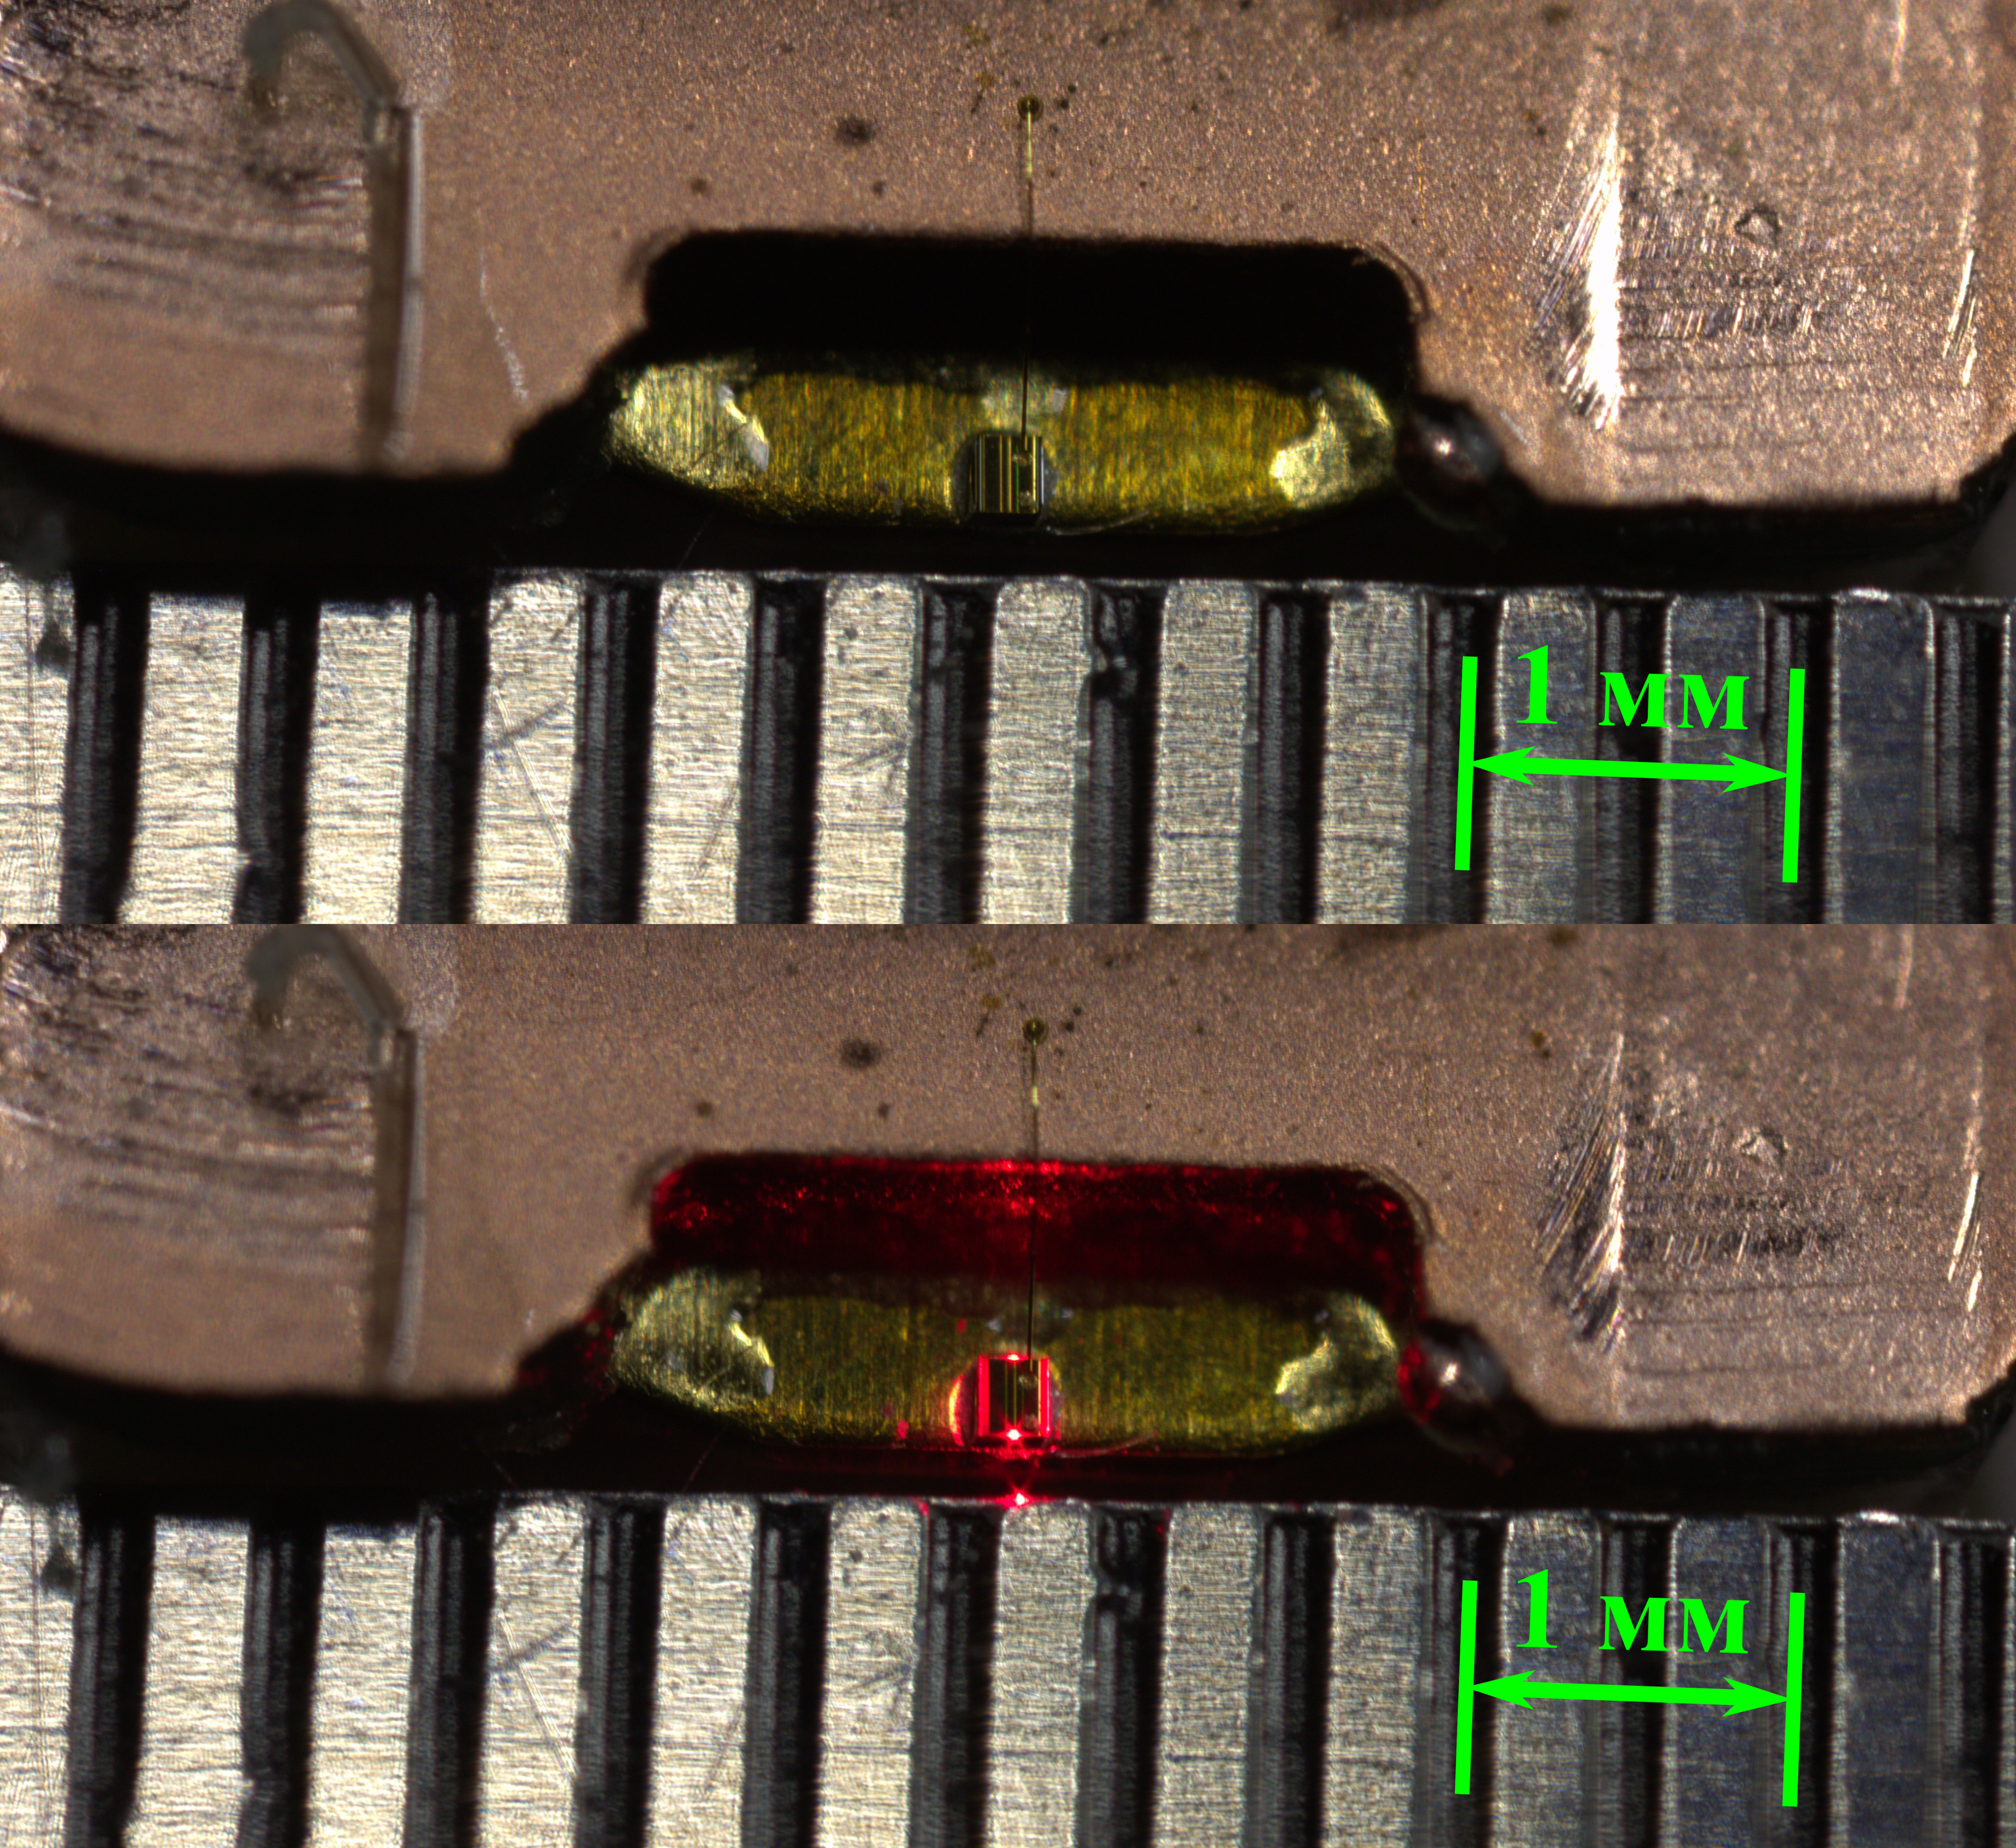
Inside the case is a plastic lens and a laser chip mounted on a small printed circuit board. Also on the board is a resistor, the value of which depends on the stated supply voltage. I used 5V modules with a 91 ohm resistor. When the input voltage is 5V on the module, the voltage on the laser chip is 2.4V, and the current is 28 mA. The design is completely open from the side of the board, so that any dust or moisture easily gets inside. Therefore, I sealed the back of each module with hot melt. In addition, the chip and the lens are not set exactly, so the output radiation may not be parallel to the axis of the housing. During operation, the module is heated to a temperature of 35-40 ° C.
Initial version
Initially (it was a year ago) I bought 200 laser modules and decided to send them to a single point using a purely geometric method, that is, not adjusting each module individually, but installing each radiator into special cutouts. For this, I ordered a special fastening of plywood 4 mm thick. Laser modules pressed to the cutout and glued with hot melt. It turned out the installation, which gave a beam of 200 laser dots in diameter of about 100 mm. Although the result was far from falling into one point, many were impressed by this idea (I posted the video on youtube) and it was decided to continue the topic.
I disassembled a system of 200 laser modules and made a laser garland of them. It turned out interesting, but not convenient, since under the weight of the body all the rays were directed downwards. But by this time I bought a smoke machine and for the first time I saw how cool these lasers look in the fog. I decided to repeat the original idea, but manually direct each laser to one point.
Laser light
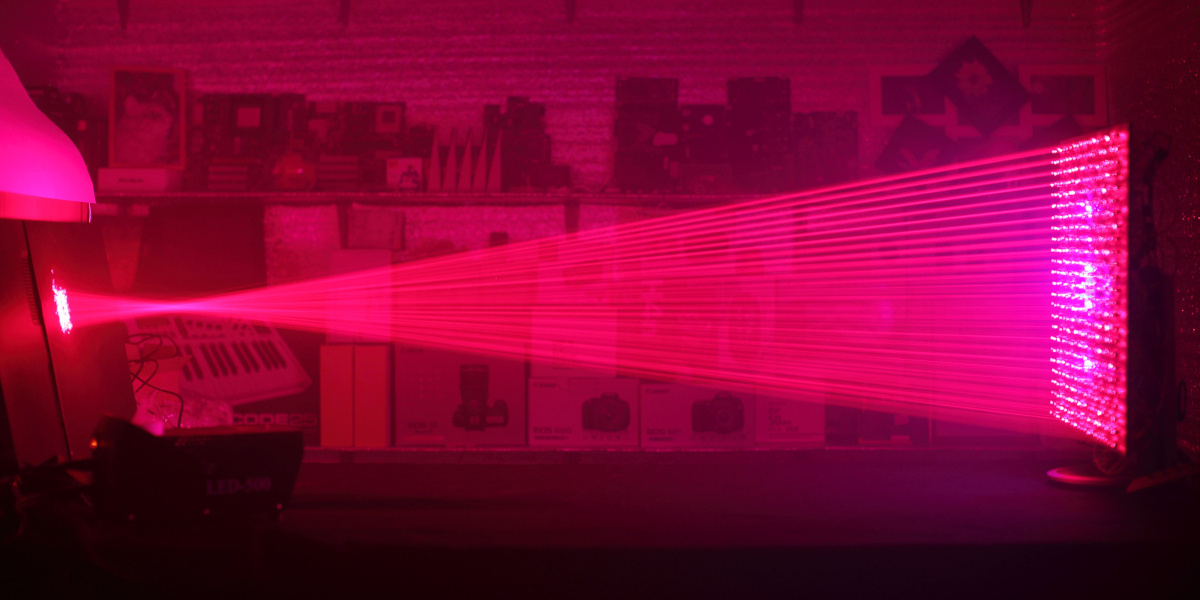
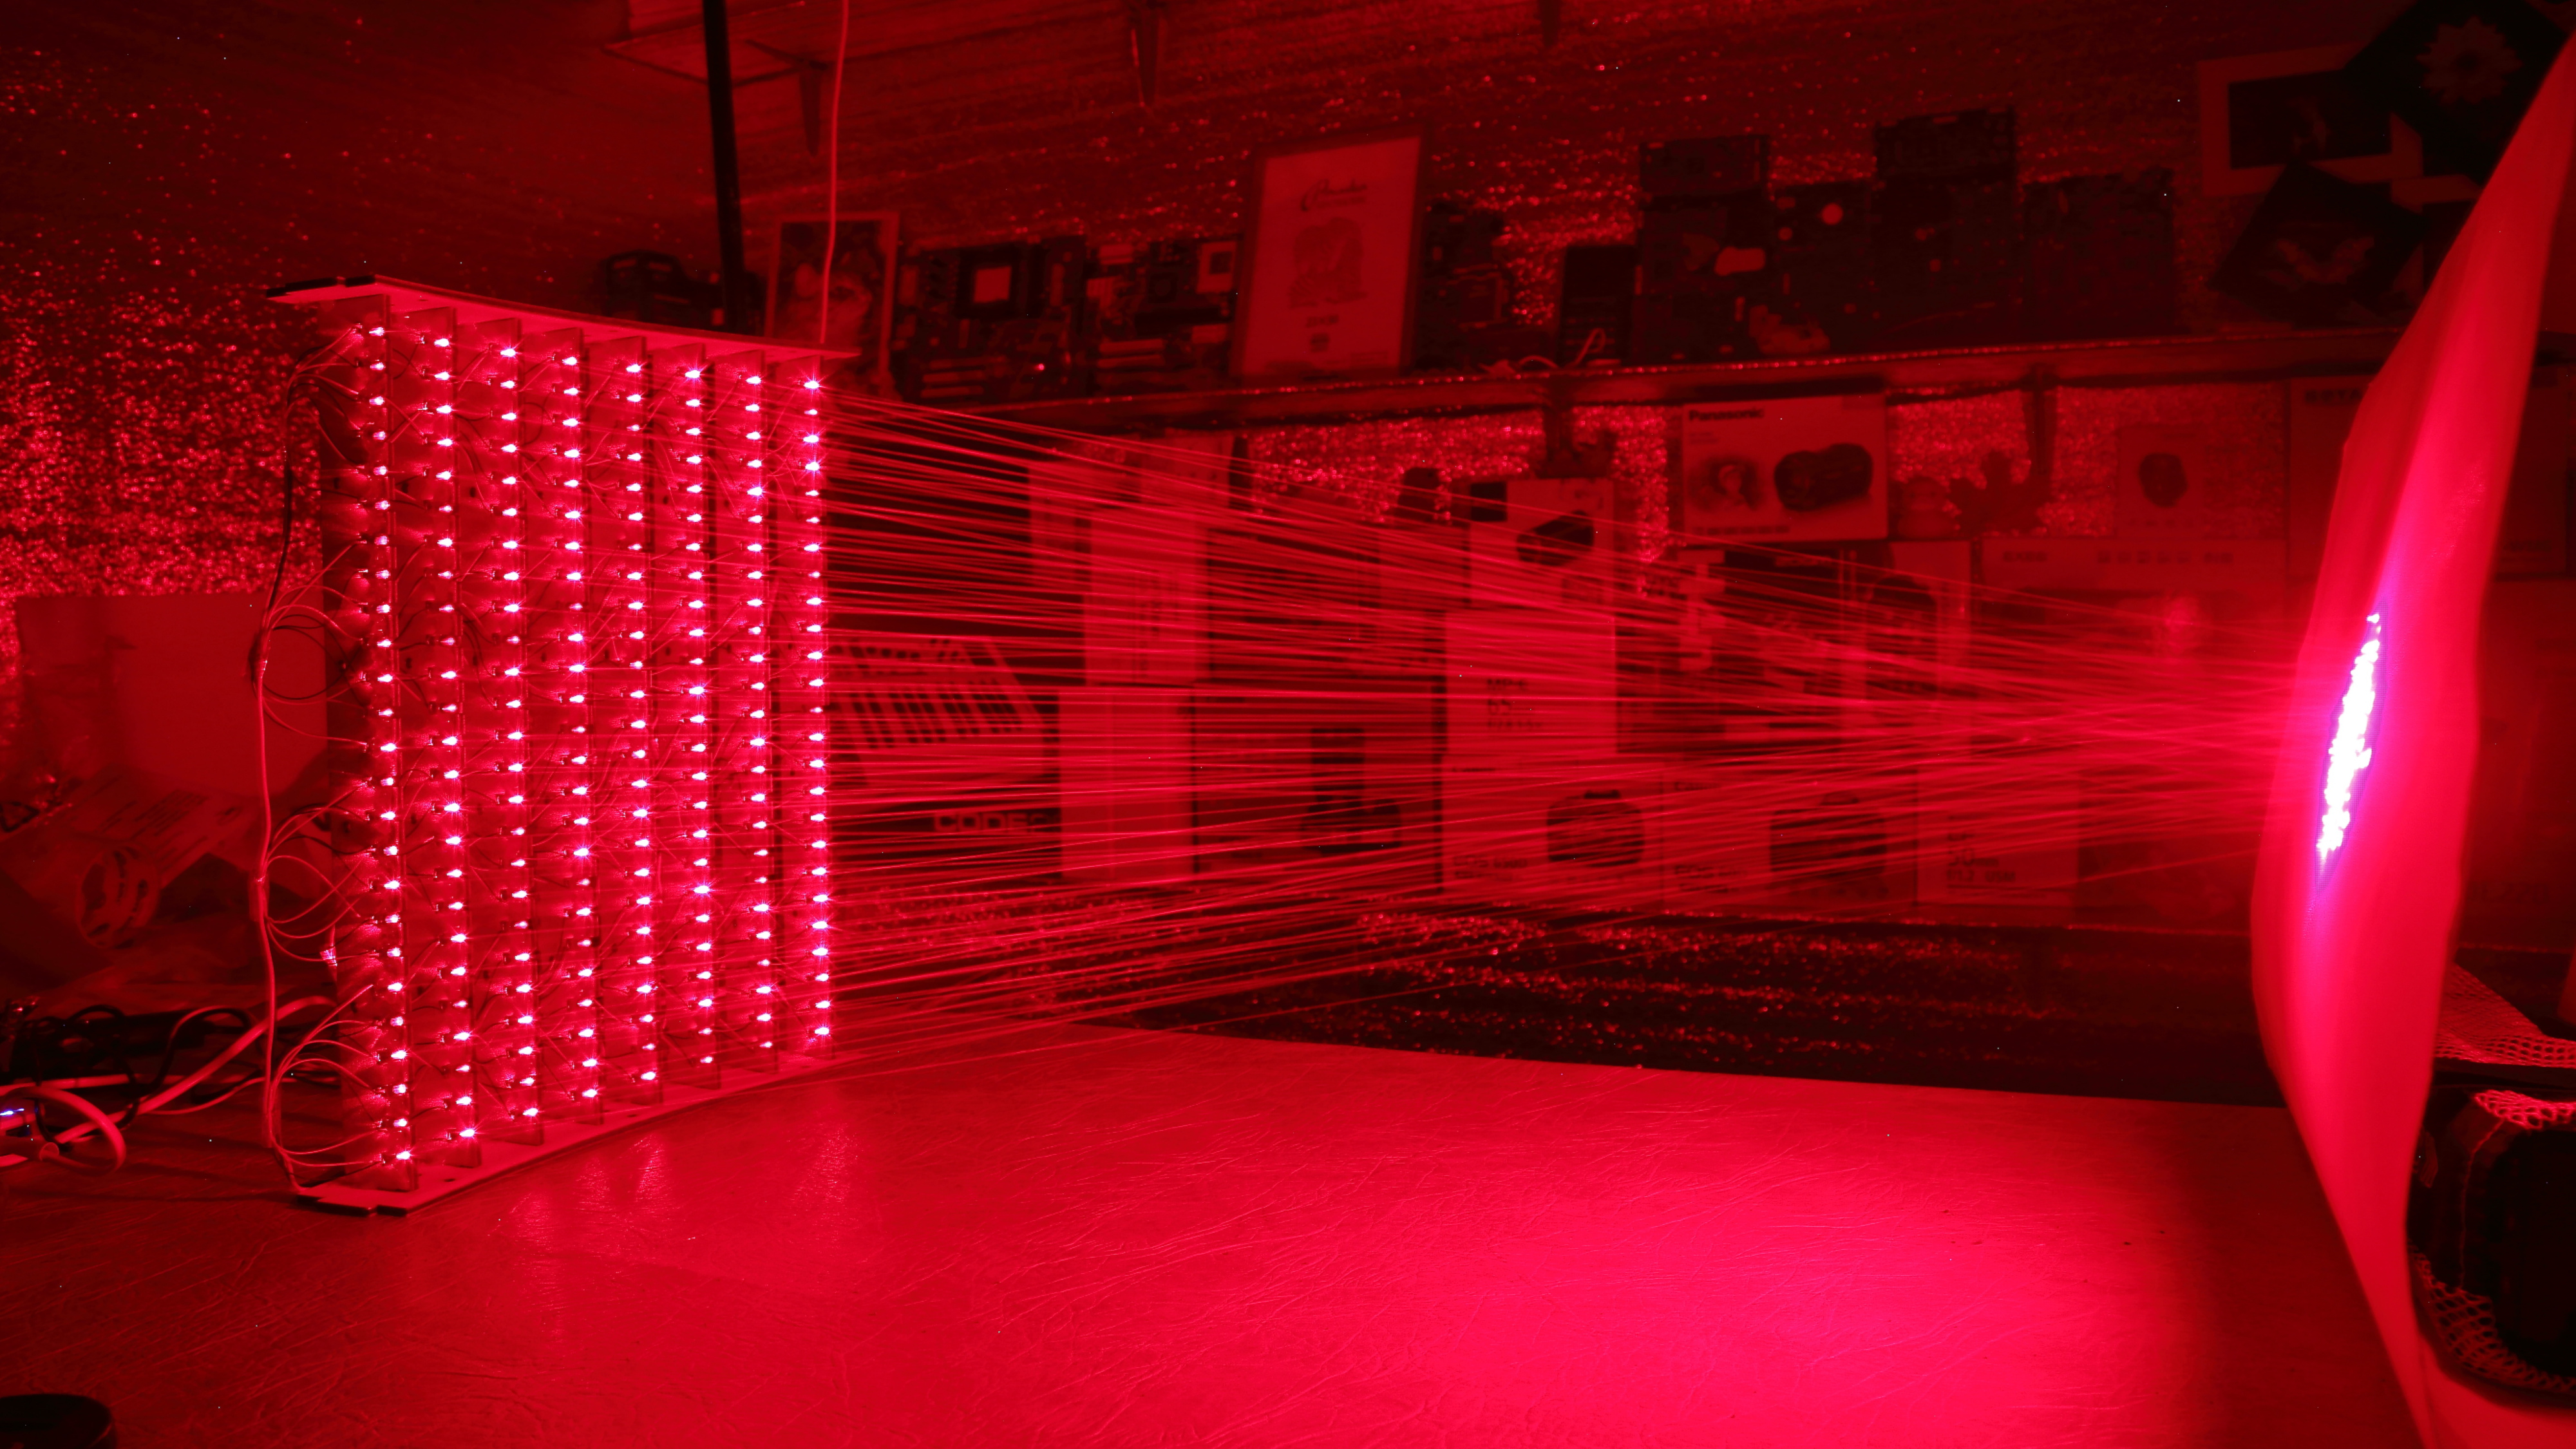
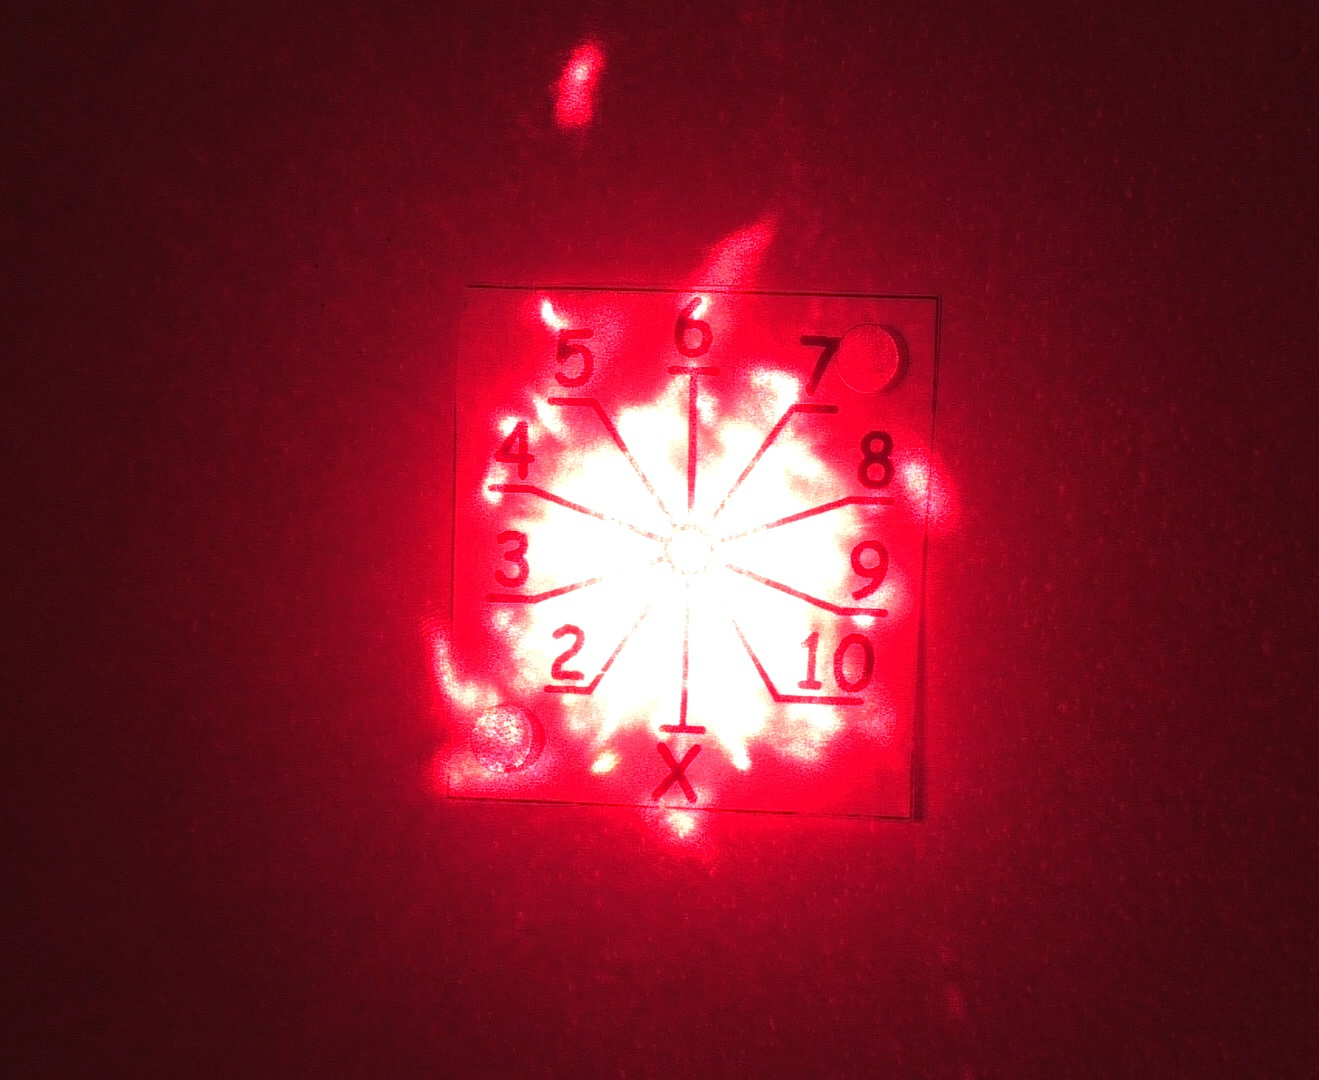
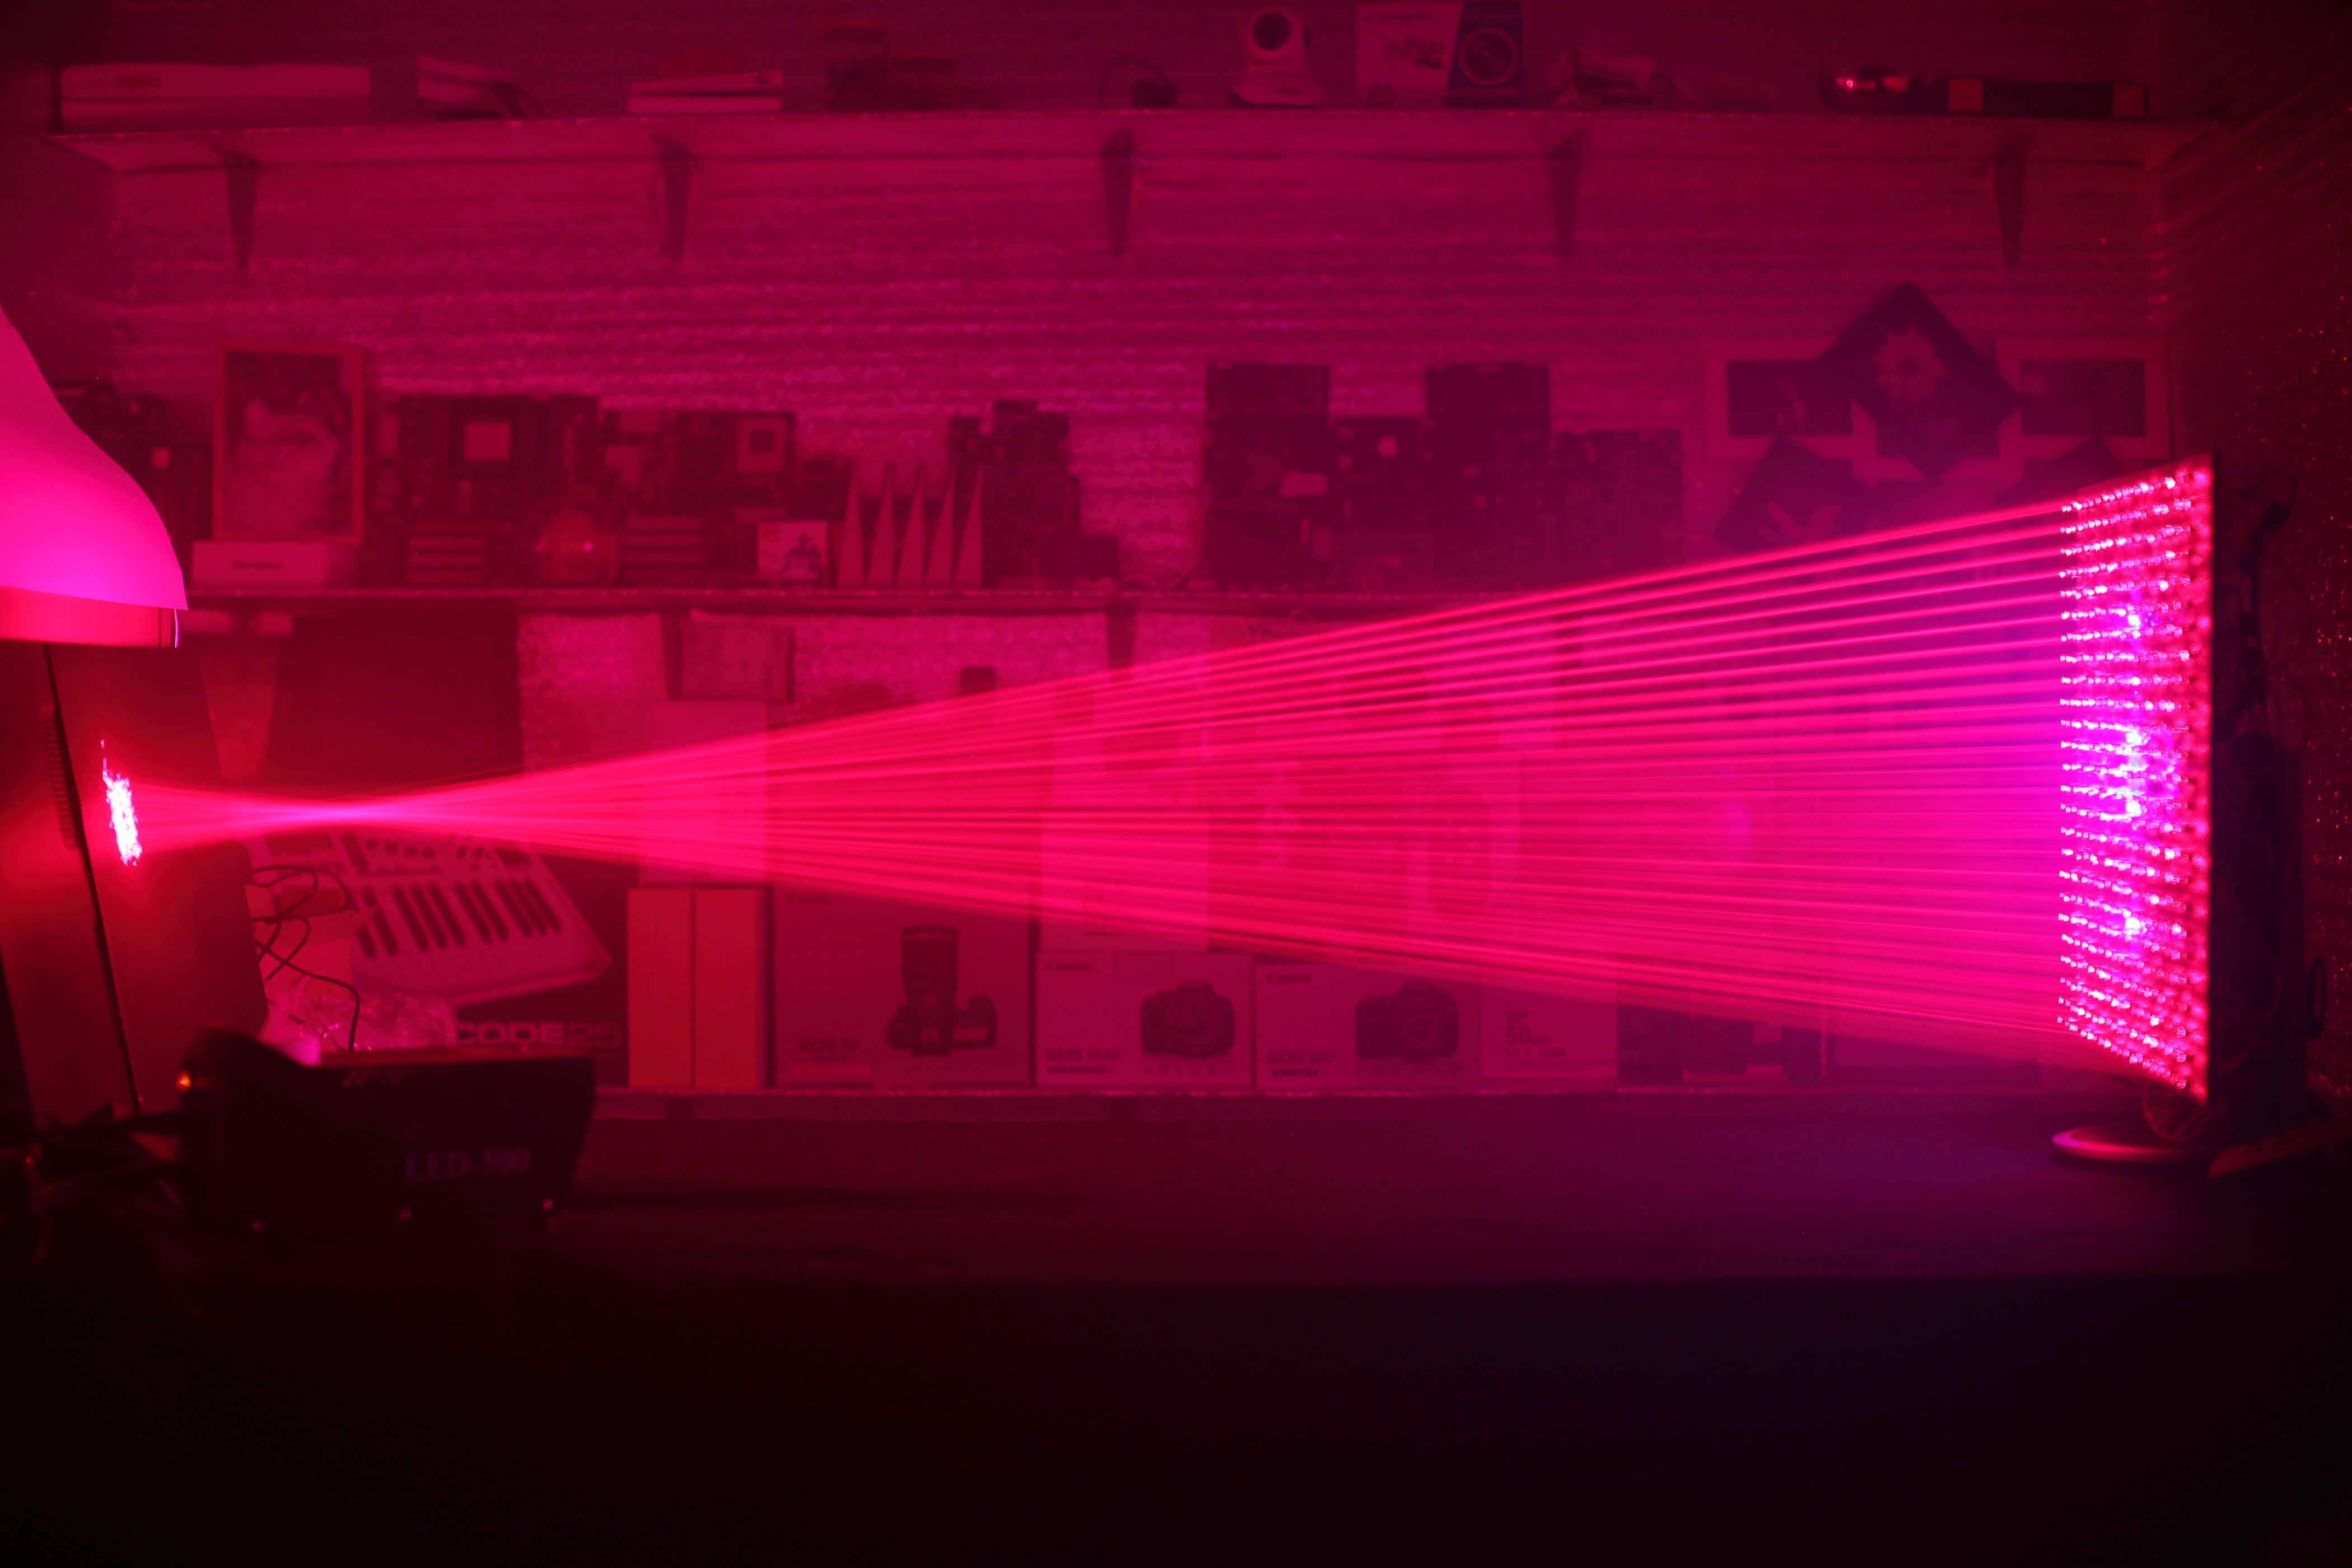
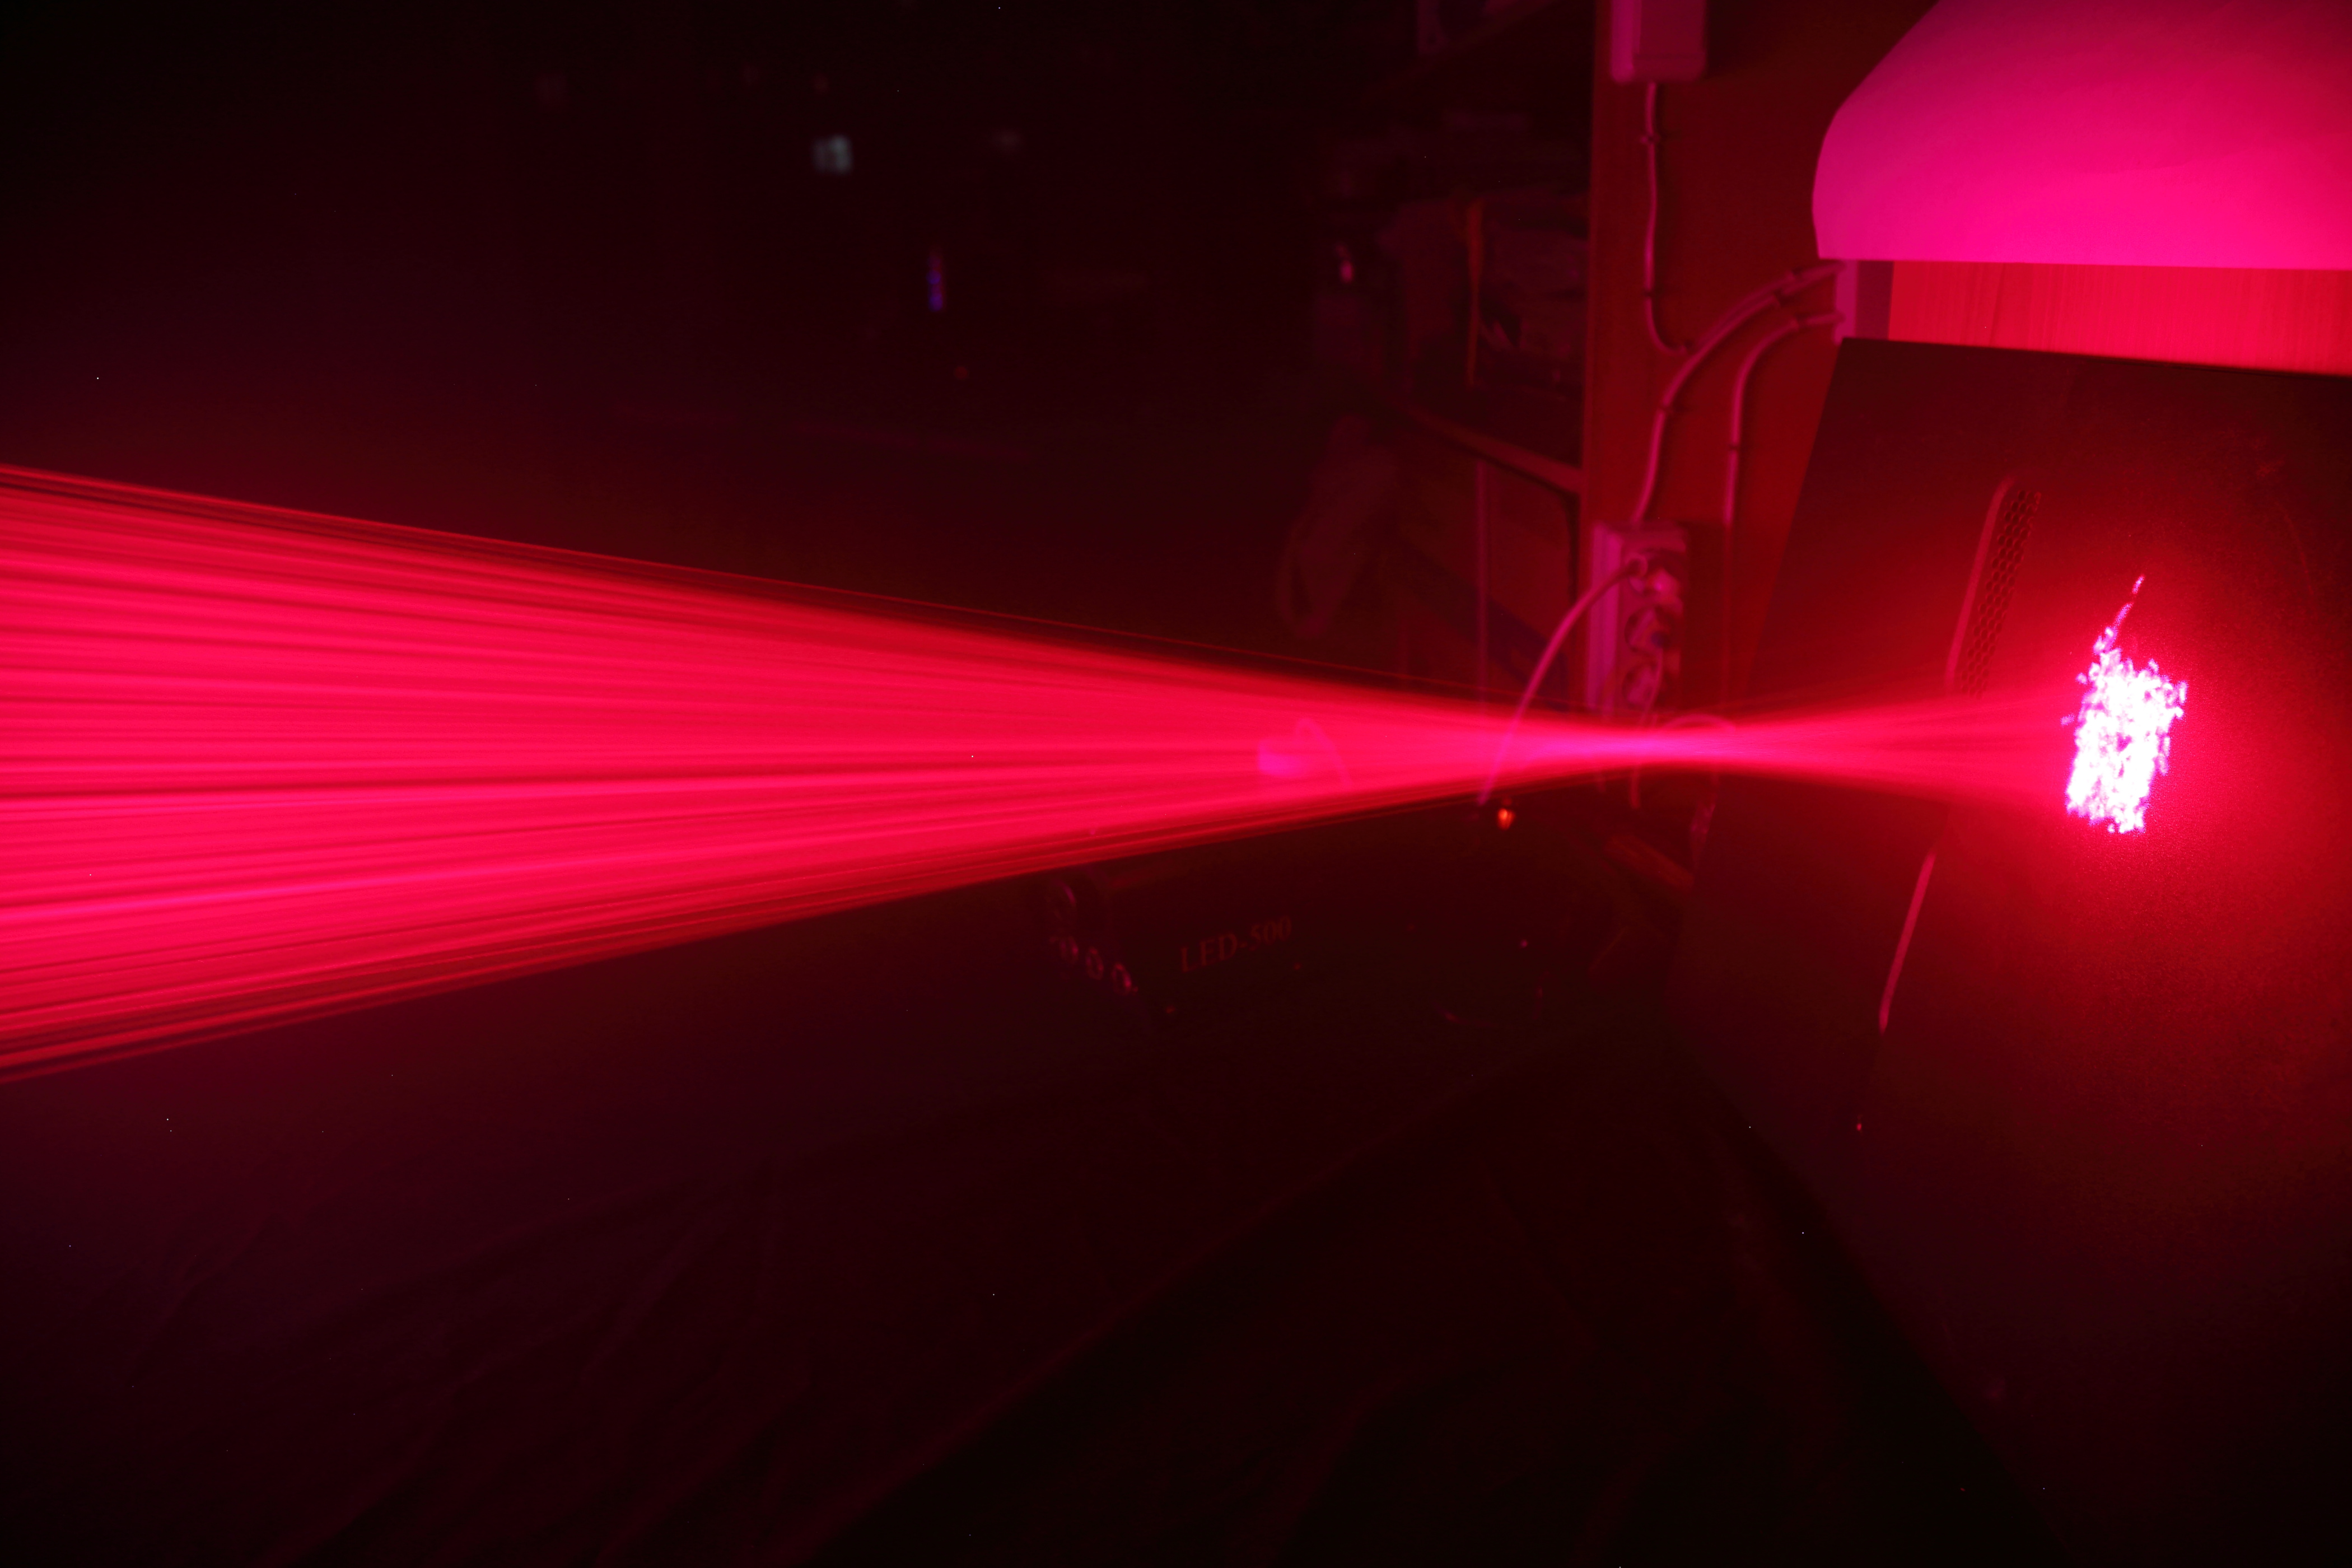
For the new version, I ordered another 300 laser modules. As an attachment, I made a square plate with a side of 440 mm of 6 mm thick plywood with a matrix of holes of 25 rows and 20 columns. The diameter of the holes is 5 mm. Later, I painted it in silver. For fixing the plate I used a rack from an old LCD monitor. I fixed the plate in a vice, and at a distance of 1350 mm (the length of my desk) I hung a paper target measuring 30x30 mm, in the center of which I directed each laser beam.
The process of inserting the laser module was as follows. I inserted the module wires into the hole and connected crocodiles with the supply voltage to them. Next, hot-melt the module case and the hole in the plate. Under the plate lay a fan for quick cooling of the glue. Since the glue hardens slowly, I could calmly correct the position of the module, focusing on the position of the laser point on the target. On average, it took me 3.5 minutes per laser module.
It is convenient to use hot melt glue as it can be heated and corrected by the module. However, there are two minuses. First, the heating of the modules led to the deformation of the module's design, which was expressed in the expansion of the laser beam. Some modules have drastically lost their brightness due to heat and had to be replaced. Secondly, after cooling, the hot melt glue continued to deform for several hours and slightly move the laser beam in an arbitrary direction. The last factor forced to change the original name of the project "500 laser pointers in one point."
Since the work was done only occasionally in the evenings and on weekends, it took about three months to glue in all 500 laser modules. Taking into account the delivery of the modules and the plate will be six months.
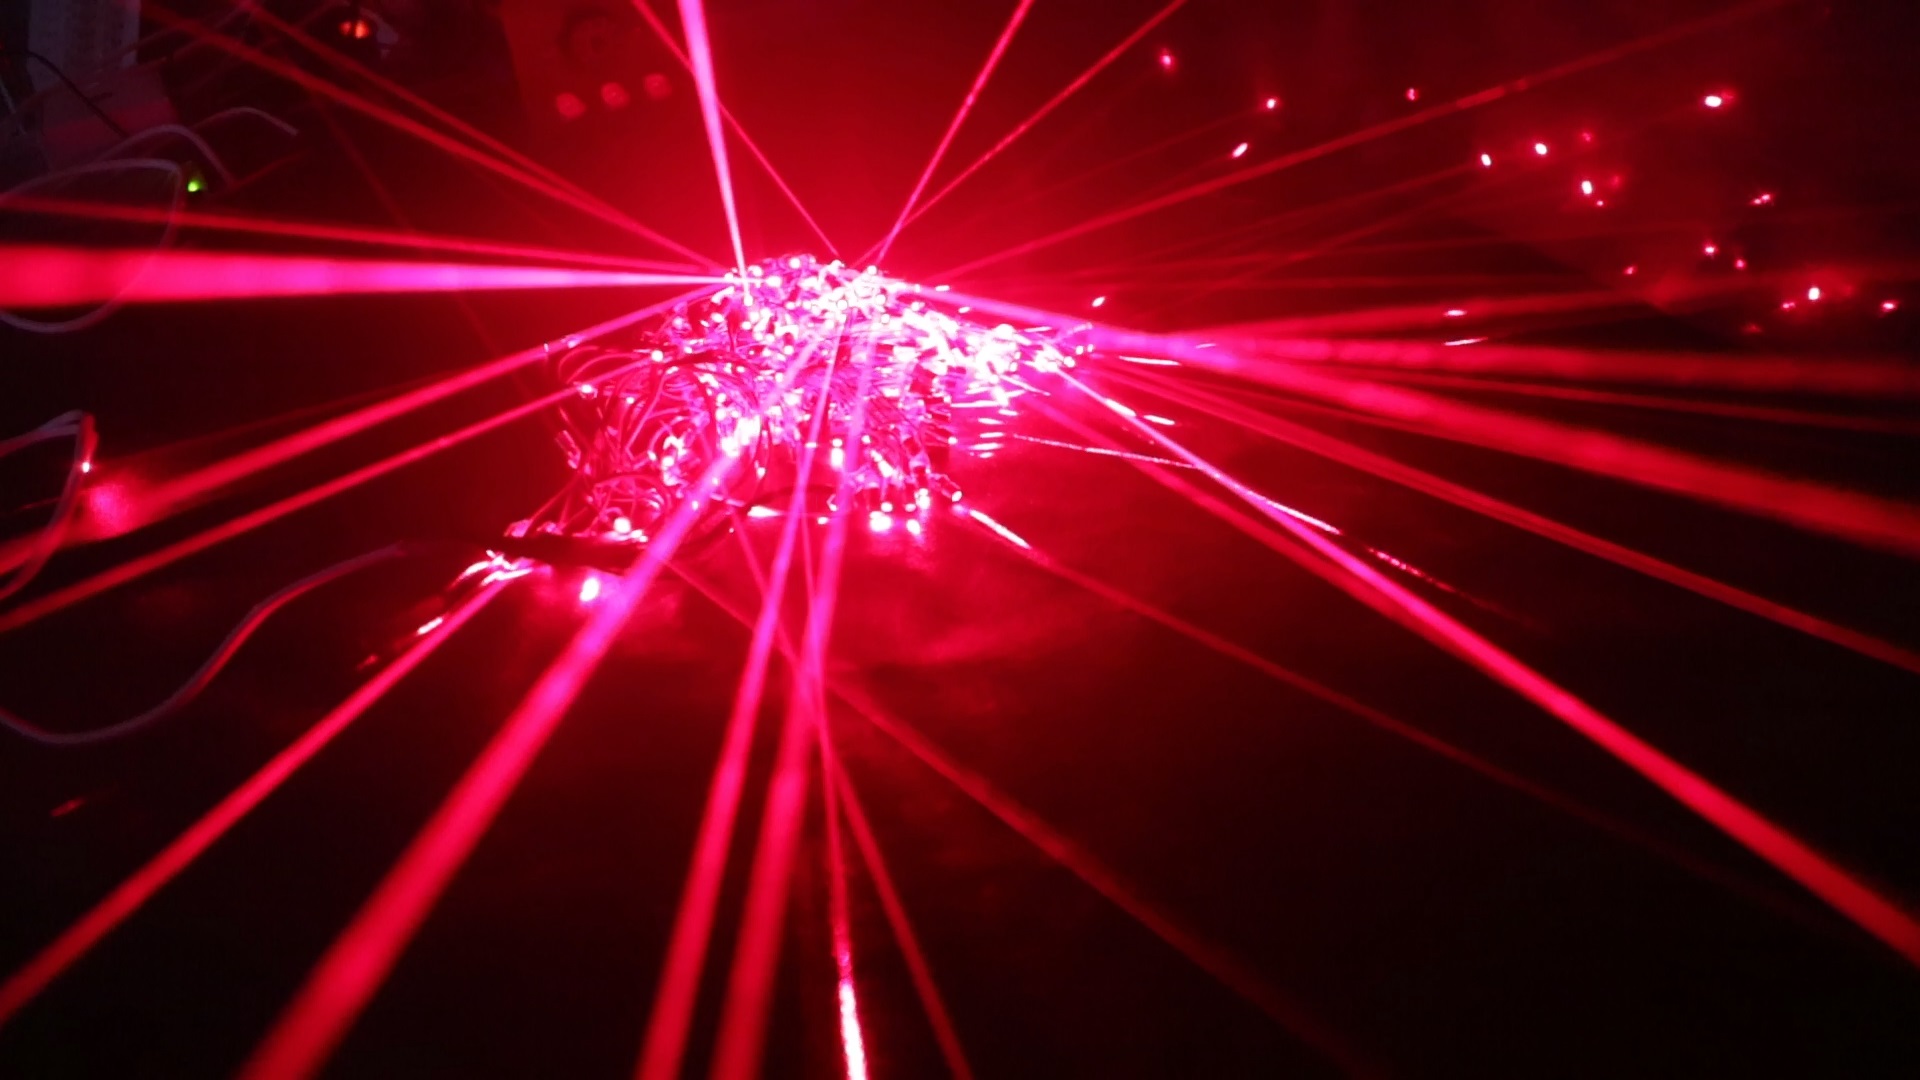
For a special effect, blue LEDs are added to the laser modules.
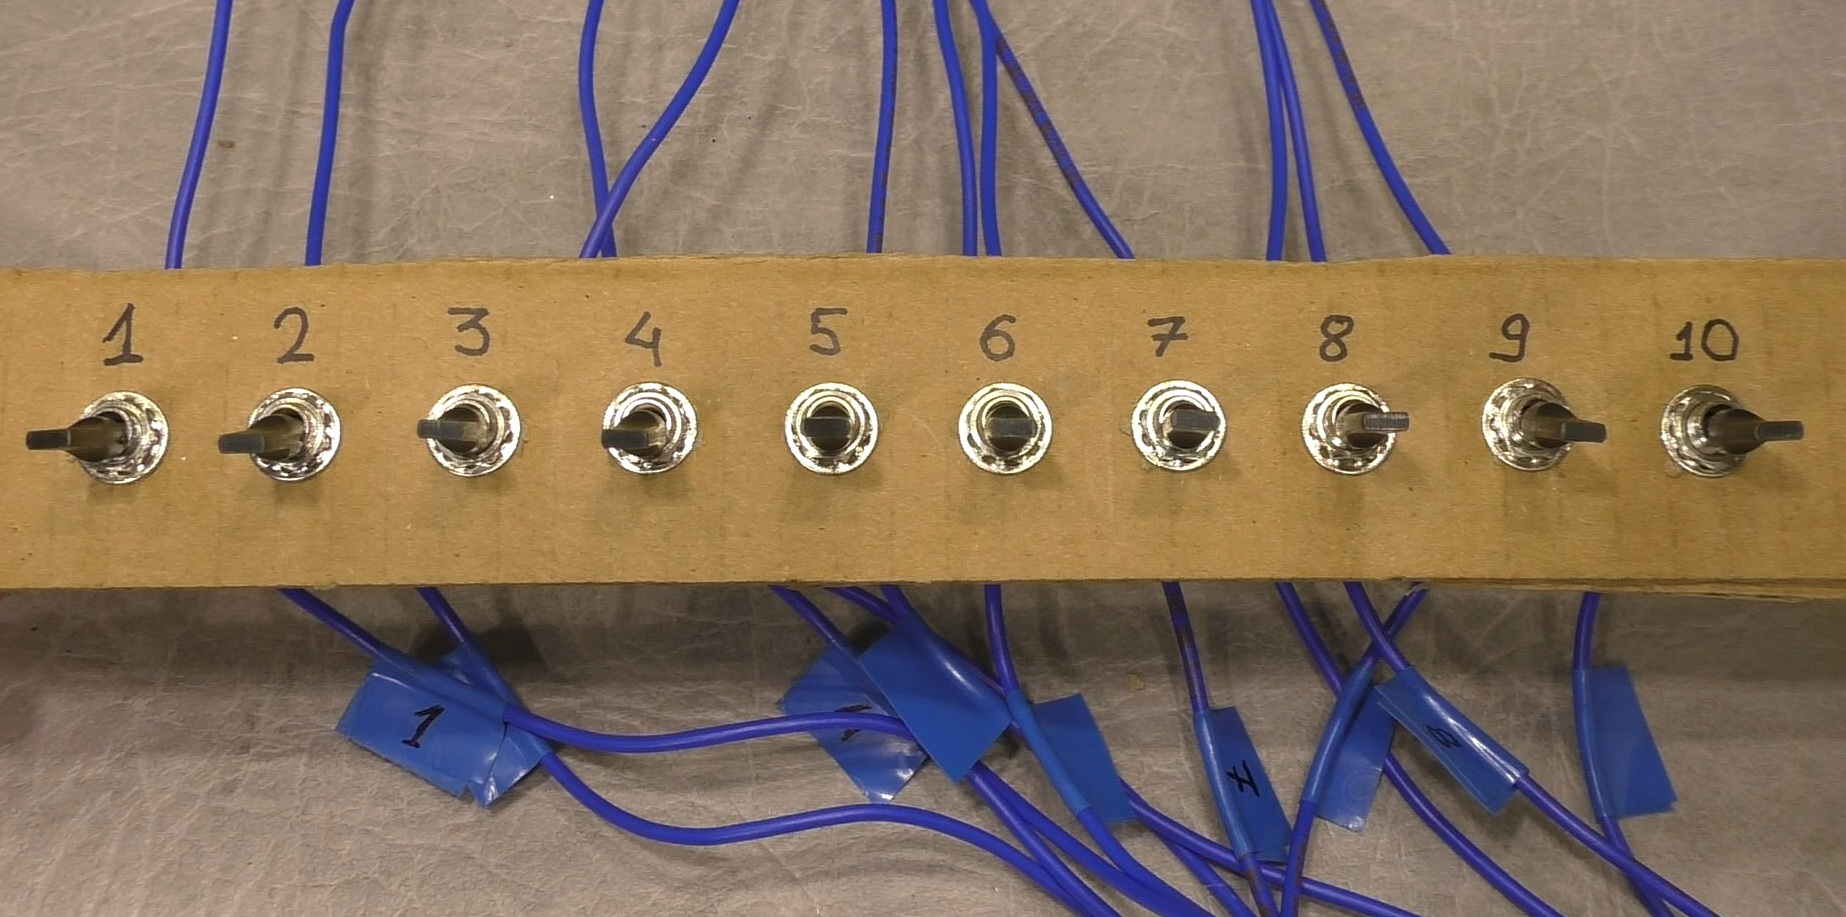
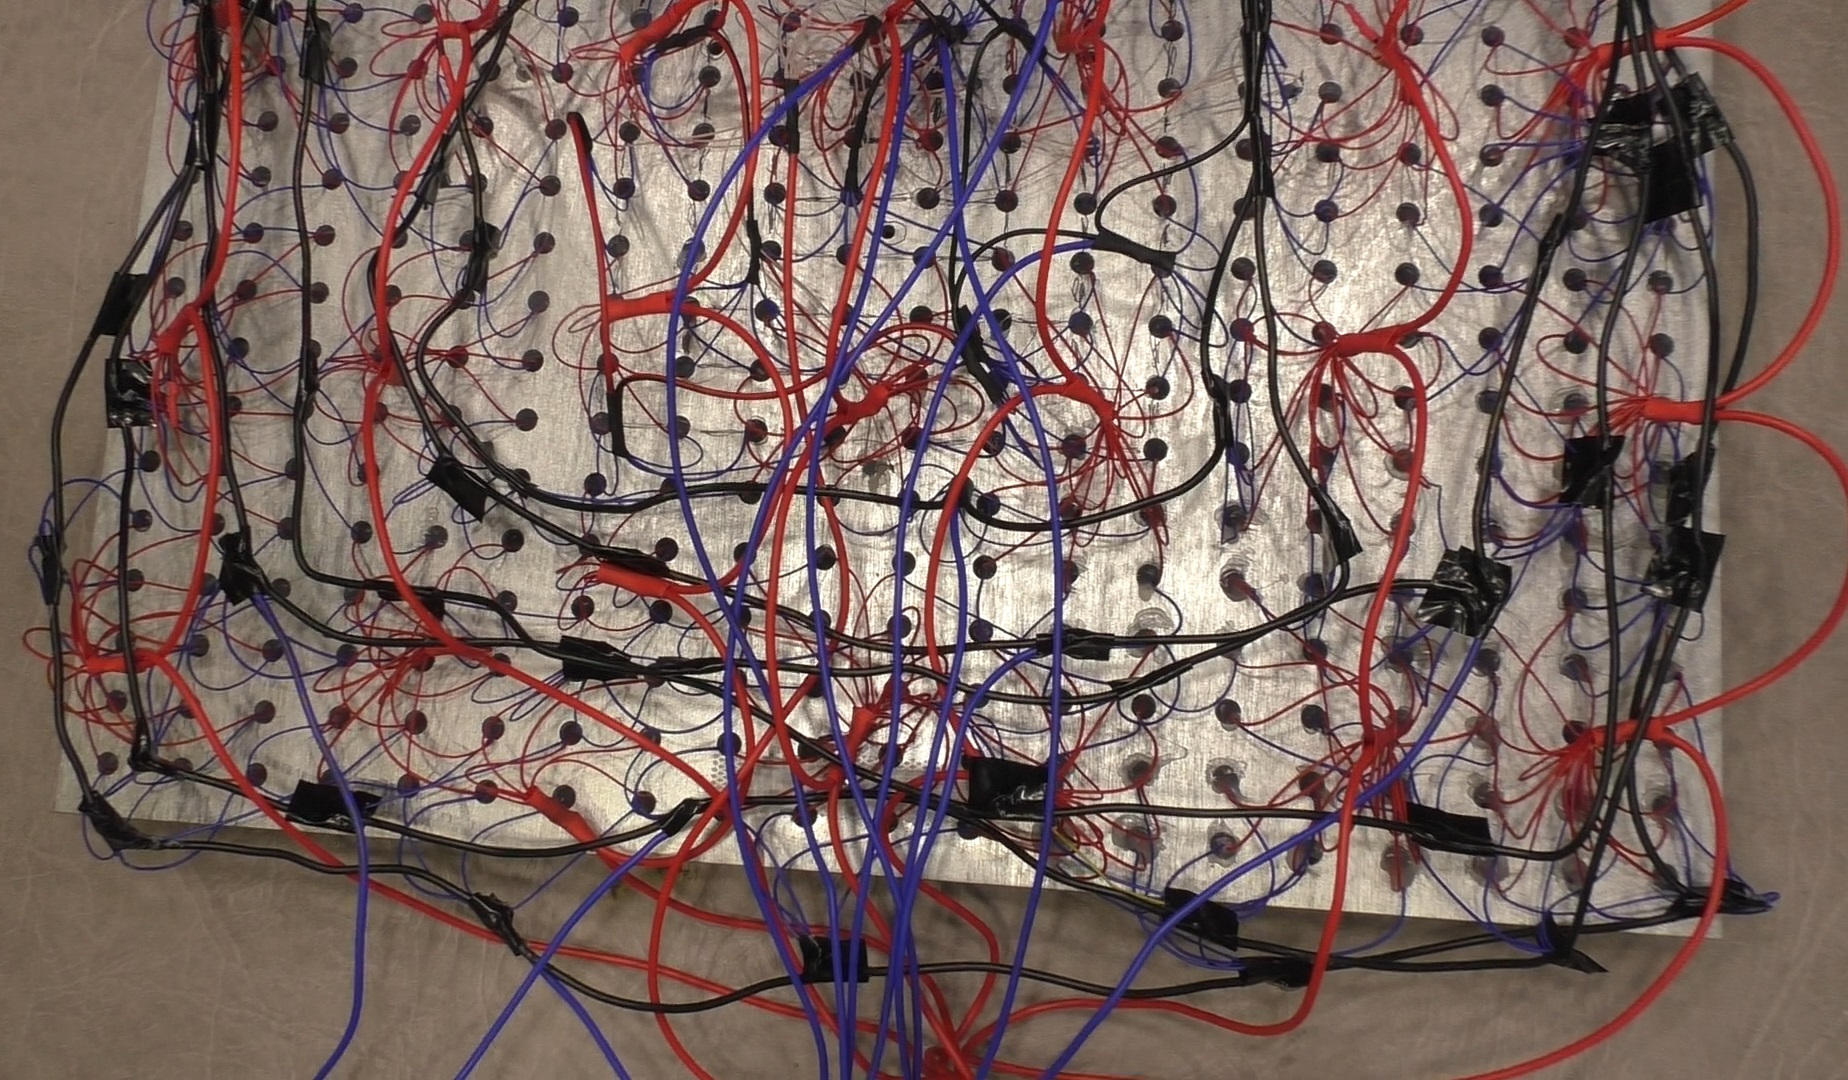
Providing power to all modules is not an easy task, because you need to connect 1000 contacts and evenly distribute the current. I connected all 500 plus contacts into one circuit. Negative contacts I divided into 10 groups. For each group assigned its toggle switch. In the future, I’m going to add 10 electronic keys controlled by the microcontroller to the music to include the groups. To power all the modules, I purchased the Mean Well LRS-350-5 constant voltage source , which provides a voltage of 5V with a current up to 60A. It has a small size and convenient terminal for connecting the load.
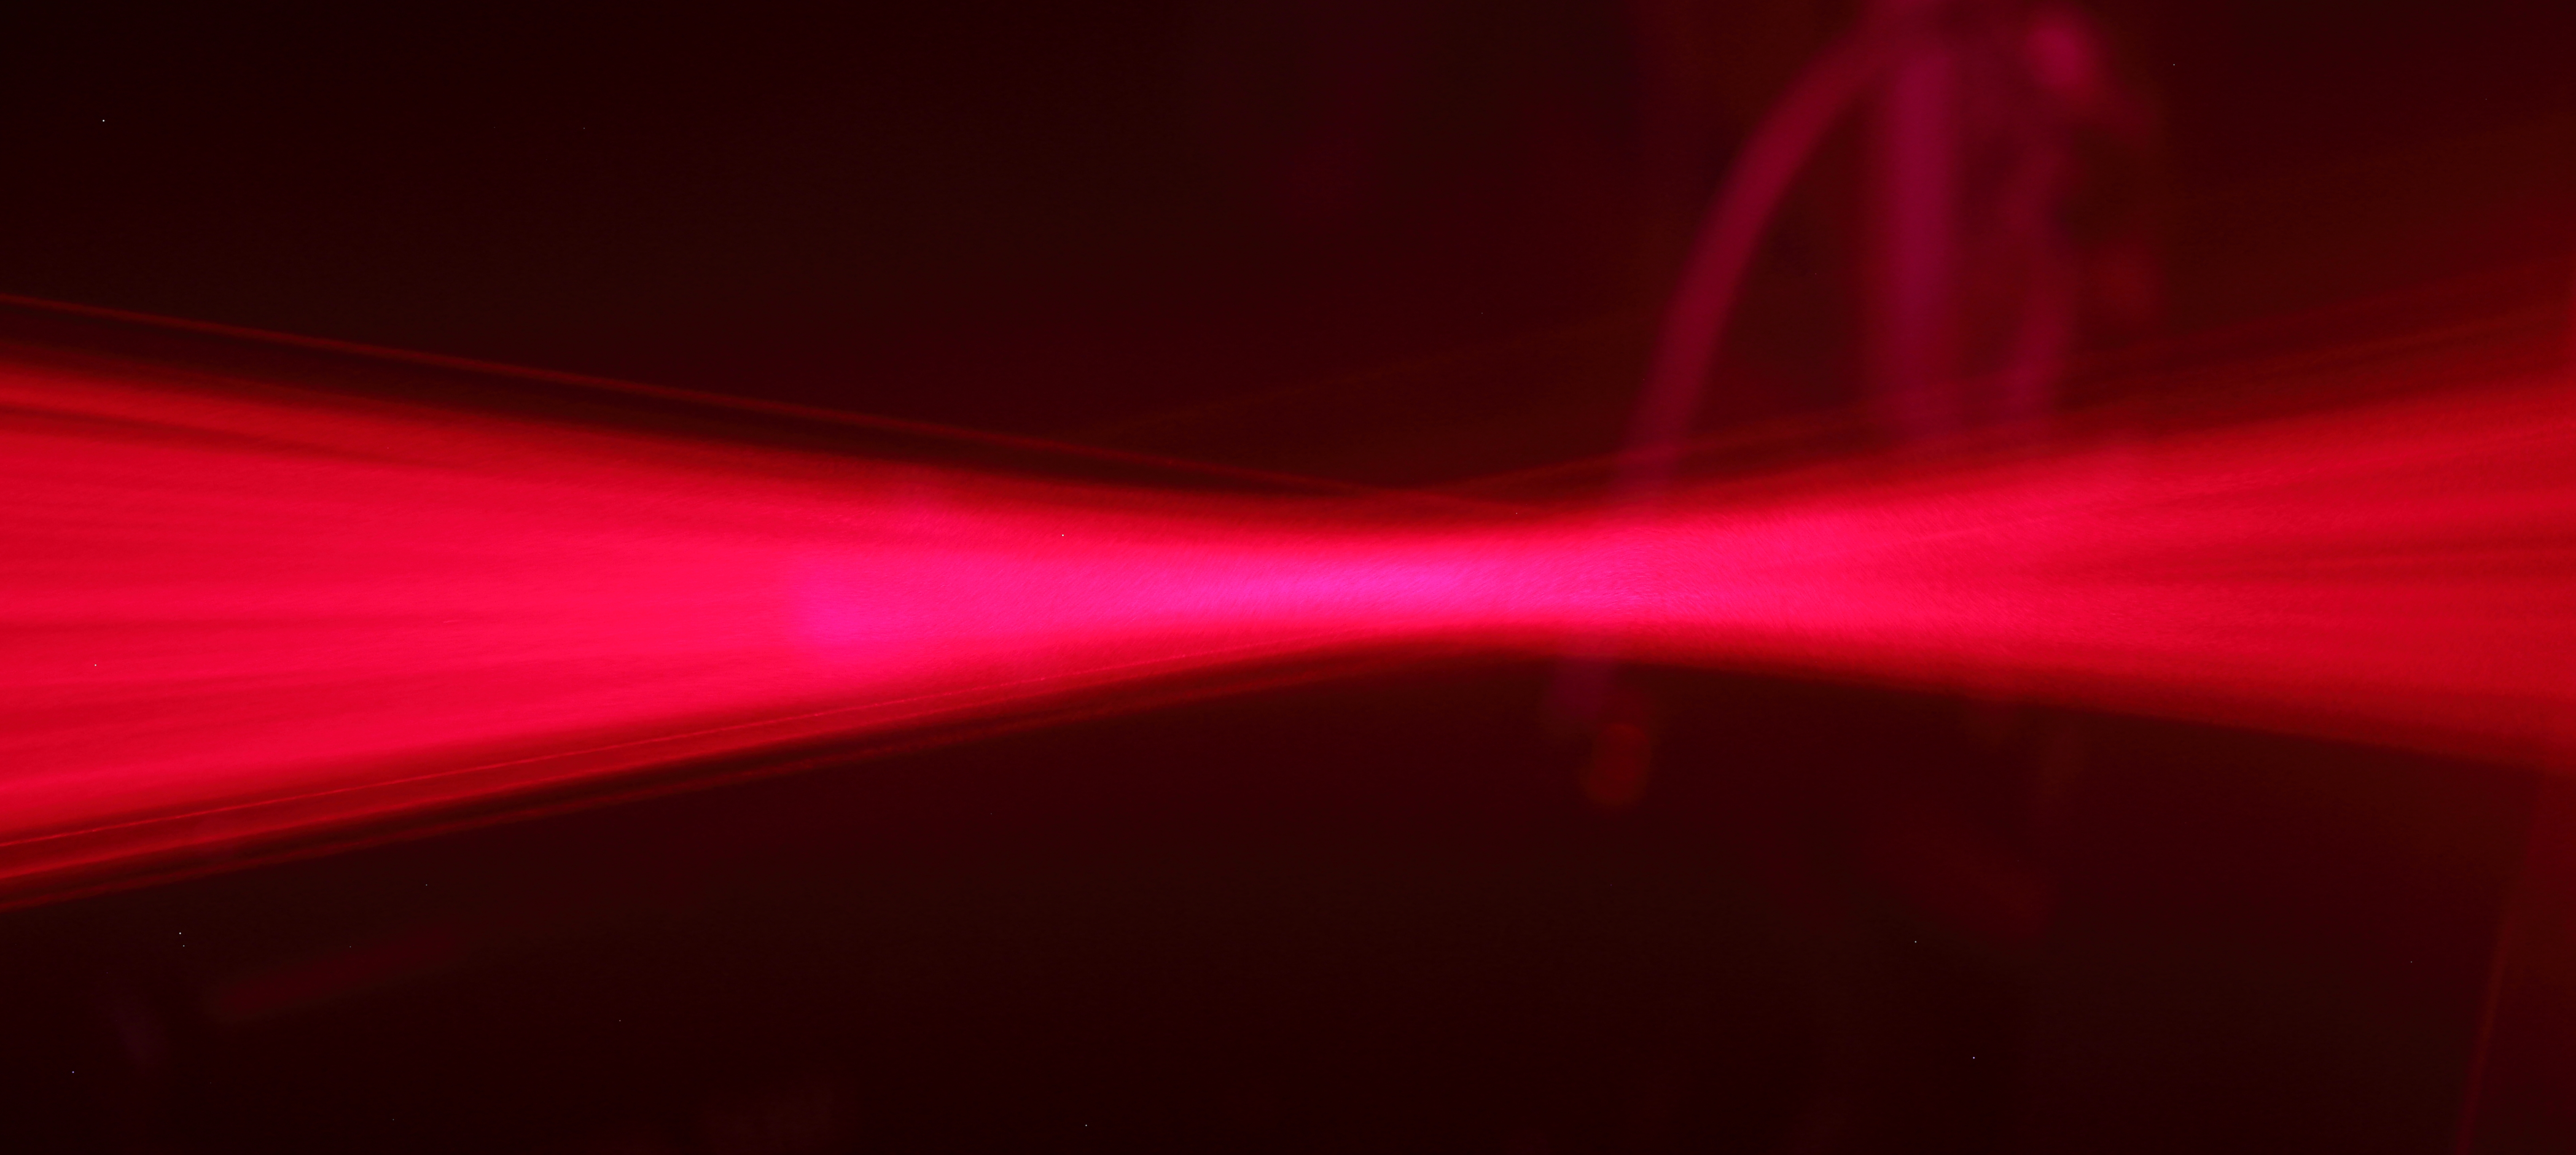
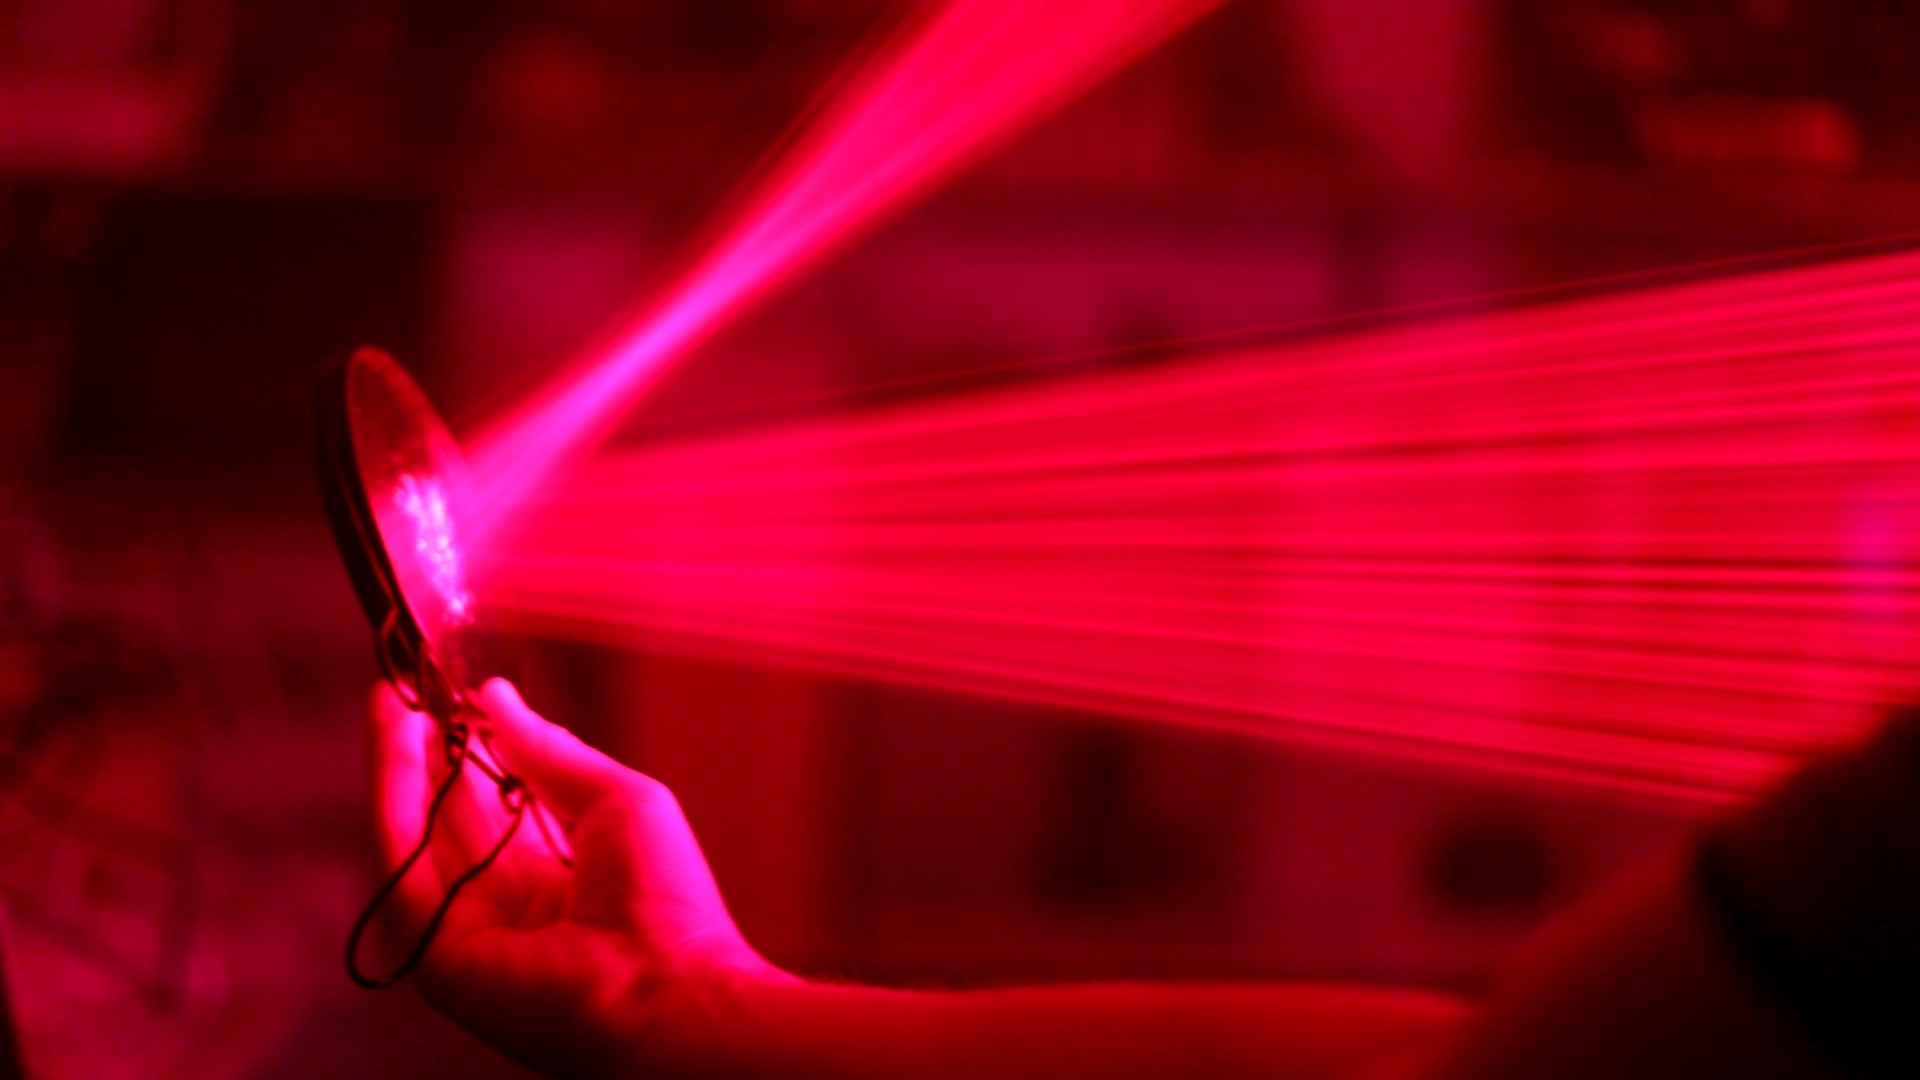
The final circuit with all the included laser modules has a consumption of about 14 amps. The figure below shows the location of all laser points on the target. As you can see, I almost met the “one place” with a size of 30x30 mm. One spot outside the target appeared due to one module having side lateral radiation. The resulting device does not look very nice, but all its beauty is manifested in the dark and fog. I tried to touch the place of intersection of the rays. Heat is felt, but not strong. And even directed the camera directly to the emitters (I myself use green safety glasses). It was very interesting to use mirrors and lenses.


This project is exclusively for leisure and its results have pleased me. At the moment I do not set myself the same time-consuming tasks, but in the future I’ll probably come up with something else. I hope you were interested too.
Thanks for attention!