April 11, 2016 at 11:26
Not IoT, but raspberries! Building an IoT project on Raspberry Pi with Windows 10 and DeviceHive
Hi, Habr.
Probably every developer at a certain stage thought about his own IoT-project. Internet of Things is now truly omnipresent and many of us want to try our hand. But not everyone knows where to start and what to take first. Today, let's see how to easily and naturally launch your own IoT project under Raspberry Pi 2 using Windows 10 IoT Core and DeviceHive.
To get started, let's install Windows 10 IoT Core on the Raspberry Pi. To do this, we need the Windows 10 IoT Core Dashboard , which you can get here . You can also download an ISO image separately if you wish, but there isn’t much point in this - the tool will do it for you.
Then we upload the image to a misroSD flash drive.
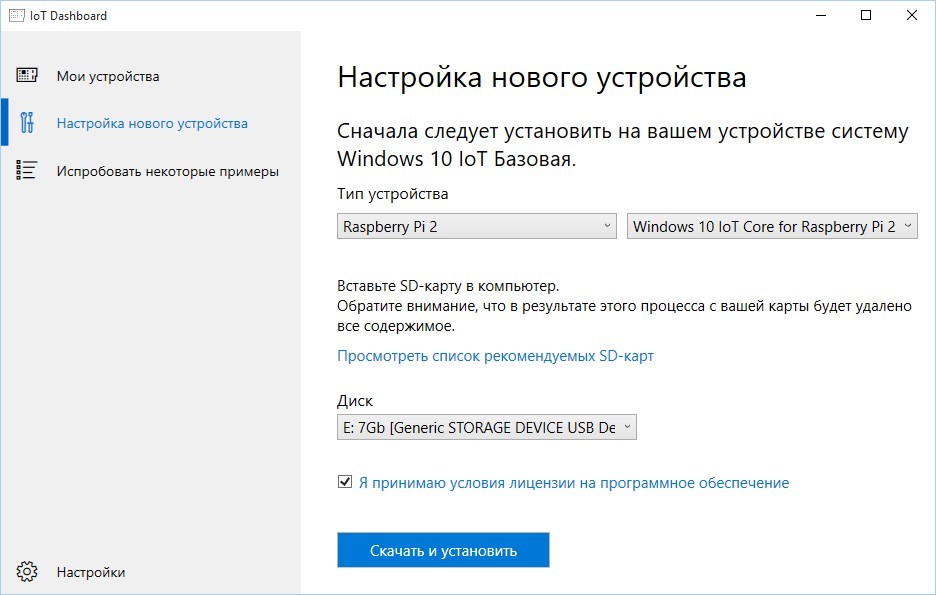
We connect the USB flash drive to Raspberry and turn it on. The first boot of the OS will have to wait; instantly, of course, it will not. When the device "comes to life" - we connect Raspberry to the local network via Ethernet. Open Windows 10 IoT Core Dashboard again and see the treasured line in the "My devices" list. By the way, you can do without a wired connection - a list of WiFi dongles supported by Windows 10 IoT Core is here .
Next, we will need Visual Studio 2015. If you still haven’t installed it (although you would hardly have read this article in this case), you can download Community Edition.
Create a new one or open an existing Windows Universalproject. By the way, if the project does not need a UI, you can create a Headless Application by selecting the project type of Windows IoT Core Background Application .

Select deployment on Remote Machine.
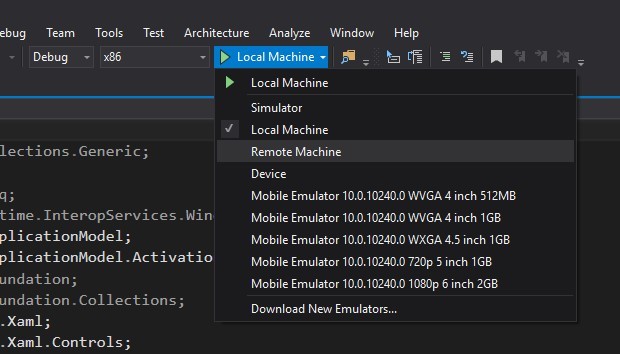
Enter the address of Raspberry. You can watch it on the start screen of Win10 IoT Core or in Windows 10 IoT Core Dashboard .

Since we have an article about embedded - “blinking LEDs” will have to in any case. It’s good that we are dealing with DeviceHive, which has tools for all occasions and all platforms. Therefore, the LED will be virtual and also on .NET.
We clone the master branch of the DeviceHive.NET repository from GitHub. At the time of this writing, working examples for Win10 IoT were there.
Open the solution DeviceHive.Device and in the Program.cs file of the VirtualLed project we configure access to the DeviceHive sandbox.
If you are interested in IoT, but for some inconceivable reason have not yet got a DeviceHive Playground - you can do it here .

And it will manage our "LED" ... No, not Raspberry yet, but a client of a virtual LED. An example is in the VirtualLedClient project of the solution DeviceHive.Client . It also needs to be configured in the Program.cs file :
Our application on the Raspberry Pi will be not just a button for turning on / off the LED, but a practically complete admin panel for all IoT devices of our DeviceHive network. If you wish, of course, you can simplify it to that very “button” or vice versa expand it, for example, to a client operating a telepresence robot .
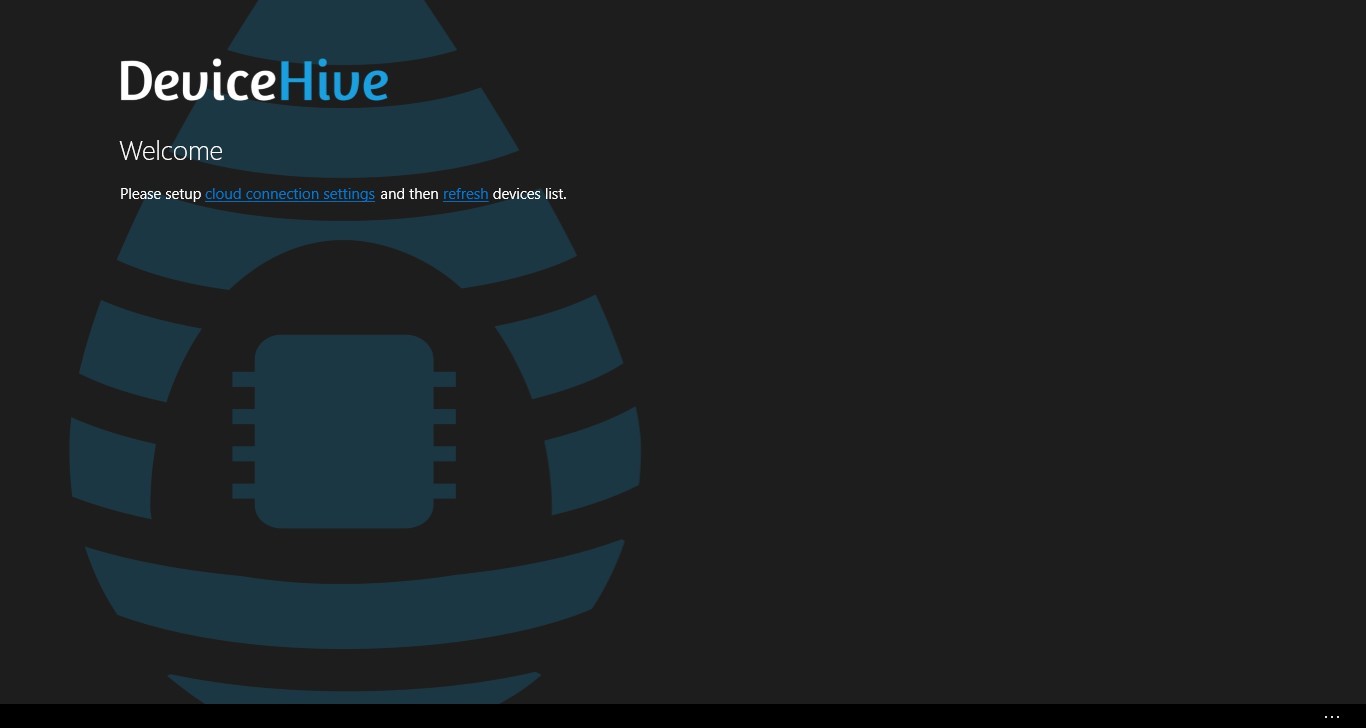
The finished application is located in the same repository, in the solution DeviceHive.WindowsManager.Universal . We will not dwell on the nuances of the Win10 guidelines - the roots of the application grow back from Win8. MVVM will not be here either - everyone already knows how to use it. Let's focus on the main thing : we need a console for monitoring and managing devices connected to DeviceHive under Windows 10on the Raspberry Pi2 .
DeviceHive has three client libraries:
Inherit ClientService from DeviceHiveClient and initialize its setting:
And also indicate not to use LongPolling , but only WebSocket , so as not to run into the limit of simultaneous HTTP requests:
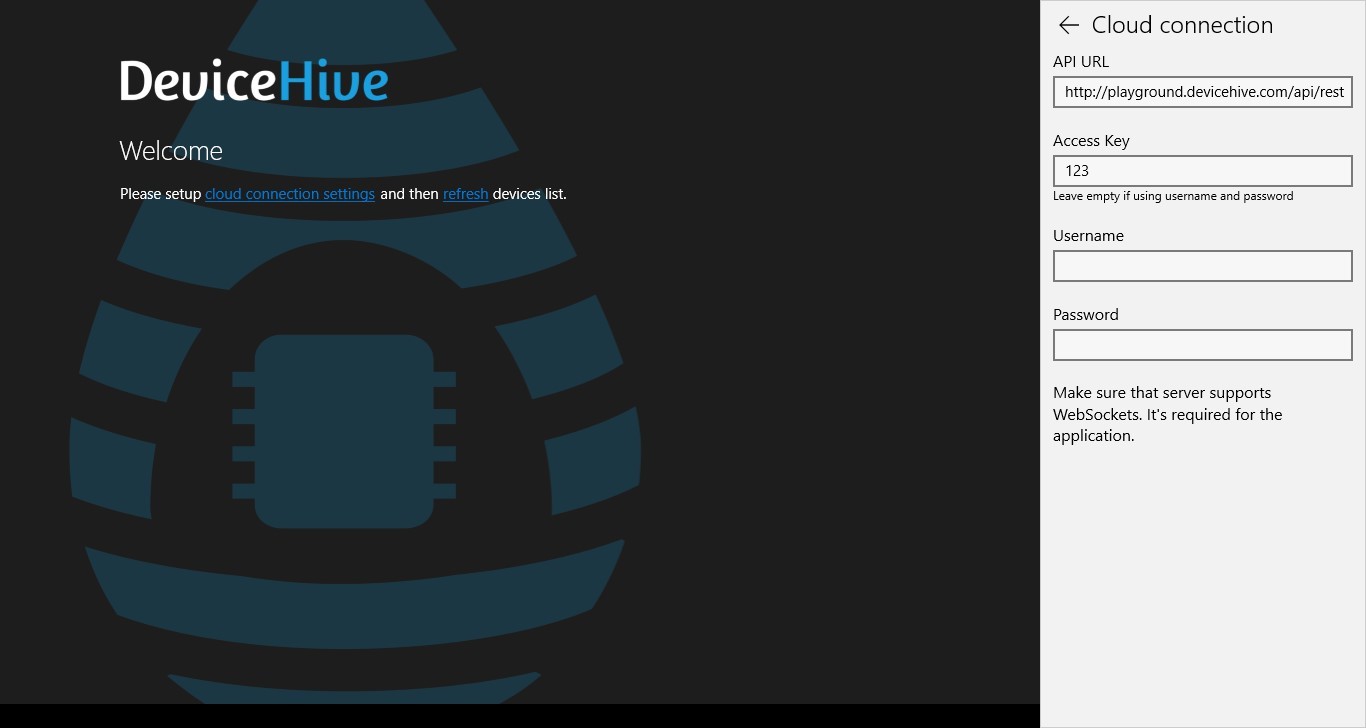
Download the list of devices and group them by network in MainPage :
And here is our virtual LED:

Go to DevicePage , load information about it:

We switch to the tab with notifications. Notifications are sent from the managed device to the controlling device. In our case, from VirtualLedClient to VirtualLed .
We initialize the auto-loading list with an “infinite” scroll:
If the end date for filtering the list of notifications is not defined, we subscribe to new notifications that will come via the web socket:
If you try to switch our virtual LED, then notifications about its new state will immediately appear in the list.
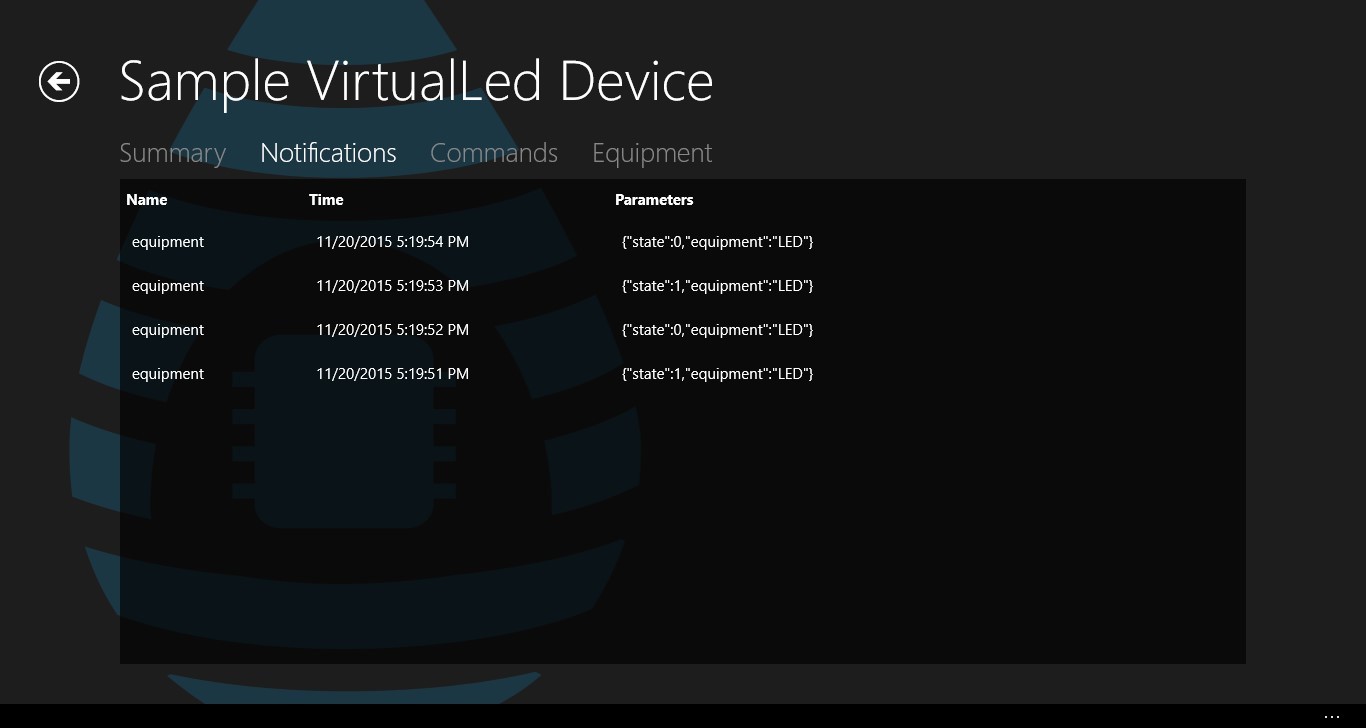
If you change the filtering settings, the auto-loading list is reinitialized with a new filter.

Now it's the turn of the command tab. Commands are similar to notifications, but are directed from the controlling device to the controlled, and may also have a status and a result of execution.
Similarly, subscribe to new teams:

Since we are making a tool not only for monitoring, but also for managing devices in the DeviceHive network, we need to realize the ability to send commands:
When sending a command, we signed up for its update using the CommandResultCallback method. We process the result of the command:

In order not to copy commands manually, it is necessary to provide cloning of commands. We select, clone, if necessary - edit, send.

Mission accomplished! As you can see, the Raspberry Pi 2 with Windows 10 IoT Core and DeviceHive is a great solution for almost any task in the context of Internet of Things. Screw a couple of buttons, a dashboard and connect the Raspberry Pi to the TV in the living room - monitoring and control of the smart home is ready. Bought an extra Raspberry? It’s not a question, the DeviceHive.Client library can work not only as a managing client, but also as a managed device - we implement the Headless Application, connect sensors / relays and install Raspberry Pi around the house. Only your imagination limits you.
The advent of Windows 10 IoT Core is exactly what embedded developers have been waiting for. When the resources of even the most powerful microcontroller on the .NET Micro Framework (for which, incidentally, there is also a DeviceHive implementation ) are not enough, and installing a full-fledged computer on Windows is the same as shooting a sparrow from a cannon, then Windows 10 IoT Core is a real salvation . And while there are still nuances with hardware graphics acceleration and a lack of drivers for some USB devices, this is all forgivable. Indeed, until recently we only dreamed that Windows-based applications running on desktop PCs and tablets would run not only on phones, but also on microcomputers. And now - this is reality, welcome to "today."

Anton Sedyshev - Senior .NET developer “DataArt”
He has been working in IT since 2003, joined the DataArt team in 2012. Previously, he was involved in the development of web and mobile projects, automation of logistics processes in the warehouses of a large international company. He now acts as the leading .NET developer and ideologist of the Microsoft DataArt community. He is engaged in application development on Windows Phone and Windows 10, DeviceHive service and embedded-technologies in general. In his spare time he works on his own OpenSource embedded project for integrating the .NET Micro Framework device into BMW cars.
Probably every developer at a certain stage thought about his own IoT-project. Internet of Things is now truly omnipresent and many of us want to try our hand. But not everyone knows where to start and what to take first. Today, let's see how to easily and naturally launch your own IoT project under Raspberry Pi 2 using Windows 10 IoT Core and DeviceHive.
Deploy Windows 10 applications on Raspberry Pi 2
To get started, let's install Windows 10 IoT Core on the Raspberry Pi. To do this, we need the Windows 10 IoT Core Dashboard , which you can get here . You can also download an ISO image separately if you wish, but there isn’t much point in this - the tool will do it for you.
Then we upload the image to a misroSD flash drive.
We connect the USB flash drive to Raspberry and turn it on. The first boot of the OS will have to wait; instantly, of course, it will not. When the device "comes to life" - we connect Raspberry to the local network via Ethernet. Open Windows 10 IoT Core Dashboard again and see the treasured line in the "My devices" list. By the way, you can do without a wired connection - a list of WiFi dongles supported by Windows 10 IoT Core is here .
Next, we will need Visual Studio 2015. If you still haven’t installed it (although you would hardly have read this article in this case), you can download Community Edition.
Create a new one or open an existing Windows Universalproject. By the way, if the project does not need a UI, you can create a Headless Application by selecting the project type of Windows IoT Core Background Application .
Select deployment on Remote Machine.
Enter the address of Raspberry. You can watch it on the start screen of Win10 IoT Core or in Windows 10 IoT Core Dashboard .
Actually, Internet of Things
Since we have an article about embedded - “blinking LEDs” will have to in any case. It’s good that we are dealing with DeviceHive, which has tools for all occasions and all platforms. Therefore, the LED will be virtual and also on .NET.
We clone the master branch of the DeviceHive.NET repository from GitHub. At the time of this writing, working examples for Win10 IoT were there.
Open the solution DeviceHive.Device and in the Program.cs file of the VirtualLed project we configure access to the DeviceHive sandbox.
using (var service = new RestfulDeviceService("http://playground.devicehive.com/api/rest"))
{
    // create a DeviceHive network where our device will reside
    var network = new Network("Network WPNBEP", "Playground Network", "%NETWORK_KEY%");
    //...
}
If you are interested in IoT, but for some inconceivable reason have not yet got a DeviceHive Playground - you can do it here .
And it will manage our "LED" ... No, not Raspberry yet, but a client of a virtual LED. An example is in the VirtualLedClient project of the solution DeviceHive.Client . It also needs to be configured in the Program.cs file :
var connectionInfo = new DeviceHiveConnectionInfo("http://playground.devicehive.com/api/rest", "%ACCESS_KEY%");
The most interesting
Our application on the Raspberry Pi will be not just a button for turning on / off the LED, but a practically complete admin panel for all IoT devices of our DeviceHive network. If you wish, of course, you can simplify it to that very “button” or vice versa expand it, for example, to a client operating a telepresence robot .
The finished application is located in the same repository, in the solution DeviceHive.WindowsManager.Universal . We will not dwell on the nuances of the Win10 guidelines - the roots of the application grow back from Win8. MVVM will not be here either - everyone already knows how to use it. Let's focus on the main thing : we need a console for monitoring and managing devices connected to DeviceHive under Windows 10on the Raspberry Pi2 .
DeviceHive has three client libraries:
- DeviceHive.Client - for "large" .NET 4.5 and higher. Uses WebSocket4Net.
- DeviceHive.Client.Portable - for Windows 8.1 and Windows Phone 8.1. Uses native WebSockets.
- DeviceHive.Client.Universal - for all editions of Windows 10, including Win10 IoT Core. It is she who is used in our application.
Inherit ClientService from DeviceHiveClient and initialize its setting:
DeviceHiveConnectionInfo connInfo;
if (!String.IsNullOrEmpty(Settings.Instance.CloudAccessKey))
{
    connInfo = new DeviceHiveConnectionInfo(Settings.Instance.CloudServerUrl, Settings.Instance.CloudAccessKey);
}
else
{
    connInfo = new DeviceHiveConnectionInfo(Settings.Instance.CloudServerUrl, Settings.Instance.CloudUsername, Settings.Instance.CloudPassword);
}
current = new ClientService(connInfo, new RestClient(connInfo));
And also indicate not to use LongPolling , but only WebSocket , so as not to run into the limit of simultaneous HTTP requests:
SetAvailableChannels(new Channel[] {
    new WebSocketChannel(connectionInfo, restClient)
});
Download the list of devices and group them by network in MainPage :
var deviceList = await ClientService.Current.GetDevicesAsync();
var networkList = (await ClientService.Current.GetNetworksAsync()).FindAll(n => n.Id != null);
foreach (Network network in networkList)
{
    var devices = deviceList.FindAll(d => d.Network?.Id == network.Id);
    if (devices.Count > 0)
    {
        networkWithDevicesList.Add(new NetworkViewModel(network) { Devices = devices });
    }
}
And here is our virtual LED:
Go to DevicePage , load information about it:
Device = await ClientService.Current.GetDeviceAsync(deviceId);
We switch to the tab with notifications. Notifications are sent from the managed device to the controlling device. In our case, from VirtualLedClient to VirtualLed .
We initialize the auto-loading list with an “infinite” scroll:
NotificationFilter filter = new NotificationFilter()
{
    End = filterNotificationsEnd,
    Start = filterNotificationsStart,
    SortOrder = SortOrder.DESC
};
var list = new IncrementalLoadingCollection(async (take, skip) =>
{
    filter.Skip = (int)skip;
    filter.Take = (int)take;
    return await ClientService.Current.GetNotificationsAsync(deviceId, filter);
}, 20);
If the end date for filtering the list of notifications is not defined, we subscribe to new notifications that will come via the web socket:
notificationsSubscription = await ClientService.Current.AddNotificationSubscriptionAsync(new[] { deviceId }, null, async (notificationReceived) =>
{
    await Dispatcher.RunAsync(CoreDispatcherPriority.Normal, () =>
    {
        lock (NotificationsObservable)
        {
            if (!NotificationsObservable.Any(c => c.Id == notificationReceived.Notification.Id))
            {
                NotificationsObservable.Insert(0, notificationReceived.Notification);
            }
        }
    });
});
If you try to switch our virtual LED, then notifications about its new state will immediately appear in the list.
If you change the filtering settings, the auto-loading list is reinitialized with a new filter.
Now it's the turn of the command tab. Commands are similar to notifications, but are directed from the controlling device to the controlled, and may also have a status and a result of execution.
CommandFilter filter = new CommandFilter()
{
End = filterCommandsEnd,
Start = filterCommandsStart,
SortOrder = SortOrder.DESC
};
var list = new IncrementalLoadingCollectionSimilarly, subscribe to new teams:
commandsSubscription = await ClientService.Current.AddCommandSubscriptionAsync(new[] { deviceId }, null, async (commandReceived) =>
{
    await Dispatcher.RunAsync(CoreDispatcherPriority.Normal, () =>
    {
        lock (CommandsObservable)
        {
            if (!CommandsObservable.Any(c => c.Id == commandReceived.Command.Id))
            {
                CommandsObservable.Insert(0, commandReceived.Command);
            }
        }
    });
});
Since we are making a tool not only for monitoring, but also for managing devices in the DeviceHive network, we need to realize the ability to send commands:
var parameters = commandParams.Text != "" ? JObject.Parse(commandParams.Text) : null;
var command = new Command(commandName.Text, parameters);
await ClientService.Current.SendCommandAsync(deviceId, command, CommandResultCallback);
When sending a command, we signed up for its update using the CommandResultCallback method. We process the result of the command:
foreach (Command cmd in CommandsObservable)
{
  if (command.Id == cmd.Id)
  {
        // Command class doesn't implement INotifyPropertyChanded to update its result,
        // so old command is replaced by command with result:
        var index = commandsObservable.IndexOf(cmd);
        commandsObservable.RemoveAt(index);
        commandsObservable.Insert(index, command);
        break;
    }
}
In order not to copy commands manually, it is necessary to provide cloning of commands. We select, clone, if necessary - edit, send.
Mission accomplished! As you can see, the Raspberry Pi 2 with Windows 10 IoT Core and DeviceHive is a great solution for almost any task in the context of Internet of Things. Screw a couple of buttons, a dashboard and connect the Raspberry Pi to the TV in the living room - monitoring and control of the smart home is ready. Bought an extra Raspberry? It’s not a question, the DeviceHive.Client library can work not only as a managing client, but also as a managed device - we implement the Headless Application, connect sensors / relays and install Raspberry Pi around the house. Only your imagination limits you.
Conclusion
The advent of Windows 10 IoT Core is exactly what embedded developers have been waiting for. When the resources of even the most powerful microcontroller on the .NET Micro Framework (for which, incidentally, there is also a DeviceHive implementation ) are not enough, and installing a full-fledged computer on Windows is the same as shooting a sparrow from a cannon, then Windows 10 IoT Core is a real salvation . And while there are still nuances with hardware graphics acceleration and a lack of drivers for some USB devices, this is all forgivable. Indeed, until recently we only dreamed that Windows-based applications running on desktop PCs and tablets would run not only on phones, but also on microcomputers. And now - this is reality, welcome to "today."
about the author
Anton Sedyshev - Senior .NET developer “DataArt”
He has been working in IT since 2003, joined the DataArt team in 2012. Previously, he was involved in the development of web and mobile projects, automation of logistics processes in the warehouses of a large international company. He now acts as the leading .NET developer and ideologist of the Microsoft DataArt community. He is engaged in application development on Windows Phone and Windows 10, DeviceHive service and embedded-technologies in general. In his spare time he works on his own OpenSource embedded project for integrating the .NET Micro Framework device into BMW cars.