Making a standalone photo booth on raspberry pi
 In the age of "online", print photography has become more like a curiosity, as it was before with digital photography. Recently, various photo booths have begun to gain popularity as an interesting way to entertain guests and receive a memorable souvenir in the form of photographs. I am a photographer who is fond of programming, and with this combination, it would be strange not to try to make yourself a photo booth.
 Unlike commercial models of photo booths that are on sale, I wanted to make a really compact and autonomous system. So that I’m parallel to the main work, in a couple of minutes I could install it even in the field and not carry extra tens of kilograms of weight with me. And I did it.
Under the cat there will be a story about hardware, raspberry pi and programming all this under linux and of course my favorite python. Looking ahead, I’ll say that I really wanted high-quality photographs, so shooting is not done on a web camera, but on a DSLR, so the article should be even more interesting.
Iron. From simple to complex.
When I took on this project, it was winter. In winter, I have a lot of free time and little work, so the project should be as cheap as possible. Besides the financial component, I love the KISS principle - the system should be as simple as possible. The simplicity also depends on such components as reliability, size and, importantly, energy consumption.
And I will begin the story about hardware with how it could be made much simpler, and further, in the course of work on the project, “easier” was replaced by a more complex one. Perhaps the implementation is "easier" to someone useful.
And so, we have a DSLR camera and the task: at the command of a person to take a picture and send it to print. This is actually very, very simple. Take the button, connect it to any MK (yes even plug the whole arduino). When a person presses a button, count down the number of seconds, and after this time, take a picture. Taking a picture on the DSLR is also simple - just “pretend” to be either a wired remote control (it connects to the camera via the 2.5 jack connector and, in fact, “closes” two contacts) or “pretend” to be a wireless IR remote control (there are a lot of realizations for MK). For counting the time, you can use any sigment indicator or LCD display, but I planned to make an “analog” indication - a servo drive and an arrow. There should not be a problem with sending photos from the camera to print. There are wonderful SD memory cards with built-in WiFi transmitter. About this, by the way, I have already detailedwrote on a habr. Further, on a laptop, one could already write a simple script that sends the received photos to print.
Further, in my “mental” work on the project, it was necessary to complicate the system. In the first version, one photograph is taken, but I want to make a series, as in "real" photo booths, and print it on one sheet of paper. You can implement this using the second button (the person chooses to take one photo, or several at once). A problem arises - how does the laptop know which button was pressed, and accordingly print this photo, or wait 3 more to be placed on one sheet. This is also solved simply - everyone’s favorite esp8266, which can be connected to the same network as the SD card with WiFi. She will “inform” the laptop about the user's choice.
The project would have remained so if I had not thought about a very important thing - people should see themselves during the shooting. They don’t know at what distance you need to go, how many people will fit into the frame, etc. There is of course the display of the camera itself, which can be turned on in LiveView mode, I have already begun to think about a system of mirrors and lenses so that this picture is visible to people (the task was simplified the fact that the display on the camera is rotatable), but I remembered that the camera has an HDMI output and there should be something I need on the well-known “Chinese” electronics store. As a result, a 7-inch LCD display was ordered with a controller that can receive signals from various sources, including HDMI.
While the display was on, I decided that I also did not want to carry a laptop with me. It occurred to me to make a truly autonomous system. And here comes the “brain” of the entire system - the Raspberry Pi. With his appearance, I decided to completely entrust all the work to him: to abandon the buttons, allowing the user to press the buttons on the touch screen, show him a picture from the LiveView and most importantly “approve” the photos for printing, since there are not rare cases when a person, for example, corny "blinks" during shooting.
When all the spare parts arrived, I began to put everything together. Of the tools I had a soldering iron, glue gun and siding (!). The first was the display unit - a kind of home-made monitor.

In the photo above the display controller, below the USB touchscreen controller. The whole set was bought on aliexpress (searchso )
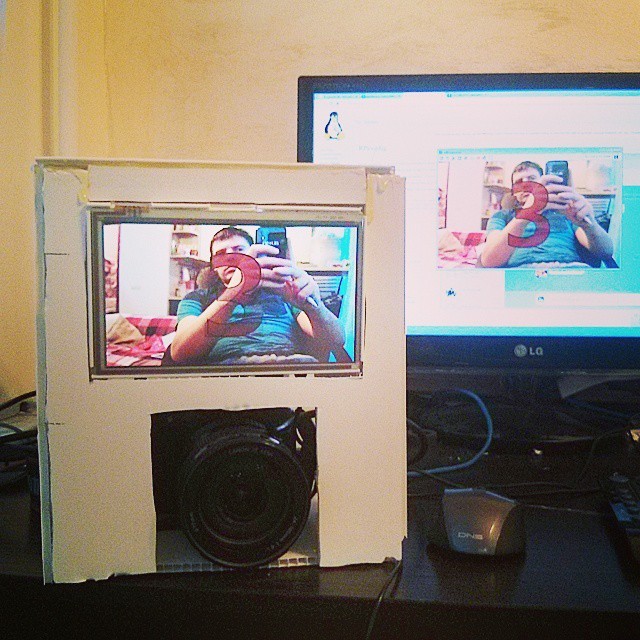
From the side of the display, it looks like this: The

whole thing is powered by 5 volts and consumes 700-800 milliamps at the peak.
I made the “case” for raspberry pi from the same siding (this is the first thing that caught my eye, and it’s very easy to work with it).
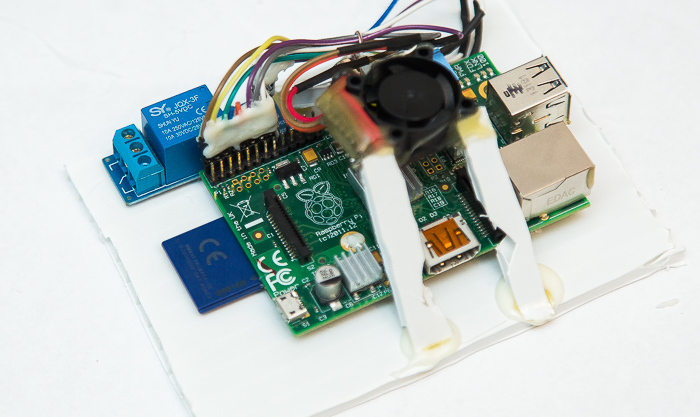
Let me explain what kind of "coulibia" it turned out. On top is a 5-volt cooler. I was afraid of overheating, and it turns on when the temperature reaches 55 degrees, with a simple script that starts from the crown.
The script is very simple.
#!/usr/bin/env python
import RPIO
import subprocess
RPIO.setwarnings(False)
RPIO.setup(18,RPIO.OUT)
sub=subprocess.Popen(['/opt/vc/bin/vcgencmd', 'measure_temp'],stdout=subprocess.PIPE,stderr=subprocess.PIPE,shell=False)
temp=float(sub.stdout.read().split('=')[1].split("'")[0])
if temp>55:
	RPIO.output(18,1)
if temp<45:
	RPIO.output(18,0)
On the left you can see the relay module. It is designed to turn on the diode backlight during operation. Let me explain why this is necessary: at various kinds of banquets, during a break for dancing it can be very dark. The backlight is needed both for autofocus operation during shooting, and so that during the "posing" people see themselves, and not the darkness on the screen. When shooting indoors, I have a stand with a flash and a softbox that works through a regular radio synchronizer, which is connected to the hot shoe of the camera. Thus, I get good light in the pictures. Although you could leave just a diode backlight, but the quality of the pictures would be worse.
The prototype hulls were assembled from the same siding in order to evaluate the requirements and sizes for the final version.
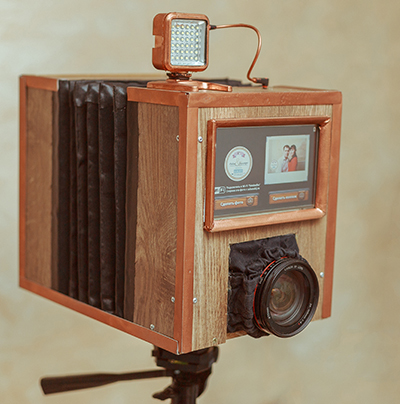
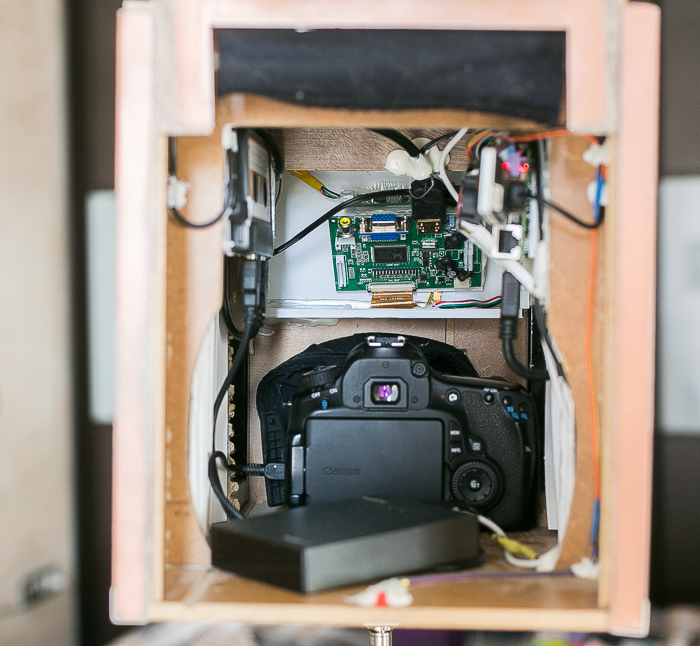
I wanted to stylize the case itself as an old camera. I did not dare to do it myself and ordered the manufacture of acquaintances who are engaged in decor. The case was made of laminate, using leatherette for accordion.

The cats really liked him, but they still had to be driven out to accommodate the entire filling.
The whole thing feeds on two power banks. In theory, one would be enough for 10,000 mA / h for 5-6 hours of operation, but with the simultaneous connection of both the display and raspberry, the current load is greater and the batteries give less capacity.
A few words about printing photos, for what it was up to. You can print photos on anything, even on a regular household inkjet printer. But again, I needed compactness. In addition to compactness, for battery life, you still need reliability. I don’t really want to worry about ink levels, clogged nozzles, etc. As a result, a cheap and compact thermal sublimation printer was chosen. Of the advantages: the small size of the printer, trouble-free printing (you can forget about stripes, spots of ink, etc.), the ability to transport and print at least upside down, the longevity of the pictures (immediately after printing, the picture was dipped in water and there was nothing). Of the minuses: the high cost of printing and the need to replace paper every 18 shots and a cartridge from ribbons once every 36 shots. Consumables are only original (included, except for special paper, also a special cartridge with tape), the cost of one print is 25 rubles, although this is laid down in the final cost of the service. The printer works via WiFi, for this “WiFi whistle” is connected to raspberry pi.

Software
For "serial" photo booths, there is a software on sale that exists naturally only under PC and Windows. For linux, I had to write everything from scratch under arm (oh well, I had to, I just like it!). Python was chosen as the programming language (in fact, I do not know anything else).
First, you need to learn how to interact with a camera that is connected via USB. I was not surprised when I discovered that there are already ready-made tools for linux. This is the console utility gphoto2 .
First of all, I needed a settings screen that starts immediately after the system starts.

The GUI is written in Tkinter, which is more than suitable for these tasks.
Here you can configure the camera for specific shooting conditions, launch the main program, configure its behavior (take one large photo, or let you choose “one photo” and “4 in 1”, print or just save, as well as the print mode, but more on that later), and take a test shot. This is more detailed.
To start, you need to write the settings to the camera, this is done simply:
#список со значениями баланса белого
bb_list=['Авто','Дневной','Тень','Облачно','Вольф.','Флюр. лампа','Вспышка','Ручной']
sub=subprocess.Popen(['gphoto2',
				'--set-config', 'whitebalance='+str(bb_list.index(settings['bb'])),
				'--set-config', 'iso='+t_iso,
				'--set-config', 'aperture='+settings['a'],
				'--set-config', 'imageformat=7'  #настройка размера фотографии (jpeg размером 1920х1080)
				],stdout=subprocess.PIPE,stderr=subprocess.PIPE,shell=False)
err=sub.stderr.read()
Now you need to take a test shot and show it on the screen.
sub=subprocess.Popen(['gphoto2','--capture-image-and-download','--filename','/tmp/booth.jpg','--force-overwrite'],stdout=subprocess.PIPE,stderr=subprocess.PIPE,shell=False)
err=sub.stderr.read()
The camera will take a picture and it will be written to the /tmp/booth.jpg file (in order to speed up work and save the memory card resource in raspberry, it’s better to do such things in / tmp, which by default is mounted in tmpfs, that is, it works in RAM). After that, the picture is displayed on the screen for evaluation, and the settings are written to the file using the usual open ('/ home / pi / settings.dat', 'wb'). Write (repr (settings))
So, the camera is set up, it's time to start user interface

The interface itself is written using the famous pygame library.
Naturally, so that users cannot click "where not needed", the application launches in full screen:
pygame.init()
pygame.mouse.set_visible(0)
screen = pygame.display.set_mode((800,480), pygame.HWSURFACE  | pygame.FULLSCREEN,32)
The architecture of the application is painfully simple: the interface is drawn from pre-saved images, and the program itself works according to the finite state machine method, with predetermined states. In more detail, I would like to talk about the interaction with the camera.
The first thing we need is to get a LiveView picture from the camera so that users can see themselves while preparing for the shoot. I tried to do this using the gphoto2 utility, but for reasons that I no longer remember, I did not succeed. A library was found for the piggyphoto python , where this task is solved simply:
cam = piggyphoto.camera()
cam.leave_locked()
while WORK:
    s=self.cam.capture_preview()
    s.save('/tmp/preview.jpg')
    s.clean()  # этого в примерах нет, но без этого возникает утечка памяти https://github.com/alexdu/piggyphoto/issues/2
    from_camera = pygame.image.load('/tmp/preview.jpg') # загружаем фотографию
    from_camera=pygame.transform.scale(from_camera, (800, 530)) # уменьшаем до размера экрана
    from_camera=pygame.transform.flip(from_camera,1,0) # делаем флип по горизонтали, чтоб на экране все было как в зеркале)
Under the LiveView mode, you also need to configure the camera. For example, if the survey itself is conducted with ISO 100, then on LiveView this may not be enough. Before turning it on, you need to do something like this:
		sub=subprocess.Popen(['gphoto2',
				'--set-config', 'whitebalance=0', # баланс белого на Авто
				'--set-config', 'iso=0',	# ISO на авто
				'--set-config', 'aperture=2.8', # диафрагму открываем
				'--set-config', 'imageformat=7'
				],stdout=subprocess.PIPE,stderr=subprocess.PIPE,shell=False)
After the timer completes, you can already do the frame itself, as described above. If the “4 frames in 1” mode is selected, then accordingly all this is repeated 4 times to get 4 different photos, which are then glued together into one. The Pillow library is already doing this (I strongly recommend using it, rather than the outdated PIL, at least due to performance), which, in addition to combining several photos on one sheet, overlays the logo and makes it possible to do some kind of branding:

For demonstration, I made a small video:
The photo is ready, it can be sent for printing. On linux, this is done with just one command: lpr FILENAME. Sending a photo for printing via WiFi to a canon selphie printer has one nuance: the photo must be sent for printing “directly”, that is, the printer accepts a ready-made jpg file: lpr -o RAW filename.
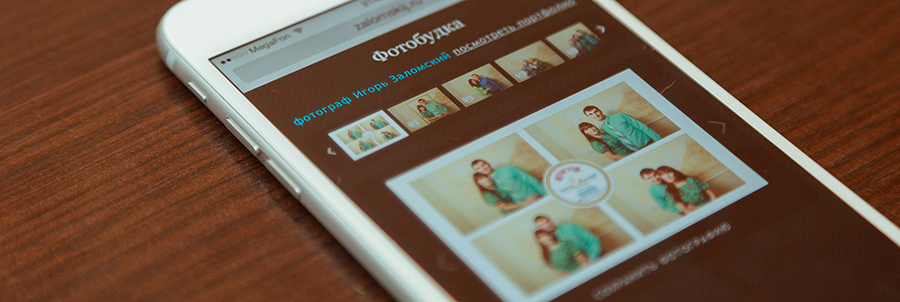
Actually, the main functionality is ready. Subsequently, a few more features were added. The first thing that I wanted to realize was the return of photos in electronic form. Since WiFi already works in the mode of the access point to which the printer connects, why not make it open. A web server was raised on raspberry, with a simple gallery. To avoid problems with the searches for this web server, I configured Captive Portal - when connected to an access point, the page with the gallery opens itself. This is done by installing a DNS server, which for all requests gave the IP address of the web server.
In fact, within the framework of one article, it is impossible to talk about all the nuances. As far as possible, I will try to answer your questions in the comments. My next article, too, promises to be interesting, in it we will mix old unusual technologies in the printing of photographs, and new technologies in the field of software.