November 16, 2015 at 11:47
Installing the onlyoffice-alfresco plugin (checklist - cheat sheet)
- Tutorial
On November 10, 2015, a plug-in for editing documents in Alfresco Share using online editors OnlyOffice became available. The plugin code is distributed under the GPL.
It is assumed that your DocumentServer is already installed and configured. If not, the official developer page: Document Server for Linux will help you . To build and use, you must complete the following steps in Ubuntu 14.04.
Remove gradle if installed:
Add the repository and install the latest version:
To build, you need to install the latest stable version - Oracle Java 8.
If you do not have one, follow these steps:
Switch to the alternative:
We collect the necessary dependencies:
Download the source code of the plugin:
Run gradle amp for share and repo in the appropriate folders:
Add the onlyoffice.url parameter to the alfresco-global.properties file:
Download the compiled packages from ./build/amp to the amps / and amps_share / directories, respectively, on your Alfresco installation.
Run the bin / apply_amps.sh script if you are installing on Linux, and the bin / apply_amps.bat script if you are on Windows. During the installation process, you should see two new modules being installed. Press Enter to continue the installation.
In Alfresco 5.1, you can check the module in the administration toolkit:

In Alfresco 5.0
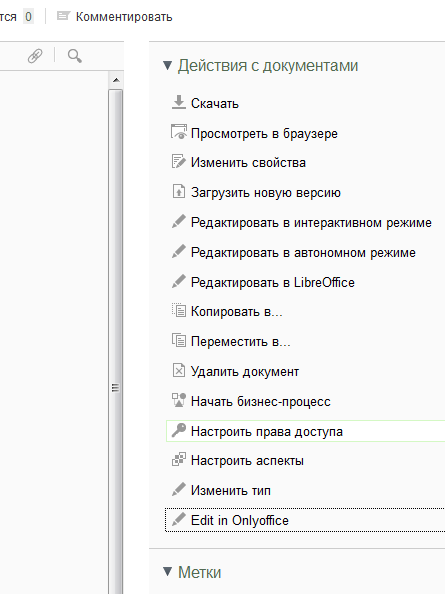
This completes the installation.
It is assumed that your DocumentServer is already installed and configured. If not, the official developer page: Document Server for Linux will help you . To build and use, you must complete the following steps in Ubuntu 14.04.
Remove gradle if installed:
$ sudo apt-get remove gradle
Add the repository and install the latest version:
$ sudo add-apt-repository ppa:cwchien/gradle
$ sudo apt-get update
$ sudo apt-get install gradle
To build, you need to install the latest stable version - Oracle Java 8.
If you do not have one, follow these steps:
$ sudo add-apt-repository ppa:webupd8team/java
$ sudo apt-get update
$ sudo apt-get install oracle-java8-installer
Switch to the alternative:
$ sudo update-alternatives --config java
$ sudo update-alternatives --config javac
$ sudo update-alternatives --config javaws
We collect the necessary dependencies:
git clone https://github.com/yeyan/alfresco-amp-plugin.git
cd amp-plugin
gradle publish
Download the source code of the plugin:
cd ..
git clone https://github.com/cetra3/onlyoffice-alfresco.git
Run gradle amp for share and repo in the appropriate folders:
gradle amp
Add the onlyoffice.url parameter to the alfresco-global.properties file:
onlyoffice.url=http://onlyoffice.сайт.рф/
Download the compiled packages from ./build/amp to the amps / and amps_share / directories, respectively, on your Alfresco installation.
Run the bin / apply_amps.sh script if you are installing on Linux, and the bin / apply_amps.bat script if you are on Windows. During the installation process, you should see two new modules being installed. Press Enter to continue the installation.
In Alfresco 5.1, you can check the module in the administration toolkit:
In Alfresco 5.0
https://сайт.рф/share/page/modules/deploy
This completes the installation.