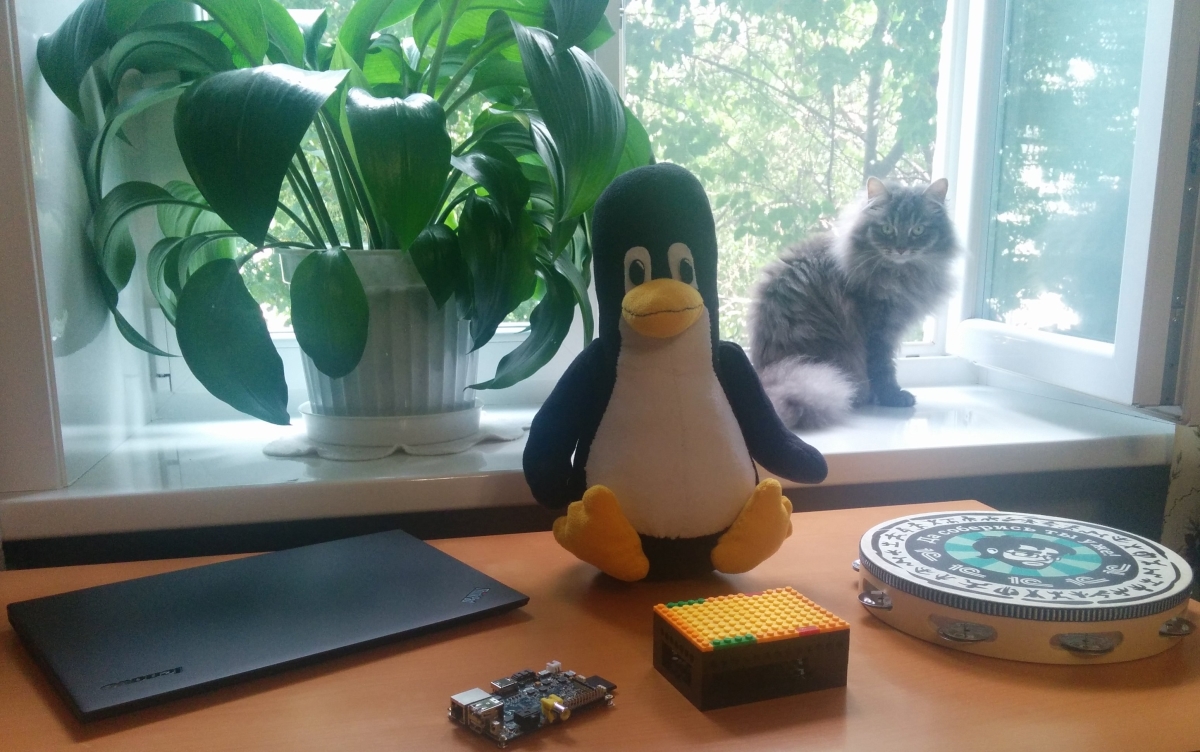
Banana Pi: Via U-Boot to Arch Linux
 For the fourth year in a row, since the launch of the Raspberry Pi, various microcomputers on non-x86 architectures that act as media centers, smart home controllers, web servers and whatever the geek’s soul wants to be delivered to the markets around the world
 By 2014-2015, not everyone was happy with the computing capabilities of Raspberry, and the release of dozens of its clones with more powerful hardware began. Most of them have disadvantages: a fixed outdated version of the kernel and bootloader, a small selection of distributions. Under the cut, I’ll talk about how to break the shackles of a vendor using the example of Banana Pi.
Background
In the second half of 2014 I wanted to have a home server, the choice was between the classic x86 architecture with the Intel Atom series processor and something new for me - an ARM-based microcomputer.
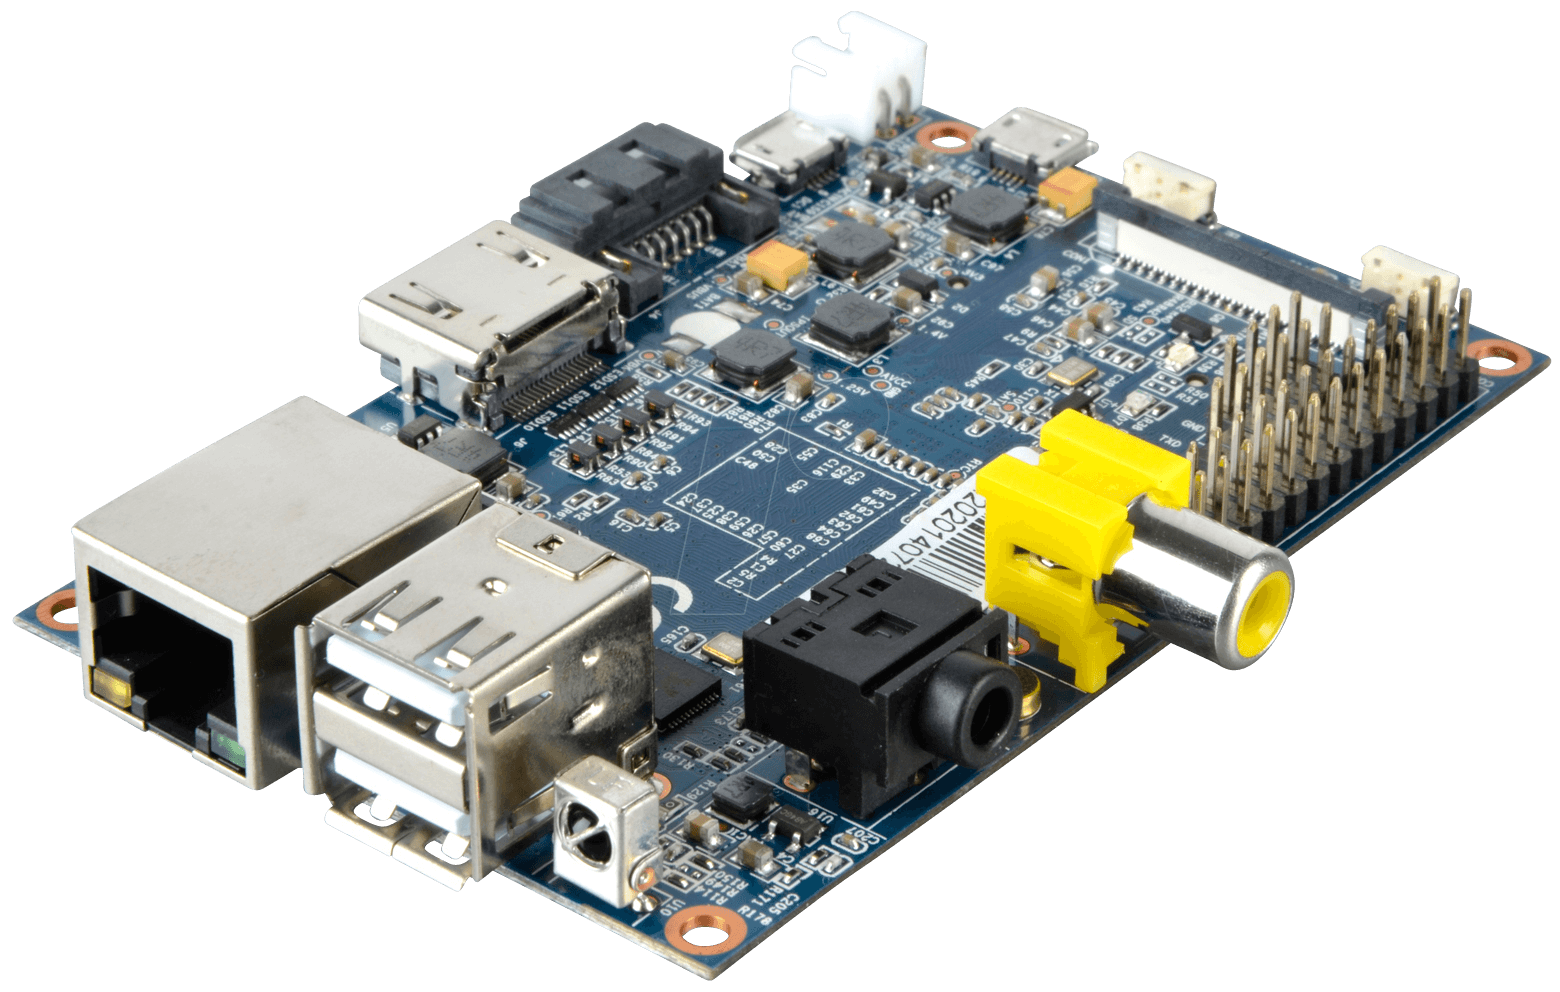
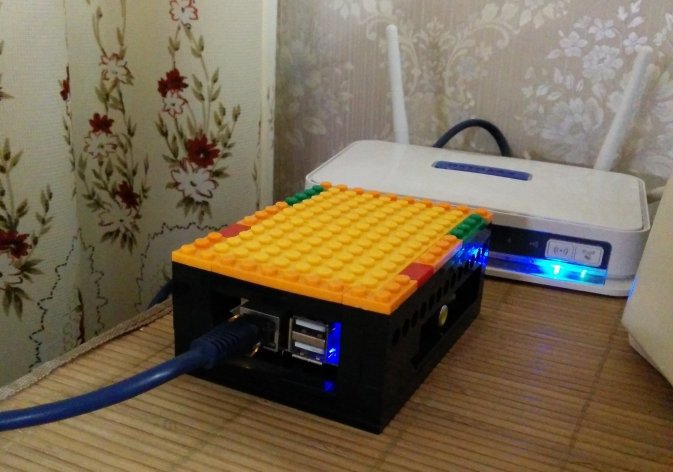
After evaluating the price / performance / capabilities ratio, the Banana Pi was chosen - a crumb with a dual-core Allwinner A20, 1 gigabyte DDR3, a gigabit LAN, a SATA connector and other delights of such devices. After playing a couple of days, I made a case out of plastic parts into which Banana was imprisoned and served for all kinds of small tasks for a long time.
The distribution was Bananian - this is Debian 7 Wheezy truncated in many ways to save resources. There is no newer Debian 8.x to this day, you can imagine how old the software is there, which receives only security patches. All this disgrace lasted until mid-summer ...
Finally, in July, there was a need to raise a web server and related services for your pet project. It was time to change the old Debian to something less conservative and more convenient for me.
Formulation of the problem
There were several requirements for the distribution: it should have “out of the box” repositories covering all needs, the programs in them should be closest to the latest available versions. I follow the development of distributions and their programs, but I am too lazy to compile all of the sources, so Arch Linux became the obvious choice.
On the manufacturer’s website, in the download section, I was waiting for a year-overdue image with a wired, non-updated kernel (3.4.100), a bootloader of the same age and from another device (Cubieboard 2). On the Arch Linux site, support for the Banana Pi was not announced. Based on all this, there was only one thing left: to build and run the distribution yourself.
Materiel
Das U-Boot (the origin of the name is somehow connected with submarines and puns in German and English, see U-boat )
This is an operating system loader aimed at devices with MIPS, PowerPC, ARM architectures and others. He knows a lot: loads the system with NAND, NOR, SPI, MMC, SATA, USB, TFTP, NFS, can be stored in the device’s ROM or external memory, has a built-in dhcp client and shell, receives signals from the keyboard, outputs to UART, HDMI , VGA, analog video. Naturally, to support all this, you need to have drivers.
This is where the difference from x86 platforms begins - ARM does not have ACPI (advanced configuration and power management interface) and UEFI (interaction interface between the operating system and the “firmware” of the device) and that is why there are no unified distributions for ARM computers as such, but the movement is The UEFI and ACPI side has been going on for several years. In the meantime, this movement is going on, we are in a real harsh world and the loader needs to be compiled independently for different types of hardware. Iron is described in a data structure calledDevice Tree (dt) . You can learn more about DT at its dedicated site: devicetree.org .
Complete with the bootloader source code comes a set of configuration files for compilation, as well as the Device Tree for 1089 devices. Google, unfortunately, does not find this list, so it is available here:U-boot supported devices .
Linux Kernel
Much has been written about it, much has been said, and now only a few facts will come in handy:
- The distributions I met store the kernel in several forms:
- Image is not a compressed image.
- zImage is a compressed, self-extracting image.
- uImage - an image that has a wrapper that includes some information for U-Boot.
Previously, uImage was used extensively for devices with U-Boot, but in recent years, developers have taught the bootloader to work with zImage, which has become a common practice for storing a kernel image in the Arch Linux ARM distribution. - Happy news! The core within the same architecture (ARMv5, ARMv6, ARMv7, ARMv8) with a high probability will not have to be compiled for each device. It uses its version of Device Tree , calledDevice Tree Binary (dtb) . These are small files that indicate to the kernel which modules need to be loaded. More information about dtb can be found here .
From theory to practice
You will need:
- Banana Pi or another microcomputer from the list of devices supported by U-Boot
- Memory card and card reader
- Linux computer
- Installed toolchain for the desired architectureWhere to get?The easiest way, I consider the following:
- Download a ready-made toolchain for your platform from the Linaro website .
Banana Pi needs linaro-toolchain-binaries (little-endian) . - Add toolbar bin folder to PATH:
export PATH=~/your_toolchain_path/bin/:$PATH
- Download a ready-made toolchain for your platform from the Linaro website .
- The bc and dtc utilities needed to compile the bootloader, dosfstools and uboot-tools packages for creating the file system and compiling bootloader scripts, respectively
Download and unzip the source code for the latest version of U-Boot:
wget ftp://ftp.denx.de/pub/u-boot/u-boot-latest.tar.bz2
tar -jxf u-boot-latest.tar.bz2
We find our “piece of iron” in the u-boot-2015.07 / configs directory that appears and remember the file name. For Banana Pi, the configuration file is called Bananapi_defconfig .
Remember that the core of the Arch Linux ARM distribution is stored in zImage? You need to take care of this in advance and add the ability to load self-extracting kernels before compiling. I don’t have exact information about whether this is already enabled by default, therefore, in the u-boot-2015.07 / include / configs / directory, you need to find the header file for your microcomputer platform (for Banana Pi it is sun7i.h ) and write inside:
#ifndef __CONFIG_H#define __CONFIG_H
...
#endif/* __CONFIG_H */
line
#define CONFIG_CMD_BOOTZThis will add the ability to use the bootz command in the bootloader to run self-extracting compressed programs. Source
Now the compilation stage. All operations take place in the u-boot-2015.07 directory .
What if without cross-compilation?
If you compile on the same architecture (for example, on a computer with ARMv7), then for make you can omit the CROSS_COMPILE flag.
make CROSS_COMPILE=arm-linux-gnueabihf- Bananapi_defconfigDirectly compiling the bootloader:
make CROSS_COMPILE=arm-linux-gnueabihf-As a result, many files with the u-boot prefix should appear in our working folder. u-boot.bin contains the bootloader executable, but we need a file with the “with-spl” postfix. SPL is a small program that is located directly in front of the bootloader and loads U-Boot itself into RAM. For Banana Pi, this is the u-boot-sunxi-with-spl.bin file . Save it, it will come in handy later.
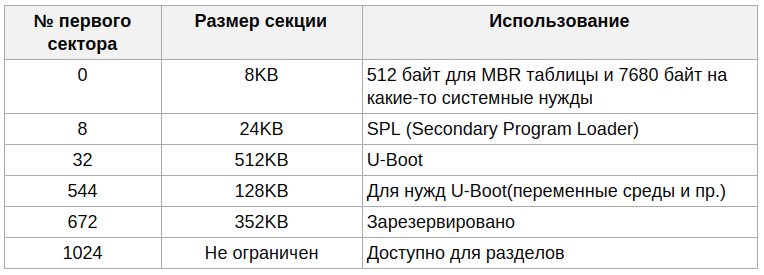
The next step is to prepare a flash card from which the system will boot. How its layout should look:
Connect a flash card through a card reader and run the fdisk utility:
fdisk /dev/sdbHow to find out what name your card has?
В каталоге /dev/ должен появиться новый файл, соответствующий вставленной карте. Она определится либо как SCSI-устройство (sda, sdb, sdc...), либо как блочная MMC память (mmcblk0, mmcblk1 ...).
Add MBR markup:
Command (m for help): o
Created a new DOS disklabel with disk identifier 0xa53166ce.
And be sure to at least two sections:
- 50-100 Mbfdisk, markup of the first
Command (m forhelp): n Partition type p primary (0 primary, 0 extended, 4 free) e extended (container for logical partitions) Select (default p): p Partition number (1-4, default 1): 1 First sector (2048-7831551, default 2048): 2048 Last sector, +sectors or +size{K,M,G,T,P} (2048-7831551, default 7831551): +75M Created a new partition 1 of type'Linux' and of size 75 MiB. - 2 GB or morefdisk, markup of the second
Command (m for help): n
       Partitiontype
          p   primary (1 primary, 0extended, 3 free)
          e   extended (containerforlogicalpartitions)
       Select (default p): p
       Partitionnumber (2-4, default2): 2First sector (155648-7831551, default155648): 155648Last sector, +sectors or +size{K,M,G,T,P} (155648-7831551, default7831551): +3G
       Created a newpartition2oftype'Linux'andofsize3 GiB.
After all this, enter "w", thereby writing the changes to disk.
Why such sections? U-Boot can be controlled using scripts, it reads them only from the first partition of the drive, and this section should be with the FAT file system . In the same section, the / boot directory of the future Arch Linux will be mounted for convenient access to the kernels from U-Boot scripts, as well as for quick kernel swapping from any computer that comes across. The second section is for the root of the system. The rest is optional.
After marking, you need to clear the space for the bootloader. It is extremely important not to overwrite the first 512 bytes (MBR) and not to affect 1024 sectors further (based on the table above):
dd if=/dev/zero of=/dev/sdb bs=1K count=1023 seek=1We write U-Boot:
dd if=u-boot-sunxi-with-spl.bin of=/dev/sdb bs=1024 seek=8Now you can insert the USB flash drive into the destination device, turn it on and see how it blinks merrily with LEDs, picks up the ip address through dhcp, tries to reach the tftp server to boot up and invites you to your Shell by showing it via output or UART.
But one bootloader is not enough, there are still a few components: a script for managing U-Boot and the distribution of Arch Linux itself. We go
to os.archlinuxarm.org and download the archive with a distribution suitable for our architecture. For Banana, this is ArchLinuxARM-armv7-latest.tar.gz. Unpack it into a separate directory and continue manipulating the flash card.
Let's create file systems and mount them in the given order:
mkfs.vfat /dev/sdb1
mkfs.ext4 /dev/sdb2
mount /dev/sdb2 /mnt
mkdir /mnt/boot
mount /dev/sdb1 /mnt/boot
Copy the entire contents of the unpacked archive to / mnt:
cp -r ~/ArchLinux-generic-armv7/* /mntLet's look at the first section of the flash drive (/ mnt / boot). Inside we are waiting for the dtbs folder and a compressed kernel image - zImage. dtbs are exactly those Device Tree Binary, which were discussed above .
For ARMv7, there are as many as 301 dtb. The list can be seen here or by directly opening the distribution's boot / dtbs directory on your computer. If there is dtb, then the kernel will start up with almost 100% probability. For Banana Pi, the desired file is sun7i-a20-bananapi.dtb . We need it for the last and final stage - writing a script for U-Boot and, naturally, launching the entire resulting system.
Let's get started. Create a boot.cmd file right in place (in / mnt / boot ) and start writing.
First, we tell U-Boot to load the kernel image into RAM:
fatload mmc 0 0x46000000 zImageThen dtb for the desired device:
fatload mmc 0 0x49000000 dtbs/sun7i-a20-bananapi.dtbSet the parameters to start the kernel:
setenv bootargs console=ttyS0,115200 earlyprintk root=/dev/mmcblk0p2 rw rootwait panic=10And tell him to boot from this memory area, thereby transferring control to the Linux kernel.
bootz 0x46000000 - 0x49000000The memory areas available for download for each model are different and unfortunately I do not know how to determine them myself. I would be very happy if someone tells about it in simple words in the comments.
The script we wrote can only be compiled. For this, the uboot-tools package has the mkimage utility, we will use it:
mkimage -C none -A arm -T script -d boot.cmd boot.scrboot.cmd can be removed if desired, the bootloader only needs boot.scr.
Is there something else like boot.scr?
Да, бывает. U-Boot для некоторых устройств можно сконфигурировать через простой текстовый файл uEnv.txt, это зависит от вендора, но с Banana Pi такой трюк не прокатит.
And the last touch - add sections to the etc / fstab of the new system that will be connected at startup:
/dev/mmcblk0p2    /    ext4    rw,relatime,data=ordered 0 1
/dev/mmcblk0p1 /boot vfat rw,relatime,fmask=0022,dmask=0022,codepage=437,iocharset=iso8859-1,shortname=mixed,errors=remount-ro 0 2
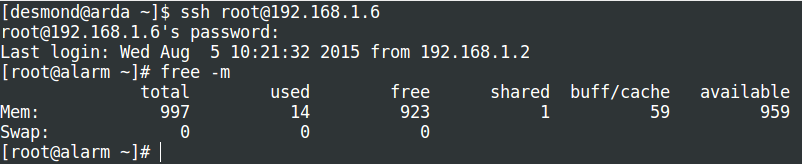
A flash drive can be inserted into the device and enjoy the fresh system. The dhcpd daemon itself picks up the address if there is a DHCP server on your network. SSH server is added to autoload by default. The account on the default images of Arch Linux ARM is always always the only one: root / root. Be sure to change the password and add a user with limited privileges.
Total
What did you get? The stars came together so that support for my microcomputer is on the list of 1089 devices supported by U-Boot and among the 301st among the mainline-supported kernels for ARMv7. Therefore, we got exactly what we wanted: a system with the latest software, which is stably updated from repositories, including the kernel of the system (currently 4.1.4). The stable bootloader branch is updated every 3 months and you only need to compile it and repeat the installation procedure, as done above.
What doesn't out of the box work?
В составе ядра и дистрибутиве нет ни ядерной, ни userspace частей драйвера Mali. Это обусловлено тем, что полнофункциональный билд возможен только с помощью проприетарного SDK, который предоставляется только партнёрам компании ARM.
For the lazy
Prepared an image for Banana Pi:
Link , Mirror # 1 , Mirror # 2 .
md5 image in the archive: f36d707c4c1fd857b50d37501b4a3d7a
You can write the image to a flash card using the dd utility or win32diskimager (for Windows users).
Sources
linux-sunxi.org/Mainline_U-boot
elinux.org/RPi_Hub
en.wikipedia.org/wiki/Das_U-Boot
I wish good luck to those who want to repeat this at home and will be glad to be criticized fairly.