Configure Checkpoint. Part 1. Installation and initial configuration

Good all the time of day. Today I want to start a cycle about setting up and working with Checkpoint firewalls .
Chekpoint has been a network security solutions company since 1993. The company positions itself as a developer of its own management \ interaction architecture - SMART (SecurityManagment Architecture). Based on this concept, the Gaia operating system was ultimately created by combining IPSO (Nokia) OS and SPLAT OS (early development of CP based on Unix-based systems). This software implements a number of technologies related to the security of data exchange (for example, packet filtering, IPS), as well as the proprietary Stateful Inspection whose main task is to control specific connections in real time . Wikipedia .
Alas, on Habré there are not many articles devoted to this vendor. Although, in my opinion, it deserves more attention.
Experienced security engineers are unlikely to find any new information in this and subsequent articles. But for beginners, I hope they will be useful. We will try to understand the principles of operation of the main modules and the system as a whole, as well as consider configuration examples from “best practice.”
Today, installation and initial configuration of the device are on the agenda. Welcome to Cat.
There was already an article on Habr on how to install two firewall nodes and make a cluster of them. Try to pay attention to issues that were not considered in that article.
Step 0. Preparation
So, let's begin.
First of all, we need to pick up equipment. There are, in fact, only two options: either buy a device lovingly pasted with Checkpoint labels and placed in a specially prepared case for it, or assemble the platform yourself. In any case, the choice of device will depend on a very large number of parameters. We can only rely on our experience and on the documentation that the vendor himself provides us. The list of supported servers can be found here . You can also roughly calculate what load a specific device from Checkpoint will be designed for ( carefully PDF) Unfortunately, Checkpoint does not provide information about the equipment installed in the device, only the amount of RAM and the number of interfaces, but on the Internet you can find some information about the CPU .
Stage 1. Installation of the Gaia operating system.
After we have chosen the platform, we will proceed to the installation of the operating system. Speaking of operating system: Gaia (the last of Checkpoint's operating systems) is based on the RedHat 5.2 distribution. So, if you have previously worked with linux-based operating systems, then you will be pleased to see many familiar utilities and commands.
Here, the Gaia R77.10 in a virtual environment will be considered. Installing previous and subsequent versions of this operating system is no different. To date, the latest is the Gaia R77.30.
Checkpoint does not provide distributions of its operating systems without registering
Now we are armed with everything we need and can go directly to the installation.
Most of the following screenshots do not require explanation: further, further, ready. No one offers to install Mail. Agent or any other application that is not related to the topic.
The only thing I want to draw your attention to is disk layout. The system will give an error and stop the installation if the hard drive is less than 8GB. If there is from 8 to 15 GB, the system independently splits the disk into the partitions it needs. If the volume is more than 15GB, then we will be allowed to slightly affect this process, namely: resize partitions under system-root (/) and logs (/ var / logs /). This information may be useful to those who are going to install Checkpoint on a virtual machine. The rest of them only need to know the basic rule, which is that the size of the “Backup and upgrade” section should be no less than the sum of system-root and logs, since snapshots of the operating system are placed there.
Now a few recommendations on disk layout for server management and for firewall nodes.
Management server:
- The root must be at least 6 GB, and if you plan to use additional components (blades), such as: IPS, Application Control, URL Filtering, it is worth increasing the size, at least to 10 GB.
- Logs are our everything. At least on the management server. Allocate the available space to them, because the main function of the server management, in addition to setting the rules, is to store all kinds of logs and updates.
Firewall:
- Route is the only partition that the firewall really needs, and 10GB, with additional blades turned on, will also be quite enough.
- The size of the section for logs is not so critical, because the logs are written to the management server, and on the firewall this directory is used mainly for updates, so even 5GB is enough.
A lot of pictures
Fig 1.1.
Select “Install Gaia on this system":
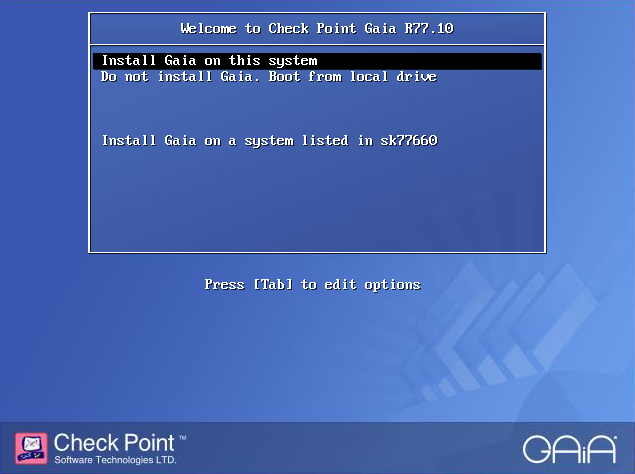
Fig. 1.2.
Here we can see information about the installed equipment:

Fig. 1.3.
Select the language:
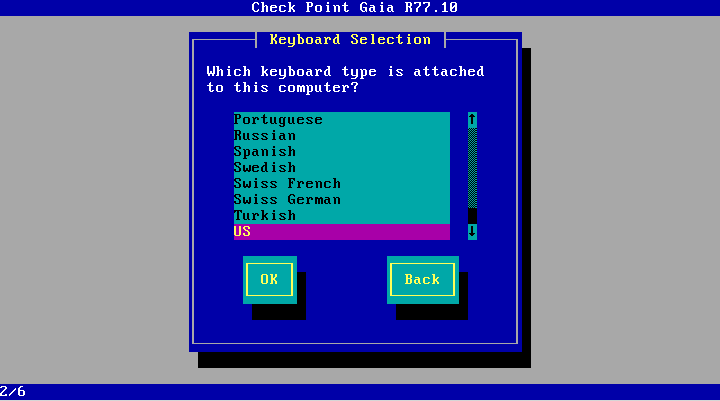
Fig. 1.4.
Partition the disk:

Fig. 1.5.
Create a password:

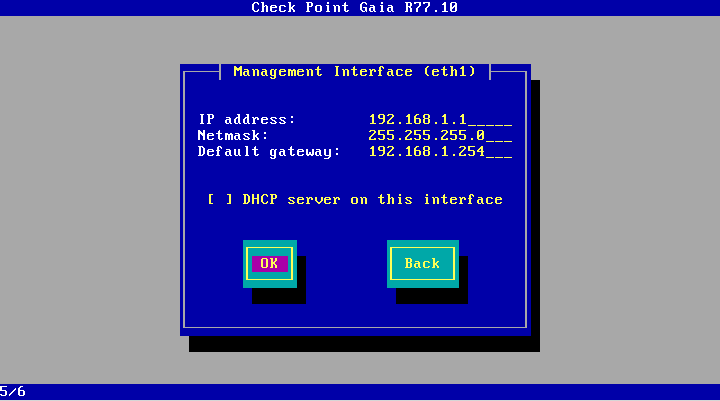
Fig. 1.6.
Here we can select and configure the interface, which we will use it later to connect to the device via https and ssh.

Fig 1.7.
Directly, setup.
After that, you will have to wait a bit until the system is installed on the selected server.
Select “Install Gaia on this system":
Fig. 1.2.
Here we can see information about the installed equipment:
Fig. 1.3.
Select the language:
Fig. 1.4.
Partition the disk:
Fig. 1.5.
Create a password:
Fig. 1.6.
Here we can select and configure the interface, which we will use it later to connect to the device via https and ssh.
Fig 1.7.
Directly, setup.
After that, you will have to wait a bit until the system is installed on the selected server.
Step 2.1 Preparing for configuration
After we installed the operating system, it would be logical to immediately go on to configure policies and other firewall delights. But here it turns out that we need to first select which function our server will perform: whether it is a firewall or a management server. Thus, the initial configuration includes the following items:
- Choosing a server role
- Management Interface Settings
- Access rules
- DNS, NTP, Proxy server parameters (proxy only through WebUI)
The initial configuration of Checkpoint for further work with it is available in the article mentioned above . We will now try to do the same, but using the command line, for this we do not need a separate computer, a network connection to the firewall and even a monitor, if you
In order to configure the firewall through the CLI, we have a special utility config_system , more precisely, this is a regular bash script, the contents of which you can see and edit. It lies in / bin / config_system .
This script edits the Gaia OS database file / config / db / initial .
Let's analyze the principle of its operation using the example of the function for changing the ip-address:
DBSET=/bin/dbset
DBGET=/bin/dbget
...........
# configure new ip for interface
# $1 - interface name
# $2 - ip
# $3 - mask
set_ip() {
	local cip
	# get current ip
	cip=$(dbget -c interface:$1:ipaddr)
	# if interface configured, delete old ip first
	if [[ ! -z $cip ]]; then
		log "Configure IPv4 - remove old ip:$cip from $1"
		$DBSET interface:$1:ipaddr:$cip
		$DBSET interface:$1:ipaddr:$cip:mask
	fi
	# now configure new ip/mask
	log "Configure IPv4 - interface:$1, new ip:$2, mask:$3"
	$DBSET interface:$1:state on
	$DBSET interface:$1:ipaddr:$2 t
	$DBSET interface:$1:ipaddr:$2:mask $3
}
........
$DBSET :save
The current settings are obtained from the database using the / bin / dbget utility , and the / bin / dbset command changes the configuration . Here is a piece of the file that describes the eth0 interface settings:
[Expert@Gaia_R77.10_test:0]# cat /config/db/initial | grep eth0
management:interface eth0
interface:eth0 t
interface:eth0:link_speed 1000M/full
interface:eth0:state on
interface:eth0:ipaddr:192.168.1.2 t
interface:eth0:ipaddr:192.168.1.2:mask 24
interface:eth0:duplicity full
interface:eth0:speed 1000M
interface:eth0:auto_negotiation on
The parameter is separated from the value by a space. Now we can try to get some values using DBGET.
[Expert@Gaia_R77.10_test:0]# dbget -c interface:eth0:ipaddr
192.168.1.2
The -c switch is required to display the name of a child parameter with a non-zero value. To additionally show the value of this parameter, the -v switch exists .
[Expert@Gaia_R77.10_test:0]# dbget -cv interface:eth0:ipaddr
192.168.1.2 t
We got a value equal to t , i.e. true . In essence, this only means that an IP address of 192.168.1.2 is specified on the interface.
Now change the ip address on the interface. To do this, we need:
- Delete current ip address and mask values
- Set a new ip address value
- Set a new mask value
- Save configuration
[Expert@Gaia_R77.10_test:0]# dbset interface:eth0:ipaddr:192.168.1.2
[Expert@Gaia_R77.10_test:0]# dbset interface:eth0:ipaddr:192.168.1.2:mask
[Expert@Gaia_R77.10_test:0]# dbset interface:eth0:ipaddr:192.168.1.1 t
[Expert@Gaia_R77.10_test:0]# dbset interface:eth0:ipaddr:192.168.1.1:mask 24
[Expert@Gaia_R77.10_test:0]# dbset :save
Step 2.2 The initial configuration
Config_system accepts either a file or a string of the required parameters, separated by an ampersand (&). The command syntax with a string as a parameter will look like this:
Gaia_R77.10_test> config_system "hostname=myhost&domainname=somedomain.com&timezone='UTC-3'&ftw_sic_key=aaaa&install_security_gw=true&gateway_daip=false&install_ppak=true&gateway_cluster_member=true&install_security_managment=false"
The value of each of these parameters will be discussed below. And now we will deal with the configuration file.
The configuration file contains all the same values, each on a separate line.
First of all, we will create a configuration file template, which we will then edit.
[Expert@Gaia_R77.10_test:0]# config_system -t /home/admin/initial.conf
initial.conf
#########################################################################
# 									#
#			Products configuration				#
#									#
#    For keys below set "true"/"false" after '='  within the quotes	#
#########################################################################
# Install Security Gateway.
install_security_gw=
# Install Acceleration Blade (aka Performance Pack).
install_ppak=
# Enable DAIP (dynamic ip) gateway.
# Should be "false" if CXL or Security Management enabled
gateway_daip="false"
# Enable/Disable CXL.
gateway_cluster_member=
# Install Security Management.
install_security_managment=
# Optional parameters, only one of the parameters below can be "true".
# If no primary of secondary specified, log server will be installed.
# Requires Security Management to be installed.
install_mgmt_primary=
install_mgmt_secondary=
# Provider-1 paramters
# e.g: install_mds_primary=true
#      install_mds_secondary=false
#      install_mlm=false
#      install_mds_interface=eth0
install_mds_primary=
install_mds_secondary=
install_mlm=
install_mds_interface=
# Automatically download Blade Contracts and other important data (highly recommended)
# It is highly recommended to keep this setting enabled, to ensure smooth operation of Check Point products.
# for more info see sk94508
#
# possible values: "true" / "false"
download_info="true"
# Improve product experience by sending data to Check Point
# If you enable this setting, the Security Management Server and Security Gateways may upload data that will
# help Check Point provide you with optimal services.
# for more info see sk94509
#
# possible values: "true" / "false"
upload_info="false"
# In case of Smart1 SmartEvent appliance, choose
# Security Management only, log server will be installed automatically
#########################################################################
#									#
#			Products Parameters				#
#									#
#		For keys below set value after '='			#
#########################################################################
# Management administrator name
# Must be provided, if Security Management installed
mgmt_admin_name=
# Management administrator password
# Must be provided, if Security Management installed
mgmt_admin_passwd=
# Management GUI client allowed e.g. any, 1.2.3.4, 192.168.0.0/24
# Set to "any" if any host allowed to connect to managment
# Set to "range" if range of IPs allowed to connect to management
# Set to "network" if IPs from specific network allowed to connect
# to management
# Set to "this" if it' a single IP
# Must be provided if Security Management installed
mgmt_gui_clients_radio=
#
# In case of "range", provide the first and last IPs in dotted format
mgmt_gui_clients_first_ip_field=
mgmt_gui_clients_last_ip_field=
#
# In case of "network", provide IP in dotted format and netmask length
# in range 0-32
mgmt_gui_clients_ip_field=
mgmt_gui_clients_subnet_field=
#
# In case of a single IP
mgmt_gui_clients_hostname=
# Secure Internal Communication key, e.g. "aaaa"
# Must be provided, if primary Security Management not installed
ftw_sic_key=
#########################################################################
#									#
#	Operating System configuration - optional section		#
#									#
# 		For keys below set value after '='			#
#########################################################################
# Password (hash) of user admin.
# To get hash of admin password from configured system:
# 	dbget passwd:admin:passwd
# OR
# 	grep admin /etc/shadow | cut -d: -f2
#
# IMPORTANT! In order to preserve the literal value of each character
# in hash, inclose hash string within the quotes.
# 	e.g admin_hash='put_here_your_hash_string'
#
# Optional parameter
admin_hash=''
# Interface name, optional parameter
iface=
# Management interface IP in dotted format (e.g. 1.2.3.4),
# management interface mask length (in range 0-32, e,g 24 ) and
# default gateway.
# Pay attention, that if you run first time configuration remotely
# and you change IP, in order to maintain the connection,
# an old IP address will be retained  as a secondary IP address.
# This secondary IP address can be delete later.
# Your session will be disconnected after first time condiguration
# process.
# Optional prameter, requires "iface" to be specified
# IPv6 address format: 0000:1111:2222:3333:4444:5555:6666:7777
# ipstat_v4 manually/off
ipstat_v4=
ipaddr_v4=
masklen_v4=
default_gw_v4=
ipstat_v6=
ipaddr_v6=
masklen_v6=
default_gw_v6=
# Host Name e.g host123, optional parameter
hostname=
# Domain Name e.g. checkpoint.com, optional parameter
domainname=
# Time Zone in format Area/Region (e.g America/New_York or Etc/GMT-5)
# Pay attention that GMT offset should be in classic UTC notation:
# GMT-5 is 5 hours behind UTC (i.e. west to Greenwich)
# Inclose time zone string within the quotes.
# Optional parameter
timezone=''
# NTP servers
# NTP parameters are optional
ntp_primary=
ntp_primary_version=
ntp_secondary=
ntp_secondary_version=
# DNS - IP address of primary, secondary, tertiary DNS servers
# DNS parameters are optional.
primary=
secondary=
tertiary=
In the template itself, each parameter is described in some detail. Therefore, I will simply give a configuration example for a management server:
install_security_managment="true"
mgmt_admin_name=admin
mgmt_admin_passwd=password
mgmt_gui_clients_radio="network"
mgmt_gui_clients_ip_field=192.168.1.0
mgmt_gui_clients_subnet_field=24
admin_hash='HASH_OF_ADMIN_PASSWORD'
install_mgmt_primary="true"
iface=eth0
ipstat_v4=manual
ipaddr_v4=192.168.1.1
masklen_v4=24
default_gw_v4=192.168.1.254
ipstat_v6=off
hostname=Gaia_R77.10_MGMT
timezone='Etc/GMT+3'
primary=8.8.8.8
And one firewall:
install_security_gw="true"
admin_hash='HASH_OF_ADMIN_PASSWORD'
iface=eth0
ipstat_v4=manual
ipaddr_v4=192.168.1.2
masklen_v4=24
default_gw_v4=192.168.1.254
ipstat_v6=off
hostname=Gaia_R77.10_FW1
timezone='Etc/GMT+3'
ftw_sic_key='onetimepassword'
primary=8.8.8.8
The only thing I want to dwell on separately is the ftw_sic_key = "" parameter . SIC, or Secure Internal Communication key, is a one-time password that is needed so that the firewall can be controlled from the management server (therefore, we set it only on the firewall). We will need it once when adding a firewall to the control panel of the management server.
The last step is to give the resulting file to the script and wait for the configuration to complete:
[Expert@Gaia_R77.10_test:0]# config_system -f /home/admin/initial.conf
Now we reboot the server and everything is ready.
Stage 3. Summing up
Now we have one management server and one firewall. They are ready for further customization.
In the next article, we will learn how to add firewalls for management from one management server. We will learn how to form a cluster from them, if initially we were not ready for this. Consider the options for clusters and their principle of operation. We’ll also go over the methods of configuring NAT and the simplest firewall policies.
Thanks for attention. I will be glad to answer your questions.