April 29, 2015 at 15:16
Application of STM32 in industrial machines using the example of a CHODOS blowing machine (Czech Republic)
In one of the shops of the enterprise where I work, there is a machine that makes plastic containers. The machine is called a blowing machine. It was released in 1988 in Karlovy Vary by the company CHODOS:
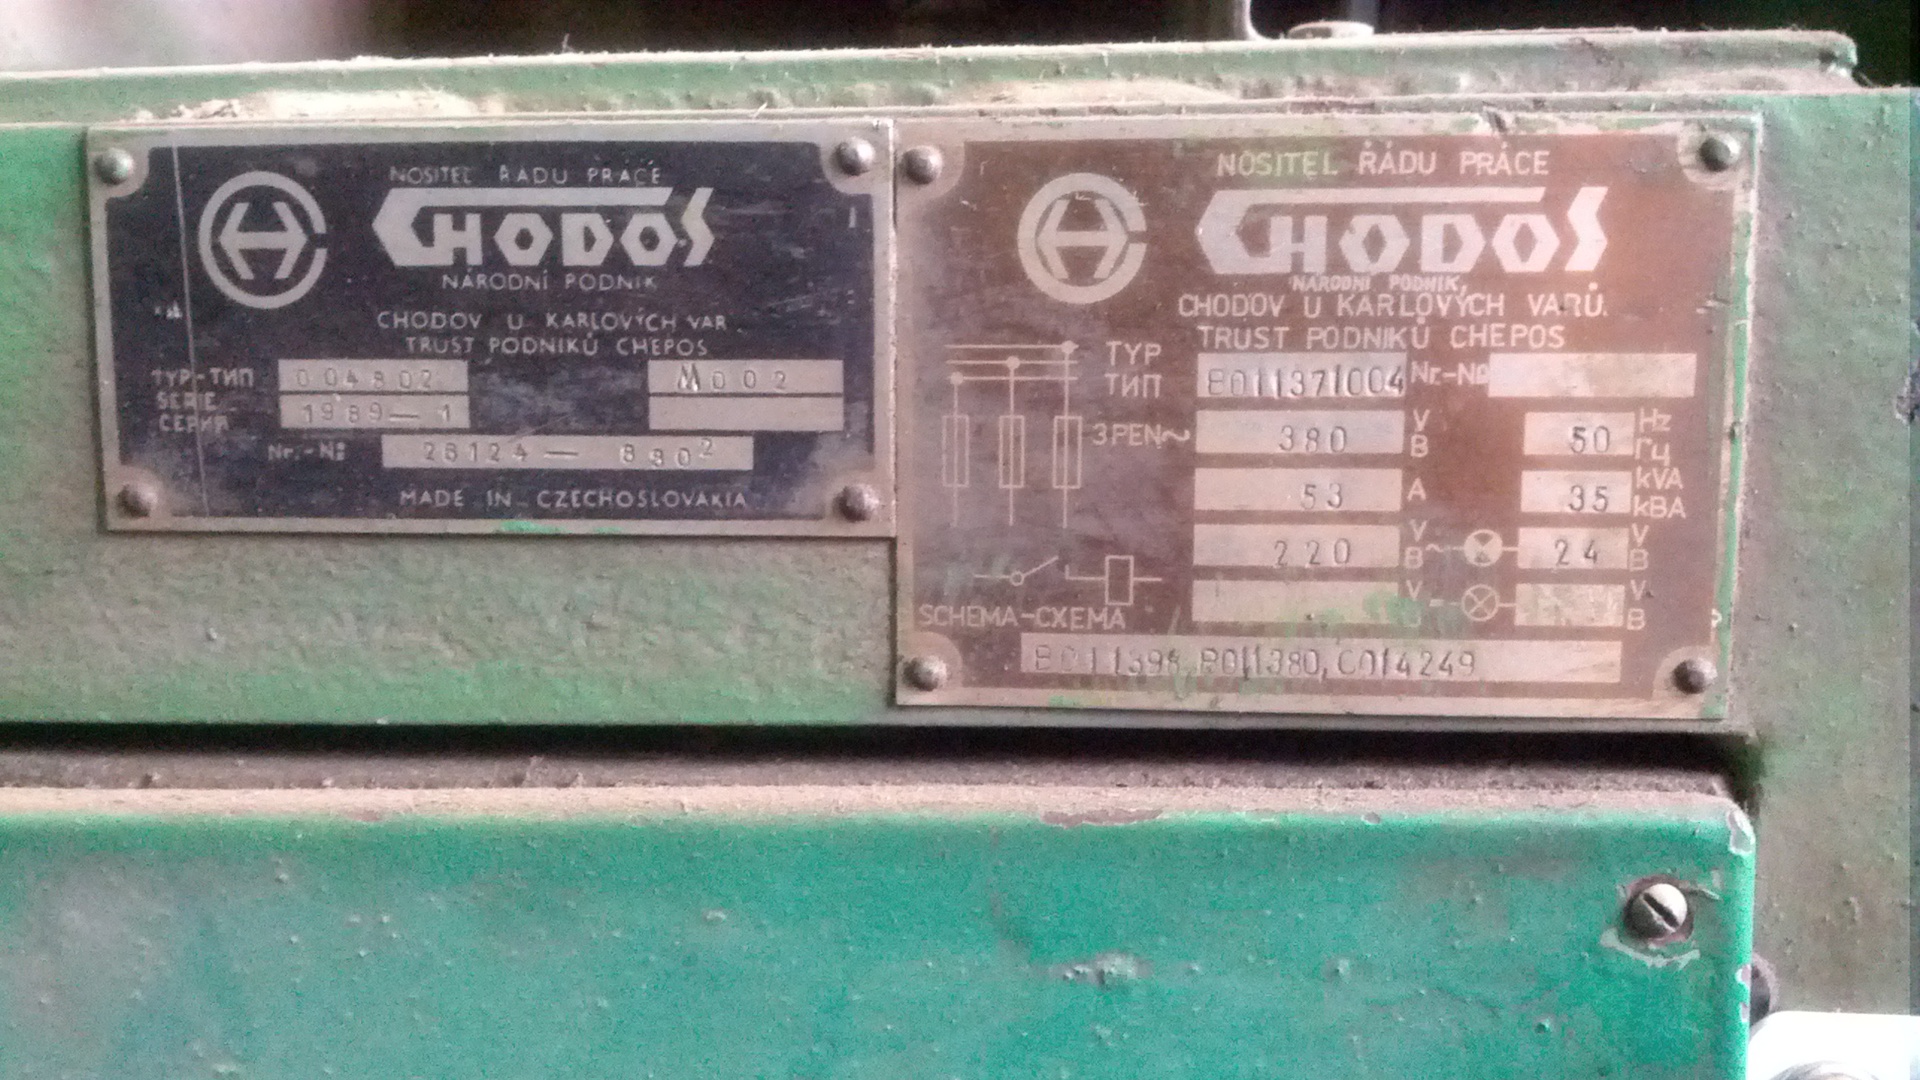
It controls the cycle of electronics on TTL logic chips (type K155 (555) or SN74xx). Under the cut, I’ll tell you how I replaced the electronics of the last century with the STM32 microcontroller.
The principle of operation of the blowing machine is briefly as follows: the plastic crumb coming from the hopper melts and is squeezed out by a screw under pressure through nozzles, forming “sleeves”. After that, the “sleeves” are cut off and fed into blow molds, in which the product is formed under the pressure of the supplied air (in my case it is a plastic bottle).
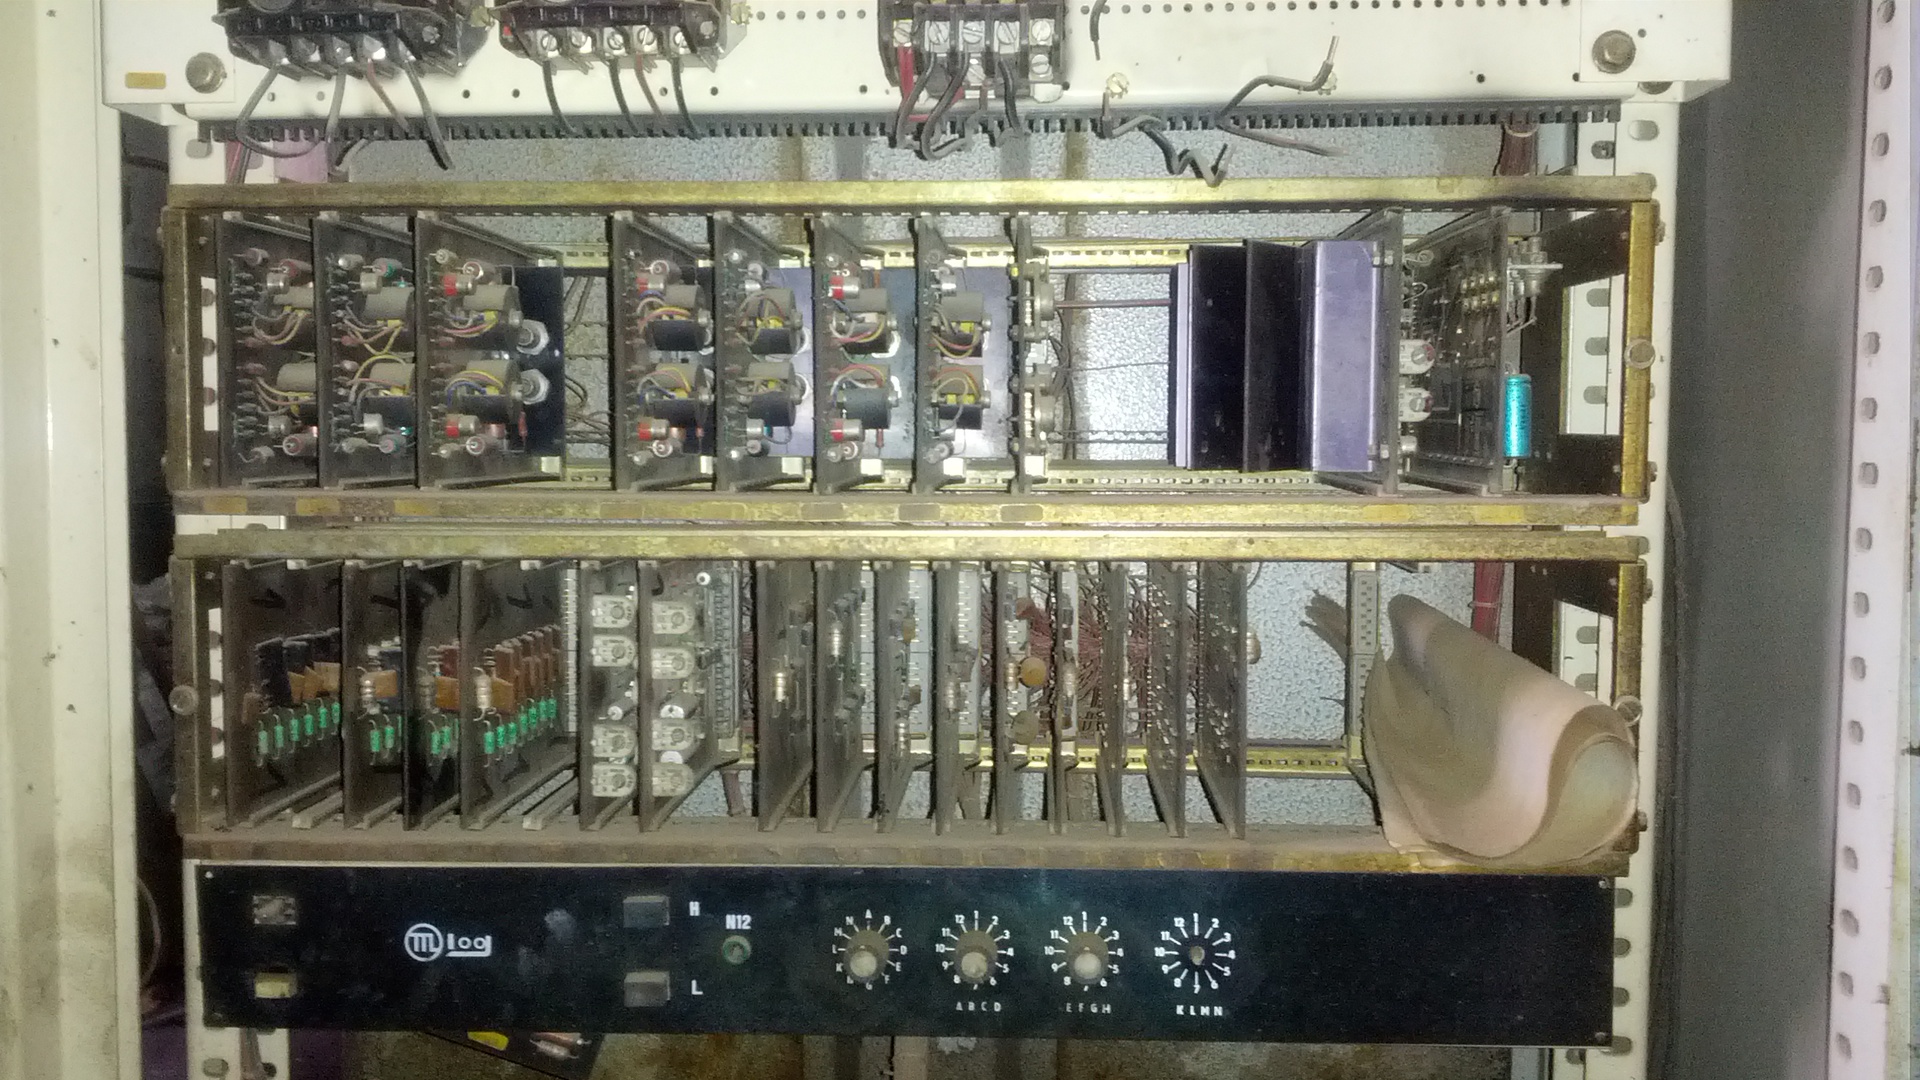
The machine is controlled by a couple of dozens of TTL logic cards, several load switch boards with seven-voltors for switching valves and starters, several boards of input level converters from limit switches. All boards are inserted into the basket with connectors in the control cabinet. In the basket, everything is connected by a wrapping method. TTL logic boards are assembled on TESLA chips (analogs K155 (555) or SN74XX).
There is practically no indication of the state of the cycle and therefore, during its strong glitches, it is almost impossible to understand what is happening to it. In addition, the boards fail over time and before you repair them, you need to go through an endless quest with a multimeter and a bunch of paper circuits, and even in uncomfortable poses.
It was decided to transfer the control and management of the casting cycle to microcontrollers. The first experimental controller was the Arduino Mega 2560. The controller turned out to be very "gentle" to work in conditions of strong electromagnetic bursts from starters and electric motors. He just hung up when he wanted to. Neither the shielding of the controller itself nor the replacement of all cables coming from the limit switches to a grounded MKESh 3x0.5 helped. And of course, all the electrical wiring of the machine was completely replaced. One of the solutions to the problem with freezes was to use the optiboot bootloader for Arduino with the watchdog function enabled, saving the state in EEPROM and restoring the state with the continuation of the cycle after the reset. But this did not help either.
In general, it was decided to abandon Atmega and switch to STM32.
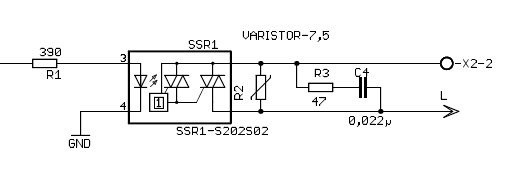
The NUCLEO-F401RE controller was purchased as an STM32 . All signals from the limit switches were collected through PC817 optocouplers . The control of electrovalves and starters was done on the SSR SHARP S202S02 (a pair of MOC3061 + BT138 can also be used ).
LCD12864 (ST7920) was ordered and paid on Aliexpress as an indicator, but the seller sent LCD 20x4 (during the dispute, the money was returned back and the display remained) and decided to apply it.
The program was written in the mbed online compiler .
Now a little on the programming methods of this controller in mbed. Work with signals from the limit switch, load control and work with timers:
The controller is flashed. NUCLEO is very easy to flash. After connecting the USB cable from NUCLEO to the computer, the removable disk appears in the latter. We copy the binary obtained after compilation in the online compiler into it and that's it - the firmware itself will be poured into the crystal. There were times when you had to upload the binary directly from the Galaxy Nexus via an OTG cable.
I made a printed circuit board using the LUT method. Soldered. Mounted in the cabinet of the machine. I launched it. Taught Adjustment Operators.
Today, the "mileage" is more than 100 thousand cycles! Not a single failure due to the fault of electronics.
Total. The controller of the blowing machine has 13 inputs with optical isolation, 11 outputs with optical isolation, each switches up to 8A load. Program organization of the casting cycle. LED indication of inputs and outputs. Display various information on the screen. Automatic and manual control modes. In manual mode, it is possible to turn on and off each power output individually with software protection from emergency conditions (for example, controlling the reversing starters of a three-phase motor of one of the machine mechanisms) to diagnose the health of individual machine nodes.
We have three machines. The other two will also be transferred to the controller.
I do not write about prices. The course is jumping. Yes, and all the details can be found on Aliexpress, where I bought everything.
Thanks. I will answer questions.
PS At the next stage, replacing the ancient control of heating the six zones of the screw and the “head” of the machine with modern electronics (6xMAX6675 + Atmega328 + 6xMOC3061 + 6xBT138-600 + LCD20x4). I will collect everything in a small box and finally throw out a huge control cabinet.
It controls the cycle of electronics on TTL logic chips (type K155 (555) or SN74xx). Under the cut, I’ll tell you how I replaced the electronics of the last century with the STM32 microcontroller.
The principle of operation of the blowing machine is briefly as follows: the plastic crumb coming from the hopper melts and is squeezed out by a screw under pressure through nozzles, forming “sleeves”. After that, the “sleeves” are cut off and fed into blow molds, in which the product is formed under the pressure of the supplied air (in my case it is a plastic bottle).
The machine is controlled by a couple of dozens of TTL logic cards, several load switch boards with seven-voltors for switching valves and starters, several boards of input level converters from limit switches. All boards are inserted into the basket with connectors in the control cabinet. In the basket, everything is connected by a wrapping method. TTL logic boards are assembled on TESLA chips (analogs K155 (555) or SN74XX).
There is practically no indication of the state of the cycle and therefore, during its strong glitches, it is almost impossible to understand what is happening to it. In addition, the boards fail over time and before you repair them, you need to go through an endless quest with a multimeter and a bunch of paper circuits, and even in uncomfortable poses.
Photo of a basket with boards (2 photos)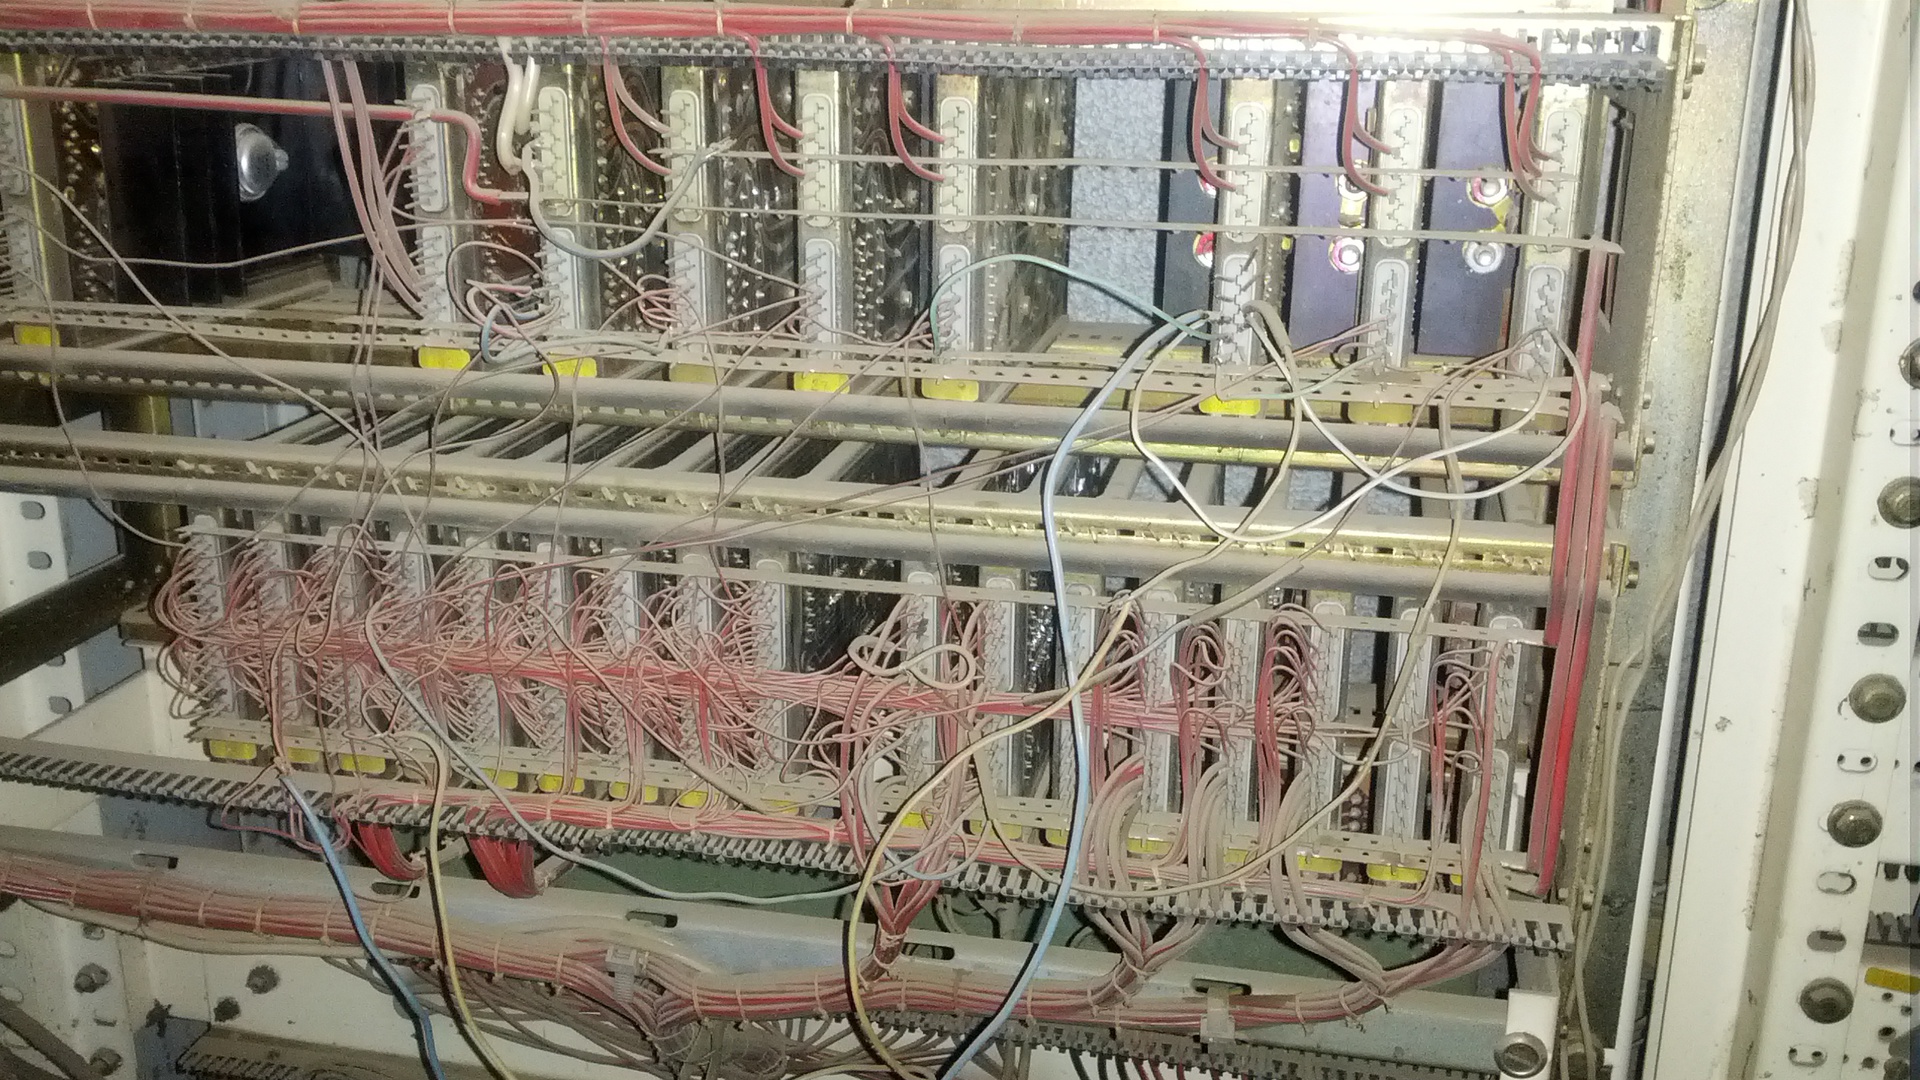
It was decided to transfer the control and management of the casting cycle to microcontrollers. The first experimental controller was the Arduino Mega 2560. The controller turned out to be very "gentle" to work in conditions of strong electromagnetic bursts from starters and electric motors. He just hung up when he wanted to. Neither the shielding of the controller itself nor the replacement of all cables coming from the limit switches to a grounded MKESh 3x0.5 helped. And of course, all the electrical wiring of the machine was completely replaced. One of the solutions to the problem with freezes was to use the optiboot bootloader for Arduino with the watchdog function enabled, saving the state in EEPROM and restoring the state with the continuation of the cycle after the reset. But this did not help either.
In general, it was decided to abandon Atmega and switch to STM32.
The NUCLEO-F401RE controller was purchased as an STM32 . All signals from the limit switches were collected through PC817 optocouplers . The control of electrovalves and starters was done on the SSR SHARP S202S02 (a pair of MOC3061 + BT138 can also be used ).
LCD12864 (ST7920) was ordered and paid on Aliexpress as an indicator, but the seller sent LCD 20x4 (during the dispute, the money was returned back and the display remained) and decided to apply it.
The program was written in the mbed online compiler .
Now a little on the programming methods of this controller in mbed. Work with signals from the limit switch, load control and work with timers:
Code Cut
All code takes about 2000 lines. I will not spread it. I can only say that service information is constantly coming out of the controller through the COM port (made for myself).
I will show only key fragments.
// Initial settings
// Operator-controlled variables the program stores in eeprom memory.
#include "_24LCXXX.h" // Library for working with the eeprom microchip
_24LCXXX eeprom (& i2c, 0x50); // Connect the chip eeprom
DigitalIn S41 (PC_8); // The S41 trailer is connected via an optocoupler to the PC_8 pin of the
DigitalOut Y43 controller (PA_13); // Control of the hydraulic valve Y43 (coil 220V) through the output PA_13
Timer T48;// T48 - timer used in the casting cycle
float SetT48 = 15.0; // Variable adjustable by the operator. Time for which the T48 timer starts.
...
void setup ()
{
...
S41.mode (PullDown); // Use the pull-up resistor
...
}
int main () // Main loop {
...
// Method for working with the signal from the limit switch
if (S41 == LOW) { // Check the status of the limit switch
...
}
...
// Load control method
Y43 == 1 ; // Turn on the hydraulic valve Y43
Y43 == 0; // Turn off the hydraulic valve Y43
...
// Work with the timer
T48.reset (); // Reset timer T48
T48.start (); // Start timer T48
...
CurrentT48 = T48.read (); // Read the current value of the count of the T48 timer
if (CurrentT48> SetT48) { // Compare with the given value
T48.stop ();
}
// Display the dynamic state of the timer on the LCD
lcd.printf ("T48 =% 4.1f", CurrentT48);
...
// Method of working with eeprom:
eeprom.nbyte_read (0x00, & SetT48, 4); // Reading from its industry 4 bytes starting from the address 0x00 and writing the contents to the memory of the allocated variable SetT48 (variable type float - 4 bytes)
eeprom.nbyte_write (0x00, & SetT48, 4);// Write 4 bytes in its industry starting with the address 0x00 of the memory values of the allocated SetT48 variable (the type of the float variable is 4 bytes)
...
}
I will show only key fragments.
// Initial settings
// Operator-controlled variables the program stores in eeprom memory.
#include "_24LCXXX.h" // Library for working with the eeprom microchip
_24LCXXX eeprom (& i2c, 0x50); // Connect the chip eeprom
DigitalIn S41 (PC_8); // The S41 trailer is connected via an optocoupler to the PC_8 pin of the
DigitalOut Y43 controller (PA_13); // Control of the hydraulic valve Y43 (coil 220V) through the output PA_13
Timer T48;// T48 - timer used in the casting cycle
float SetT48 = 15.0; // Variable adjustable by the operator. Time for which the T48 timer starts.
...
void setup ()
{
...
S41.mode (PullDown); // Use the pull-up resistor
...
}
int main () // Main loop {
...
// Method for working with the signal from the limit switch
if (S41 == LOW) { // Check the status of the limit switch
...
}
...
// Load control method
Y43 == 1 ; // Turn on the hydraulic valve Y43
Y43 == 0; // Turn off the hydraulic valve Y43
...
// Work with the timer
T48.reset (); // Reset timer T48
T48.start (); // Start timer T48
...
CurrentT48 = T48.read (); // Read the current value of the count of the T48 timer
if (CurrentT48> SetT48) { // Compare with the given value
T48.stop ();
}
// Display the dynamic state of the timer on the LCD
lcd.printf ("T48 =% 4.1f", CurrentT48);
...
// Method of working with eeprom:
eeprom.nbyte_read (0x00, & SetT48, 4); // Reading from its industry 4 bytes starting from the address 0x00 and writing the contents to the memory of the allocated variable SetT48 (variable type float - 4 bytes)
eeprom.nbyte_write (0x00, & SetT48, 4);// Write 4 bytes in its industry starting with the address 0x00 of the memory values of the allocated SetT48 variable (the type of the float variable is 4 bytes)
...
}
The controller is flashed. NUCLEO is very easy to flash. After connecting the USB cable from NUCLEO to the computer, the removable disk appears in the latter. We copy the binary obtained after compilation in the online compiler into it and that's it - the firmware itself will be poured into the crystal. There were times when you had to upload the binary directly from the Galaxy Nexus via an OTG cable.
I made a printed circuit board using the LUT method. Soldered. Mounted in the cabinet of the machine. I launched it. Taught Adjustment Operators.
Result photo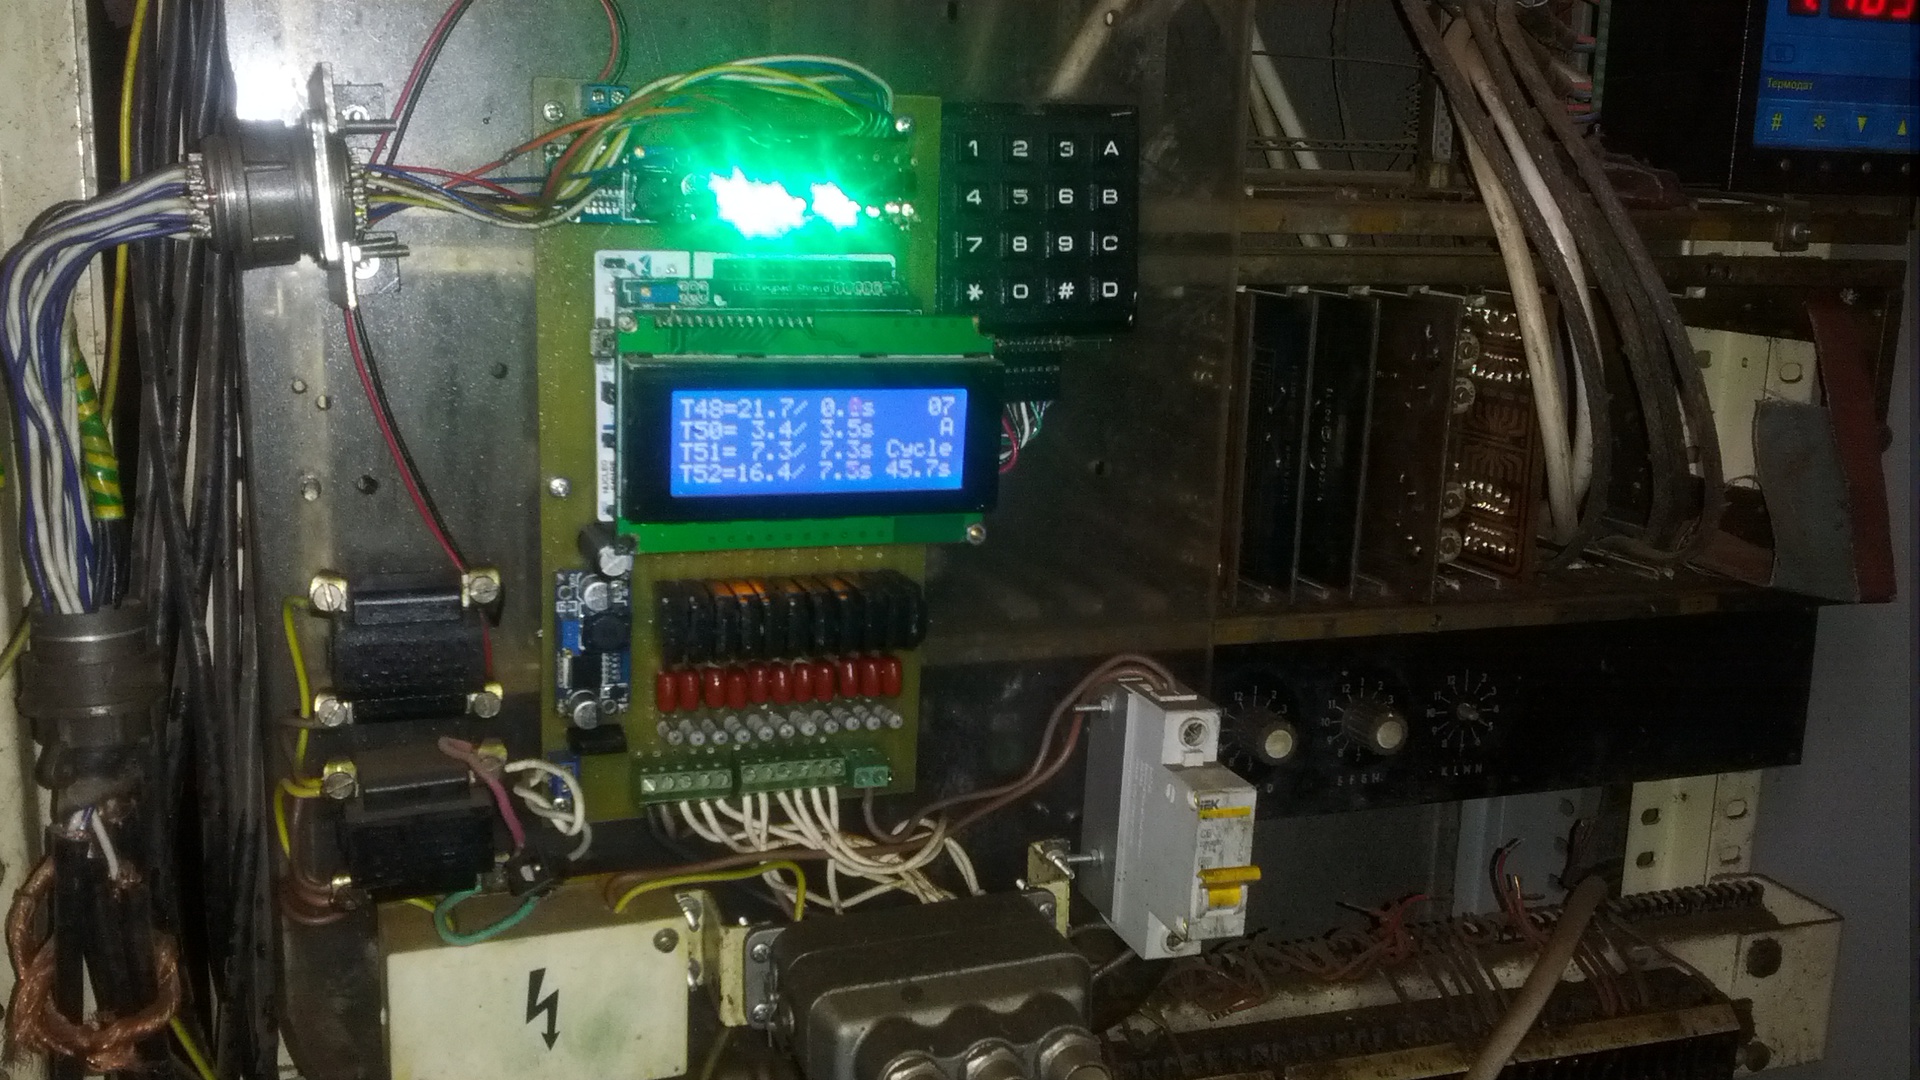
Result Video
Today, the "mileage" is more than 100 thousand cycles! Not a single failure due to the fault of electronics.
Total. The controller of the blowing machine has 13 inputs with optical isolation, 11 outputs with optical isolation, each switches up to 8A load. Program organization of the casting cycle. LED indication of inputs and outputs. Display various information on the screen. Automatic and manual control modes. In manual mode, it is possible to turn on and off each power output individually with software protection from emergency conditions (for example, controlling the reversing starters of a three-phase motor of one of the machine mechanisms) to diagnose the health of individual machine nodes.
We have three machines. The other two will also be transferred to the controller.
I do not write about prices. The course is jumping. Yes, and all the details can be found on Aliexpress, where I bought everything.
Thanks. I will answer questions.
PS At the next stage, replacing the ancient control of heating the six zones of the screw and the “head” of the machine with modern electronics (6xMAX6675 + Atmega328 + 6xMOC3061 + 6xBT138-600 + LCD20x4). I will collect everything in a small box and finally throw out a huge control cabinet.