Get to know Fabric.js. Part 3
This is a translation of the third part of a series of articles about the open Javascript canvas library Fabric.js.
We covered the bulk of the basic Fabric material in the first and second parts of this series. This article will provide more in-depth material.
The first thing we'll talk about is groups. Grouping objects is one of the most powerful tools in Fabric. Why do we need to group objects? It goes without saying in order to work with many objects as a whole.
Remember how we grouped any number of objects with the mouse? Once grouped, you can simultaneously move, scale, rotate and even change the appearance properties - color, transparency, frame, etc.
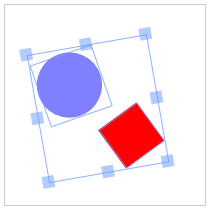
It is for this that there are groups. Each time you see a selection on the canvas (as in the image above), Fabric implicitly creates groups within itself so that you can subsequently work with them programmatically. This is the main point
Create a group of 2 objects, a circle and text:
First we created the text object “hello world”. We set the properties
And voila! You see an object on canvas that looks like an ellipse with an inscription. Note that it is easy to modify it by changing the properties of the group. You can work with this object as a whole.
Now we have a group on canvas. Let's change it a bit.
What's going on here? We accessed the objects within the group using the method
important thing that you probably noticed is that the objects in the group are aligned with the center of the group. When we changed the text object label, it remained centered, even after changing its width. This behavior can be canceled by setting the object coordinates (left \ top).
Let's create and group 3 circles so that they are arranged horizontally one after another.
When working with groups, you need to pay attention to the state of objects . For example, when forming a group of images, you need to make sure that they are fully loaded. Fortunately, Fabric has a ready-made solution:
There are several other important methods for groups. A method
You can add / remove objects from a group in two ways. With updating the position / size of the group and without.
Add a rectangle to the center of the group.
Add a rectangle 100px from the center of the group:
Add a rectangle to the center of the group and update the group sizes:
Add a rectangle 100px from the center of the group and update the size of the group:
To create a group of objects that are already on canvas, you need to clone them and only then group them:
When you start implementing functionality in which, for example, you want to allow the user to save the contents of the canvas, or want to broadcast it to another client, then you need to serialize the canvas . How can I send canvas content? You can of course export the entire canvas to an image, but uploading a picture to a server is cumbersome and inconvenient. It is much easier to translate content into text than just what Fabric can make us so happy.
The basis of serialization in Fabris is methods
Let's look at an example, serializing an empty canvas.
We use the ES5 method
Consider a return string that represents an empty canvas. It has a JSON format, and consists of the properties '' objects '' and '' background ''. The `` objects '' property is currently empty, since there is nothing on the canvas, and the `` background '' has the initial transparent value (“rgba (0, 0, 0, 0)”).
Set the canvas to a different background and see what changes.
As expected, the canvas view now contains a different background. Now let's try to add some objects.
... will output to the console:
Wow! At first glance, a lot of things have changed, but taking a closer look, we will see that this new object has become part of the `` objects '' array serialized in JSON. Please note that its description contains all the visual components: coordinates, width, height, filling, etc. If we add another object, say a red circle, and place it behind the rectangle, the result will change accordingly.
... will output to the console:
I highlighted
And ~ 17,000 more characters .
At first glance, it is not clear why one more method was needed
As you can see, the output
This means that when you create your own “class”, or if you want to change the serialized representation of an object, then you need a method
Let's look at an example:
... will output to the console:
As you can see, the `` objects '' array now has a modified representation of our rectangle. But rewriting in this way is often not very useful, unlike expanding the functionality with
... will output to the console:
We extended the existing method
Another textual representation of canvas is the SVG format. Fabric specializes in SVG parsing and display on canvas. This provides the ability to convert from canvas to SVG and vice versa. Add the same rectangle to the canvas and see the method in action
... will output to the console:
Just like
The advantage of SVG presentation in comparison with
As in serialization, there are 2 ways to load canvas from a string: from a JSON and SVG view. There are
Note that the first two methods are called on canvas, and the other two directly on fabric.
There is nothing special to say about these methods. They work exactly as expected from them. Take, for example, the previous JSON output and place it on an empty canvas:
... Both objects appear on canvas:
Well, loading canvas from a string is quite simple, but what about a method that is not clear at first glance
... and it
... and this is just the 5th (!) Part of the whole text.
What's going on here? A Path object consists of hundreds of Bezier curve symbols that show how this object should be displayed. All these parts
What to do?
This is where the method comes to the rescue
... will output to the console:
Well, much less! What have we done? Please note that before calling the method,
Working with a large number of complex forms, the
Returning to the method
Let's look at the methods for loading SVG. We can use a string or URL:
The first argument is an SVG string, the second is a callback function. The function is called when the SVG has loaded. She takes two arguments:
Since Fabric is built on the principles of OOP, you can easily create and create subclasses and extend the functionality of objects. As you know from the first part of the series, Fabric has a strict hierarchy of objects. All 2D objects (path, images, text, etc.) inherit from
How about subclassing an existing “class” in Fabric? Or maybe create a new "class"?
In order to do this, we need a method
If we want to create a descendant of the “class” Point, say, a colored point, we use
Note that now the object for inheritance is used as the second argument, and the first is the "class" Point, which becomes the parent for this object. To avoid duplication, we use a method
Now we know how to create our own “classes” and “subclasses,” but we can also use existing ones in Fabric. For example, create a “class”
The code may seem complicated, but it's pretty simple.
First, we define the parent “class” as
The constructor (
As a result, we have 2 methods left -
As
As for the method
Now, if we want to show such an object:
... we get the following:
Changing a property (label or whatever) will produce the expected result:
You can modify the behavior of the “class” as you wish. For example, add default values so as not to set them in the constructor once again. Or make custom properties available on the object. If you make additional properties customizable, you can put them in
This concludes the 3rd part of our series. Now you have an idea of groups, “classes”, “subclasses” and (de) serialization. I hope that the material presented in the article will help you solve more complex problems with Fabric. Even more information will be presented in the fourth part of the series .
Success and successful development!
The translation was made with the consent and direct participation of the authors. Link to the source .
We covered the bulk of the basic Fabric material in the first and second parts of this series. This article will provide more in-depth material.
Groups
The first thing we'll talk about is groups. Grouping objects is one of the most powerful tools in Fabric. Why do we need to group objects? It goes without saying in order to work with many objects as a whole.
Remember how we grouped any number of objects with the mouse? Once grouped, you can simultaneously move, scale, rotate and even change the appearance properties - color, transparency, frame, etc.
It is for this that there are groups. Each time you see a selection on the canvas (as in the image above), Fabric implicitly creates groups within itself so that you can subsequently work with them programmatically. This is the main point
fabric.Group. Create a group of 2 objects, a circle and text:
var circle = new fabric.Circle({
  radius: 100,
  fill: '#eef',
  scaleY: 0.5,
  originX: 'center',
  originY: 'center'
});
var text = new fabric.Text('hello world', {
  fontSize: 30,
  originX: 'center',
  originY: 'center'
});
var group = new fabric.Group([ circle, text ], {
  left: 150,
  top: 100,
  angle: -10
});
canvas.add(group);
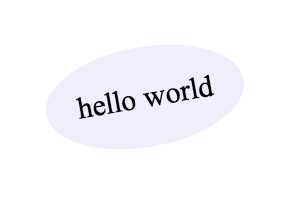
First we created the text object “hello world”. We set the properties
originXand the originYvalue 'center'that will center this object within the group. In the initial settings, group members are oriented relative to the upper left corner of the group. Then a circle with a radius of 100px was painted over with the color "#eef" and vertically compressed (compression ratio - 0.5). Next, we created an object fabric.Groupwith two parameters. The first parameter is an array of 2 of our objects. The second parameter set the group position 150/100 and angle -10. Finally, they added it using a method canvas.add()like any other object. And voila! You see an object on canvas that looks like an ellipse with an inscription. Note that it is easy to modify it by changing the properties of the group. You can work with this object as a whole.
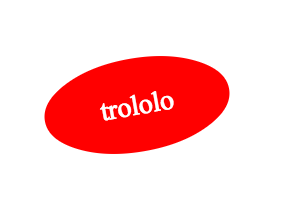
Now we have a group on canvas. Let's change it a bit.
group.item(0).setFill('red');
group.item(1).set({
  text: 'trololo',
  fill: 'white'
});
canvas.renderAll();
What's going on here? We accessed the objects within the group using the method
item()and changed their properties. The first object is a compressed circle, the second is text. Let's see what happened: The important thing that you probably noticed is that the objects in the group are aligned with the center of the group. When we changed the text object label, it remained centered, even after changing its width. This behavior can be canceled by setting the object coordinates (left \ top).
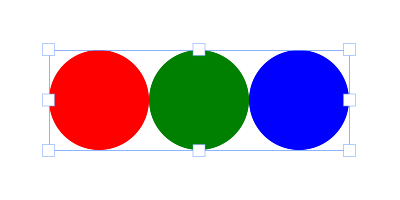
Let's create and group 3 circles so that they are arranged horizontally one after another.
var circle1 = new fabric.Circle({
  radius: 50,
  fill: 'red',
  left: 0
});
var circle2 = new fabric.Circle({
  radius: 50,
  fill: 'green',
  left: 100
});
var circle3 = new fabric.Circle({
  radius: 50,
  fill: 'blue',
  left: 200
});
var group = new fabric.Group([ circle1, circle2, circle3 ], {
  left: 200,
  top: 100
});
canvas.add(group);
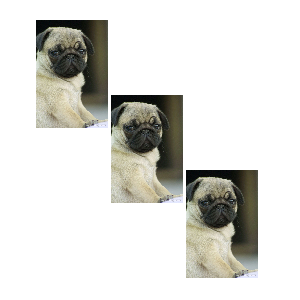
When working with groups, you need to pay attention to the state of objects . For example, when forming a group of images, you need to make sure that they are fully loaded. Fortunately, Fabric has a ready-made solution:
fabric.Image.fromURL('/assets/pug.jpg', function(img) {
  var img1 = img.scale(0.1).set({ left: 100, top: 100 });
  fabric.Image.fromURL('/assets/pug.jpg', function(img) {
    var img2 = img.scale(0.1).set({ left: 175, top: 175 });
    fabric.Image.fromURL('/assets/pug.jpg', function(img) {
      var img3 = img.scale(0.1).set({ left: 250, top: 250 });
      canvas.add(new fabric.Group([ img1, img2, img3], { left: 200, top: 200 }))
    });
  });
});
There are several other important methods for groups. A method
getObjects()that works the same as fabric.Canvas#getObjects()and returns an array of all objects in the group. There is a method size()showing the number of all objects in a group. There is also a method contains()that checks for the presence of a specific object in a group. The previously mentioned method item()that allows you to take a specific object from a group. A method forEachObject()that works just like fabric.Canvas#forEachObjectwith groups only. Finally, add()and methods remove()that add and remove objects from the group accordingly. You can add / remove objects from a group in two ways. With updating the position / size of the group and without.
Add a rectangle to the center of the group.
group.add(new fabric.Rect({
  ...
  originX: 'center',
  originY: 'center'
}));
Add a rectangle 100px from the center of the group:
group.add(new fabric.Rect({
  ...
  left: 100,
  top: 100,
  originX: 'center',
  originY: 'center'
}));
Add a rectangle to the center of the group and update the group sizes:
group.addWithUpdate(new fabric.Rect({
  ...
  left: group.getLeft(),
  top: group.getTop(),
  originX: 'center',
  originY: 'center'
}));
Add a rectangle 100px from the center of the group and update the size of the group:
group.addWithUpdate(new fabric.Rect({
  ...
  left: group.getLeft() + 100,
  top: group.getTop() + 100,
  originX: 'center',
  originY: 'center'
}));
To create a group of objects that are already on canvas, you need to clone them and only then group them:
// создаем группу с копиями 2-х существующих объектов.
var group = new fabric.Group([
  canvas.item(0).clone(),
  canvas.item(1).clone()
]);
// удаляем все объекты и перерисовываем.
canvas.clear().renderAll();
// добавляем группу на canvas.
canvas.add(group);
Serialization
When you start implementing functionality in which, for example, you want to allow the user to save the contents of the canvas, or want to broadcast it to another client, then you need to serialize the canvas . How can I send canvas content? You can of course export the entire canvas to an image, but uploading a picture to a server is cumbersome and inconvenient. It is much easier to translate content into text than just what Fabric can make us so happy.
Methods toObject, toJSON
The basis of serialization in Fabris is methods
fabric.Canvas#toObject()and fabric.Canvas#toJSON(). Let's look at an example, serializing an empty canvas.
var canvas = new fabric.Canvas('c');
JSON.stringify(canvas); // '{"objects":[],"background":"rgba(0, 0, 0, 0)"}'
We use the ES5 method
JSON.stringify(), which calls the method toJSONon the object, if this method exists. A canvas object in Fabric has such a method; it is equivalent to a call JSON.stringify(canvas.toJSON()). Consider a return string that represents an empty canvas. It has a JSON format, and consists of the properties '' objects '' and '' background ''. The `` objects '' property is currently empty, since there is nothing on the canvas, and the `` background '' has the initial transparent value (“rgba (0, 0, 0, 0)”).
Set the canvas to a different background and see what changes.
canvas.backgroundColor = 'red';
JSON.stringify(canvas); // '{"objects":[],"background":"red"}'
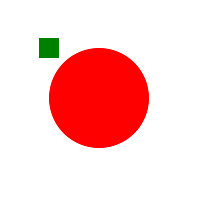
As expected, the canvas view now contains a different background. Now let's try to add some objects.
canvas.add(new fabric.Rect({
  left: 50,
  top: 50,
  height: 20,
  width: 20,
  fill: 'green'
}));
console.log(JSON.stringify(canvas));
... will output to the console:
'{"objects":[{"type":"rect","left":50,"top":50,"width":20,"height":20,"fill":"green","overlayFill":null,"stroke":null,"strokeWidth":1,"strokeDashArray":null,"scaleX":1,"scaleY":1,"angle":0,"flipX":false,"flipY":false,"opacity":1,"selectable":true,"hasControls":true,"hasBorders":true,"hasRotatingPoint":false,"transparentCorners":true,"perPixelTargetFind":false,"rx":0,"ry":0}],"background":"rgba(0, 0, 0, 0)"}'
Wow! At first glance, a lot of things have changed, but taking a closer look, we will see that this new object has become part of the `` objects '' array serialized in JSON. Please note that its description contains all the visual components: coordinates, width, height, filling, etc. If we add another object, say a red circle, and place it behind the rectangle, the result will change accordingly.
canvas.add(new fabric.Circle({
  left: 100,
  top: 100,
  radius: 50,
  fill: 'red'
}));
console.log(JSON.stringify(canvas));
... will output to the console:
'{"objects":[{(Прямоугольник) "type":"rect","left":50,"top":50,"width":20,"height":20,"fill":"green","overlayFill":null,"stroke":null,"strokeWidth":1,"strokeDashArray":null,"scaleX":1,"scaleY":1,"angle":0,"flipX":false,"flipY":false,"opacity":1,"selectable":true,"hasControls":true,"hasBorders":true,"hasRotatingPoint":false,"transparentCorners":true,"perPixelTargetFind":false,"rx":0,"ry":0},{(Круг) "type":"circle","left":100,"top":100,"width":100,"height":100,"fill":"red","overlayFill":null,"stroke":null,"strokeWidth":1,"strokeDashArray":null,"scaleX":1,"scaleY":1,"angle":0,"flipX":false,"flipY":false,"opacity":1,"selectable":true,"hasControls":true,"hasBorders":true,"hasRotatingPoint":false,"transparentCorners":true,"perPixelTargetFind":false,"radius":50}],"background":"rgba(0, 0, 0, 0)"}'
I highlighted
"type":"rect"and "type":"circle"to indicate where these objects begin. It may seem that the line is too long, but these are still flowers, compared to serializing images. For comparison, let's look at 1/10 (!) Of the line that the method will return to us canvas.toDataURL('png'):'data:image/png;base64,iVBORw0KGgoAAAANSUhEUgAAAyAAAAK8CAYAAAAXo9vkAAAgAElEQVR4Xu3dP4xtBbnG4WPAQOQ2YBCLK1qpoQE1/m+NVlCDwUACicRCEuysrOwkwcJgAglEItRQaWz9HxEaolSKtxCJ0FwMRIj32zqFcjm8e868s2fNWo/Jygl+e397rWetk5xf5pyZd13wPwIECBAgQIAAAQIECBxI4F0H+hwfQ4AAAQIECBAgQIAAgQsCxENAgAABAgQIECBAgMDBBATIwah9EAECBAgQIECAAAECAsQzQIAAAQIECBAgQIDAwQQEyMGofRABAgQIECBAgAABAgLEM0CAAAECBAgQIECAwMEEBMjBqH0QAQIECBAgQIAAAQICxDNAgAABAgQIECBAgMDBBATIwah9EAECBAgQIECAAAECAsQzQIAAAQIECBAgQIDAwQQEyMGofRABAgQIECBAgAABAgLEM0CAAAECBAgQIECAwMEEBMjBqH0QAQIECBAgQIAAAQICxDNAgAABAgQIECBAgMDBBATIwah9EAECBAgQIECAAAECAsQzQIAAAQIECBAgQIDAwQQEyMGofRABAgQIECBAgAABAgLEM0CAAAECBAgQIECAwMEEBMjBqH0QAQIECBAgQIAAAQICxDNAgAABAgQIECBAgMDBBATIwah9EAECBAgQIECAAAECAsQzQIAAAQIECBAgQIDAwQQEyMGofRABAgQIECBAgAABAgLEM0CAAAECBAgQIECAwMEEBMjBqH0QAQIECBAgQIAAAQICxDNAgAABAgQIECBAgMDBBATIwah9EAECBAgQIECAAAECAsQzQIAAAQIECBAgQIDAwQQEyMGofRABAgQIECBAgAABAgLEM0CAAAECBAgQIECAwMEEBMjBqH0QAQIECBAgQIAAAQICxDNAgAABAgQIECBAgMDBBATIwah9EAECBAgQIECAAAECAsQzQIAAAQIECBAgQIDAwQQEyMGofRABAgQIECBAgAABAgLEM0CAAAECBAgQIECAwMEEBMjBqH0QAQIECBAgQIAAAQICxDNAgAABAgQIECBAgMDBBATIwah9EAECBAgQIECAAAECyw+Qb134R/U2fevC8q+5esGWESBAgAABAgQIEFiOwPL/MC5AlvO0OBMCBAgQIECAAAECJxQQICcE9HYCBAgQIECAAAECBPYXECD7W3klAQIECBAgQIAAAQInFBAgJwT0dgIECBAgQIAAAQIE9hcQIPtbeSUBAgQIECBAgAABAicUECAnBPR2AgQIECBAgAABAgT2FxAg+1t5JQECBAgQIECAAAECJxQQICcE9HYCBAgQIECAAAECBPYXECD7W3klAQIECBAgQIAAAQInFBAgJwTc9+3z49yvmNd+dI7PzPHJOW6Y4wNzXD3HlXNc9pZdb85/vzbHK3P8aY7n5vj1HL+Y43dz417f97O9jgABAgQIECBAgMBSBATIKd2JCY5dWNwyx5fn+PwcV5U/6tXZ99M5fjjHk3Mjd6HifwQIECBAgAABAgQWLSBAirdnouP6WXfvHHfOcU1x9T6rXp4XPTLHA3NTX9jnDV5DgAABAgQIECBA4NACAuSE4hMdl8+Kr83xzTmuO+G61ttfnEXfnuN7c4PfaC21hwABAgQIECBAgMBJBQTIJQpOeFw7b71/jtsvccWh3vbYfNB9c6NfOtQH+hwCBAgQIECAAAECFxMQIMd8No7C4+F5283HfOtZv/ypOYG7hMhZ3wafT4AAAQIECBDYtoAA2fP+H/1Vqwd3f4jf8y1Lfdkunu7xV7OWenucFwECBAgQIEBg3QICZI/7O/Fxx7xs9wf3t36r3D3evciX7L7F7+6rIY8u8uycFAECBAgQIE'
And ~ 17,000 more characters .
At first glance, it is not clear why one more method was needed
fabric.Canvas#toObject. It's simple: it toObjectreturns the same representation as toJSON, only in the form of an object. For example, take a canvas with the contents as a green rectangle. canvas.toObject()will output to the console:{ "background" : "rgba(0, 0, 0, 0)",
"objects" : [
{
"angle" : 0,
"fill" : "green",
"flipX" : false,
"flipY" : false,
"hasBorders" : true,
"hasControls" : true,
"hasRotatingPoint" : false,
"height" : 20,
"left" : 50,
"opacity" : 1,
"overlayFill" : null,
"perPixelTargetFind" : false,
"scaleX" : 1,
"scaleY" : 1,
"selectable" : true,
"stroke" : null,
"strokeDashArray" : null,
"strokeWidth" : 1,
"top" : 50,
"transparentCorners" : true,
"type" : "rect",
"width" : 20
}
]
}
As you can see, the output
toJSONis nothing but a string toObject. The method is toObjectinteresting and useful in that it is “smart” and “lazy.” What you see in the array is the result of iterating over all the canvas objects and delegating the method to them toObject. The "class" object fabric.Pathhas its own toObject, which returns an array of `` points ''. And fabric.Imagealso has this method, it returns the `` src '' property of images. Following the pattern of OOP, each object knows how to serialize itself. This means that when you create your own “class”, or if you want to change the serialized representation of an object, then you need a method
toObjectthat can be overwritten or expanded with its functionality. Let's look at an example:
var rect = new fabric.Rect();
rect.toObject = function() {
  return { name: 'trololo' };
};
canvas.add(rect);
console.log(JSON.stringify(canvas));
... will output to the console:
'{"objects":[{"name":"trololo"}],"background":"rgba(0, 0, 0, 0)"}'
As you can see, the `` objects '' array now has a modified representation of our rectangle. But rewriting in this way is often not very useful, unlike expanding the functionality with
toObjectadditional properties.var rect = new fabric.Rect();
rect.toObject = (function(toObject) {
return function() {
return fabric.util.object.extend(toObject.call(this), {
name: this.name
});
};
})(rect.toObject);
canvas.add(rect);
rect.name = 'trololo';
console.log(JSON.stringify(canvas));
... will output to the console:
'{"objects":[{"type":"rect","left":0,"top":0,"width":0,"height":0,"fill":"rgb(0,0,0)","overlayFill":null,"stroke":null,"strokeWidth":1,"strokeDashArray":null,"scaleX":1,"scaleY":1,"angle":0,"flipX":false,"flipY":false,"opacity":1,"selectable":true,"hasControls":true,"hasBorders":true,"hasRotatingPoint":false,"transparentCorners":true,"perPixelTargetFind":false,"rx":0,"ry":0,"name":"trololo"}],"background":"rgba(0, 0, 0, 0)"}'
We extended the existing method
toObjecton the object with the additional property `` name ''. Now it is present as a result of a method call. It must be remembered that when expanding the functional in this way, the “class” of the object (in this case fabric.Rect) must contain the newly added property in the array '' stateProperties ''. Only in this case will everything work correctly.ToSVG method
Another textual representation of canvas is the SVG format. Fabric specializes in SVG parsing and display on canvas. This provides the ability to convert from canvas to SVG and vice versa. Add the same rectangle to the canvas and see the method in action
toSVG:canvas.add(new fabric.Rect({
left: 50,
top: 50,
height: 20,
width: 20,
fill: 'green'
}));
console.log(canvas.toSVG());
... will output to the console:
''
Just like
toJSONor toObject, toSVGwhen invoked on canvas, it delegates its logic to each object, and each of them has its own toSVGmethod, special for each type of object. If you need to change or extend a toSVGmethod, you can do it the same way as with the method toObject. The advantage of SVG presentation in comparison with
toObject/toJSONthat is that you can coordinate with any device capable of SVG visualization (browser, application, printer, camera, etc.). With the toObject / toJSON methods, you need to load the view into canvas first. Speaking of loading on canvas. We can serialize the contents of canvas into text, but how can we load it back?Deserialization, SVG parser
As in serialization, there are 2 ways to load canvas from a string: from a JSON and SVG view. There are
fabric.Canvas#loadFromJSONand methods for JSON fabric.Canvas#loadFromDatalessJSON. For SVG - methods fabric.loadSVGFromURLand fabric.loadSVGFromString. Note that the first two methods are called on canvas, and the other two directly on fabric.
There is nothing special to say about these methods. They work exactly as expected from them. Take, for example, the previous JSON output and place it on an empty canvas:
var canvas = new fabric.Canvas();
canvas.loadFromJSON('{"objects":[{"type":"rect","left":50,"top":50,"width":20,"height":20,"fill":"green","overlayFill":null,"stroke":null,"strokeWidth":1,"strokeDashArray":null,"scaleX":1,"scaleY":1,"angle":0,"flipX":false,"flipY":false,"opacity":1,"selectable":true,"hasControls":true,"hasBorders":true,"hasRotatingPoint":false,"transparentCorners":true,"perPixelTargetFind":false,"rx":0,"ry":0},{"type":"circle","left":100,"top":100,"width":100,"height":100,"fill":"red","overlayFill":null,"stroke":null,"strokeWidth":1,"strokeDashArray":null,"scaleX":1,"scaleY":1,"angle":0,"flipX":false,"flipY":false,"opacity":1,"selectable":true,"hasControls":true,"hasBorders":true,"hasRotatingPoint":false,"transparentCorners":true,"perPixelTargetFind":false,"radius":50}],"background":"rgba(0, 0, 0, 0)"}');
... Both objects appear on canvas:
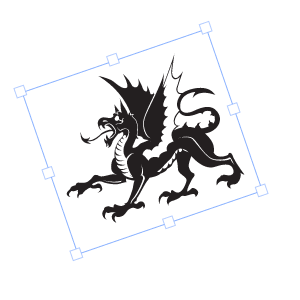
Well, loading canvas from a string is quite simple, but what about a method that is not clear at first glance
loadFromDatalessJSON? What is its fundamental difference from the loadFromJSONone we just used? To understand what this method is for, we need to look at a more or less complex path object, for example this one: ... and it
JSON.stringify(canvas)will print the following:'{"objects":[{"type":"path","left":184,"top":177,"width":175,"height":151,"fill":"#231F20","overlayFill":null,"stroke":null,"strokeWidth":1,"strokeDashArray":null,"scaleX":1,"scaleY":1,"angle":-19,"flipX":false,"flipY":false,"opacity":1,"selectable":true,"hasControls":true,"hasBorders":true,"hasRotatingPoint":false,"transparentCorners":true,"perPixelTargetFind":false,"path":[["M",39.502,61.823],["c",-1.235,-0.902,-3.038,-3.605,-3.038,-3.605],["s",0.702,0.4,3.907,1.203],["c",3.205,0.8,7.444,-0.668,10.114,-1.97],["c",2.671,-1.302,7.11,-1.436,9.448,-1.336],["c",2.336,0.101,4.707,0.602,4.373,2.036],["c",-0.334,1.437,-5.742,3.94,-5.742,3.94],["s",0.4,0.334,1.236,0.334],["c",0.833,0,6.075,-1.403,6.542,-4.173],["s",-1.802,-8.377,-3.272,-9.013],["c",-1.468,-0.633,-4.172,0,-4.172,0],["c",4.039,1.438,4.941,6.176,4.941,6.176],["c",-2.604,-1.504,-9.279,-1.234,-12.619,0.501],["c",-3.337,1.736,-8.379,2.67,-10.083,2.503],["c",-1.701,-0.167,-3.571,-1.036,-3.571,-1.036],["c",1.837,0.034,3.239,-2.669,3.239,-2.669],["s",-2.068,2.269,-5.542,0.434],["c",-3.47,-1.837,-1.704,-8.18,-1.704,-8.18],["s",-2.937,5.909,-1,9.816],["C",34.496,60.688,39.502,61.823,39.502,61.823],["z"],["M",77.002,40.772],["c",0,0,-1.78,-5.03,-2.804,-8.546],["l",-1.557,8.411],["l",1.646,1.602],["c",0,0,0,-0.622,-0.668,-1.691],["C",72.952,39.48,76.513,40.371,77.002,40.772],["z"],["M",102.989,86.943],["M",102.396,86.424],["c",0.25,0.22,0.447,0.391,0.594,0.519],["C",102.796,86.774,102.571,86.578,102.396,86.424],["z"],["M",169.407,119.374],["c",-0.09,-5.429,-3.917,-3.914,-3.917,-2.402],["c",0,0,-11.396,1.603,-13.086,-6.677],["c",0,0,3.56,-5.43,1.69,-12.461],["c",-0.575,-2.163,-1.691,-5.337,-3.637,-8.605],["c",11.104,2.121,21.701,-5.08,19.038,-15.519],["c",-3.34,-13.087,-19.63,-9.481,-24.437,-9.349],["c",-4.809,0.135,-13.486,-2.002,-8.011,-11.618],["c",5.473,-9.613,18.024,-5.874,18.024,-5.874],["c",-2.136,0.668,-4.674,4.807,-4.674,4.807],["c",9.748,-6.811,22.301,4.541,22.301,4.541],["c",-3.097,-13.678,-23.153,-14.636,-30.041,-12.635],["c",-4.286,-0.377,-5.241,-3.391,-3.073,-6.637],["c",2.314,-3.473,10.503,-13.976,10.503,-13.976],["s",-2.048,2.046,-6.231,4.005],["c",-4.184,1.96,-6.321,-2.227,-4.362,-6.854],["c",1.96,-4.627,8.191,-16.559,8.191,-16.559],["c",-1.96,3.207,-24.571,31.247,-21.723,26.707],["c",2.85,-4.541,5.253,-11.93,5.253,-11.93],["c",-2.849,6.943,-22.434,25.283,-30.713,34.274],["s",-5.786,19.583,-4.005,21.987],["c",0.43,0.58,0.601,0.972,0.62,1.232],["c",-4.868,-3.052,-3.884,-13.936,-0.264,-19.66],["c",3.829,-6.053,18.427,-20.207,18.427,-20.207],["v",-1.336],["c",0,0,0.444,-1.513,-0.089,-0.444],["c",-0.535,1.068,-3.65,1.245,-3.384,-0.889],["c",0.268,-2.137,-0.356,-8.549,-0.356,-8.549],["s",-1.157,5.789,-2.758,5.61],["c",-1.603,-0.179,-2.493,-2.672,-2.405,-5.432],["c",0.089,-2.758,-1.157,-9.702,-1.157,-9.702],["c",-0.8,11.75,-8.277,8.011,-8.277,3.74],["c",0,-4.274,-4.541,-12.82,-4.541,-12.82],["s",2.403,14.421,-1.336,14.421],["c",-3.737,0,-6.944,-5.074,-9.879,-9.882],["C",78.161,5.874,68.279,0,68.279,0],["c",13.428,16.088,17.656,32.111,18.397,44.512],["c",-1.793,0.422,-2.908,2.224,-2.908,2.224],["c",0.356,-2.847,-0.624,-7.745,-1.245,-9.882],["c",-0.624,-2.137,-1.159,-9.168,-1.159,-9.168],["c",0,2.67,-0.979,5.253,-2.048,9.079],["c",-1.068,3.828,-0.801,6.054,-0.801,6.054],["c",-1.068,-2.227,-4.271,-2.137,-4.271,-2.137],["c",1.336,1.783,0.177,2.493,0.177,2.493],["s",0,0,-1.424,-1.601],["c",-1.424,-1.603,-3.473,-0.981,-3.384,0.265],["c",0.089,1.247,0,1.959,-2.849,1.959],["c",-2.846,0,-5.874,-3.47,-9.078,-3.116],["c",-3.206,0.356,-5.521,2.137,-5.698,6.678],["c",-0.179,4.541,1.869,5.251,1.869,5.251],["c",-0.801,-0.443,-0.891,-1.067,-0.891,-3.473]'...
... and this is just the 5th (!) Part of the whole text.
What's going on here? A Path object consists of hundreds of Bezier curve symbols that show how this object should be displayed. All these parts
["c",0,2.67,-0.979,5.253,-2.048,9.079]in JSON format are the coordinates of one of the curves. And when there are hundreds or thousands of these curves, it is not difficult to guess how huge the string will be. What to do?
This is where the method comes to the rescue
fabric.Canvas#toDatalessJSON. Let's try:canvas.item(0).sourcePath = '/assets/dragon.svg';
console.log(JSON.stringify(canvas.toDatalessJSON()));
... will output to the console:
{"objects":[{"type":"path","left":143,"top":143,"width":175,"height":151,"fill":"#231F20","overlayFill":null,"stroke":null,"strokeWidth":1,"strokeDashArray":null,"scaleX":1,"scaleY":1,"angle":-19,"flipX":false,"flipY":false,"opacity":1,"selectable":true,"hasControls":true,"hasBorders":true,"hasRotatingPoint":false,"transparentCorners":true,"perPixelTargetFind":false,"path":"/assets/dragon.svg"}],"background":"rgba(0, 0, 0, 0)"}
Well, much less! What have we done? Please note that before calling the method,
toDatalessJSONwe set the "sourcePath" property of the path (dragon shape) object to "/assets/dragon.svg". Then we called the method toDatalessJSON, and this whole huge path line turned into a simple line "/assets/dragon.svg". Working with a large number of complex forms, the
toDatalessJSONmethod allows us to significantly reduce the textual representation of canvas, and replace large path data with a simple link to SVG. Returning to the method
loadFromDatalessJSON, you probably guessed that it allows loading canvas from a view without data (dataless). loadFromDatalessJSONcan load “path” lines (such as “/assets/dragon.svg”) and use them as data for path objects.Let's look at the methods for loading SVG. We can use a string or URL:
fabric.loadSVGFromString('...', function(objects, options) {
  var obj = fabric.util.groupSVGElements(objects, options);
  canvas.add(obj).renderAll();
});
The first argument is an SVG string, the second is a callback function. The function is called when the SVG has loaded. She takes two arguments:
objectsand options. objects- an array of objects obtained from SVG - paths, a group of path-objects (for complex objects), images, text, etc. To group all these objects into one collection and make them look like they were in the SVG document, we use fabric.util.groupSVGElementsboth objectsfor and options. In the end, we get fabric.Patheither fabric.PathGroupan object that we can add to the canvas.fabric.loadSVGFromURLworks the same way, except that you are using a string containing a URL, not the contents of an SVG. Note that Fabric will try to get this URL through XMLHttpRequest, so the link to the SVG must comply with SOP rules.Subclassing
Since Fabric is built on the principles of OOP, you can easily create and create subclasses and extend the functionality of objects. As you know from the first part of the series, Fabric has a strict hierarchy of objects. All 2D objects (path, images, text, etc.) inherit from
fabric.Object, and some “classes” - like fabric.PathGroup- even have 3-level inheritance. How about subclassing an existing “class” in Fabric? Or maybe create a new "class"?
In order to do this, we need a method
fabric.util.createClassthat is a simple abstraction of ordinary prototype inheritance in javascript. First, create a simple “class” Point:var Point = fabric.util.createClass({
initialize: function(x, y) {
this.x = x || 0;
this.y = y || 0;
},
toString: function() {
return this.x + '/' + this.y;
}
});
createClasstakes an object and uses its properties as properties of the object of the new "class". '' initialize '' is used as a constructor. Therefore, when we initialize Point, we create a new object with the properties '' x '', '' y '' and the method '' toString '':var point = new Point(10, 20);
point.x; // 10
point.y; // 20
point.toString(); // "10/20"
If we want to create a descendant of the “class” Point, say, a colored point, we use
createClass:var ColoredPoint = fabric.util.createClass(Point, {
initialize: function(x, y, color) {
this.callSuper('initialize', x, y);
this.color = color || '#000';
},
toString: function() {
return this.callSuper('toString') + ' (color: ' + this.color + ')';
}
});
Note that now the object for inheritance is used as the second argument, and the first is the "class" Point, which becomes the parent for this object. To avoid duplication, we use a method
callSuperthat calls the method on the parent "class". This means that if we change Point, the changes will also affect ColoredPoint. Let's look at an example:var redPoint = new ColoredPoint(15, 33, '#f55');
redPoint.x; // 15
redPoint.y; // 33
redPoint.color; // "#f55"
redPoint.toString(); "15/35 (color: #f55)"
Now we know how to create our own “classes” and “subclasses,” but we can also use existing ones in Fabric. For example, create a “class”
LabeledRectthat is just a rectangle with an inscription. When an instance of the “class” is displayed on canvas, the label will be displayed inside the rectangle. Something similar (circle and text) we have already considered in the chapter 'Groups'. By the way, while working with Fabric, you can notice that abstractions can be created here using both groups and “classes”.var LabeledRect = fabric.util.createClass(fabric.Rect, {
type: 'labeledRect',
initialize: function(options) {
options || (options = { });
this.callSuper('initialize', options);
this.set('label', options.label || '');
},
toObject: function() {
return fabric.util.object.extend(this.callSuper('toObject'), {
label: this.get('label')
});
},
_render: function(ctx) {
this.callSuper('_render', ctx);
ctx.font = '20px Helvetica';
ctx.fillStyle = '#333';
ctx.fillText(this.label, -this.width/2, -this.height/2 + 20);
}
});
The code may seem complicated, but it's pretty simple.
First, we define the parent “class” as
fabric.Rectto add its display capabilities. Then we define the property '' type '' and set it to the value '' labeledRect ''. This is done to align with the Fabric architecture, since all the objects there have the property `` type '' (rectangle, circle, path, text, etc.). The constructor (
initialize) is already familiar to us, in it we call callSuper, which calls initializeon fabric.Rect. In addition, we give the object an inscription (label), taking the value from options. As a result, we have 2 methods left -
toObjectand _render. toObjectas we remember from the chapter on serialization, it is responsible for representing the object. As
LabeledRecthas the same properties as a regular rectangle, we expanded the parent method toObjectby simply adding a label to it. As for the method
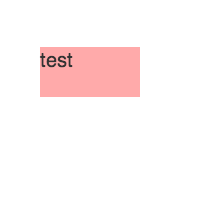
_render, it is responsible for directly rendering the object. It consists of a rectangle display ( callSuper) and additional text display logic. Now, if we want to show such an object:
var labeledRect = new LabeledRect({
  width: 100,
  height: 50,
  left: 100,
  top: 100,
  label: 'test',
  fill: '#faa'
});
canvas.add(labeledRect);
... we get the following:
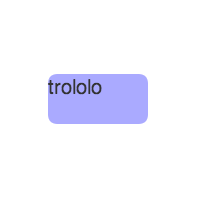
Changing a property (label or whatever) will produce the expected result:
labeledRect.set({
  label: 'trololo',
  fill: '#aaf',
  rx: 10,
  ry: 10
});
You can modify the behavior of the “class” as you wish. For example, add default values so as not to set them in the constructor once again. Or make custom properties available on the object. If you make additional properties customizable, you can put them in
toObject, and initialize:...
initialize: function(options) {
options || (options = { });
this.callSuper('initialize', options);
// задать всем прямоугольникам с метками фиксированную ширину/высоту в размере 100/50
this.set({ width: 100, height: 50 });
this.set('label', options.label || '');
}
...
_render: function(ctx) {
// сделать шрифт и значение заполнения меток настраиваемыми
ctx.font = this.labelFont;
ctx.fillStyle = this.labelFill;
ctx.fillText(this.label, -this.width/2, -this.height/2 + 20);
}
...
This concludes the 3rd part of our series. Now you have an idea of groups, “classes”, “subclasses” and (de) serialization. I hope that the material presented in the article will help you solve more complex problems with Fabric. Even more information will be presented in the fourth part of the series .
Success and successful development!
The translation was made with the consent and direct participation of the authors. Link to the source .