Electronic signature in a trusted environment based on the bootable Ubuntu 14.04 LTS and Rootoken EDS Flash
The procedure for applying an electronic signature, designed to ensure confirmation of the integrity of the signed document and its authorship, may itself be unsafe.
The main attacks on an electronic signature are theft of a key and the substitution of signed information, as well as unauthorized access to an electronic signature tool (for example, a USB token) by stealing its PIN code.
These attacks are implemented in various ways and at different levels. At the OS level, this is the introduction of malware (viruses, spyware, rootkits, etc.), which is able to steal keys, PIN codes and do a spoofing of documents by reading and / or spoofing data in the memory of the system process using various mechanisms " hack ”embedded in the OS.
If we are talking about the signature in the browser, then the possibility of carrying out a man-in-the-middle attack aimed at modifying the signed data on a web page or stealing a PIN code or intercepting a secure token to allow an attacker to pretend to be a system subscriber is added to these attacks . In addition, a CSS-type attack is possible on sites, due to the carelessness of site developers.
It is obvious that the maximum protection of the client during the ES procedure is possible only with a set of measures.
These measures include:
Some time ago, our company released a new Rutoken EDS Flash . This two-in-one device is a cryptographic token and managed FLASH memory in a single package. At the same time, the controller allows you to configure the FLASH memory in such a way that the settings attributes cannot be changed without knowing the PIN code for the device.
In this article, we will make a custom Ubuntu 14.04 LTS, in which we “pack” smartcard drivers and the Rutoken Plug-in . We write this OS to the Flash memory of Rutoken EDS Flash (USB-live) and use special tools to make it read-only, so that without knowing the PIN code the attacker will not be able to remove this attribute.
Thus, we get a bootable device, upon loading from which the user will immediately be able to sign documents in the browser on non-recoverable keys in a trusted environment, the integrity of which is guaranteed by the USB token management controller.
As a machine for customizing Ubuntu, I also had Ubuntu.
Training:
Download the Ubuntu 14.04 ISO image and store it where necessary:
Mount the ISO image:
We make an image extract:
Well and so on:
Customization itself - installing a smart card driver and plug-in:
And the technical work to create a new ISO:
Ubuntu-14.04.1-desktop-i386-rutoken.iso is our custom bootable image (with installed smartcard drivers and the Rutoken Plug-in), which is ready for recording on the Rutoken EDS Flash.
First of all, we will format the Rutoken EDS FLASH with a special utility, setting the read-write attribute (under Windows) to memory:
Then we write the ISO to it using UNETBootin (under ubuntu): Set the

size for the preserve file to 0. Then bootable Ubuntu will store all the changes in RAM memory, and not on FLASH.
After recording the image, set the read-only attribute of the device’s FLASH-memory using special means:
Now, no one without the knowledge of the device’s PIN code will be able to modify the image of Ubuntu recorded on the FLASH memory.
Below is the process of downloading from Rutoken EDS Flash and signing documents in a browser in a trusted environment:
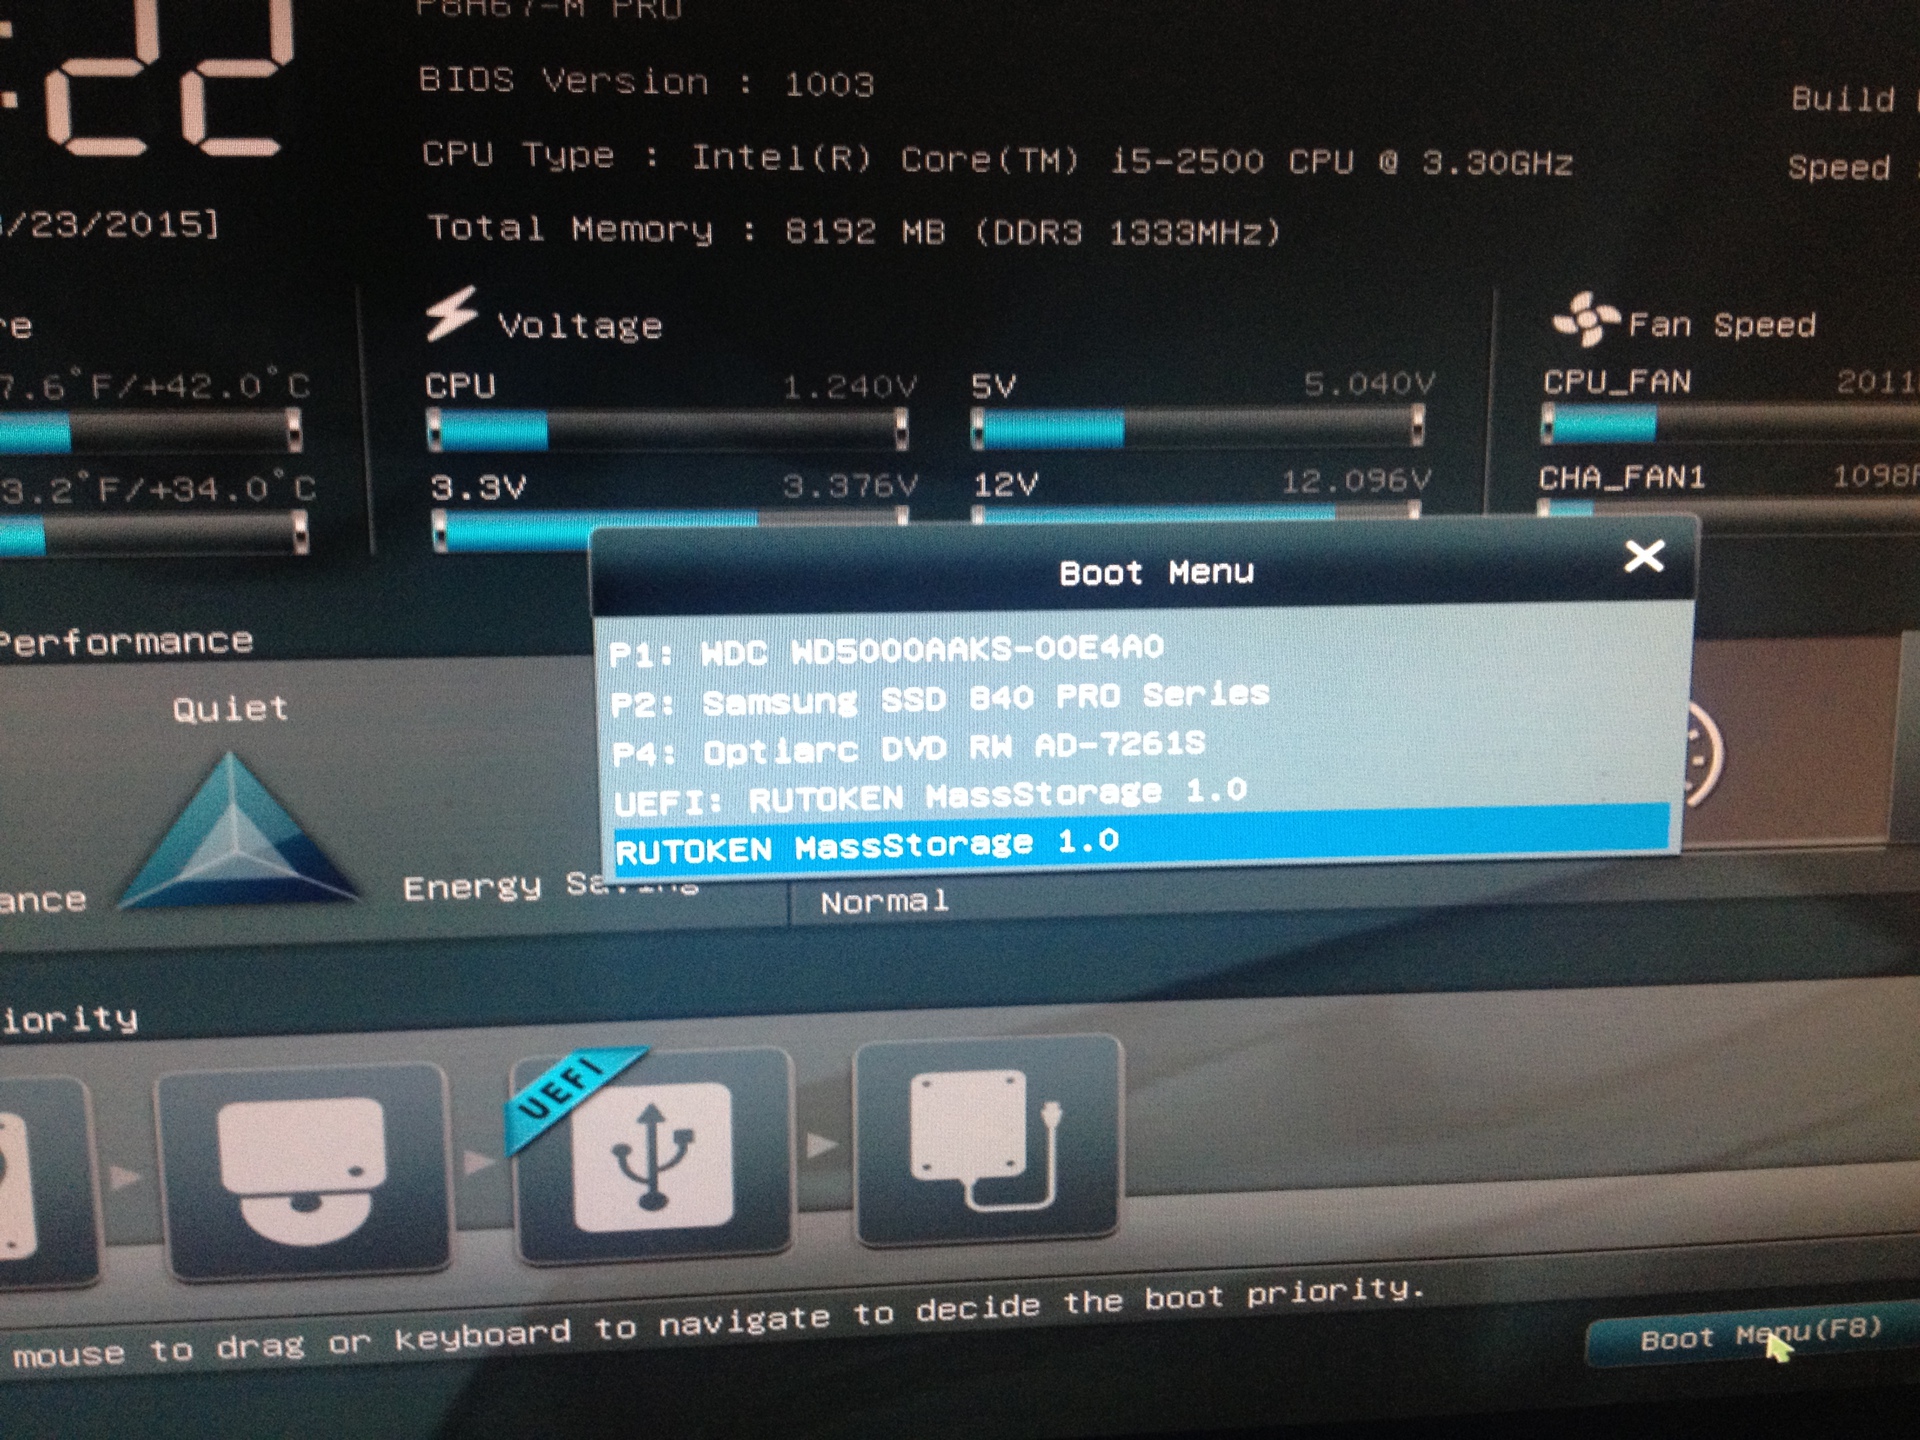
1. Boot menu in bios
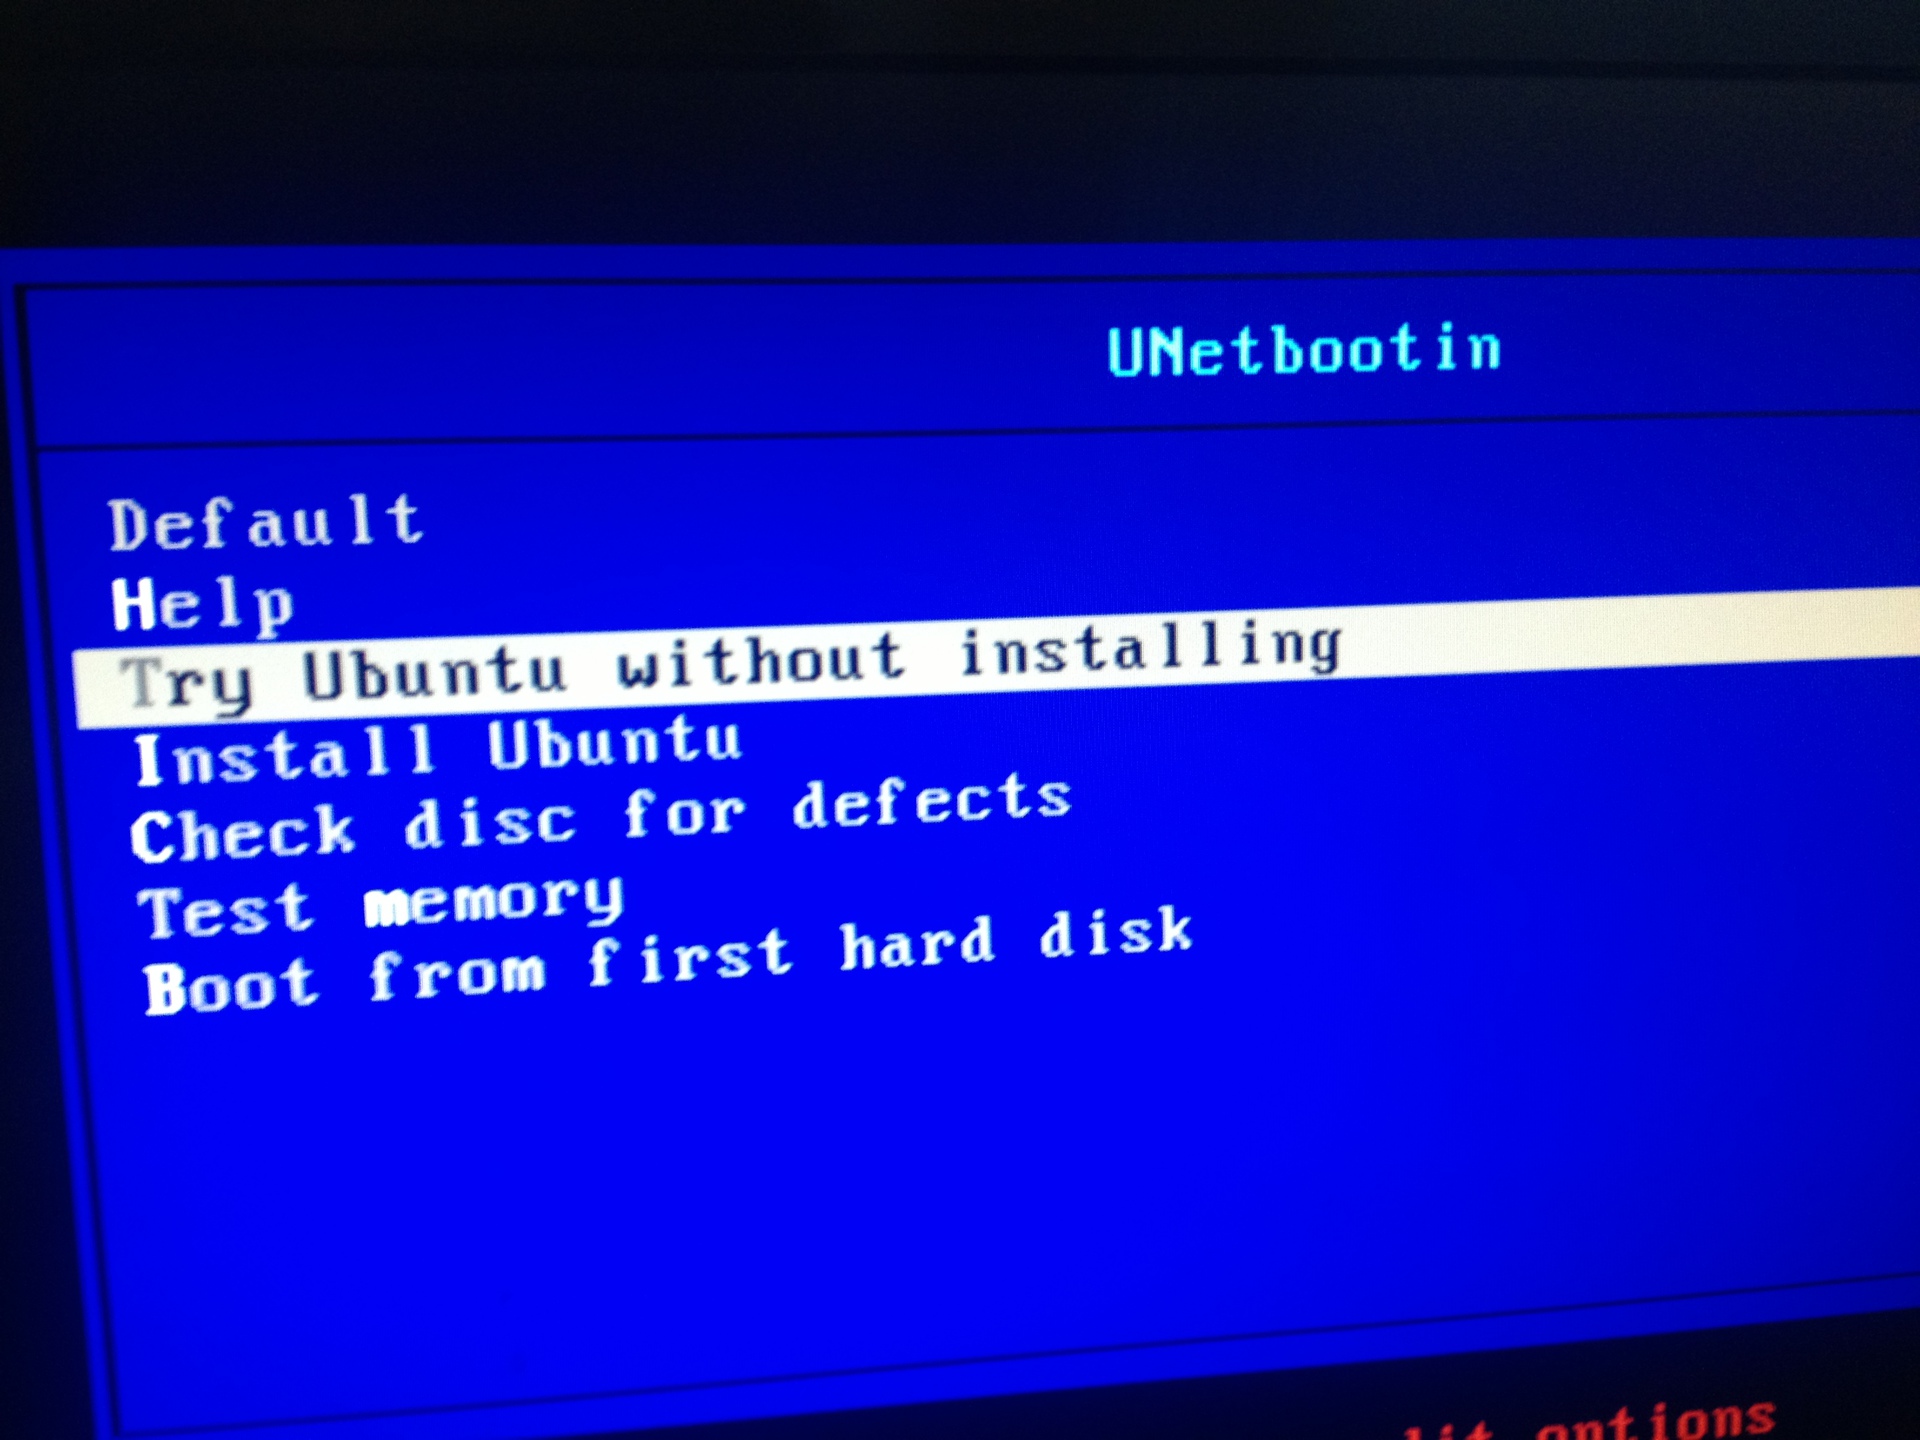
2. Selecting the desired item in the bootloader menu
3. Ubuntu booted, launch the browser, go to the demo system. The browser asks the user for permission to start the plugin on the web page

4. We allow the Rutoken plugin to load - click “Allow” in the upper right corner of the browser

5. F5

6. Log in to the system using a certificate stored on the Rootoken EDS Flash

Enter the PIN code :

6. Signature of payment orders in your account


The main attacks on an electronic signature are theft of a key and the substitution of signed information, as well as unauthorized access to an electronic signature tool (for example, a USB token) by stealing its PIN code.
These attacks are implemented in various ways and at different levels. At the OS level, this is the introduction of malware (viruses, spyware, rootkits, etc.), which is able to steal keys, PIN codes and do a spoofing of documents by reading and / or spoofing data in the memory of the system process using various mechanisms " hack ”embedded in the OS.
If we are talking about the signature in the browser, then the possibility of carrying out a man-in-the-middle attack aimed at modifying the signed data on a web page or stealing a PIN code or intercepting a secure token to allow an attacker to pretend to be a system subscriber is added to these attacks . In addition, a CSS-type attack is possible on sites, due to the carelessness of site developers.
It is obvious that the maximum protection of the client during the ES procedure is possible only with a set of measures.
These measures include:
- application for electronic signing of cryptographic smart cards / USB tokens with non-removable keys
- using the correct implementation of the TLS protocol on the site
- proper configuration of this correct implementation of the TLS protocol
- use of special hardware for visualization of signed data before signing (trustscreen)
- correct implementation of browser plug-ins and extensions that provide ES in the browser
- regulation of the signing procedure for the user, taking into account the security mechanisms built into the browser
- verification of the TLS server certificate by the user before ES
- launching browser plugins and extensions only on a trusted site (now correctly configured browsers warn the user about the launch)
- enter token PIN-code upon request of only trusted site
- response to a browser warning about receiving “mixed” content - part via HTTPS, part via HTTP
- OS protection from malware (creating a trusted environment)
Some time ago, our company released a new Rutoken EDS Flash . This two-in-one device is a cryptographic token and managed FLASH memory in a single package. At the same time, the controller allows you to configure the FLASH memory in such a way that the settings attributes cannot be changed without knowing the PIN code for the device.
In this article, we will make a custom Ubuntu 14.04 LTS, in which we “pack” smartcard drivers and the Rutoken Plug-in . We write this OS to the Flash memory of Rutoken EDS Flash (USB-live) and use special tools to make it read-only, so that without knowing the PIN code the attacker will not be able to remove this attribute.
Thus, we get a bootable device, upon loading from which the user will immediately be able to sign documents in the browser on non-recoverable keys in a trusted environment, the integrity of which is guaranteed by the USB token management controller.
Modifying an Ubuntu Image
As a machine for customizing Ubuntu, I also had Ubuntu.
Training:
sudo su
apt-get install squashfs-tools genisoimage
Download the Ubuntu 14.04 ISO image and store it where necessary:
mkdir ~/livecdtmp
mv ubuntu-14.04.1-desktop-i386.iso ~/livecdtmp
cd ~/livecdtmp
Mount the ISO image:
sudo su
mkdir mnt
mount -o loop ubuntu-14.04.1-desktop-i386.iso mnt
We make an image extract:
sudo su
mkdir extract-cd
rsync --exclude=/casper/filesystem.squashfs -a mnt/ extract-cd
Well and so on:
sudo su
unsquashfs mnt/casper/filesystem.squashfs
mv squashfs-root editsudo su
cp /etc/resolv.conf edit/etc/
cp /etc/hosts edit/etc/
mount --bind /dev/ edit/dev
chroot edit
mount -t proc none /proc
mount -t sysfs none /sys
mount -t devpts none /dev/pts
export HOME=/root
export LC_ALL=C
dbus-uuidgen > /var/lib/dbus/machine-id
dpkg-divert --local --rename --add /sbin/initctl
ln -s /bin/true /sbin/initctl
Customization itself - installing a smart card driver and plug-in:
pt-get install libccid libpcsclite1 pcscd
mkdir /home/ubuntu/.mozilla
mkdir /home/ubuntu/.mozilla/plugins
chmod 776 /home/ubuntu/.mozilla
chmod 776 /home/ubuntu/.mozilla/plugins
cp npCryptoPlugin.so /home/ubuntu/.mozilla/plugins
cp librtpkcs11ecp.so /home/ubuntu/.mozilla/plugins
And the technical work to create a new ISO:
apt-get clean
rm /var/lib/dbus/machine-id
rm /sbin/initctl
dpkg-divert --rename --remove /sbin/initctl
umount /proc || umount -lf /proc
umount /sys
umount /dev/pts
exit
sudo su
umount edit/dev
sudo su
chmod +w extract-cd/casper/filesystem.manifest
chroot edit dpkg-query -W --showformat='${Package} ${Version}\n' > extract-cd/casper/filesystem.manifest
cp extract-cd/casper/filesystem.manifest extract-cd/casper/filesystem.manifest-desktop
sed -i '/ubiquity/d' extract-cd/casper/filesystem.manifest-desktop
sed -i '/casper/d' extract-cd/casper/filesystem.manifest-desktop
rm extract-cd/casper/filesystem.squashfs
mksquashfs edit extract-cd/casper/filesystem.squashfs -comp xz -e edit/boot
printf $(sudo du -sx --block-size=1 edit | cut -f1) > extract-cd/casper/filesystem.size
nano extract-cd/README.diskdefines
cd extract-cd
rm md5sum.txt
find -type f -print0 | sudo xargs -0 md5sum | grep -v isolinux/boot.cat | sudo tee md5sum.txt
mkisofs -D -r -V "$IMAGE_NAME" -cache-inodes -J -l -b isolinux/isolinux.bin -c isolinux/boot.cat -no-emul-boot -boot-load-size 4 -boot-info-table -o ../ubuntu-14.04.1-desktop-i386-rutoken.iso .
Ubuntu-14.04.1-desktop-i386-rutoken.iso is our custom bootable image (with installed smartcard drivers and the Rutoken Plug-in), which is ready for recording on the Rutoken EDS Flash.
Create boot device
First of all, we will format the Rutoken EDS FLASH with a special utility, setting the read-write attribute (under Windows) to memory:
rtadmin.exe -F 1 30000 u rw -o 87654321 -z rtPKCS11ECP.dll
Then we write the ISO to it using UNETBootin (under ubuntu): Set the
size for the preserve file to 0. Then bootable Ubuntu will store all the changes in RAM memory, and not on FLASH.
After recording the image, set the read-only attribute of the device’s FLASH-memory using special means:
rtadmin.exe -C 1 ro p -c 12345678 -z rtPKCS11ECP.dll
Now, no one without the knowledge of the device’s PIN code will be able to modify the image of Ubuntu recorded on the FLASH memory.
What happened
Below is the process of downloading from Rutoken EDS Flash and signing documents in a browser in a trusted environment:
1. Boot menu in bios
2. Selecting the desired item in the bootloader menu
3. Ubuntu booted, launch the browser, go to the demo system. The browser asks the user for permission to start the plugin on the web page
4. We allow the Rutoken plugin to load - click “Allow” in the upper right corner of the browser
5. F5
6. Log in to the system using a certificate stored on the Rootoken EDS Flash
Enter the PIN code :
6. Signature of payment orders in your account