Meet Envoyer.io (Part 1)
- Transfer
Envoyer is a new service from Taylor Otwell, creator of Laravel. Already now you can watch a series of screencasts on Laracasts about this service. This is the first part of the description of this service.
Second part here
When Laravel Forge was launched by Taylor, he became a serious assistant in launching and managing several VPS, as well as deploying applications. Forge was involved in the process of creating VPS in the cloud, managing the environment and deploying (including Git-hook-deployment) applications to the servers, and made this process more accessible and simple.
But, unfortunately, Forge did not satisfy such needs as managing more complex deployment processes or deployment without downtime. Regardless of whether you were a Forge user or not, you had to use tools like Capistrano or Chef or Ansible to have more features. But at the same time, dealing with these tools takes a lot of time.
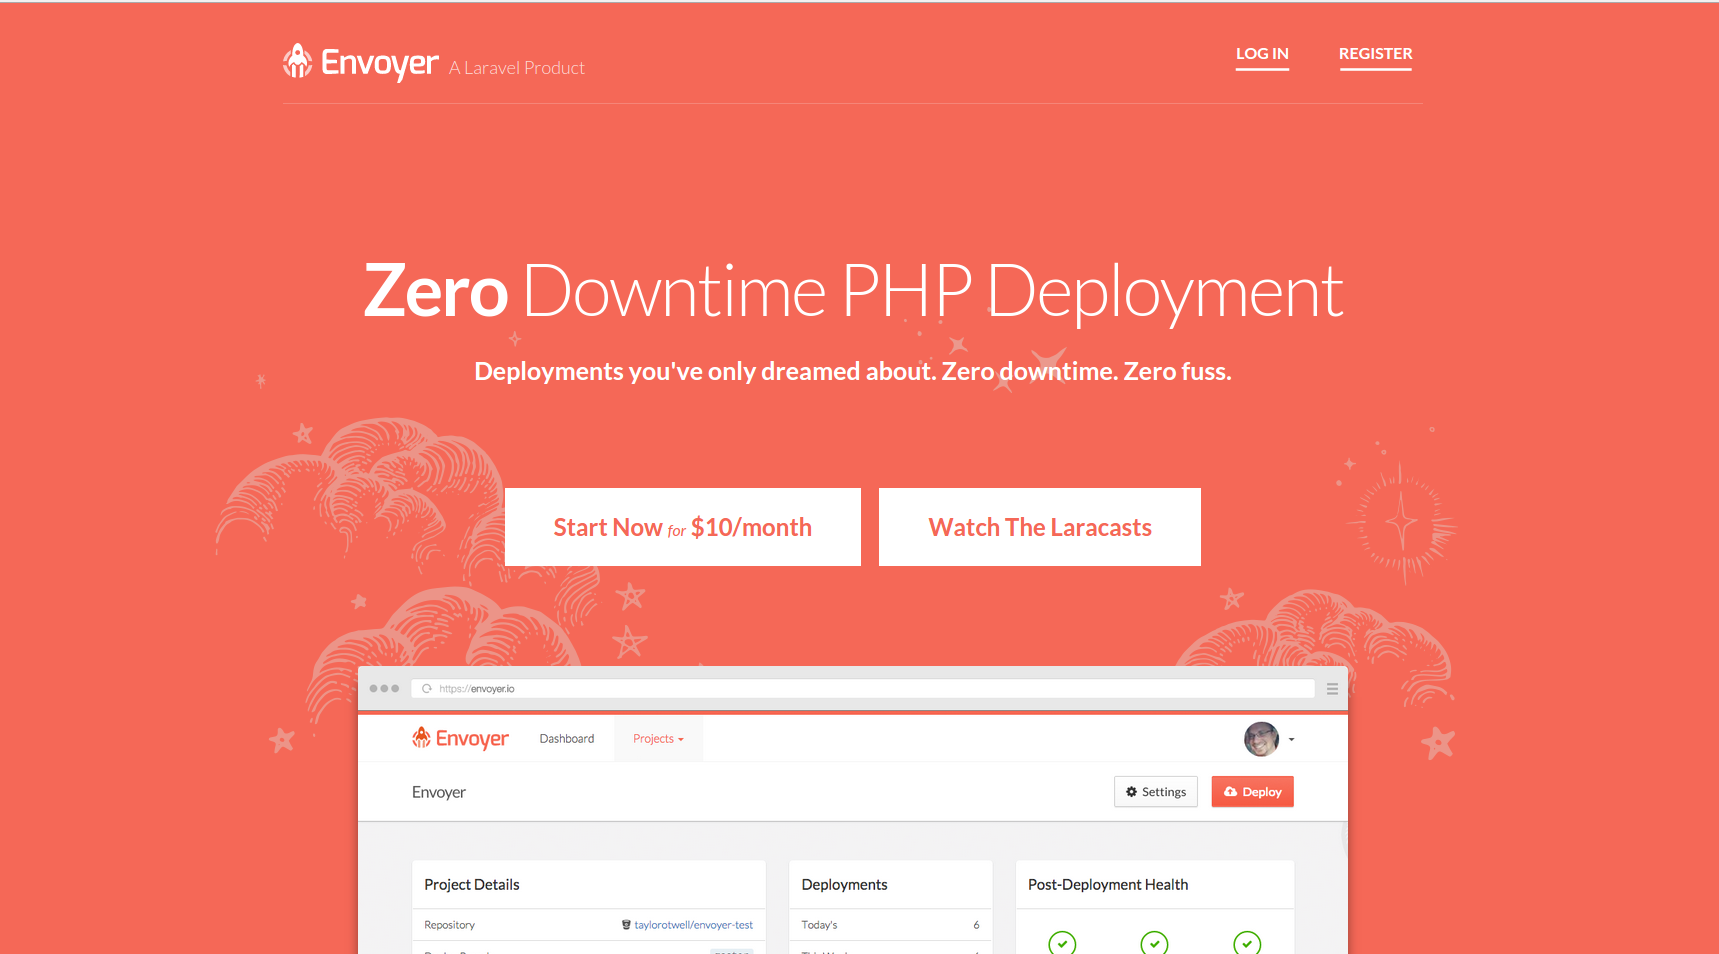
Today Envoyer is launched , which will help solve the problems described above. Envoyer is a zero-downtime deployer for PHP and Laravel projects. This is a tool that connects to your server to deploy, and which uses a series of tools to ensure that all the preparatory work for the deployment (for example, composer install) is performed in the background, while the previous version of the site is still working .
If you have ever worked with Capistrano, you should already be familiar with this. Please note that this is a technical answer, so if you are not interested, you can skip this section.
Deployment on a regular system (for example, In Forge) means that there is only one folder where your project lives. Let's say there are two files: a
Your deploy system will usually make
And the zero-down-time system supports a system with a folder
And Envoyer manages everything. And at the end you have something like this:
I note that all folders that should be kept between releases must exist in the root of the project folder, and you need to make new symbolic links to them at each deployment. If the Laravel application is deployed, then everything works out of the box.
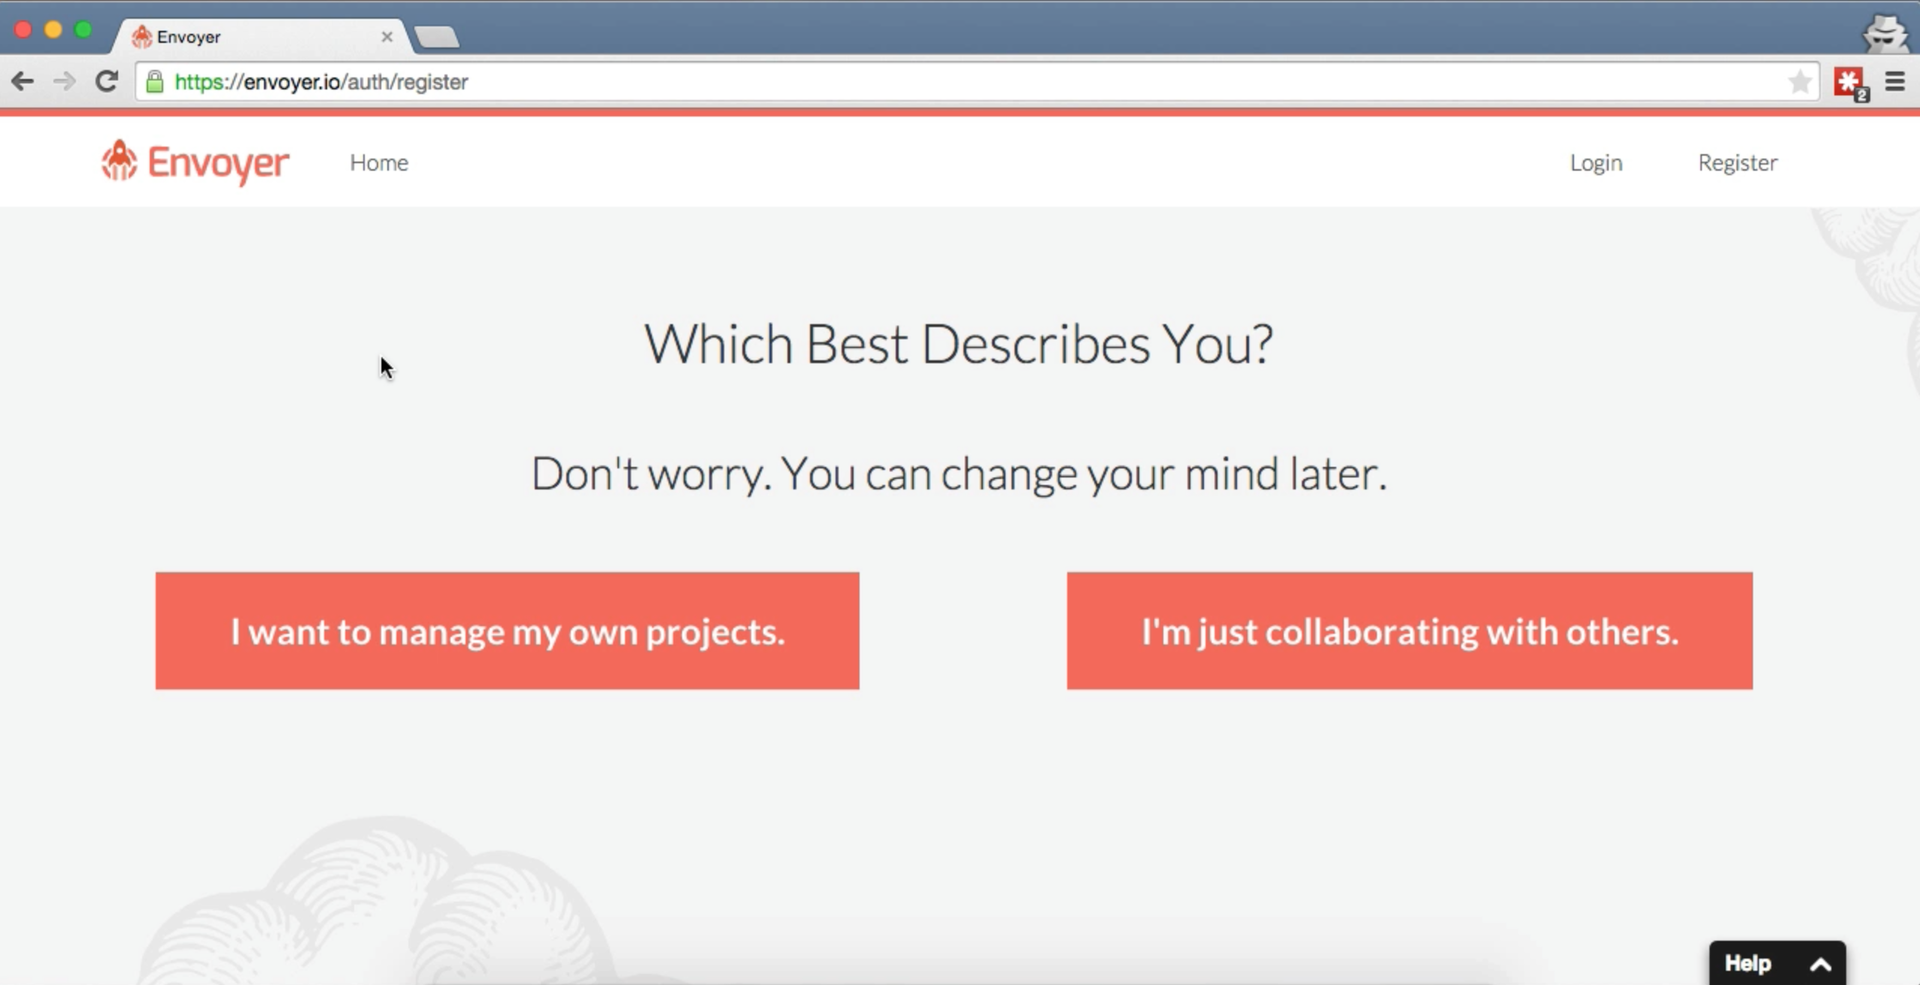
Ok, let's start the first project with Envoyer. Register on Envoyer.io by selecting “I want to manage my own projects.”.
And this is what the dashboard looks like:

The first step is to add a project. Click on the big "Add Project" button in the upper right corner.

You will be asked what type of new project, as well as specify Git data.
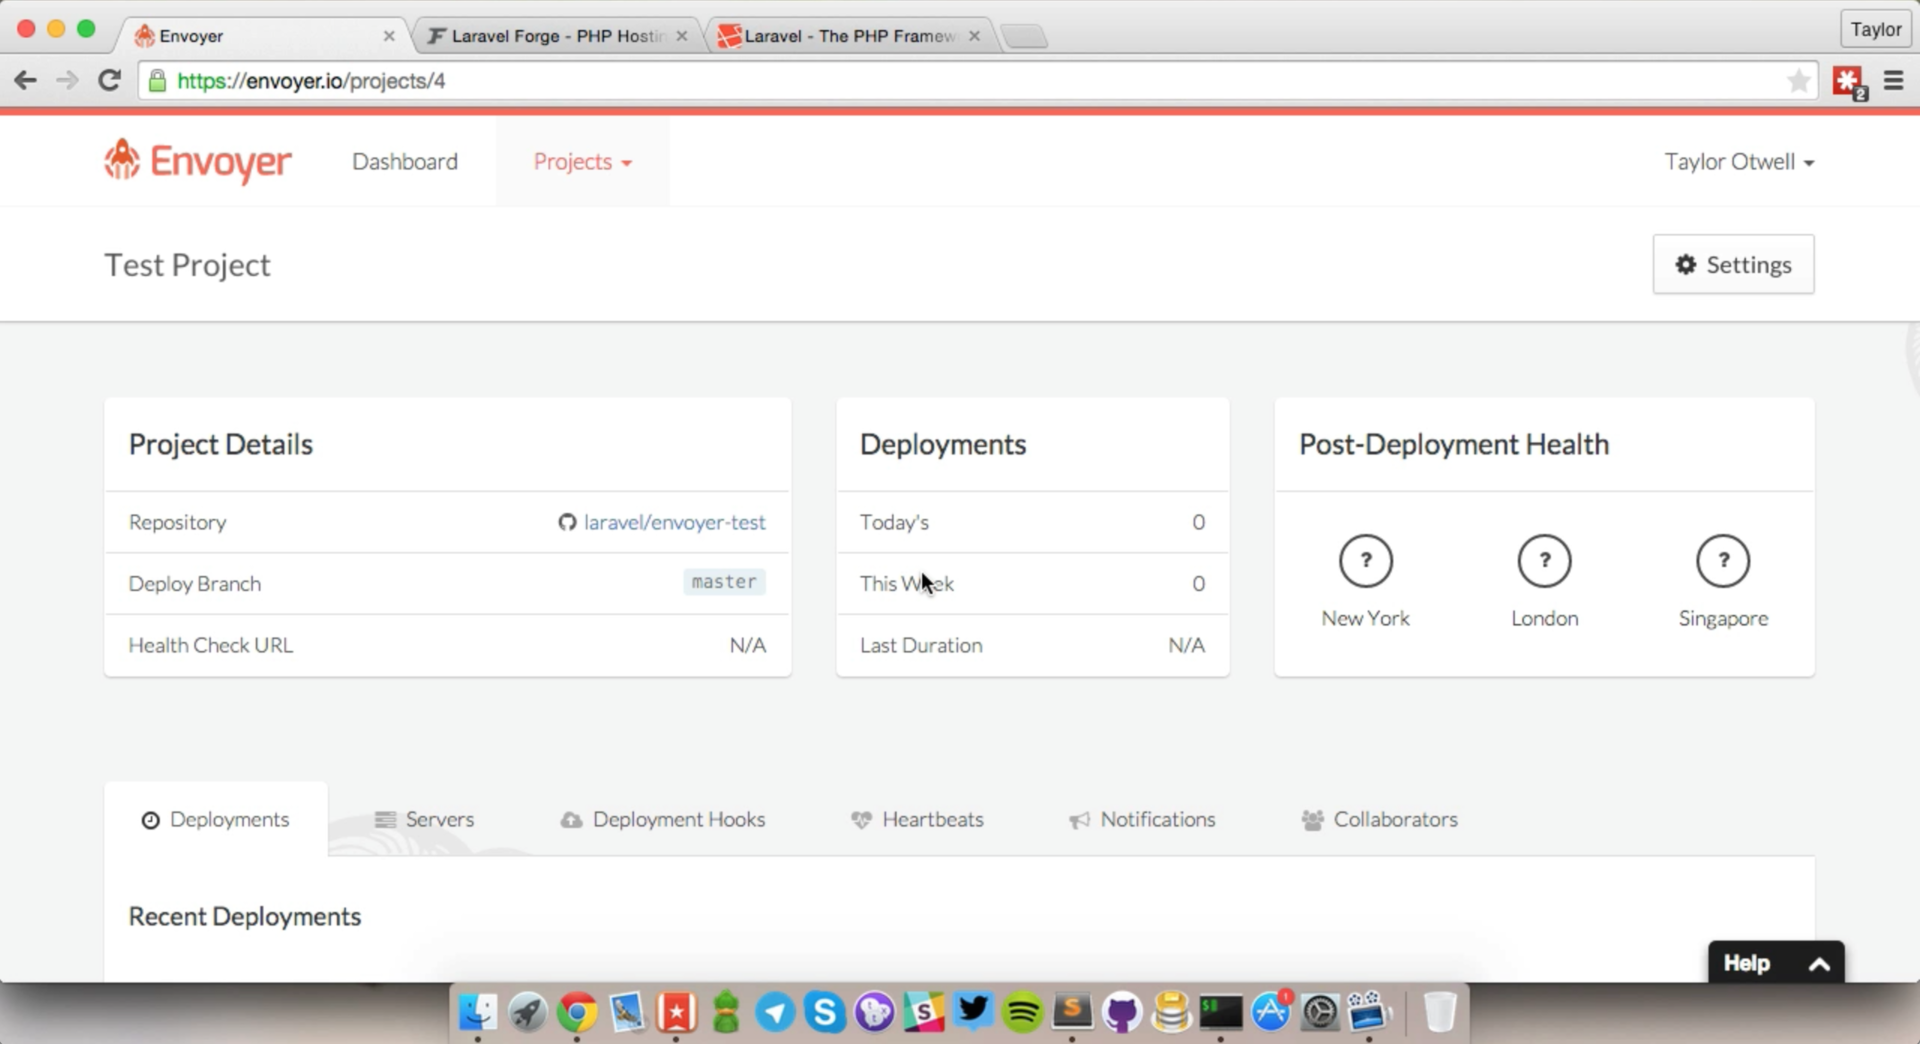
Immediately after creating a project, you can view the dashboard of an individual project.
In the Servers tab on the dashboard, you can add a new server for the project.

To add a new server, you need to specify the IP address of the server, the Unix / SSH user under which Envoyer will log in, and the path where the project is stored (for example,
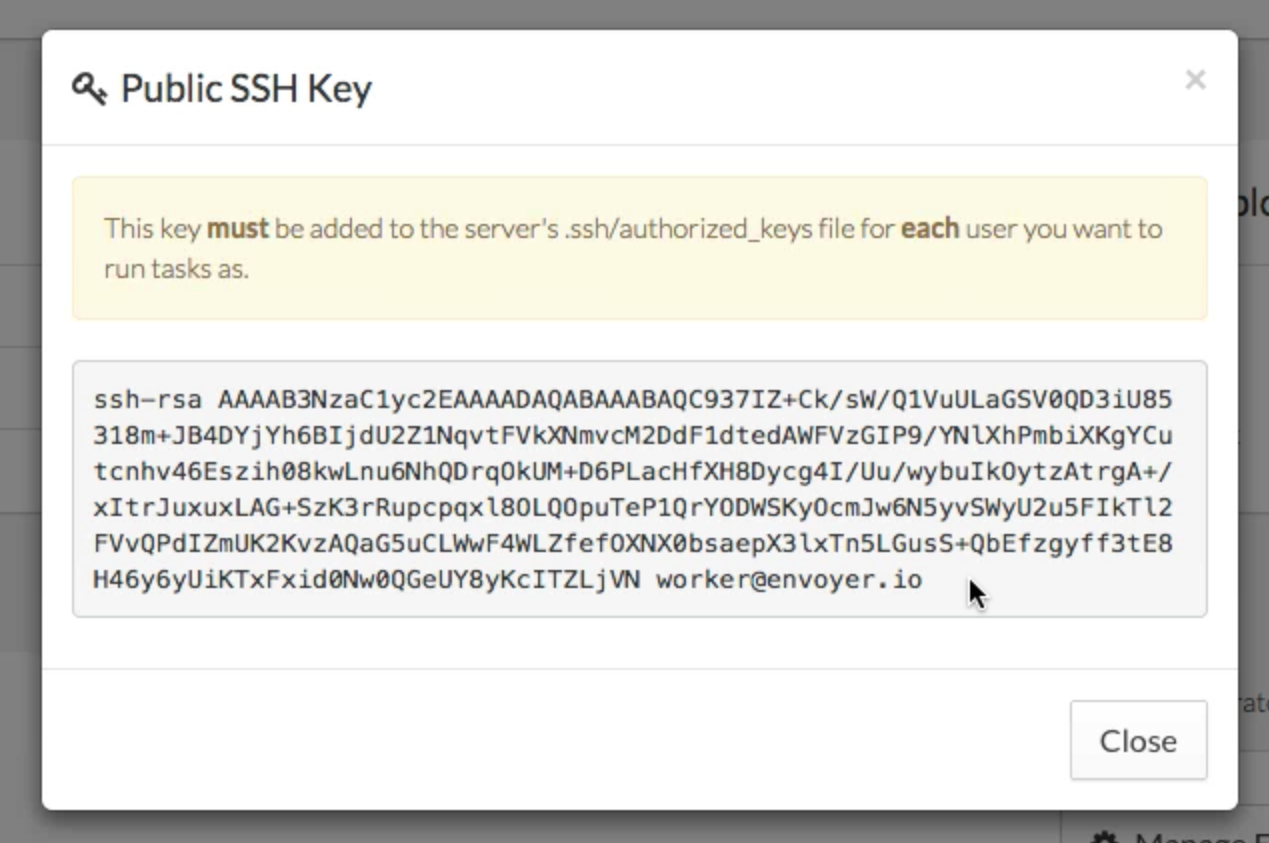
When you add the server, you will be given an SSH key that you need to add to the file of
And if you use Forge, add this SSH key in the SSH keys tab of the desired server.
Now in the servers tab, by clicking the refresh button , you can check the connection to the server.

If all is well, the icon will turn green with the caption “Successful.”
Add
Now, in the nginx / Apache config, you need to add it

Return to the dashboard project and click on the red Deploy button to execute a new deployment. A record of this appears in the Deployments tab.

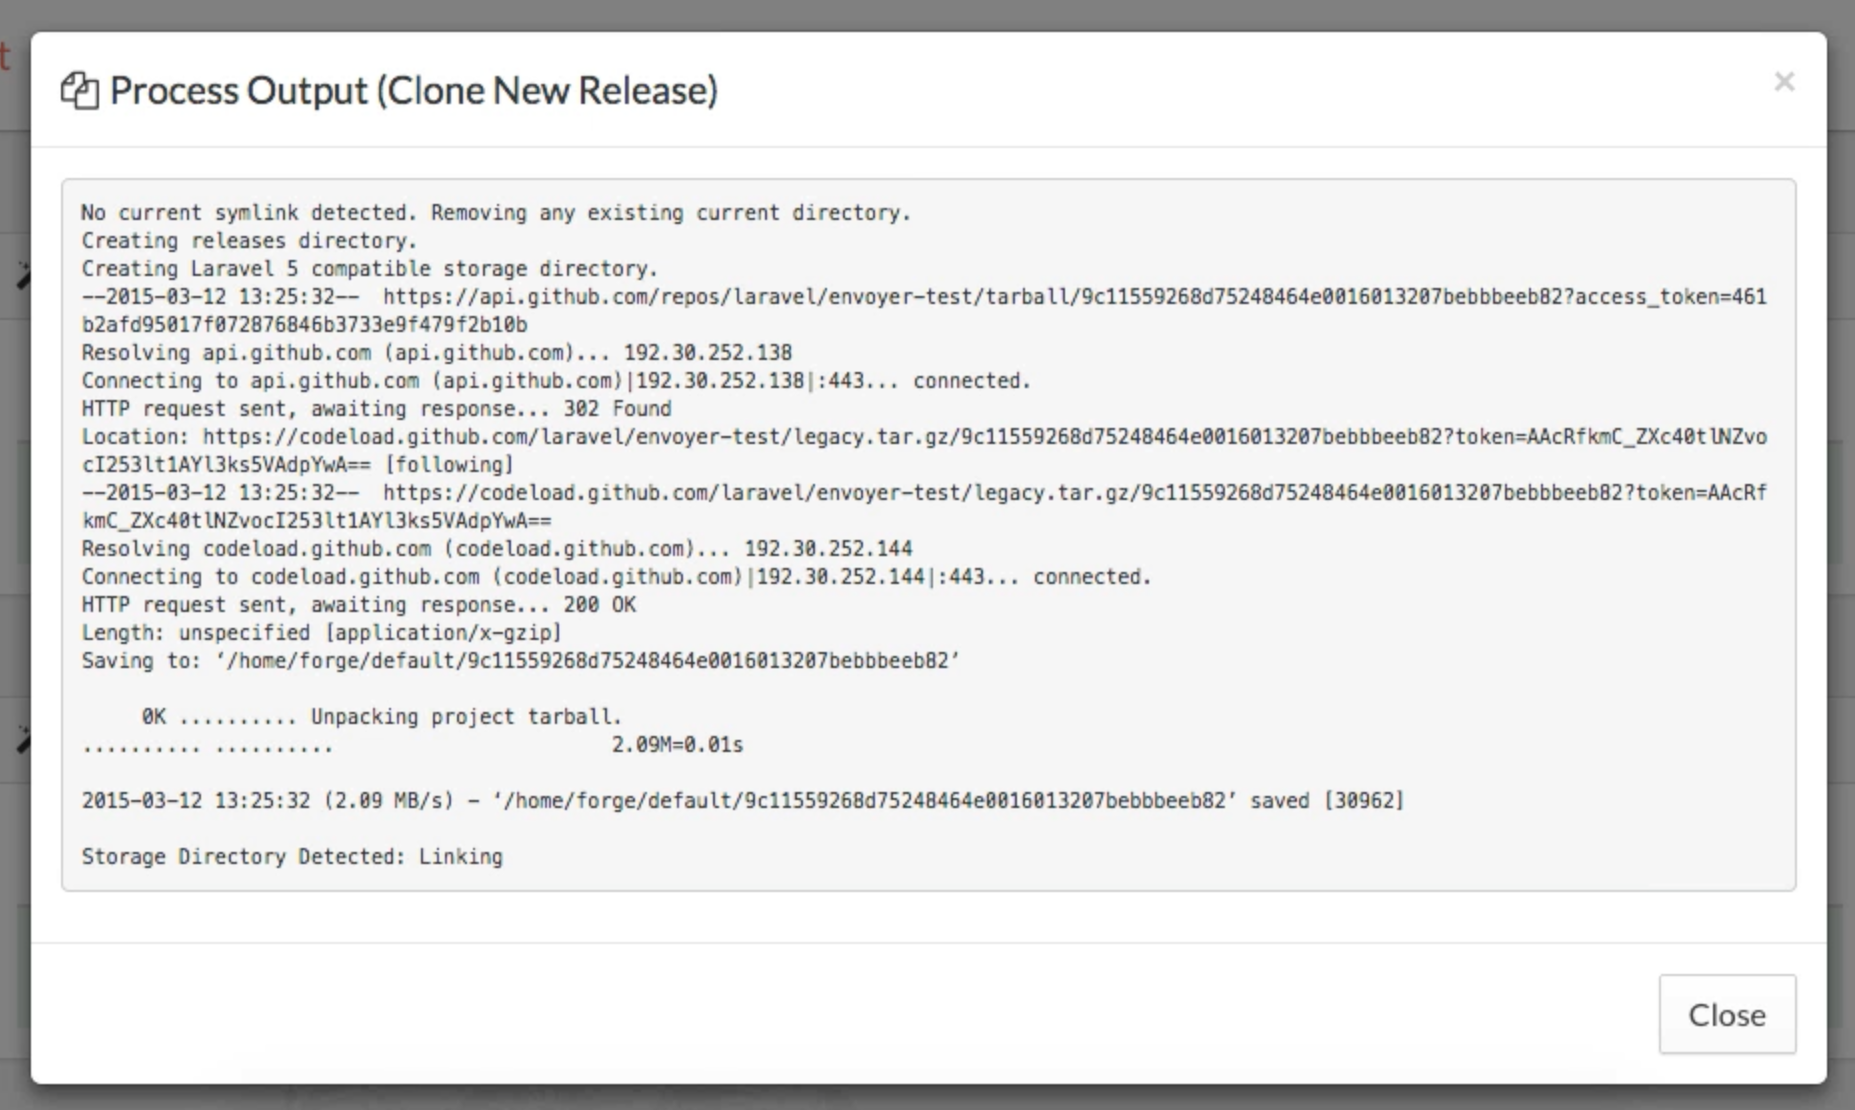
Click on the arrow near the desired deployment and you can see all the steps of the deployment script (at the moment, this is the standard deployment script for this type of project):

Note that you can also view the output of all the commands that make up the deployment script.
This is all for the first project! Now you have launched a project that is deployed using Envoyer.
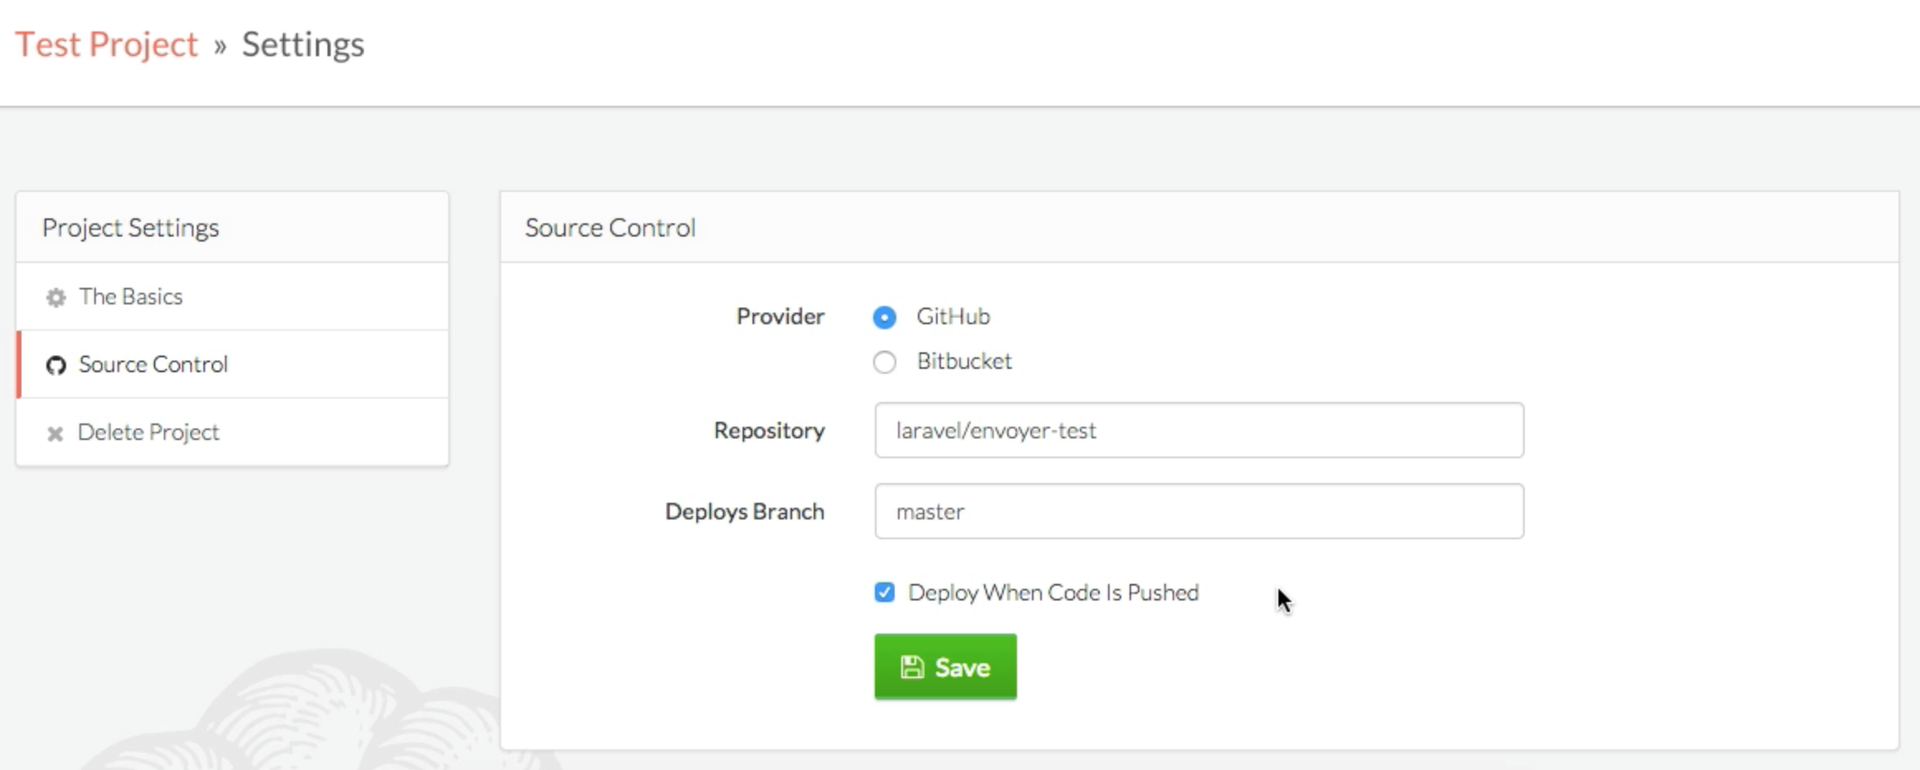
PS If you want to deploy the code as soon as you run new commits in the Git branch, you can check the “Deploy When Code Is Pushed” box in the Project Settings / Source Control section .
Second part here
A bit of history
When Laravel Forge was launched by Taylor, he became a serious assistant in launching and managing several VPS, as well as deploying applications. Forge was involved in the process of creating VPS in the cloud, managing the environment and deploying (including Git-hook-deployment) applications to the servers, and made this process more accessible and simple.
But, unfortunately, Forge did not satisfy such needs as managing more complex deployment processes or deployment without downtime. Regardless of whether you were a Forge user or not, you had to use tools like Capistrano or Chef or Ansible to have more features. But at the same time, dealing with these tools takes a lot of time.
Introducing Envoyer.io
Today Envoyer is launched , which will help solve the problems described above. Envoyer is a zero-downtime deployer for PHP and Laravel projects. This is a tool that connects to your server to deploy, and which uses a series of tools to ensure that all the preparatory work for the deployment (for example, composer install) is performed in the background, while the previous version of the site is still working .
How does Zero-Downtime Deploy work?
If you have ever worked with Capistrano, you should already be familiar with this. Please note that this is a technical answer, so if you are not interested, you can skip this section.
Deployment on a regular system (for example, In Forge) means that there is only one folder where your project lives. Let's say there are two files: a
index.phpfolder appand they are in webroot./webroot/index.php
/webroot/app
Your deploy system will usually make
cdthis folder, execute git pull and then execute the deploy script, which most likely includes composer install. This means that, most likely, your application will not function correctly for at least a few seconds. And the zero-down-time system supports a system with a folder
releases, which essentially stores the commits of your githistory. Each time the deployment system starts up, it creates a new folder in releasesand clones the repository on the last commit (or the necessary commit) to this folder. Then in this folder the deploy script is launched. And only when a fully functioning project exists in the new folder, the system changes the symbolic link of the currentfolder to the latest release. And that’s it!And Envoyer manages everything. And at the end you have something like this:
/webroot/current
/webroot/releases
/webroot/releases/20150316074832
/webroot/releases/20150315041251
I note that all folders that should be kept between releases must exist in the root of the project folder, and you need to make new symbolic links to them at each deployment. If the Laravel application is deployed, then everything works out of the box.
First project with Envoyer
Ok, let's start the first project with Envoyer. Register on Envoyer.io by selecting “I want to manage my own projects.”.
And this is what the dashboard looks like:
Add the first project
The first step is to add a project. Click on the big "Add Project" button in the upper right corner.
You will be asked what type of new project, as well as specify Git data.
View project dashboard
Immediately after creating a project, you can view the dashboard of an individual project.
Adding a New Project
In the Servers tab on the dashboard, you can add a new server for the project.
To add a new server, you need to specify the IP address of the server, the Unix / SSH user under which Envoyer will log in, and the path where the project is stored (for example,
/home/username/website.comor /var/www/website.com). When you add the server, you will be given an SSH key that you need to add to the file of
~/.ssh/authorized_keysthe user that you specified when adding the server. And if you use Forge, add this SSH key in the SSH keys tab of the desired server.
Now in the servers tab, by clicking the refresh button , you can check the connection to the server.
If all is well, the icon will turn green with the caption “Successful.”
Add current/to current webroot in web server settings
Now, in the nginx / Apache config, you need to add it
current/. If you are a Forge and Laravel user, then you are most likely used to specifying a folder /public. Now you need to specify /current/public.Run deployment
Return to the dashboard project and click on the red Deploy button to execute a new deployment. A record of this appears in the Deployments tab.
Click on the arrow near the desired deployment and you can see all the steps of the deployment script (at the moment, this is the standard deployment script for this type of project):
Note that you can also view the output of all the commands that make up the deployment script.
Done!
This is all for the first project! Now you have launched a project that is deployed using Envoyer.
PS If you want to deploy the code as soon as you run new commits in the Git branch, you can check the “Deploy When Code Is Pushed” box in the Project Settings / Source Control section .