Old school, hardcore, AY-3-8912. Iron Chiptune with Serial Input
I did not have a Spectrum 128K clone equipped with the AY-3-8910 (YM2149F) music coprocessor. There was 48K with an expanded keyboard and a wretched power supply, overheating the inside after an hour or two of work. From this, I remember. houses in the middle of the sea in Sim City formed other funny artifacts. But these memories are not relevant. Inspired by the tronix286 material , I decided to fill the gap in retro education and rivet something on the legendary (and at the same time, easily mined and inexpensive) chip.
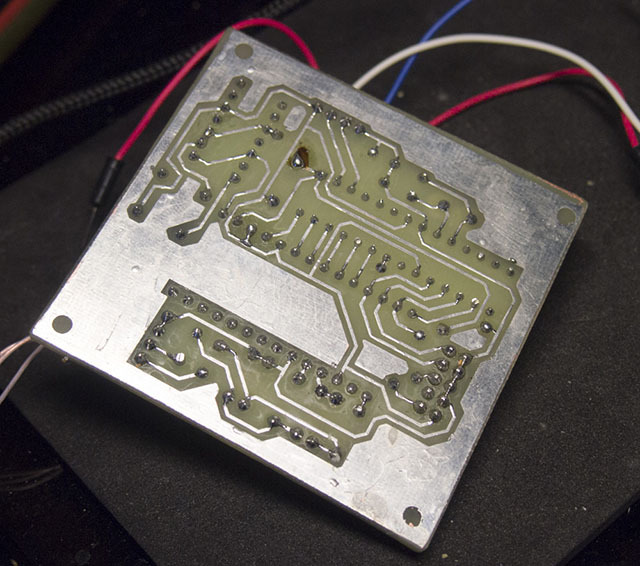
In the course of studying various crafts, the idea was formed as follows: you need to make a module with a serial (UART) input. So that it can already be connected at minimal cost to any device, thereby adding +146 to the chipunews. In the process, it was also decided to learn a couple of additional skills, such as programming AVR and manufacturing printed circuit boards using photoresist.
I’ll describe the results right away: the module is developed and scribbled, side skills are pumped, the rake is assembled, you can enjoy, expand and deepen.
Synthesizer
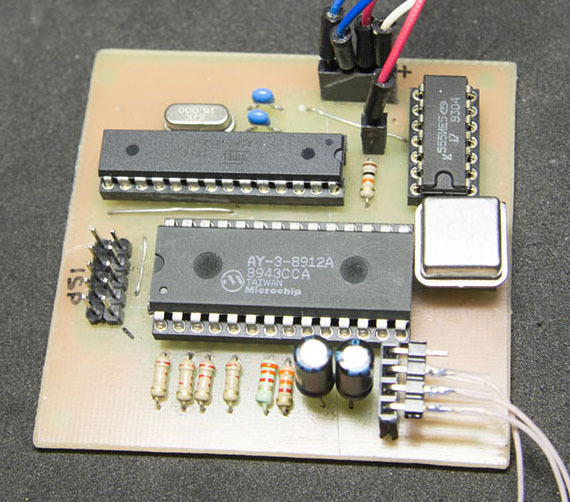
AY-3-8910 is a large beautiful 40-leg DIP chip. In addition to the necessary things, there are two more 8-bit ports that are not used to output sound by normal people (who are not trying to collect the hellish analog of Covox on them). AY-3-8912 is no less beautiful, but it is deprived and packed with one "extra" port already in DIP28. And then there is AY-3-8913, generally without a parallel port (DIP24). And this is just General Instrument / Microchip. Yamaha riveted even more variations: from YM2149F (analogue of AY-3-8910 with a clock divider) to YMZ284 (DIP16, one mixed output of channels). Learn more about chips on the Wiki .
Management
An 8-bit parallel port is used to download data. Plus, three control lines (one that is BC2, pulled to the power plus). The logic is as follows:
1. The initial state is BC1 = 0, BDIR = 0.
2. We set the register address on the legs of the port AY.
3. BC1 = 1, BDIR = 1. Download address. The delay between switching on the lines should be no more than 50 ns, so any slow jerking of the legs (such as the Arduino DigitalWrite) is not suitable, for example, PORTC | = 0b00110000;
4. BC1 = 0, BDIR = 0.
5. We set the register value on the legs of the port AY.
6. BC1 = 0, BDIR = 1. Loading value.
We repeat the sequence 14 times (for each desired register). And all this - 50 times per second. We get the music.
The choice of a specific iron
In my case, the following:
1. AY-3-8912 - was cheaper.
2. Atmega8A (DIP28) - available, enough conclusions.
3. 4 MHz crystal oscillator - for AY clocking.
4. Counter K555IE5 - as a frequency divider for clocking AY.
5. Quartz at 16 MHz - for Atmega8A.
6. To connect to a PC - USB UART on the FT232R.
The fee is divorced precisely for this case. In the process of debugging and a more thoughtful study, the following thoughts arose:
1. If you use YM2149F, then you do not need a counter, because this chip has a built-in frequency divider by 2.
2. It seems that quartz is not needed for Atmega either - everything works decently from the internal 8 MHz oscillator.
3. In theory, you can try to completely get rid of the crystal oscillator for AY, if you dig deeper with hardware timers and Atmega counters. But! In this case, we can only clock AY at 2 MHz. But in a good way, you need to be able to clock at 1.7 (many digits) MHz - as is done in Speccy. I have a 4 MHz crystal oscillator in the DIP-pad, then to replace it with 3.5 (many digits) MHz.
The sound output is copied from tronix286 , there are a handful of resistors and two capacitors.
Software
For inspiration, this (under) implementation was studied .. It describes the general principle of operation of the “source - UART - Atmega - AY” link, but the use of the Arduino loader on the “mega” in this case seemed completely unnecessary to me. Well, I didn’t like the PC program written in C #. Sharpe is about as "needed" here as Arduino. YM format is laid out here .
Atmega firmware
The source code and hex are available on the github (link at the end of the material), I’ll just go through the basic functions.
valToPort - writing an 8-bit value to the "port", consisting of half of port B and half of C. So it was more convenient to breed.
sendToAY - Write an 8-bit value to the AY register. Here the logic described in the “Management” item is just implemented.
setup- initialization of ports and UART.
main - looped "get 16 bytes - write to AY".
PC demo
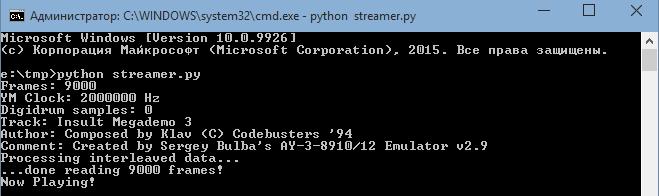
Written in Python 3 using PySerial. Like firmware, it lies on the github. It takes the 1.ym file (uncompressed!) From the current directory, parses it and pushes it into COM6. For the sake of interest, the example is tested on OS X, it works out of the box, just change the name of the port. I suspect that it will work just as successfully on Linux, incl. on the "raspberry".
There is one nuance in issuing a register dump on AY. The YM format stores data in the form "all register values 0, all register values 1 ...". This is very correct in terms of further compression. I work with uncompressed YM, and I need to give out packets of bytes "register 0, register 1 ...". For PC, the problem is solved in the forehead - we read the data from the file in the necessary order into a large array, then we sequentially give it to the controller. When it will be necessary to make a “head unit” based on a chip with a small amount of memory, some buffers will have to be invented.
Total
It is worth remembering that before starting playback it would be nice to reset the "mega" and AY. Because if there is something in the controller buffer, when transmitting new data, the whole stream will shift, and the sounds will be truly heartbreaking. A reset pin is provided on the module, but is not used in the demo. The discharge is carried out by pushing the wire into the casing of the crystal oscillator sitting on the “ground”.
There is also an uncaught bug. Which, probably, is hiding somewhere in the area of "Windows 10 - Python 3 - UART". Periodically, the update rate drops from 50 Hz to 20 (oscilloscope). No system was detected in the phenomenon, the glitch did not play on another computer. If I ever catch, I will do UPD.
In the future, the module will be bolted to the craft that is being developed, there will be an article about this in the relatively foreseeable future. Well, you should try to pick up the “raspberry”. There is room for experimentation.
Sources, board layout (SL6), module circuit (Eagle) on the github.
UPD1. Convert to YM using AYEmul .
UPD2. Here is taken .torrent to download the Modland.com archive. There are many.
UPD3. ProjectAY . There is a lot of music in AY. At the time of publication, the site was lying.
Now everything is more or less cultural
UPD4. 03/18/2015 redid the Atmega code and the demo (pythonium). Now the logic is this: Atmega asks for data from the host, fills the ring buffer (512 bytes), then, as half loses, it asks for more (i.e., request points 256 and 512 (0)). The host responds to the request with a packet of 256 bytes, Atmega consumes them through the interrupt handler. Not everything is polished, but it plays much more stable than the original version.
UPD5. I tried on the raspberry. It works almost out of the box.
0. Disable the console on the serial port (etc / inittab at the end).
1. comPort = "/ dev / ttyAMA0" (serial port)
2. regState = bytes ([registerDump [currentPos + currByte]]) (this is how serial.write works fine)