3CX v16 Beta 1 released with Raspberry Pi support
- Tutorial
We are pleased to present the next version of our system 3CX v16 Beta 1. The final release is not far off! have become even closer to the release of the final release. And now let me introduce new features, improvements and support for the new platform, which appeared in Beta 1.
Not so often a complex software product is adapted to support a new hardware architecture. Yes, it was not easy to implement for the real-time system, which is 3CX.
But we did it! 3CX v16 now works on devices the size of a bar of soap - Raspberry Pi 3B +. We have prepared a v16 installation guide on the Raspberry Pi, which is shown below. Install and use for free !
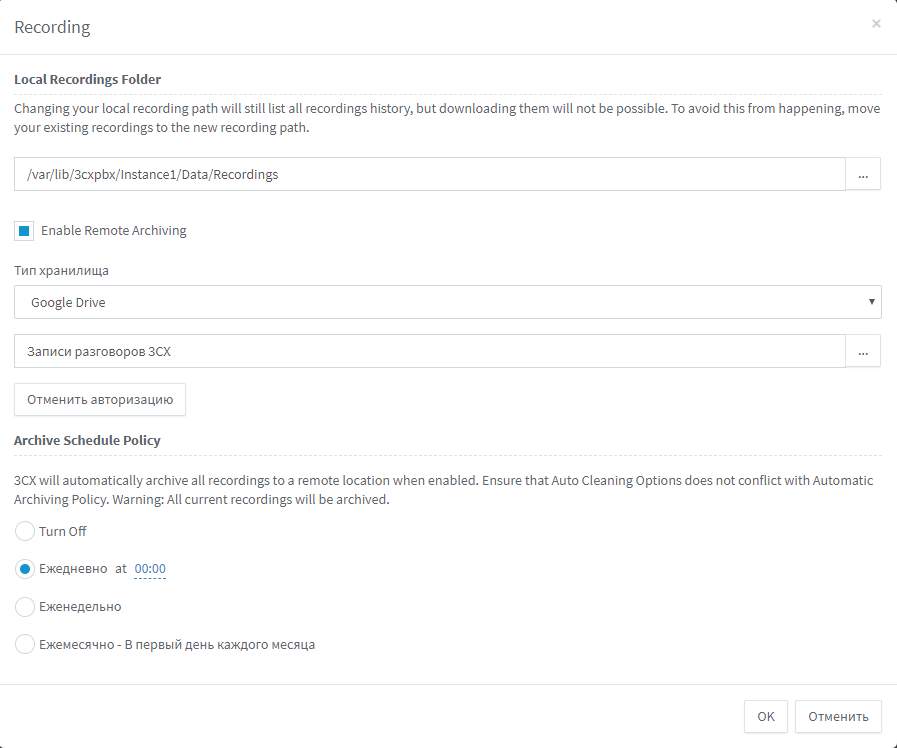
3CX v16 Beta 1 includes a new call records management system that supports transferring recording files to external storage, searching, selecting, and automatically deleting old recordings. Now you can automatically, according to the schedule, transfer the recording of conversations to Google Drive or an FTP server by enabling the Remote Archiving option. Thus, you free up valuable disk space (or Flash-card) of the PBX server. In addition, this solution allows you to speed up the update or reinstall 3CX.
In the Call Records section , a new feature, Purge, also appeared.. It deletes records that are local or in external storage. It also allows you to transfer local records to external storage (archive). Now you can reduce the cost of "hardware" PBX, moving the archive of conversations in an inexpensive external cloud storage. The Filter function allows you to select call records for the desired period or for certain phone numbers. Read more about these features in our guide .
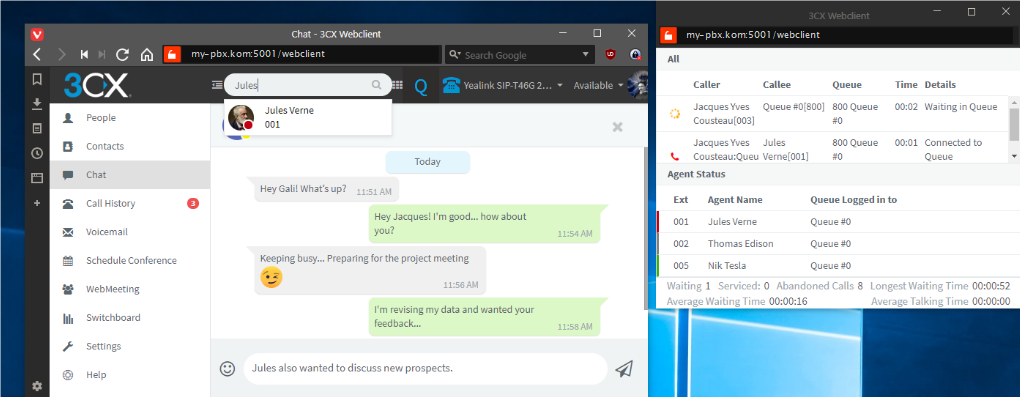
The web client in 3CX v16 Beta 1 received an important update - the tabs of the PBX operator panels can now be opened in separate windows. Call center managers and operators can use separate windows to monitor calls in the same way that it worked in the 3CX Windows client. In general, all the client functions for Windows related to call monitoring have already been transferred to the web client - everything works in a browser!
When introducing any new system, an important question arises - the complexity of the initial launch. Trying to simplify the beginning of work with video conferencing, we used the latest technologies of the Chrome 72 browser and finalized WebMeeting to refuse to install an additional plug-in.

Now users can show their screen with or without the 3CX Click2Call plugin (old versions of Chrome) installed.
Simply select the display mode — the entire screen or application window — and your desktop will be shown to the conference! To use this feature, install the latest version of Chrome .
3CX v16 Beta 1 is available for Windows or Linux, or through the PBX Express service to create a complete PBX in the cloud.
Starting with 3CX v16, you can install PBX on the latest Raspberry Pi devices, model 3B +. The system is installed on the OS Raspbian Stretch - Debian Linux distribution for the Raspberry Pi ARM architecture. You can manage Debian OS either through the 3CX web interface (basic administration commands) or through the command line interface, if you are an experienced Linux user.
Please note that the installation of 3CX on the Raspberry Pi is recommended for systems with 8 simultaneous calls with 16-24 users. Each user can have an average of up to 8 BLF-indicators configured (transmission of BLF-status provides the load on the PBX server).
Additional requirements:
To install Raspbian on a micro SD card, download and unzip the Raspbian Stretch Lite image from here .
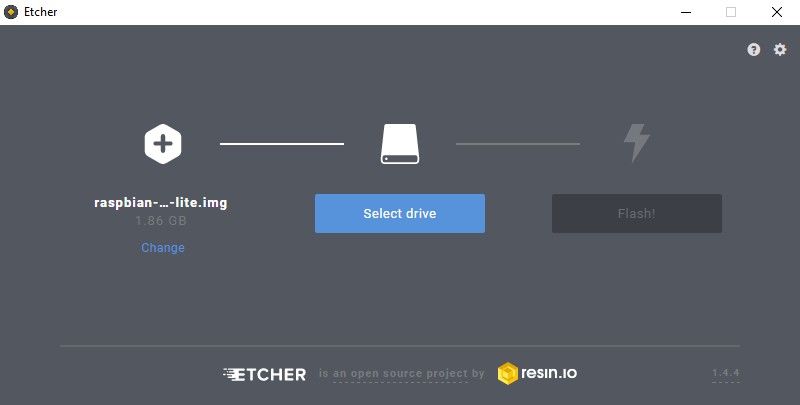
Burn the image to an SD card using Etcher or Win32 Disk Imager utilities . Then insert the card and start the device.
After booting the OS, log in with the default administrator credentials (user
Note that in Raspbian Linux, you should use the command to perform administrative tasks
To set the hostname on the Pi system, run the Raspbian configuration utility with the command

Select 2. Network Options> N1 Hostname and OK in the warning dialog box. Specify the hostname and reboot the device. You can check the new host name with the command
To set the static IP address of the eth0 interface, change the /etc/dhcpcd.conf file using the nano editor:
Go to the end of the file and change the settings: ip_address, routers (default gateway) and domain_name_servers. Use the appropriate settings for your network, for example:
Save the new settings and reboot the device
To install 3CX on Raspbian, log in with SSH as user pi and then:
Install the 3CX APT key for packet authentication:
Create a 3CX APT source file (releases and test files):
Update APT sources and packages
Check availability package 3CX PBX
Install a stable release PBX 3CX
You can also install a test release.

Installing packages takes about 5-10 minutes depending on the performance of the device.

After the installation is complete, select the 3CX initial setup method: (1) via a web browser and (2) via the command line. If the first option is selected, enter the initial configuration URL in the browser: http: // <device_ip>: 5015 (see the detailed manual ).
Restarting the Initial Configuration Wizard 3CX with a command
To uninstall 3CX in Raspbian, use one of the following commands:
Work on the platform Raspberry Pi
Not so often a complex software product is adapted to support a new hardware architecture. Yes, it was not easy to implement for the real-time system, which is 3CX.
But we did it! 3CX v16 now works on devices the size of a bar of soap - Raspberry Pi 3B +. We have prepared a v16 installation guide on the Raspberry Pi, which is shown below. Install and use for free !
Call records on external storage
3CX v16 Beta 1 includes a new call records management system that supports transferring recording files to external storage, searching, selecting, and automatically deleting old recordings. Now you can automatically, according to the schedule, transfer the recording of conversations to Google Drive or an FTP server by enabling the Remote Archiving option. Thus, you free up valuable disk space (or Flash-card) of the PBX server. In addition, this solution allows you to speed up the update or reinstall 3CX.
In the Call Records section , a new feature, Purge, also appeared.. It deletes records that are local or in external storage. It also allows you to transfer local records to external storage (archive). Now you can reduce the cost of "hardware" PBX, moving the archive of conversations in an inexpensive external cloud storage. The Filter function allows you to select call records for the desired period or for certain phone numbers. Read more about these features in our guide .
PBX operator panel in a separate window
The web client in 3CX v16 Beta 1 received an important update - the tabs of the PBX operator panels can now be opened in separate windows. Call center managers and operators can use separate windows to monitor calls in the same way that it worked in the 3CX Windows client. In general, all the client functions for Windows related to call monitoring have already been transferred to the web client - everything works in a browser!
Screencasting in 3CX WebMeeting without plugins
When introducing any new system, an important question arises - the complexity of the initial launch. Trying to simplify the beginning of work with video conferencing, we used the latest technologies of the Chrome 72 browser and finalized WebMeeting to refuse to install an additional plug-in.
Now users can show their screen with or without the 3CX Click2Call plugin (old versions of Chrome) installed.
Simply select the display mode — the entire screen or application window — and your desktop will be shown to the conference! To use this feature, install the latest version of Chrome .
3CX v16 Beta 1 Downloads
3CX v16 Beta 1 is available for Windows or Linux, or through the PBX Express service to create a complete PBX in the cloud.
- Windows: 3CX v16
- Linux: 3CX v16 on Debian 9 ISO — select “Beta” on the “3CX Update Channel” screen.
- Change log
Known issues and limitations
- Users cannot select their call records and group call records in the web client (available in the 3CX v16 release).
- The indication of background archiving of records in the 3CX management interface is not displayed (will be available in the 3CX v16 release).
- Unsuccessful callbacks from the Queue are not included in the "Unsuccessful callbacks" report if a callback was requested, but in 3CX the call went away according to the "Non-reply direction" rule (to be eliminated in the 3CX v16 release).
- Audio conferences scheduled on Google's calendar contain an empty event description (to be fixed in the 3CX v16 release).
Installing a 3CX PBX on Raspberry Pi
Starting with 3CX v16, you can install PBX on the latest Raspberry Pi devices, model 3B +. The system is installed on the OS Raspbian Stretch - Debian Linux distribution for the Raspberry Pi ARM architecture. You can manage Debian OS either through the 3CX web interface (basic administration commands) or through the command line interface, if you are an experienced Linux user.
Please note that the installation of 3CX on the Raspberry Pi is recommended for systems with 8 simultaneous calls with 16-24 users. Each user can have an average of up to 8 BLF-indicators configured (transmission of BLF-status provides the load on the PBX server).
Additional requirements:
- Memory Card: 32 + GB Class 10 Micro SDHC
- Power supply: Raspberry Pi compatible, 2.5 A, Micro USB
Preparing an SD Card for Raspbian OS
To install Raspbian on a micro SD card, download and unzip the Raspbian Stretch Lite image from here .
Burn the image to an SD card using Etcher or Win32 Disk Imager utilities . Then insert the card and start the device.
After booting the OS, log in with the default administrator credentials (user
pi, password raspberry). The default password pi can be changed with the command passwd. Note that in Raspbian Linux, you should use the command to perform administrative tasks
sudo. For example, to check for package updates in repositories, use the command sudo apt update.Set Host Name and Device IP Address
To set the hostname on the Pi system, run the Raspbian configuration utility with the command
sudo raspi-config. Select 2. Network Options> N1 Hostname and OK in the warning dialog box. Specify the hostname and reboot the device. You can check the new host name with the command
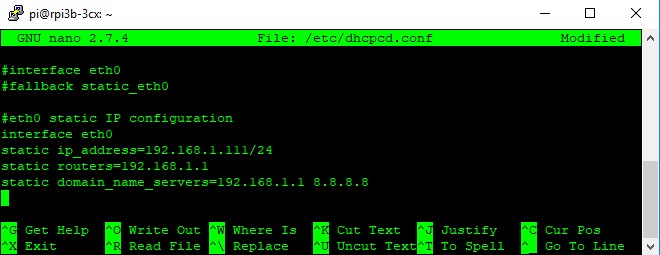
hostname. To set the static IP address of the eth0 interface, change the /etc/dhcpcd.conf file using the nano editor:
sudo nano /etc/dhcpcd.confGo to the end of the file and change the settings: ip_address, routers (default gateway) and domain_name_servers. Use the appropriate settings for your network, for example:
#eth0 static IP configuration
interface eth0
static ip_address=192.168.1.111/24
static routers=192.168.1.1
static domain_name_servers=192.168.1.1 8.8.8.8
Save the new settings and reboot the device
sudo reboot. You can check the new IP address with the command ifconfig eth0.Installing 3CX on Raspbian
To install 3CX on Raspbian, log in with SSH as user pi and then:
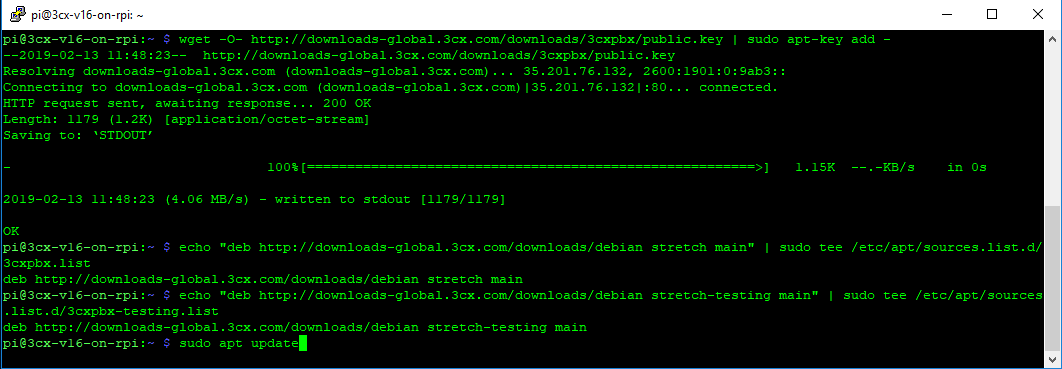
Install the 3CX APT key for packet authentication:
wget -O- http://downloads-global.3cx.com/downloads/3cxpbx/public.key | sudo apt-key add -Create a 3CX APT source file (releases and test files):
echo "deb http://downloads-global.3cx.com/downloads/debian stretch main" | sudo tee /etc/apt/sources.list.d/3cxpbx.list
echo "deb http://downloads-global.3cx.com/downloads/debian stretch-testing main" | sudo tee /etc/apt/sources.list.d/3cxpbx-testing.list
Update APT sources and packages
sudo apt updateCheck availability package 3CX PBX
sudo apt-cache policy 3cxpbxInstall a stable release PBX 3CX
sudo apt -t stable install 3cxpbxYou can also install a test release.
sudo apt -t testing install 3cxpbxInstalling packages takes about 5-10 minutes depending on the performance of the device.
After the installation is complete, select the 3CX initial setup method: (1) via a web browser and (2) via the command line. If the first option is selected, enter the initial configuration URL in the browser: http: // <device_ip>: 5015 (see the detailed manual ).
Restarting the Initial Configuration Wizard 3CX with a command
sudo /usr/sbin/3CXWizard --cleanupinitializes the 3CX configuration. At the same time, all data is deleted, including backup copies and call recordings! If necessary, save this data on another device.Uninstall 3CX in Raspbian
To uninstall 3CX in Raspbian, use one of the following commands:
sudo apt remove 3cxpbx— удаляются системные файлы 3CX, сохраняя рабочие данные (записи разговоров, базу данных АТС, файлы пользователей и т.п.). Используйте, если в дальнейшем планируете переустановить 3CX.sudo apt remove --purge 3cxpbx— полностью удаляется система 3CX, включая рабочие данные.