Home Shooting Range at Raspberry
Hi Habr.
I love small arms and shooting. However, at home this is a bad hobby. No, well, you can certainly buy a trauma and riddle the apartment, but, I think, the home will not appreciate it. Not wanting to put up with this, I decided to implement my own, moderately safe home shooting range. If interested - welcome to cat.
Ideas how this can be realized have been in my head for a long time. Here are a few rejected ones:
- a gun with a phototransistor + a monitor screen. Highlighting half / quarter / one-eighth / etc. screen, check the response from the phototransistor and iteratively specify the part of the screen into which the gun is directed. I rejected the idea because of the low refresh rate of monitors and their inertia.
- a gun with a phototransistor + a screen of LED matrices. Already better, you can update the image on the diode array with sufficient frequency. I even started soldering diode arrays, but changed my mind in time.
- a gun with a camera, several laser LEDs forming marks on the wall, by which the camera determines its position. In principle, the idea was not bad. However, having estimated how the pistol with the webcam screwed to it would look, he also refused it.
Well, the final idea is a static camera looking at the wall and a laser gun. There is an idea, it's up to implementation.
I bought the first child gun (Desert Eagle caliber 50). I threw out the insides, processed it with a file and installed a laser diode, a trigger button and nano arduinine in it. No, of course you can put a capacitor in place of the arduinine, so that he would switch the button from the power source to the diode and back, but this is not a flexible enough approach. The laser diode glued to cold welding. While it froze, he carefully adjusted the diode on, combining it with the aiming bar.
Wrote the simplest sketch:
The gun “shoots” with short pulses of 4ms (picked up during the setup) with a maximum rate of 2 shots per second.
Next, it is up to the receiver. I bought the simplest webcam. Malinka was already in the bins. I connected the camera, directed it to the wall.
Next, you need to put the necessary packages on the raspberry
It remains to write a Python script. This was my first python script, so I had to kill him for almost a day.
A little explanation. The script takes pictures from the camera and converts them to black and white. Then it cuts off everything that is darker than 245. As practice has shown, the spot of the laser diode is detected very confidently even with a pulse length of only a couple of milliseconds. Next, we find the contour of the spot and the minimum circle that describes it. Draw target hits, play sound. After seven “shots” we count points (of which you can get a maximum of 100).
Before shooting, you need to calibrate the position of the target in the camera.
By the way, the "target":
My camera is three meters from the target. Uncomment the line #print (center, dist), shoot until we hit exactly the center. We look at the hit position in the log and write to the beginning of the script (CenterX, CenterY). There we also rule Radius to fit our target size.
The resolution of the camera from three meters is about two millimeters. If this doesn’t seem enough, you can simply slide the camera.
That's it, wefall into childhood, we start classes on fire training.
The process looks like this (litter for ragged wallpapers - I live in a rented apartment):
Sources for the project: github.com/DIMOSUS/Laser-shoting
Do not forget about security - you can look at the laser, like with a telescope in the sun, only two times ...
In the future, I would like to install a servo in the gun that will pull the load to simulate recoil . Well, print a normal target.
I love small arms and shooting. However, at home this is a bad hobby. No, well, you can certainly buy a trauma and riddle the apartment, but, I think, the home will not appreciate it. Not wanting to put up with this, I decided to implement my own, moderately safe home shooting range. If interested - welcome to cat.
Ideas how this can be realized have been in my head for a long time. Here are a few rejected ones:
- a gun with a phototransistor + a monitor screen. Highlighting half / quarter / one-eighth / etc. screen, check the response from the phototransistor and iteratively specify the part of the screen into which the gun is directed. I rejected the idea because of the low refresh rate of monitors and their inertia.
- a gun with a phototransistor + a screen of LED matrices. Already better, you can update the image on the diode array with sufficient frequency. I even started soldering diode arrays, but changed my mind in time.
- a gun with a camera, several laser LEDs forming marks on the wall, by which the camera determines its position. In principle, the idea was not bad. However, having estimated how the pistol with the webcam screwed to it would look, he also refused it.
Well, the final idea is a static camera looking at the wall and a laser gun. There is an idea, it's up to implementation.
I bought the first child gun (Desert Eagle caliber 50). I threw out the insides, processed it with a file and installed a laser diode, a trigger button and nano arduinine in it. No, of course you can put a capacitor in place of the arduinine, so that he would switch the button from the power source to the diode and back, but this is not a flexible enough approach. The laser diode glued to cold welding. While it froze, he carefully adjusted the diode on, combining it with the aiming bar.
Hidden text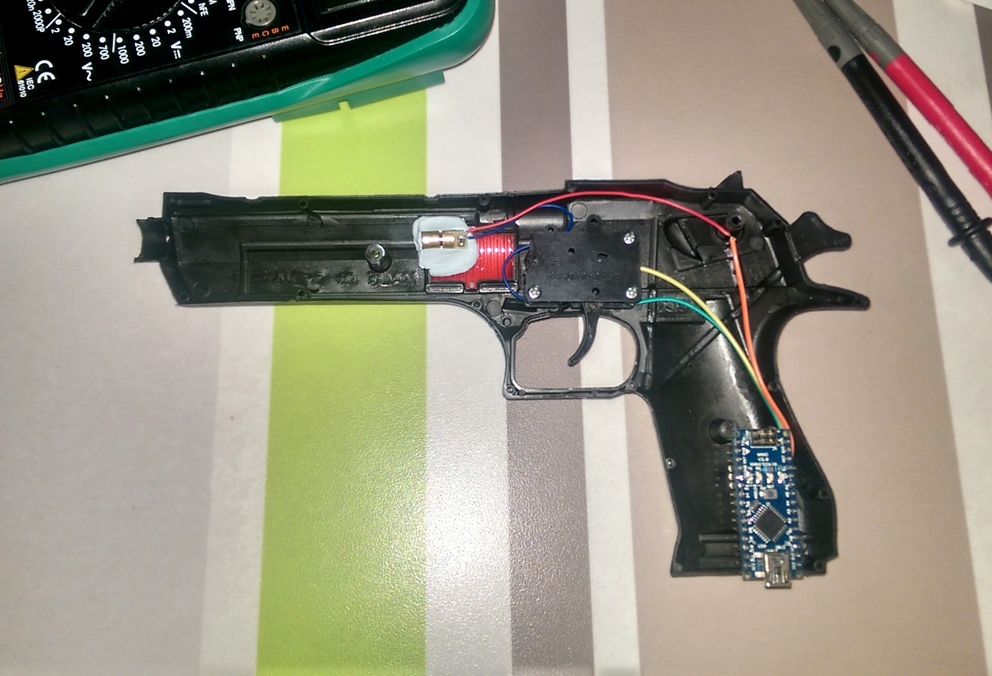
Hidden text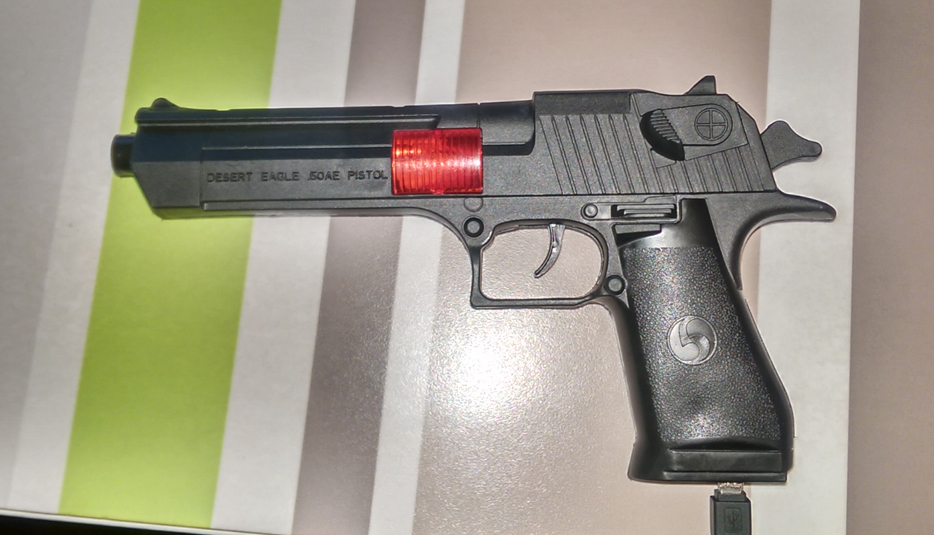
Wrote the simplest sketch:
Hidden text
void setup() {
    pinMode(3, OUTPUT);//LED
    pinMode(2, INPUT);//Button to ground
    digitalWrite(2, true);
}
int t = 10000;
bool PreButton = false;
void loop() {
    bool Button = !digitalRead(2);
    if (PreButton == false && Button == true && t > 500) t = 0;
    if (t<5) digitalWrite(3, true);
    else digitalWrite(3, false);
    if (t<10000) t++;
    PreButton = Button;
    delay(1);
}
The gun “shoots” with short pulses of 4ms (picked up during the setup) with a maximum rate of 2 shots per second.
Next, it is up to the receiver. I bought the simplest webcam. Malinka was already in the bins. I connected the camera, directed it to the wall.
Hidden text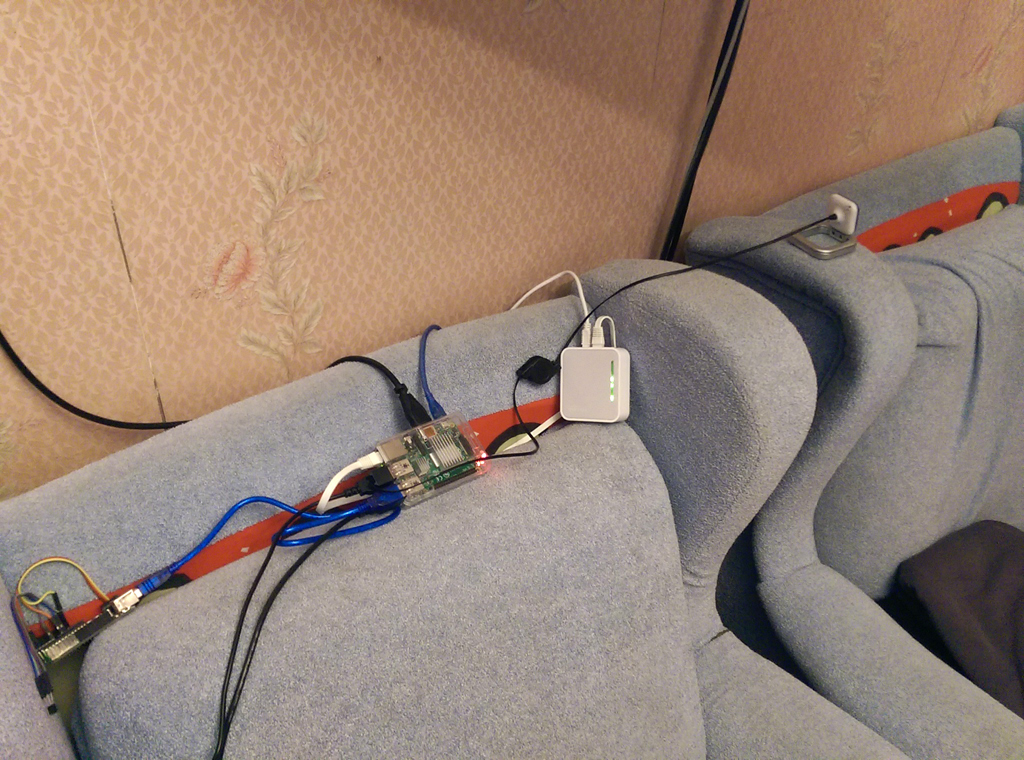
Next, you need to put the necessary packages on the raspberry
sudo apt-get install libv4l-0 libopencv-dev python-opencvIt remains to write a Python script. This was my first python script, so I had to kill him for almost a day.
Hidden text
#!/usr/bin/python
import sys
import cv2
import math
import subprocess
if __name__ == '__main__':
    #target in camera
    CenterX = 426.5
    CenterY = 190.5
    Radius = 40.0
    width = 800
    height = 640
    capture = cv2.VideoCapture(0)
    capture.set(3, width);
    capture.set(4, height);
    image = cv2.imread("target.jpg", cv2.CV_LOAD_IMAGE_COLOR)
    target_x = float(image.shape[0])*0.5
    target_y = float(image.shape[1])*0.5
    target_Radius = min(target_x,target_y)
    target = image.copy()
    cv2.namedWindow("Result", 1)
    cv2.imshow("Result", target)
    ShotCount = int();
    Scoore = 0;
    while 1:
        if cv2.waitKey(1) >= 0:
            break
        ret,frame = capture.read()
        grey_image = cv2.cvtColor(frame, cv2.COLOR_BGR2GRAY)
        ret,grey_image = cv2.threshold(grey_image, 245, 255, cv2.THRESH_BINARY)
#        grey_image = cv2.erode(grey_image, None, iterations = 1)
#        grey_image = cv2.dilate(grey_image, None, iterations = 1)
        (contour, _) = cv2.findContours(grey_image, cv2.RETR_EXTERNAL, cv2.CHAIN_APPROX_SIMPLE)
        if contour:
            subprocess.Popen('aplay Shot.wav', shell = True)
            cntr = sorted(contour, key = cv2.contourArea, reverse = True)[0]
            (x,y), radius = cv2.minEnclosingCircle(cntr)
            center = (x, y)
            shot_x = (float(x) - CenterX)/Radius
            shot_y = (float(y) - CenterY)/Radius
            dist = math.sqrt(shot_x*shot_x+shot_y*shot_y)
            shot_x = target_x + shot_x*target_Radius
            shot_y = target_y + shot_y*target_Radius
            Shot = (int(shot_x), int(shot_y))
            cv2.circle(target, Shot, 5, (60,60,255),10)
            cv2.circle(target, Shot, 10, (120,120,120),1)
            cv2.imshow("Result", target)
            #calibrate
            #print (center, dist)
            print ("Shots", ShotCount+1)
            if dist < 1.0:
                Scoore += 1 - dist
            ShotCount += 1
            if ShotCount > 6:
                ShotCount = 0;
                Scoore = Scoore/7.0*100.0
                print("You Scoore: ", Scoore)
                Scoore = 0
                target = image.copy()
                cv2.waitKey(300)
                subprocess.Popen('aplay 924.wav', shell = True)
                cv2.waitKey(1000)
            cv2.waitKey(50)
    cv2.destroyAllWindows()
A little explanation. The script takes pictures from the camera and converts them to black and white. Then it cuts off everything that is darker than 245. As practice has shown, the spot of the laser diode is detected very confidently even with a pulse length of only a couple of milliseconds. Next, we find the contour of the spot and the minimum circle that describes it. Draw target hits, play sound. After seven “shots” we count points (of which you can get a maximum of 100).
Before shooting, you need to calibrate the position of the target in the camera.
By the way, the "target":
Hidden text
My camera is three meters from the target. Uncomment the line #print (center, dist), shoot until we hit exactly the center. We look at the hit position in the log and write to the beginning of the script (CenterX, CenterY). There we also rule Radius to fit our target size.
The resolution of the camera from three meters is about two millimeters. If this doesn’t seem enough, you can simply slide the camera.
That's it, we
The process looks like this (litter for ragged wallpapers - I live in a rented apartment):
Sources for the project: github.com/DIMOSUS/Laser-shoting
Do not forget about security - you can look at the laser, like with a telescope in the sun, only two times ...
In the future, I would like to install a servo in the gun that will pull the load to simulate recoil . Well, print a normal target.