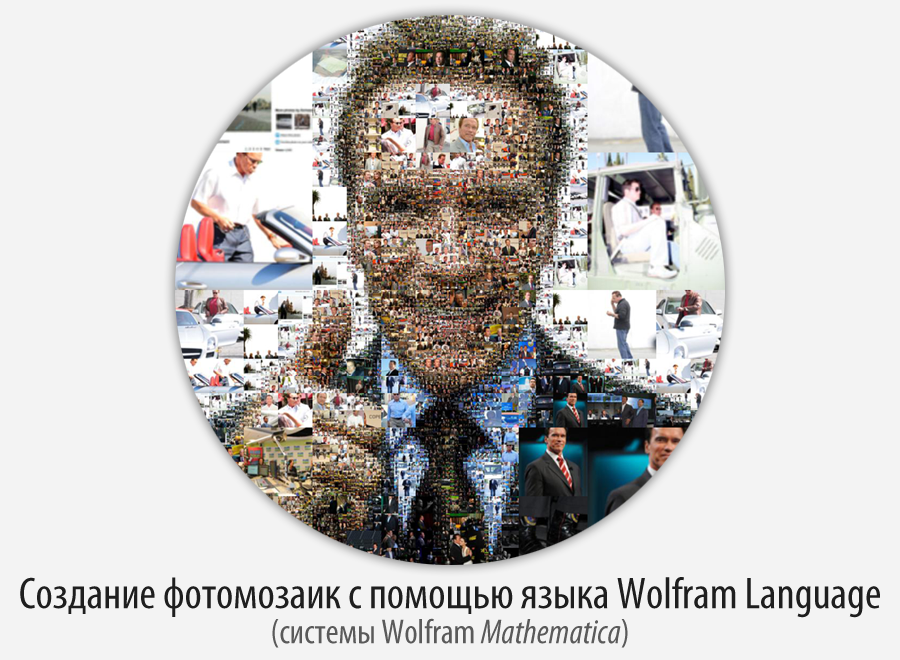
Creating a photomosaic using the Wolfram Language (Mathematica)
Download the translation in the form of a Mathematica document that contains all the code used in the article here (archive, ~ 3 MB).
Introduction
It’s already less than a day until New Year 2015:
In [1]: =
Out [1] =
I would like to congratulate everyone on the Coming New Year 2015 and tell you how you can make your friends an unusual gift in the form of photo mosaic created using Mathematica 10 and Wolfram Language.
The idea of photo mosaic in general is quite simple: create an image based on a collection of other small-sized images .
In order to create a photo mosaic you can act in two main ways:
- A simple way is to split the image into fragments of a fixed size, then pick up each fragment with the most “similar” image from a given collection and replace this fragment with it. As a result, the smaller the fragment size and the larger the collection, the better the photo mosaic will be.
- Complicated method : essentially repeats the first method, except that the source image is divided by some “adaptive” algorithm into fragments of various sizes.
To simplify the problem under consideration, we will create a mosaic of square thumbnails.
Creating a collection of images
Of course, you can use any collection of images that you have, be it family photos or travel photos.
I do not think that my collections of this kind will be very interesting to most readers, so I will use a collection of images of a famous person as a collection. As such a person, I will take someone who is known to absolutely everyone, namely, Arnold Schwarzenegger.
To create a collection of images, use the parser from the Zimbio website :
In [2]: =
In [3]: =

Import all available photos from the Arnold profile:
In [4]: =

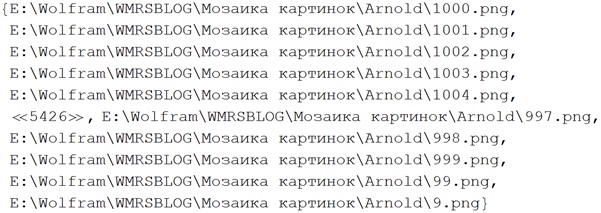
In total, 5436 photos were imported:
In [5]: =
Out [ 5] =
The total “weight” of which is almost 5 GB.
In [6]: =

Out [6] =
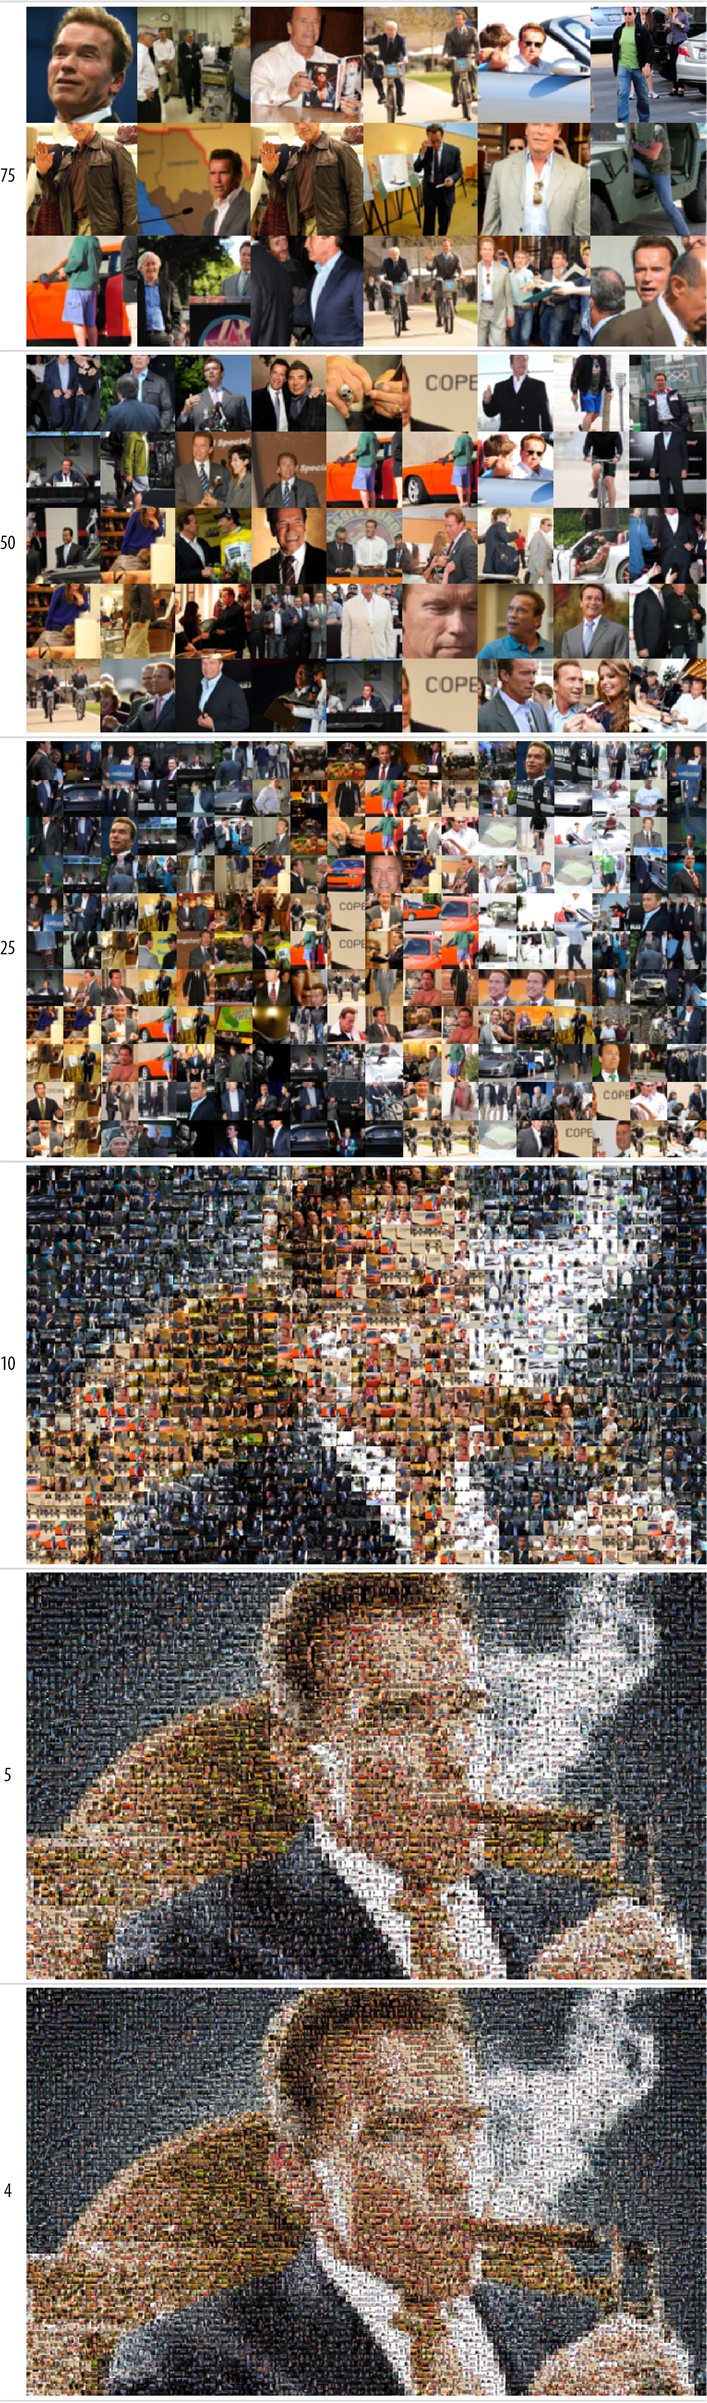
We can look at the collection briefly, making a collage of 150 randomly selected images:
In [7]: =

Out [7] =

Simple photo mosaic
Let's start creating a simple photo mosaic.
To begin, let us indicate the directory in which the collection of our images is stored:
In [8]: =
Now load the paths to each of the images:
In [9]: =

Out [9] // Short =
Save the number of images in a separate variable:
In [10 ]: =
Out [10] =
Now we will create a collection of thumbnails of images, since obviously we will not need images in their original size. The size of each thumbnail does not exceed 150x150 pixels (by default).
In [11]: =

In [13]: =

In [14]: =
Load the paths to each of the thumbnails:
In [15]: =
Now, load all the thumbnails into the system:
In [16]: =
Let us calculate the average RGB color for each of the thumbnails:
In [17]: =

Let's create a function that will select the miniature closest to it for some image. At the same time, we will provide for the possibility of randomly selecting from the n nearest miniatures (this will be necessary in order for the photo mosaic to lack areas filled with one miniature, which occurs, say, if a large section of the image has the same color).
In [18]: =

Out [18] =

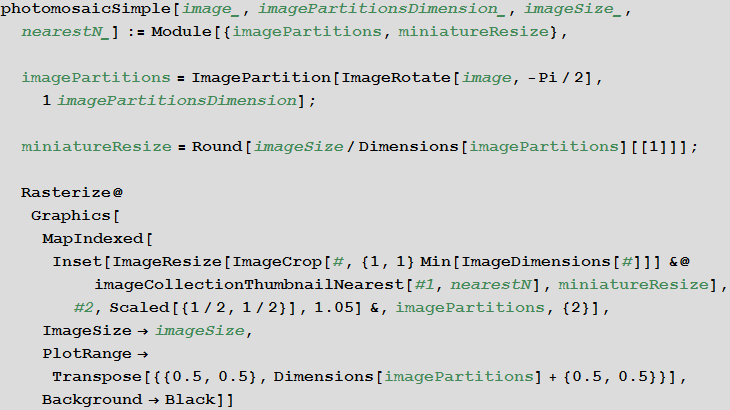
Let's create the function that makes up the photo mosaic:
In [20]: =
Let's set the image, the mosaic of which we want to get:
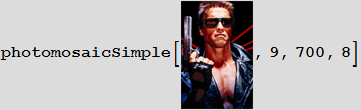
In [21]: =

Let's see what the mosaic will look like if the next thumbnail while reducing thumbnails:
In [22]: =

Out [22] =
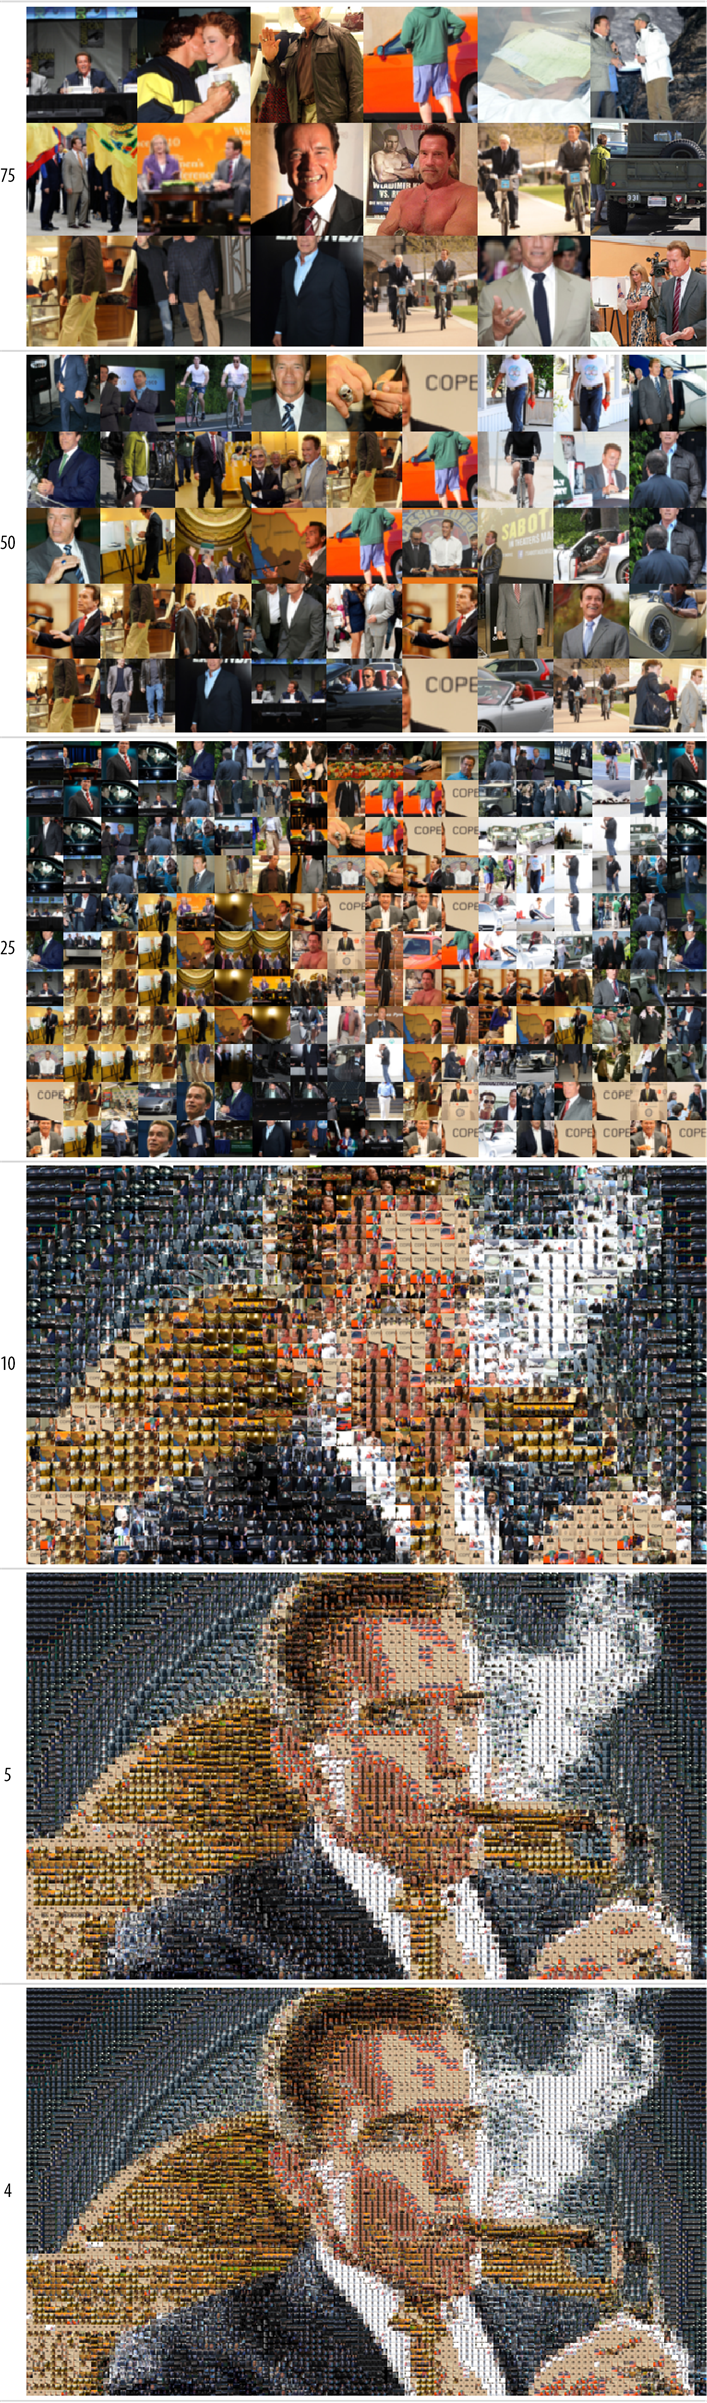
On the last photo mosaic, the effect that was mentioned earlier is most noticeable - areas filled with one miniature in areas of an image with one (or very close) color.
In order to get rid of this, we set a random selection of the 10 nearest thumbnails:
In [23]: =

Out [23] =
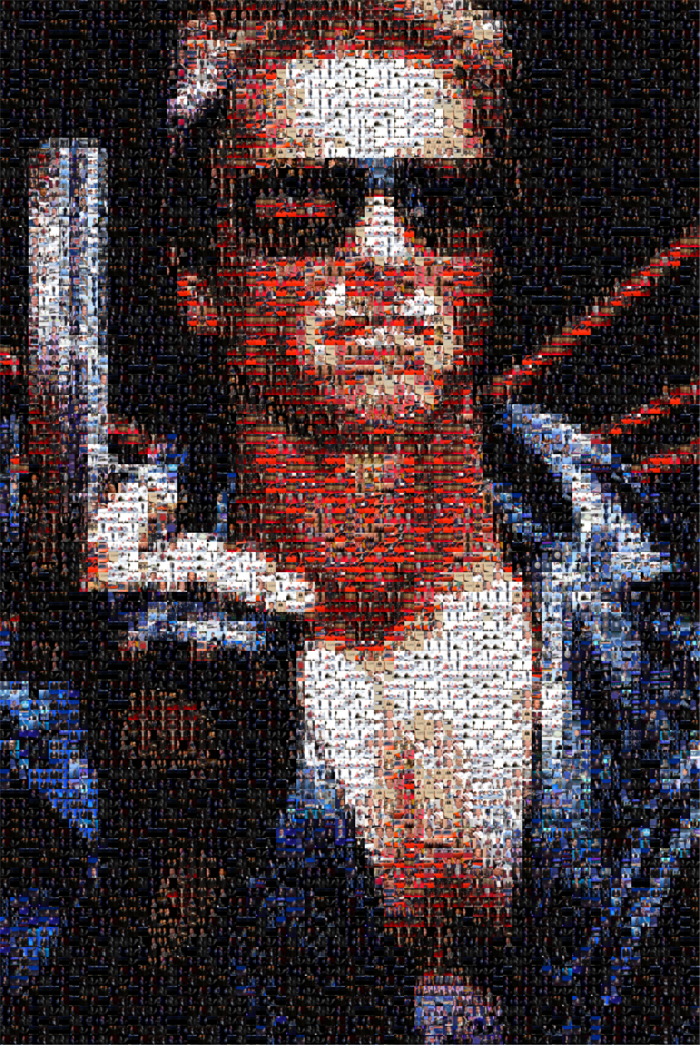
Of course, using this algorithm, you can create any kind of mosaic:
In [24]: =
Out [24] =
Adaptive photo mosaic
Create a function that will break the image into smaller images in an adaptive way.
The adaptiveImagePartition function works as follows:
- it is an iterative adaptive partition using the steps below;
- the toParts function calls the parts function for each image (or the original image in the first step);
- the parts function splits the image into 4 equal parts (straight lines drawn through the middle of the opposite sides of the image) and returns the result of the toParts function ;
- for each of the four fragments obtained, its average color is calculated, then pairwise distances between the average colors are searched for using the ColorDistance function (according to the CIE2000 standard ), then the average value of the distance is searched. If it is more than the prec value , then the original image is replaced with four new ones, otherwise the image is left as it was;
- The rule processing rule is applied to the resulting image set .
In [25]: =

In [26]: =
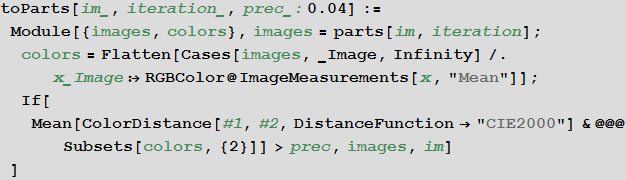
In [27]: =

Let's set the base image:
In [28]: =

Let's look at the steps of the created function:
In [29]: =
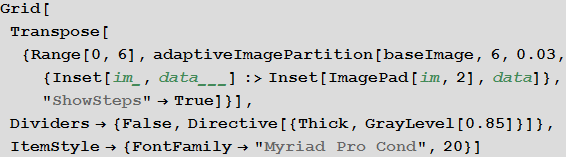
Out [29] =

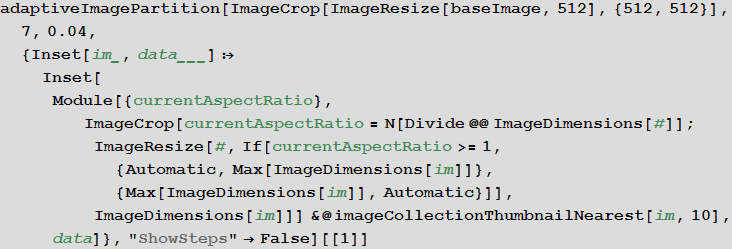
Having changed the handler, we we can get adaptive pixelation:
In [30]: =

Out [30] =

Finally, if we specify the replacement of a fragment of the image for the nearest thumbnail as a handler, we get:
In [31]: =
Out [31] =

Conclusion
I hope that my post could please you and interest. Of course, you can create even more complex algorithms for photo mosaics that take into account: not only the average color, but also the dominant colors of fragments and miniatures ( DominantColors ); image morphology; more complex adaptive partitioning, etc. But, I think, the created algorithms may already be quite enough to make an original gift yours close to the Coming New Year 2015.
Resources for learning Wolfram Language ( Mathematica ) in Russian: http://habrahabr.ru/post/244451