Snowflake Design CAD: SnowFlaker
Hello everybody.
Yes, yes, it's CAD, for designing snowflakes, written by me in a couple of days.
Foreword
Cutting out another snowflake the other day, I thought. It is very inconvenient to cut a snowflake blindly, unfold it, and make sure that he did not what he wanted.
At first I began to resort to a pencil. We turn the snowflake, draw, cut. But my imagination continued to play evil jokes with me, I turned around and saw another freak.
Why not develop CAD to put an end to this terrible injustice?
The article will not have any development and programming process. In it, I will share with you the resulting program, and tell you how to use it. Under the cut a lot of pictures.
You can pick up the assembly for win here: sourceforge.net/projects/snowflaker
There is also the source code in GIT.
About the program
In the program, we design the outline along which we will cut, and send it to print. We get a printed sheet, fold, cut along the contour.
Since not everyone has a printer - the image for printing can be rasterized beforehand in png. To print snowflakes later, come home, fold and cut.
Work basics
Now to the program itself. Since in many cases it is easier to show, there will be many pictures.
So she has the following interface:
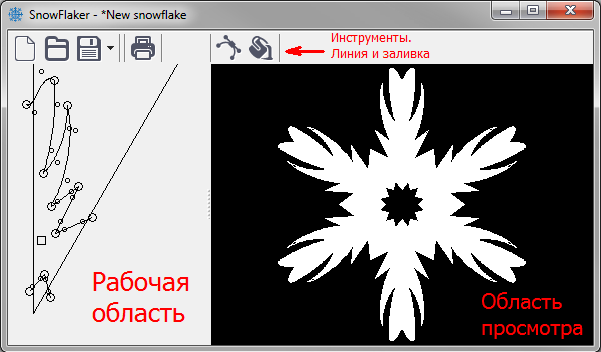
In the workspace, 2 lines are the borders of the sheet after folding. Here we can drag the area with the right mouse button, and zoom with the wheel:
To create the first contour - select the line tool, and use the left mouse button to draw a polyline. As soon as we decide what is enough for us, we turn off the tool with the right button.

hint: you can also take the line tool by double-clicking on an empty area or at any vertex.
But for now, we have straight lines. Let's bend them (grab by the line or by special control points, and drag): Do you
need to move something somewhere? Select a group of vertices by dragging them, or delete it altogether with the Del key:

hint: you can delete any primitives (lines, vertices, fill) by right-clicking on the primitive
Did you remove the excess? No problem. Double-click on the line and get an additional vertex:
Worked in Paint-e? There is a fill tool there. You can circle a certain area, then drip into the center and fill. We take the fill, drip into the snowflake, and see our miracle in the viewing area:
Important! The filled circuit must be closed. Here's what happens if you open the circuit:

Works 1 in 1 as a fill in paint.
Filling does not affect the image when printing. This is for preview only.
Saving, opening the file, I will not chew. With printing, everything is simple, press the print button, select the printer, print.
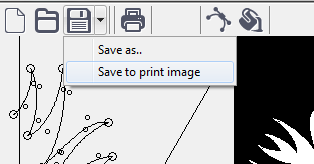
I just want to pay attention to the point of saving snowflakes for printing in PNG format. He is here:
Working with print result
After printing, you will have something like this picture:
Since there are a lot of large photos, then
how to put it all together, look under the spoiler
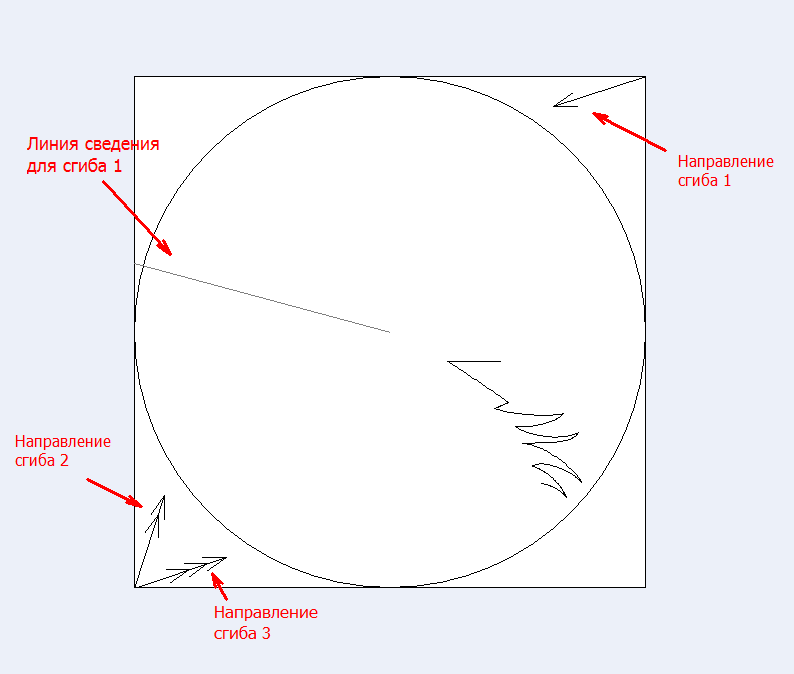
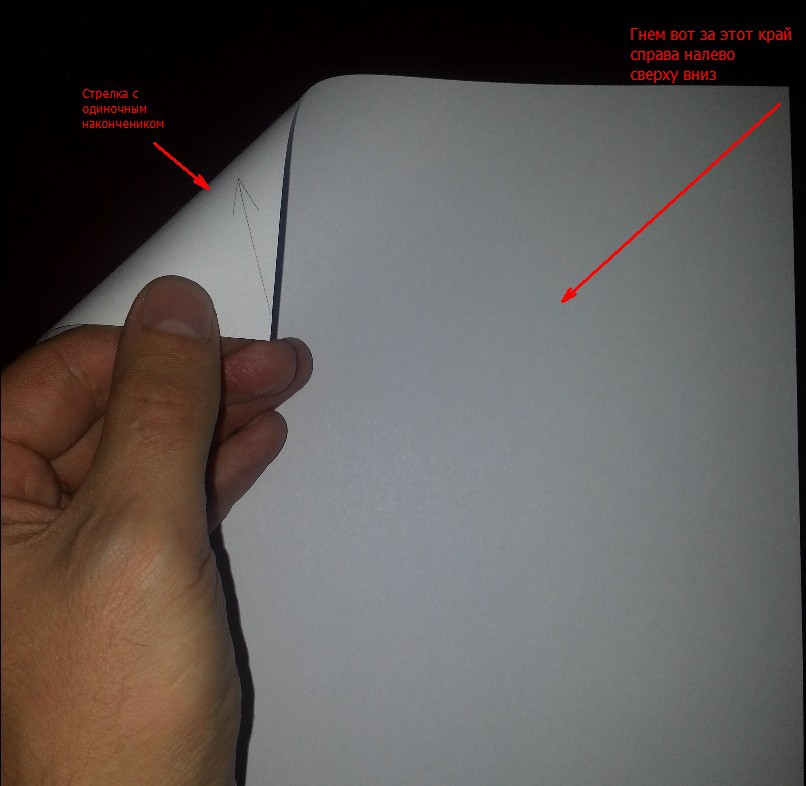
We turn the sheet so that the arrow with the tip is in the upper left corner, and bend the sheet from right to left and from top to bottom:
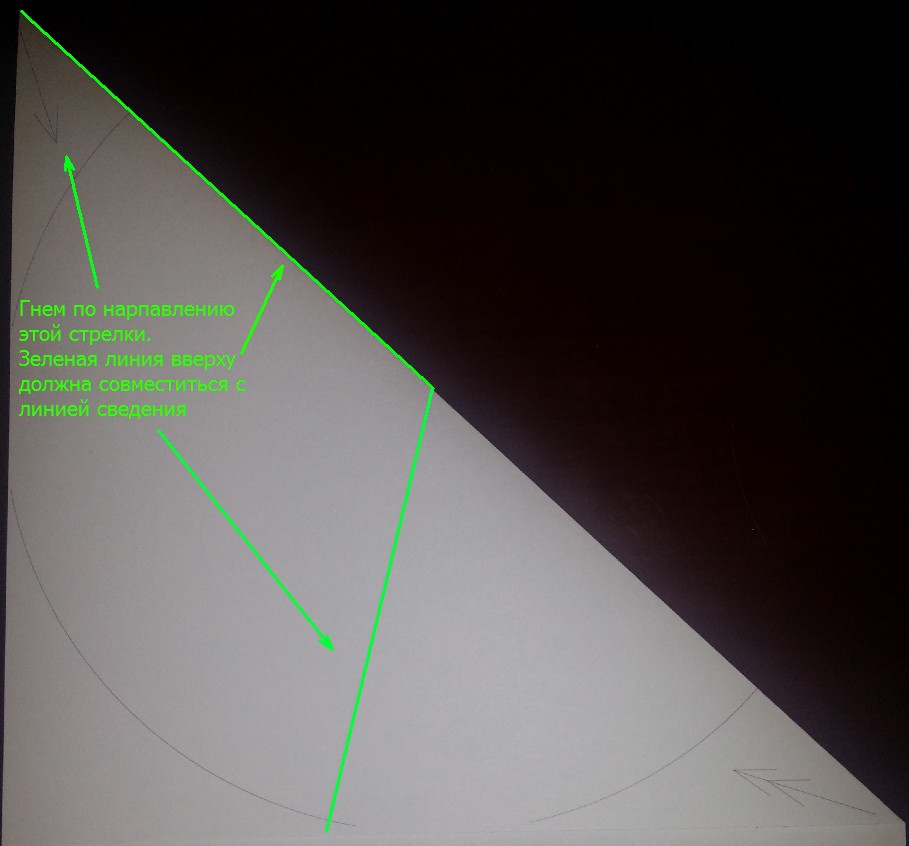
Now we need to bend to the information line. You can not finish the millimeter due to the thickness of the paper:
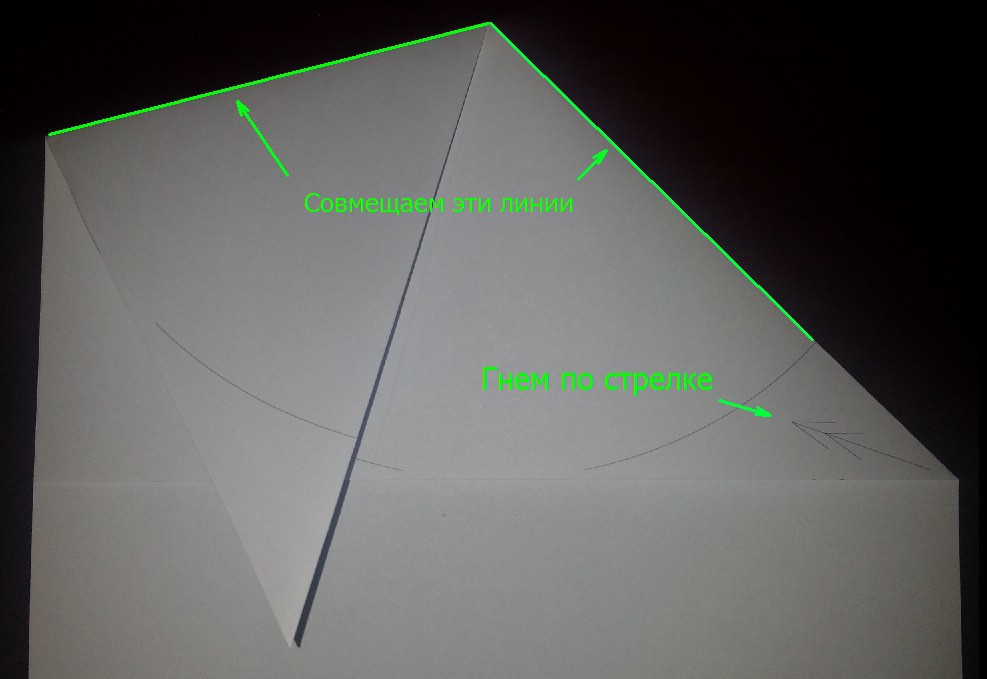
Then we bend along the arrow with two tips:
Now with three:

Cut the result:

Now we need to bend to the information line. You can not finish the millimeter due to the thickness of the paper:
Then we bend along the arrow with two tips:
Now with three:
Cut the result:
Design rules
So that there are no incidents: “I cut out a snowflake, and it crumbled”, I want to familiarize everyone with the simple rules of competent design.
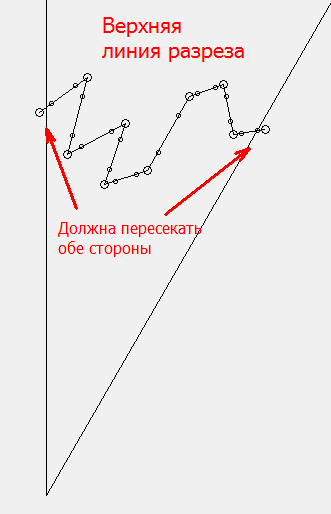
Snowflake consists of cut lines. For the snowflakes have an upper cut line which necessarily must cross both sides:
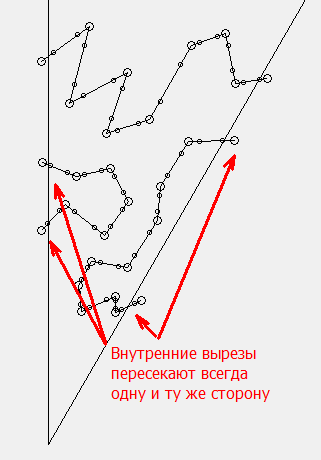
Next may be internal cuts. Their prerequisite is to cross only one side:
Well, finally, the very last, bottom line that cuts out the center can have intersections on both sides:

If you want to cut out not a snowflake, but a pattern (for example for drawing on glass), then you have to there is only one top line available. No internal cutouts.
Finally
I think I was late with the software, and most snowflakes are already cut. However, if this is not so, I will be glad if the program helps you do something wonderful. I will also be glad if you find bugs;)
All the New Year's mood, good holidays and good luck next year.
Thanks for attention!
Upd.
An example of snowflakes designed in SnowFlaker and cut by me on some standard density office paper:
cut carelessly, do not throw a slipper
