WordPress Site Migration Guide
- Tutorial
Every web developer regularly faces the challenge of migration. This includes deploying the local version on a remote server, and moving a working site from one server to another. Some prints for programmers are called “Cookbooks,” which literally means “recipes.” There are many recipes, which one is the best - a matter of taste. In this article, the author will talk about what technology of transferring a typical WordPress site he considers optimal, and why.
Also, this material is suitable for those who want to learn more about backing up the site and its subsequent restoration. Because, as a matter of fact, these are two necessary steps for the implementation of migration.
Data backup
From a technical point of view, we have to make copies of two components of the site:
- File system
- Database
Every web developer must take care of the integrity of the website data. Therefore, as a rule, after the working version is deployed on a remote server, the site developer sets up data backup or "backup" (from the English. "Backup copy", backup).
Sometimes the care of creating backups is manifested by the hosting company. Most often this happens when you use the simple site hosting service.
What is the main goal of the developer when moving a site from one server to another? Nothing to lose. That is, in a new place, the site should be completely identical to the same site in the old one.
First things first, you must make sure that after creating a backup copy of the site on it will not be made any changes.
The easiest way is to contact all the editors of the site with a request not to make changes to the contents of the site for the duration of the transfer (for example, for the next half hour). If, for example, you are blogging on WordPress , then there is no need to negotiate with anyone.
In the case when this is not possible, you must put the site in maintenance mode.
Service mode
You may have noticed that when WordPress updates plugins or the core of the system, visitors to the site see a white background instead of its contents and a large heading “ The site is temporarily closed for maintenance. Come back in a minute. ".
How to force a site into it?
To do this, you need to create a file in the root of the site under the name
.maintenanceand place the following PHP code in it:<?php $upgrading = time();
Result:
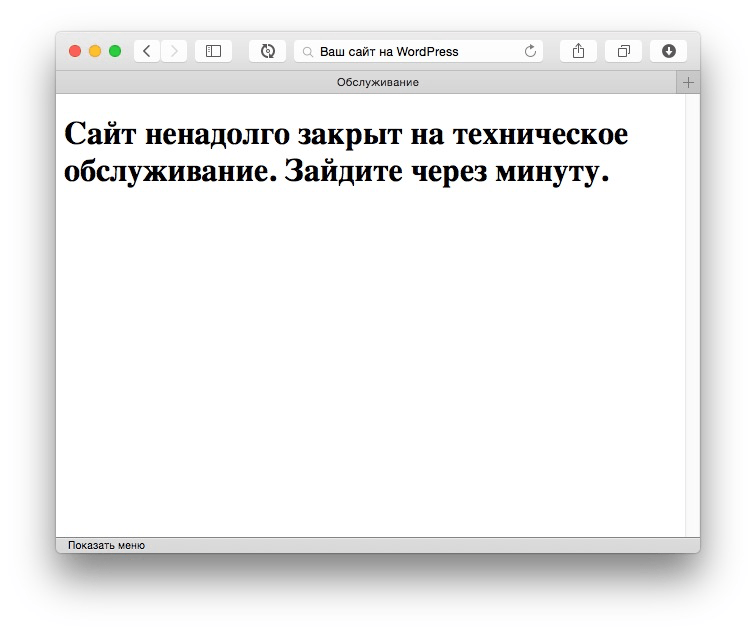
In principle, this will be sufficient so that no one (except the server administrator) can use the site.
However, if you want to make the page more attractive, you can create a
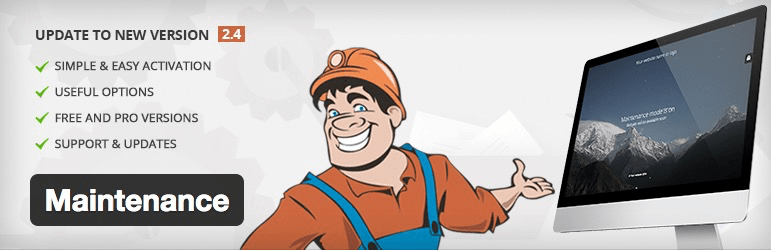
wp-contentfile in the folder maintenance.phpthat will be loaded instead of the source text. In it you can make up any picture you want for the pending completion of the user's work. You can also recommend a special plugin that can be used for the same purposes: Now that we know for sure that no data will be changed during the migration process, we can start creating a backup copy of the database.
Database backup
There are several ways to back up your WordPress database :
- Using plugins WP-DB-Backup , WP Database Backup and others.
- Using the phpMyAdmin browser utility
- Using the server console
- Using the hosting panel
In order to save space in the post I will not talk about the first two methods, they are quite trivial.
If you have access to the server console and are able to use the terminal, this will significantly speed up the work.
First of all, because creating a backup is performed by one single command:
mysqldump -u[пользователь] -p[пароль] [имя_базы_данных] > [имя_файла_резервной_копии].sql
In a good way, it will archive the base dump on the go:
mysqldump -u[пользователь] -p[пароль] [имя_базы_данных] | gzip >[имя_файла_резервной_копии].sql.gz
Text files, which is a database dump, are archived in the best way. The size of the archive can be significantly lower than the size of the base dump. This is important when transferring, as 100Mb transfer much faster than 1GB, for example.
Some hosting companies provide the ability to archive site data through the service control panel:
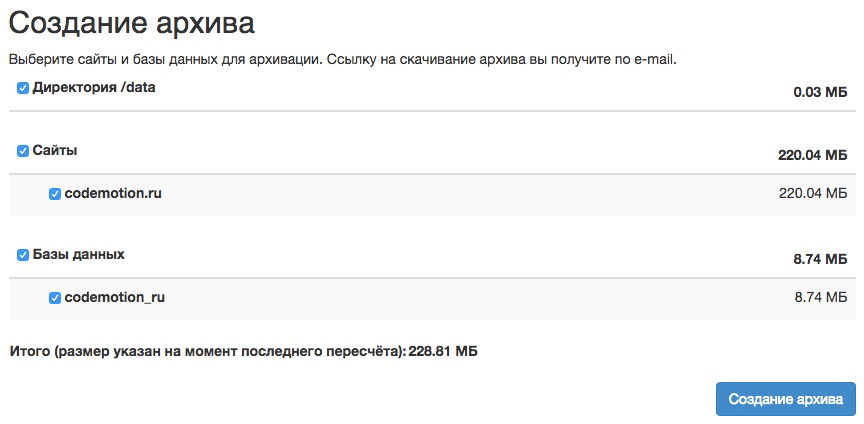
After that, an archived copy of the database and site comes to the mail.
However, not every hosting provides such opportunities to customers, so if this option is present - it is most convenient to use it.
Backup file
The WordPress file system usually looks like this (without subdirectories and their contents):
├── index.php
├── license.txt
├── readme.html
├── wp-activate.php
├── wp-admin
├── wp-blog-header.php
├── wp-comments-post.php
├── wp-config-sample.php
├── wp-config.php
├── wp-content
├── wp-cron.php
├── wp-includes
├── wp-links-opml.php
├── wp-load.php
├── wp-login.php
├── wp-mail.php
├── wp-settings.php
├── wp-signup.php
├── wp-trackback.php
└── xmlrpc.php
In principle, we are most interested in the folder
wp-contentand the configuration file wp-config.php. First of all, because all other folders and files of various WordPress installations (in the case of using the latest version of the system ) do not differ from each other.
Important: the fastest way to transfer files is to create an archive, transfer the archive, and then unzip it to the destination server.
WordPress is made up of hundreds of files. In the event that you have been maintaining a site for a long time, all the images, plugins and themes you uploaded are added to this.
Imagine FTP Transferthousands or even several thousand small files. To transfer each of them, you must first establish and then disconnect. As a result, the process is long and sometimes something happens to lose along the way. Moreover, when the files are transferred first to the local computer, and then to the new remote server.
Using the archive to transfer, you move only 1 file. Yes, it is much larger, but due to the fact that only one connection to the server is required, the transfer is faster. At current speeds of access to the Internet, the time difference can be tens, hundreds of times.
I strongly recommend using the archive as a container for transporting a large accumulation of small files.
So you can use console utilities like rsync, but for this you need to have the skills to work with the north console. Several educational materials on the topic in English. - one and the second .Data recovery
So, the archive of the site files and the database dump were transferred to the new server.
Recreating the file structure
The first step is to unzip the archive in such a way as to completely restore the original structure of files and folders.
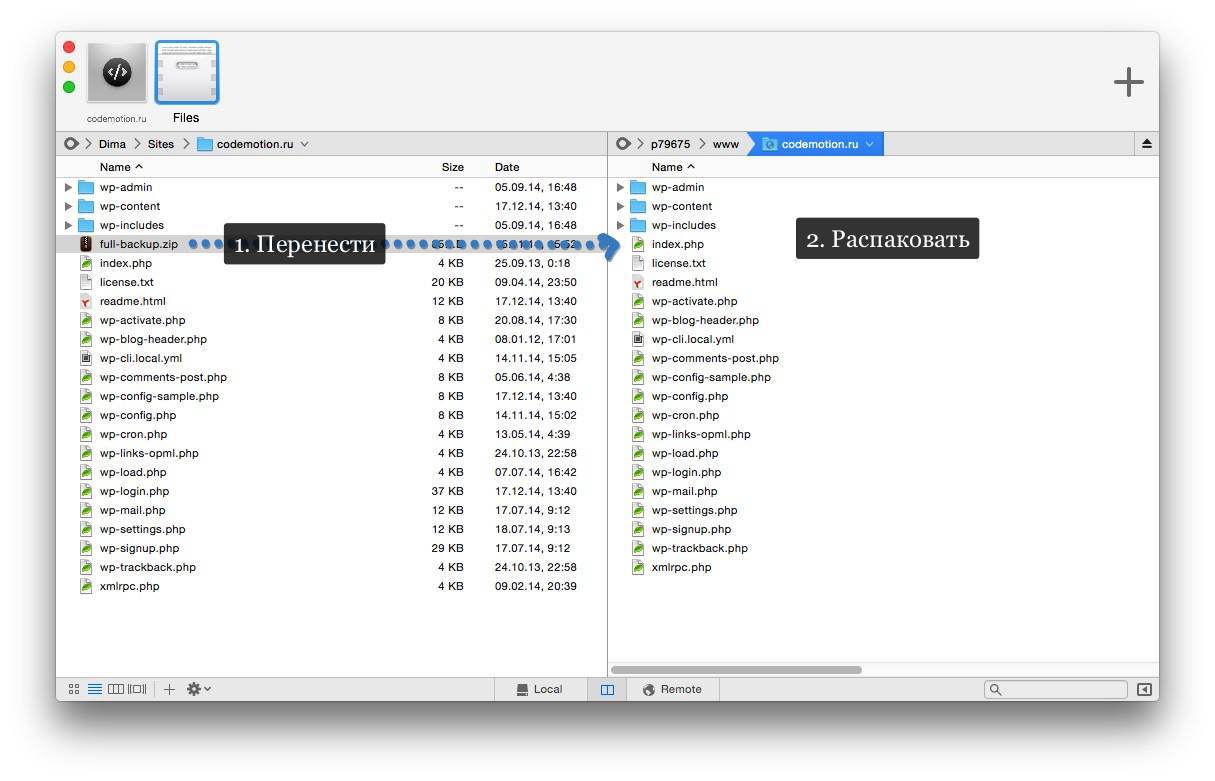
To restore the original structure and not mess with the folders, you must be guided by the following rule:
Unpack the archive in the same place where it was created.
For example, if you were compressing a site using the console archiver from the root of the site
zip -r "full-backup.zip" *, then unpacking it on a new server must also be in the root of the site unzip full-backup.zip. Please note that invisible files, which is
.htaccessnot always archived along with the rest. Therefore, if “beautiful addresses” do not work on your new site, first of all, check whether you moved it .htaccessto the root of the site.Do not forget to delete the archive with the file structure of the site from the server so that outsiders cannot download it.
Recreating a Database
Before restoring a database, you must make sure that the corresponding new database is already created on the new server.
If it is not already there, then you can create a new database in various ways:
- Via the web interface using the phpMyAdmin utility
- Via hosting control panel
- Through the server console with the following command:
mysql -u[имя_пользователя] -p;
# после ввода пароля  вы войдете в режим командной строки MySQL
mysql: CREATE DATABASE [имя_базы_данных] CHARACTER SET utf8 COLLATE utf8_general_ci; CHARACTER SET utf8 COLLATE utf8_general_ci; CHARACTER SET utf8 COLLATE utf8_general_ci;
GRANT SELECT, INSERT, UPDATE, DELETE, CREATE, DROP, ALTER ON[имя_базы_данных] .* TO [имя_пользователя]@localhost IDENTIFIED BY '[пароль]';
As a result, we must have on hand:
- Database name
- Username
- Password
In some cases, when the database is on another server, we still need to know the host address (usually localhost , if on the same machine).
Using this data, we must import our database dump.
Again, we can do this by the same means.
In phpMyAdmin, select the database, the “Import” tab, select the dump file and submit the request form.
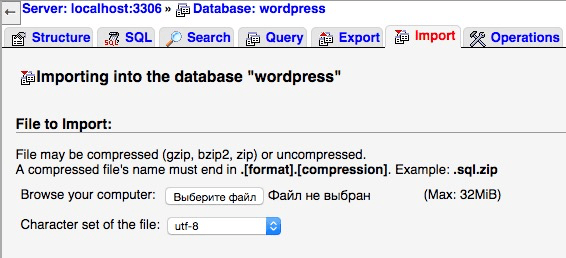
If you work through the console, use the command
mysql -u[имя_пользователя] -p[пароль] [имя_базы_данных] < [дамп_базы_данных].sql. If the database dump was zaarhivinovan:
gunzip < [дамп_базы_данных].sql.gz |mysql -u[имя_пользователя] -p[пароль] [имя_базы_данных]. Do not forget to remove the database dump from the server or move it to a safe place if it was there.
Configuring a configuration file
Now you need to open the file in the editor
wp-config.phpand set the appropriate settings for connecting to the new database: 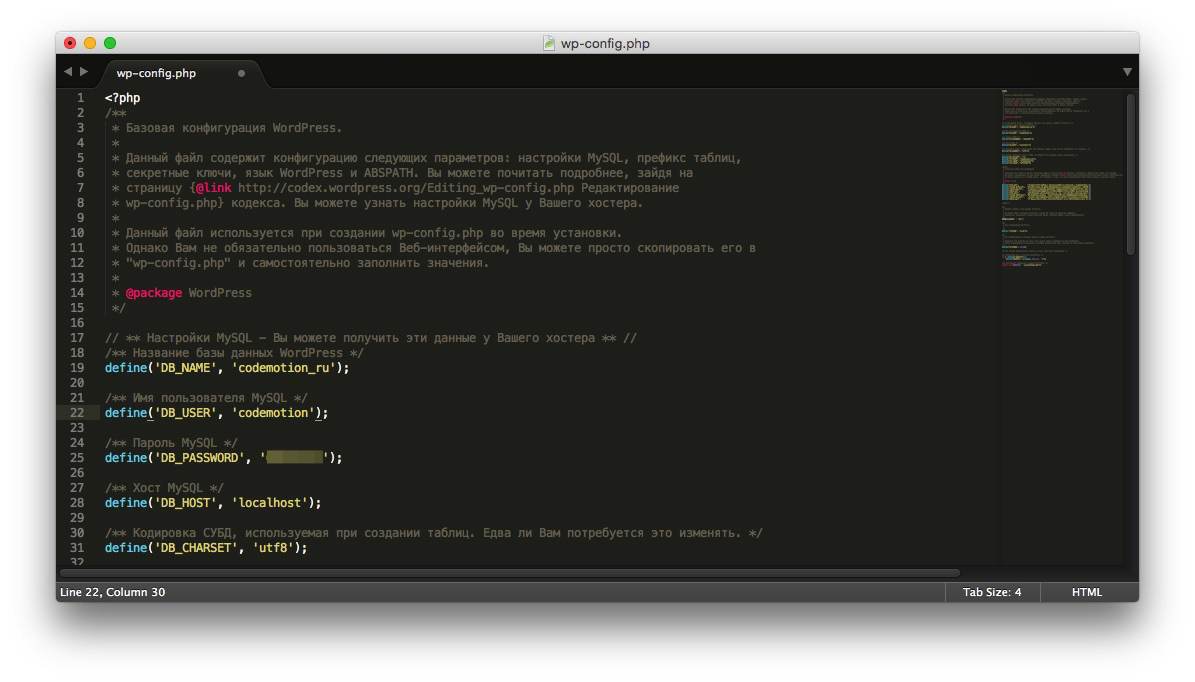
Do not forget to delete the file
.maintenancefrom the root folder of the site. It only remains to check the site’s performance!
Conclusion
I hope that this guide is useful to those who are still worried about the migration of the WordPress site and are looking for answers to questions.
Probably more experienced web developers will want to share their own developments on the topic with colleagues.
Well, comments have been created for this. Therefore, any advice, additions and just an exchange of experience are strongly welcome.
PS An important addition to the comments from nik_vr :
When transferring from localhost to a real server, you should not forget about the site address. Changing a domain with simultaneous transfer according to your instructions will make the site completely inoperative. Therefore, it’s worth adding one more step to the instructions (relevant when changing a domain, including when transferring from a local server to a combat server). For example, we assume that the side is migrated from the mysite.local domain to the mysite.ru domain .
In the saved dump of the WordPress database, look for all occurrences of mysite.local and replace it with mysite.ru. You can do this in any normal text editor (for example, Notepad ++). After the replacement, we carefully save the database, not forgetting the encoding (in the case of more or less modern versions of WordPress, you need UTF-8 encoding without BOM).
After importing the database, you can run the following MySQL command:
UPDATE wp_options SET option_value = 'http://mysite.ru' WHERE option_value = 'http://mysite.local';