How to make friends Surface Pro 3 and Linux
 Probably many who used the laptop at least once thought that despite their portability, this characteristic of laptops leaves much to be desired - you can’t hold it in one hand, do not poke it on the screen, low-resolution fonts near your eyes. All this is typical of most laptops. On the other hand, there are tablets that are partially devoid of these shortcomings, but in return we lose the keyboard, the processor usually does not allow installing third-party OS, and the performance is so-so. The Surface Pro line, it seemed to me, could be a good compromise in this matter.
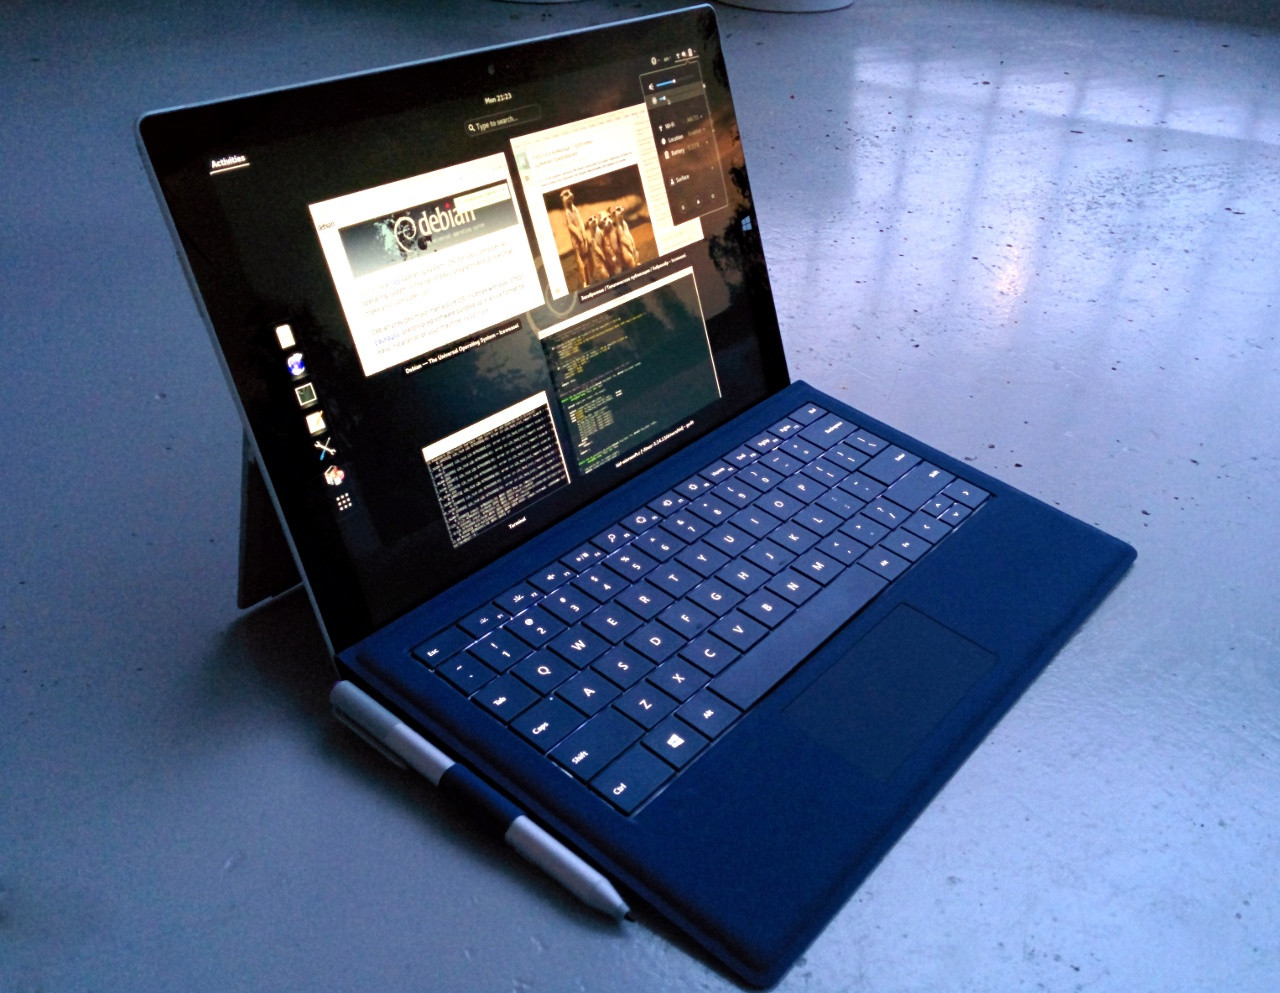
The Surface Pro 3 (SP3) itself is very interesting. It has fixed many of the shortcomings of previous generations, such as battery life, screen size, and resolution. And the Intel Core i3 / i5 / i7 processor almost completely unties your hands, making it possible to install full-fledged GNU / Linux. Without hesitation, I began to look for ways to get it, and soon after the start of sales, he was with me.
In this article, I would like to share the experience of installing Debian on SP3, as well as the difficulties encountered and their overcoming. If you are interested in what came of it from me - I ask for a cat.
Introduction
In addition to SP3 and Type Cover 3 themselves, we temporarily need the following:
- USB hub
- USB keyboard and mouse
- Ethernet / WLAN USB adapter or telephone that can distribute (tethering) Internet via USB. For example, Nexus 5 did a pretty good job of this.
SP3, like its predecessors, ships only with UEFI. Therefore, even today, most Linux installers and other Live CDs may not even try to run if the root of their image does not have an EFI directory.
My choice fell on Debian, which, at the moment, already supports installation in UEFI. Regarding the version, we will need exactly the amd64 release, due to the fact that the device on board has 64-bit UEFI. In order not to waste time downloading a bunch of CD / DVD images, you can use the miniature netinst, which weighs only ~ 250 MB, where everything you need is downloaded during the installation process. In theory, it would be possible to install a stable Debian 7 Wheezy branch, but for myself I decided to choose the Testing option, in the repositories of which more recent versions of packages are available.
Regardless of whether you chose netinst or installation from images, then we still need access to the Internet. Unfortunately, the Debian installer does not recognize the wireless adapter built into SP3, so you should get either an external Ethernet / WLAN USB adapter or a phone that can distribute the Internet via USB.
All is ready? Then let's get started.
Windows preparation
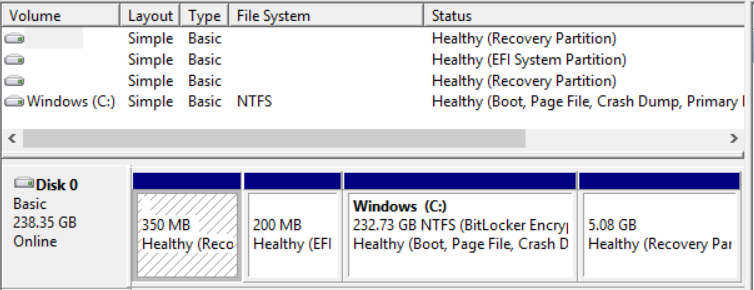
In addition to a couple of the main system partitions and the partition with Windows installed, approximately 5 GB is also allocated to the SSD for Factory Recovery, which can easily turn out to be completely useless if something happens to other system partitions. I highly recommend “copying” it to a USB flash drive in advance. A flash drive of at least 8 GB will be required. In a Windows search, look for Create a recovery drive .


Choose our flash drive and go. When at the end of copying it will be offered to delete Recovery section - agree. Subsequently, from this bootable USB flash drive it will be possible to return the initial breakdown of the SSD, including the installed Windows and the Recovery partition itself.
Since we are not going to delete Windows, we will squeeze it a little. Right-click on the (C :) section, selectShrink Volume .
In the dialog that appears, set the desired size of free space in megabytes.

We also need to turn off Hibernate, otherwise SP3 will constantly go into deep sleep when turned off. To do this, open cmd.exe with administrator rights, and execute:
powercfg.exe /hibernate off
Finally, turn off SP3 and start with the volume “+” button held down. This will allow us to get into the UEFI settings, so that we can disable Secure Boot and give the ability to load OS other than Windows. We leave and agree to save the changes. Turn off SP3 again.
Install Debian
We connect the USB flash drive with Debian and turn on SP3 with the volume “-” button held down this time , which activates booting from the USB drive. We select the graphic or text type of the installer and connect the network adapter or phone to the USB port. For those who have already installed Debian, the process is unremarkable, except for a few points. When it comes to disk partitioning, select the Partitioning method: manual and divide the allocated space between the root “/” partition and the partition under swap . Out of habit, I usually still create a separate / boot partition.

Since GPT partitioning is used for UEFI, GRUB will not be installed in the MBR. Instead, a new file will be added in the EFI section.
EFI/debian/grubx64.efi. We accept the breakdown changes and continue the installation in the usual way. Upon completion, SP3 will reboot itself and we will be back in Windows.GRUB finish
We open the search in Windows, drive recovery and select Recovery options in the search results . In the window that opens, find Advanced startup and select Restart now .

We get into the blue boot menu, where you need to select Use a device first , and then debian .


After that, GRUB will appear to us, which at such a resolution will look disastrous.

In this state, when you try to select Windows, everything will hang. To fix this, we need to lower the menu resolution. We boot into Debian and edit
/etc/default/grubwhere we need to uncomment the line:GRUB_GFXMODE=640x480
At the same time, in order to lower the resolution of the kernel boot console, we add below:
GRUB_GFXPAYLOAD_LINUX=keep
Next, update GRUB:
$ update-grub
The next step is optional and eliminates the need to preload Windows every time. Instead, when you turn on, SP3 will go directly to GRUB. To do this, go to the console and check the boot order. Then we set the corresponding debian number before the Windows Boot Manager number, thus changing 0002 and 0001 places.
$ efibootmgr
...
Boot Order: 0000,0002,0001
Boot0000* USB Drive
Boot0001* debian
Boot0002* Windows Boot Manager
$ efibootmgr --bootorder 0000,0001,0002
Cozy Debian
So, let’s evaluate the situation. So far, they do not work for us:
- Wifi
- Bluetooth
- Type Cover 3 with touchpad
- Pen
- Touchscreen
Well, we will correct it.
WiFi and Bluetooth
Both are responsible for Soc from Marvell. There are two options for getting the necessary drivers. Attention: at the time of writing, an outdated driver package version 0.43 is available in the repository, and Bluetooth does not start with it. Therefore, I advise you to use the second option.
1. From the repository
In the file
Then open the console and execute:
/etc/apt/sources.listwe find the first line with the address of the main repository and add non-free to the main section to get something like the following:deb http://ftp.us.debian.org/debian/ jessie main non-free
Then open the console and execute:
$ apt-get update
$ apt-get install firmware-libertas
2. From the manufacturer’s website
Open the console and execute:
$ git clone git://git.marvell.com/mwifiex-firmware.git
$ mkdir -p /lib/firmware/mrvl/
$ cp mwifiex-firmware/mrvl/* /lib/firmware/mrvl/
If everything went well, everything should come to life after a reboot. Note: for stable WiFi operation, the 3.16 kernel is required, the assembly instructions of which are given below.
Type cover 3
The problem with Type Cover 3 requires rebuilding the kernel. The fact is that the type of device of Type Cover 3 is incorrectly determined and the loadable driver does not fit.
$ dmesg | grep -i “045e”
[    2.080282] usb 1-3: New USB device found, idVendor=045e, idProduct=07dc
[    2.400862] usb 1-7: New USB device found, idVendor=045e, idProduct=07be
[    2.697423] usb 1-8: New USB device found, idVendor=045e, idProduct=07bf
[    6.827574] input: Microsoft Surface Type Cover as /devices/pci0000:00/0000:00:14.0/usb1/1-3/1-3:1.0/0003:045E:07DC.0003/input/input14
[    6.827969] hid-multitouch 0003:045E:07DC.0003: input,hiddev0,hidraw3: USB HID v1.11 Keyboard [Microsoft Surface Type Cover] on usb-0000:00:14.0-3/input0
The parameter idVendor = 045e corresponds to Microsoft. It is followed by idProduct , and we are interested in the one that is 07dc . As you can see, the hid-multitouch driver is loading. Although the touchpad on the keyboard is indeed capable of multi-touch gestures, at the moment such a driver leads to the inoperability of the entire keyboard. Since it is difficult to influence the situation in an already running system, you will have to patch the kernel.
We need a kernel version no lower than 3.13, which, by the way, has already added touchscreen and pen support. But I strongly advise taking the 3.16 kernel so that WiFi does not fall off every 10 minutes. At the moment, 3.16 is only available from the experimental repository, which can move to testing at any time. Check if 3.16 is already available in testing, otherwise take it from experimental.
The kernel assembly will eat 10 GB, so I recommend sparing the SSD and using the virtual machine on the desktop. At the end, you will need to copy the received two .deb packages from the virtual machine and install them on SP3.
Core from testing
Before the whole procedure, we upgrade the system and then restart.
After that, download the sources of the current kernel and go to the source directory.
$ apt-get update
$ apt-get upgrade
After that, download the sources of the current kernel and go to the source directory.
$ apt-get source linux
$ cd linux-`uname -r`
Core from experimental
We include the experimental repository by adding this line to the end of the
We update information on packages, install the kernel and its sources. Then reboot into the new kernel.
Unpack the sources and go to the directory with them:
/etc/apt/sources.listfile:deb http://ftp.de.debian.org/debian experimental main
We update information on packages, install the kernel and its sources. Then reboot into the new kernel.
$ apt-get update
$ apt-get -t experimental install linux-headers-3.16-trunk-amd64 linux-image-3.16-trunk-amd64 linux-source-3.16
Unpack the sources and go to the directory with them:
$ tar -xf /usr/src/linux-source-3.16.tar.xz
$ cd linux-source-3.16
Now install everything you need to build the kernel.
$ apt-get install kernel-package libncurses5-dev fakeroot wget bzip2 build-essential
Create a file typecover3.patch with the following contents:
Patch
--- a/drivers/hid/hid-ids.h	2014-01-19 21:40:07.000000000 -0500
+++ b/drivers/hid/hid-ids.h	2014-04-20 23:29:35.000000000 -0400
@@ -631,6 +631,7 @@
 #define USB_DEVICE_ID_MS_NE4K		0x00db
 #define USB_DEVICE_ID_MS_NE4K_JP	0x00dc
 #define USB_DEVICE_ID_MS_LK6K		0x00f9
+#define USB_DEVICE_ID_MS_TYPE_COVER_3	0x07dc
 #define USB_DEVICE_ID_MS_PRESENTER_8K_BT	0x0701
 #define USB_DEVICE_ID_MS_PRESENTER_8K_USB	0x0713
 #define USB_DEVICE_ID_MS_DIGITAL_MEDIA_3K	0x0730
--- a/drivers/hid/hid-core.c	2014-01-19 21:40:07.000000000 -0500
+++ b/drivers/hid/hid-core.c	2014-04-21 03:13:54.000000000 -0400
@@ -702,6 +702,11 @@ static void hid_scan_collection(struct h
 	if (((parser->global.usage_page << 16) == HID_UP_SENSOR) &&
 	    type == HID_COLLECTION_PHYSICAL)
 		hid->group = HID_GROUP_SENSOR_HUB;
+
+	if (hid->vendor == USB_VENDOR_ID_MICROSOFT &&
+	    hid->product == USB_DEVICE_ID_MS_TYPE_COVER_3 &&
+	    hid->group == HID_GROUP_MULTITOUCH)
+		hid->group = HID_GROUP_GENERIC;
 }
 static int hid_scan_main(struct hid_parser *parser, struct hid_item *item)
--- a/drivers/hid/usbhid/hid-quirks.c	2014-01-19 21:40:07.000000000 -0500
+++ b/drivers/hid/usbhid/hid-quirks.c	2014-04-20 23:29:35.000000000 -0400
@@ -73,6 +73,7 @@ static const struct hid_blacklist {
 	{ USB_VENDOR_ID_FORMOSA, USB_DEVICE_ID_FORMOSA_IR_RECEIVER, HID_QUIRK_NO_INIT_REPORTS },
 	{ USB_VENDOR_ID_FREESCALE, USB_DEVICE_ID_FREESCALE_MX28, HID_QUIRK_NOGET },
 	{ USB_VENDOR_ID_MGE, USB_DEVICE_ID_MGE_UPS, HID_QUIRK_NOGET },
+	{ USB_VENDOR_ID_MICROSOFT, USB_DEVICE_ID_MS_TYPE_COVER_3, HID_QUIRK_NO_INIT_REPORTS },
 	{ USB_VENDOR_ID_MSI, USB_DEVICE_ID_MSI_GX680R_LED_PANEL, HID_QUIRK_NO_INIT_REPORTS },
 	{ USB_VENDOR_ID_NOVATEK, USB_DEVICE_ID_NOVATEK_MOUSE, HID_QUIRK_NO_INIT_REPORTS },
 	{ USB_VENDOR_ID_PIXART, USB_DEVICE_ID_PIXART_OPTICAL_TOUCH_SCREEN, HID_QUIRK_NO_INIT_REPORTS },
And do:
$ patch -p1 --ignore-whitespace -i typecover3.patch
Now configure the kernel. We take the configuration of the running kernel as the basis.
$ cp /boot/config-`uname -r` .config
$ make menuconfig
We load the configuration through the menu item Load an Alternate Configuration File or simply <Load> and agree to the proposed .config .

Next, click <Exit> and save the configuration. We proceed to the most important thing, to the assembly. For reference, the process on SP3 itself took me about an hour.
$ make-kpkg clean
$ fakeroot make-kpkg --initrd --append-to-version=-typecover3 kernel_image kernel_headers
Here the value of the “-typecover3” parameter can be replaced with any other, it does not carry much load. Using it, for example, you can later determine which kernel the system booted from.
So, install both .deb packages
$ cd ..
$ dpkg -i linux-image*.deb linux-headers*.deb
And finally, the final touch. To get the touchpad, create a file
/etc/X11/xorg.conf with the following contents:Section "InputClass"
Identifier "Surface Pro 3 cover"
MatchIsPointer "on"
MatchDevicePath "/dev/input/event*"
Driver "evdev"
Option "vendor" "045e"
Option "product" "07dc"
Option "IgnoreAbsoluteAxes" "True"
EndSection
We reboot for the last time and enjoy the working system.
Afterword
If you compare with Windows, the power consumption in Linux is slightly higher, the battery lasts about 6-7 hours, while in Windows it lasts for 8-9 hours. So the result is very good.
Despite the fact that the system is installed and working as it should, there are still some problems. More specifically, the volume buttons, the buttons on the pen and the position sensor in space do not work.
useful links
https://bugzilla.kernel.org/show_bug.cgi?id=64811
http://ubuntuforums.org/showthread.php?t=2183946
http://ubuntuforums.org/showthread.php?t=2231207
https: / /github.com/rubiojr/surface3-kernel
https://github.com/rubiojr/surface3-ubuntu-trusty