Second HDD instead of DVD drive to laptop
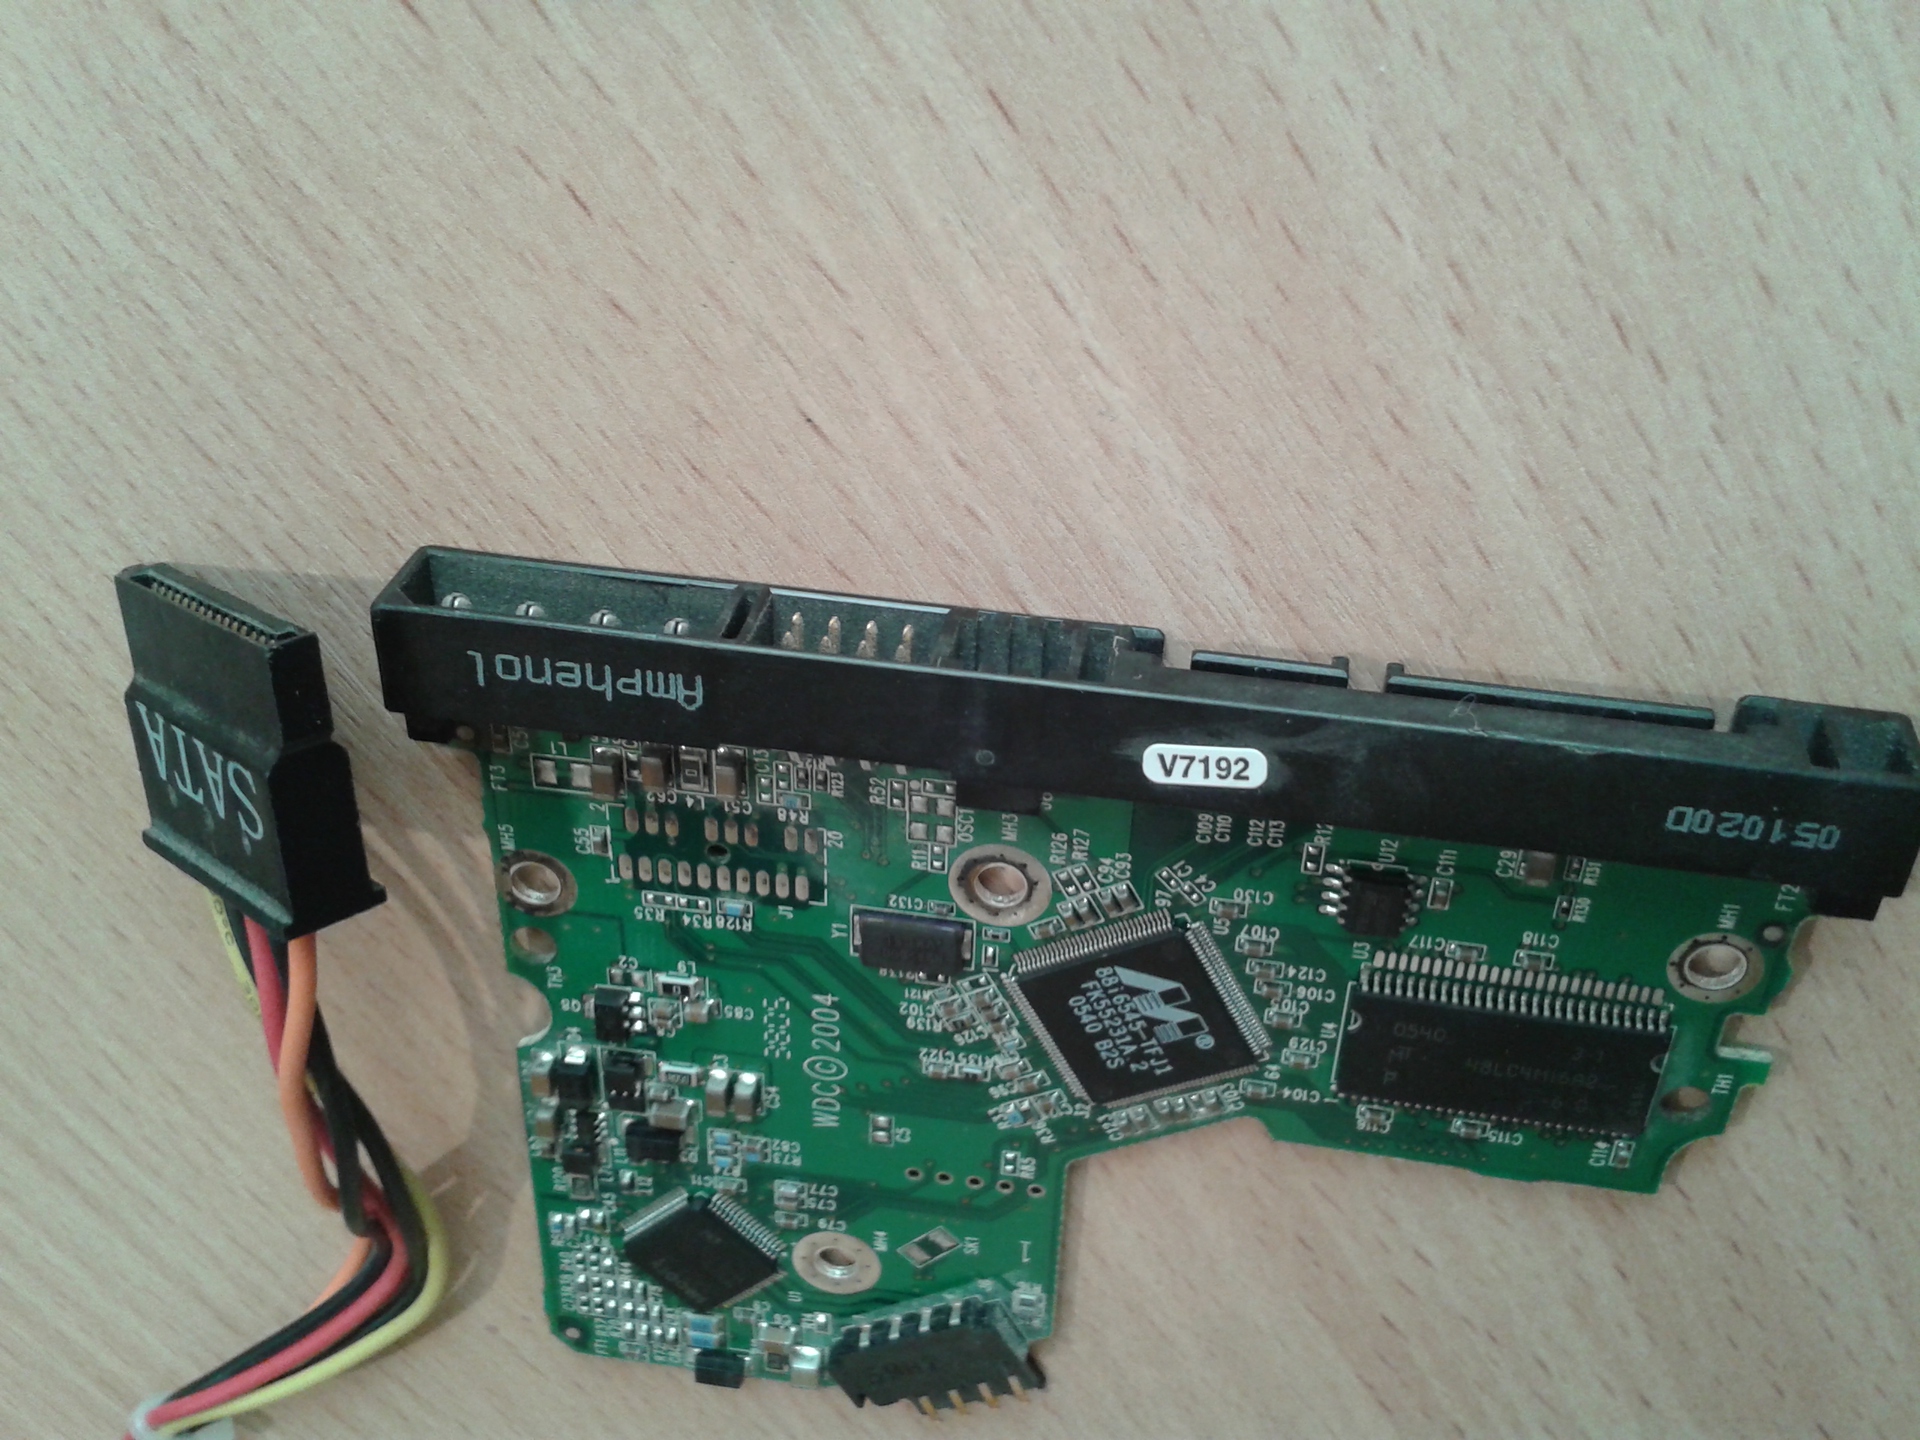
After installing ssd in my laptop instead of hdd, I began to experience a catastrophic lack of space on the first. Buying a sata-usb adapter made it possible to expand your library to the old hdd. A couple of months passed, and this option ceased to suit me, namely, I was tired of carrying this “appendix” with me, and the speed left much to be desired. After some time, I came across a series of articles about reinstalling the second disk using the ESPADA adapter. This miracle device with a second disk was inserted instead of the native DVD drive and enthralled users. A search in electronics stores led me to realize that this device was an unacceptable luxury for me. The price is from 800 rubles from us, from $ 6 in China. Further, I found articles on the Habr’s on self-remaking a DVD drive for reinstalling a second disk,
Just in my apartment was being renovated and it was full of tools to "fit" some of the details for my idea.
Using a grinder (angle grinder), the sata connector was modified to Slimline SATA.
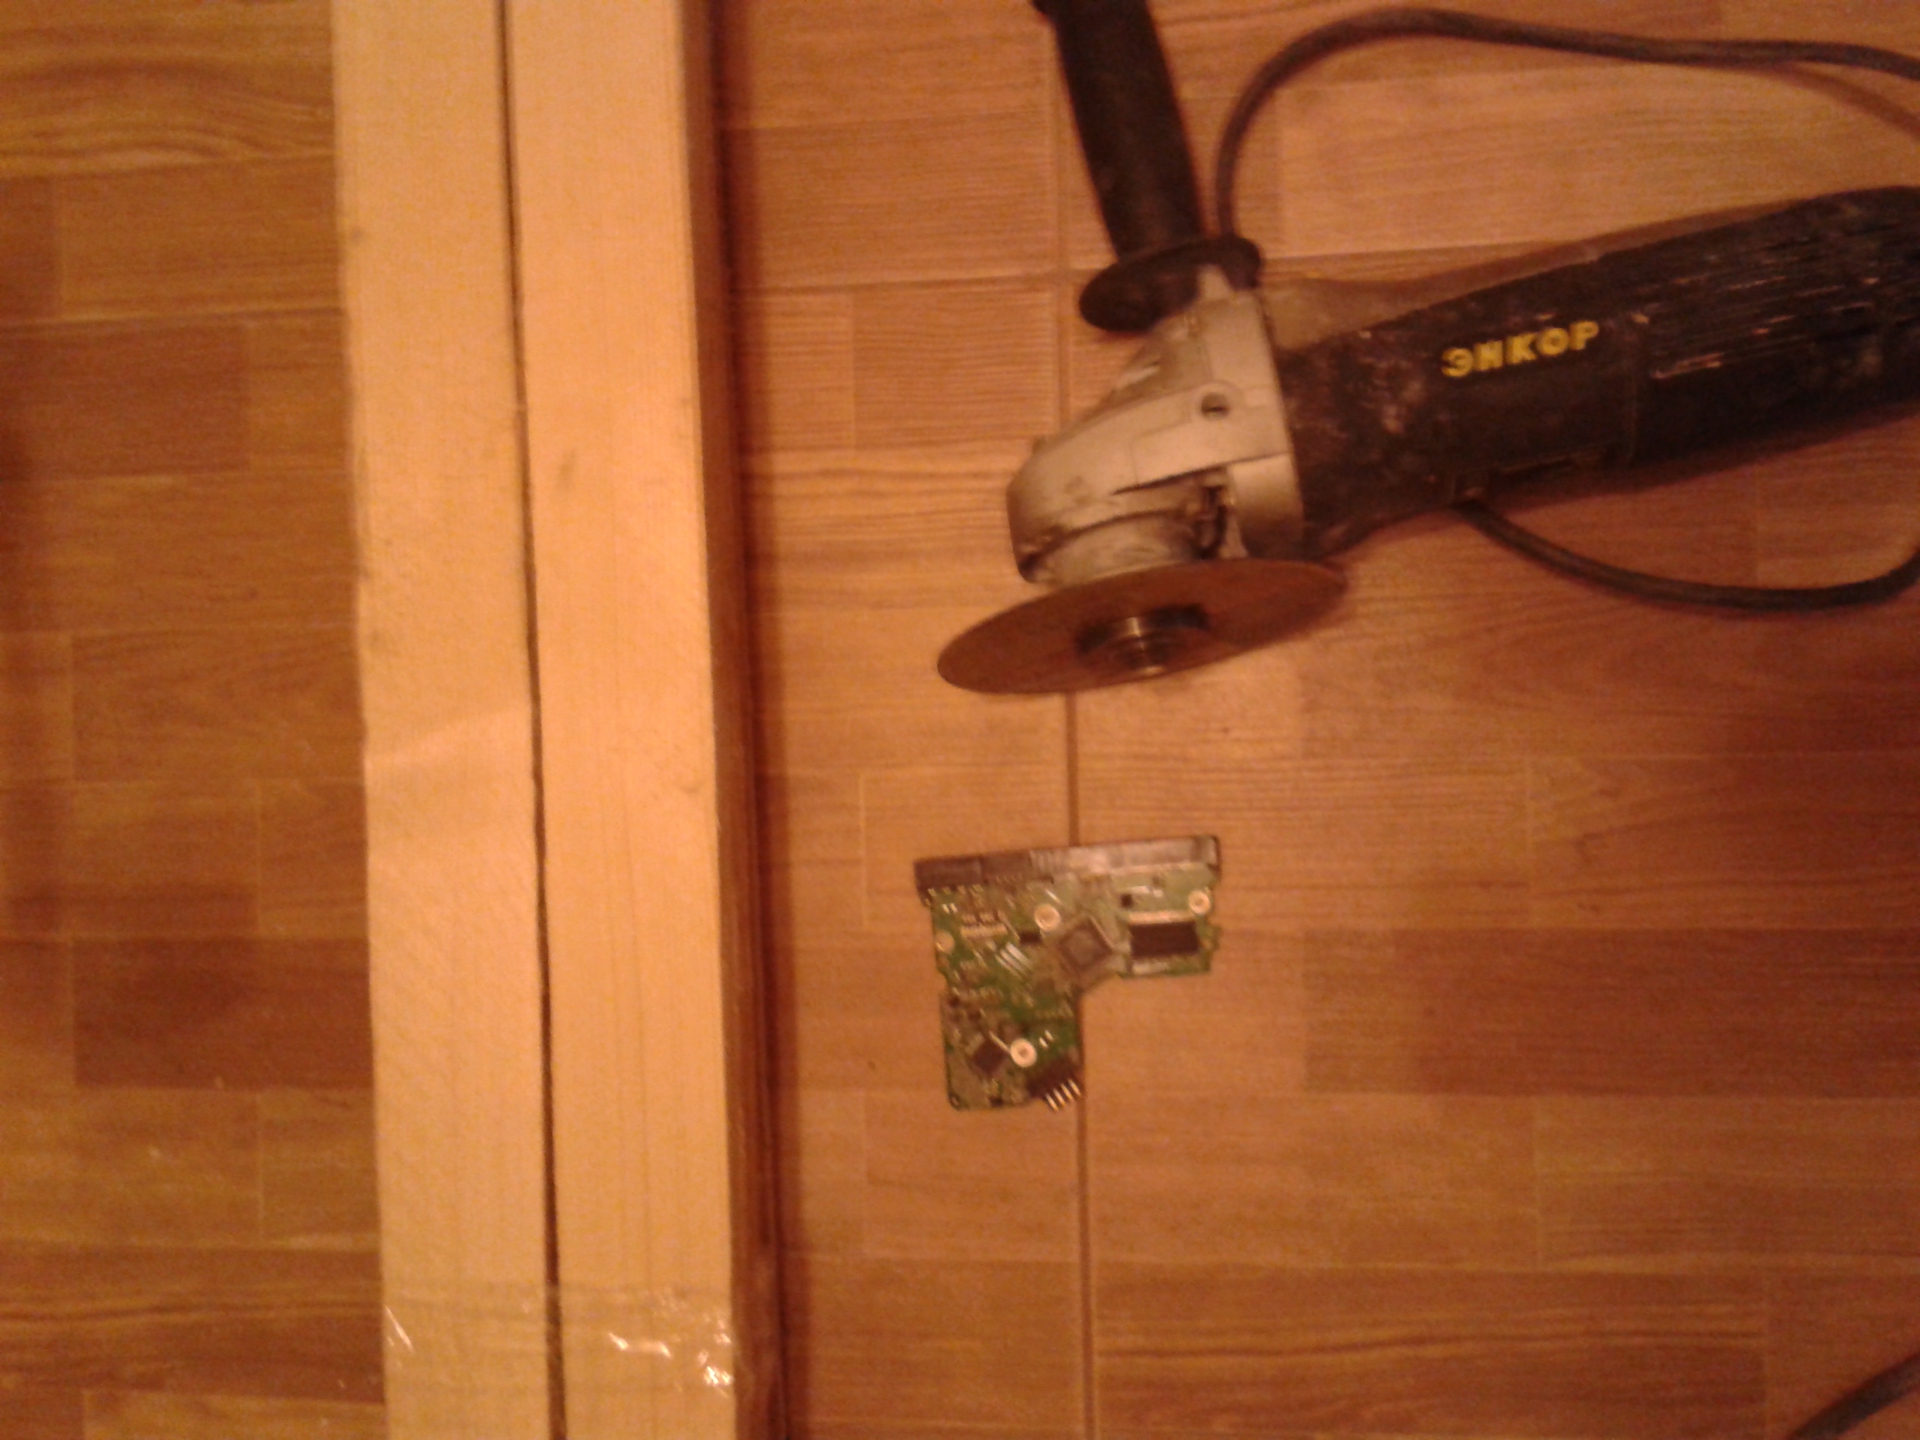
On the supply side, 5 contact pads were left and other areas that were unnecessary to us were cut.

Having removed unnecessary contact pads, in total I got the connector I needed just like in a DVD drive.

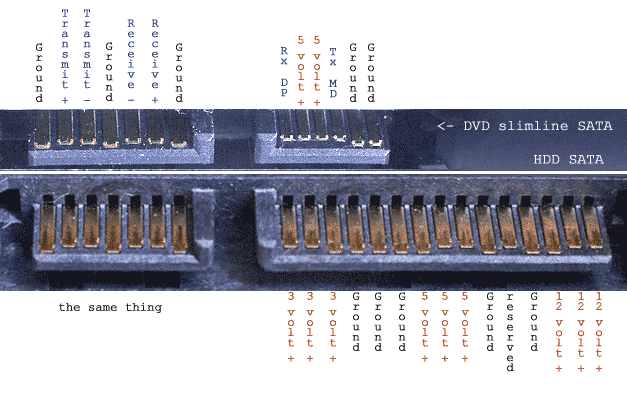
A pinout diagram of the contacts was found in advance on the Internet.
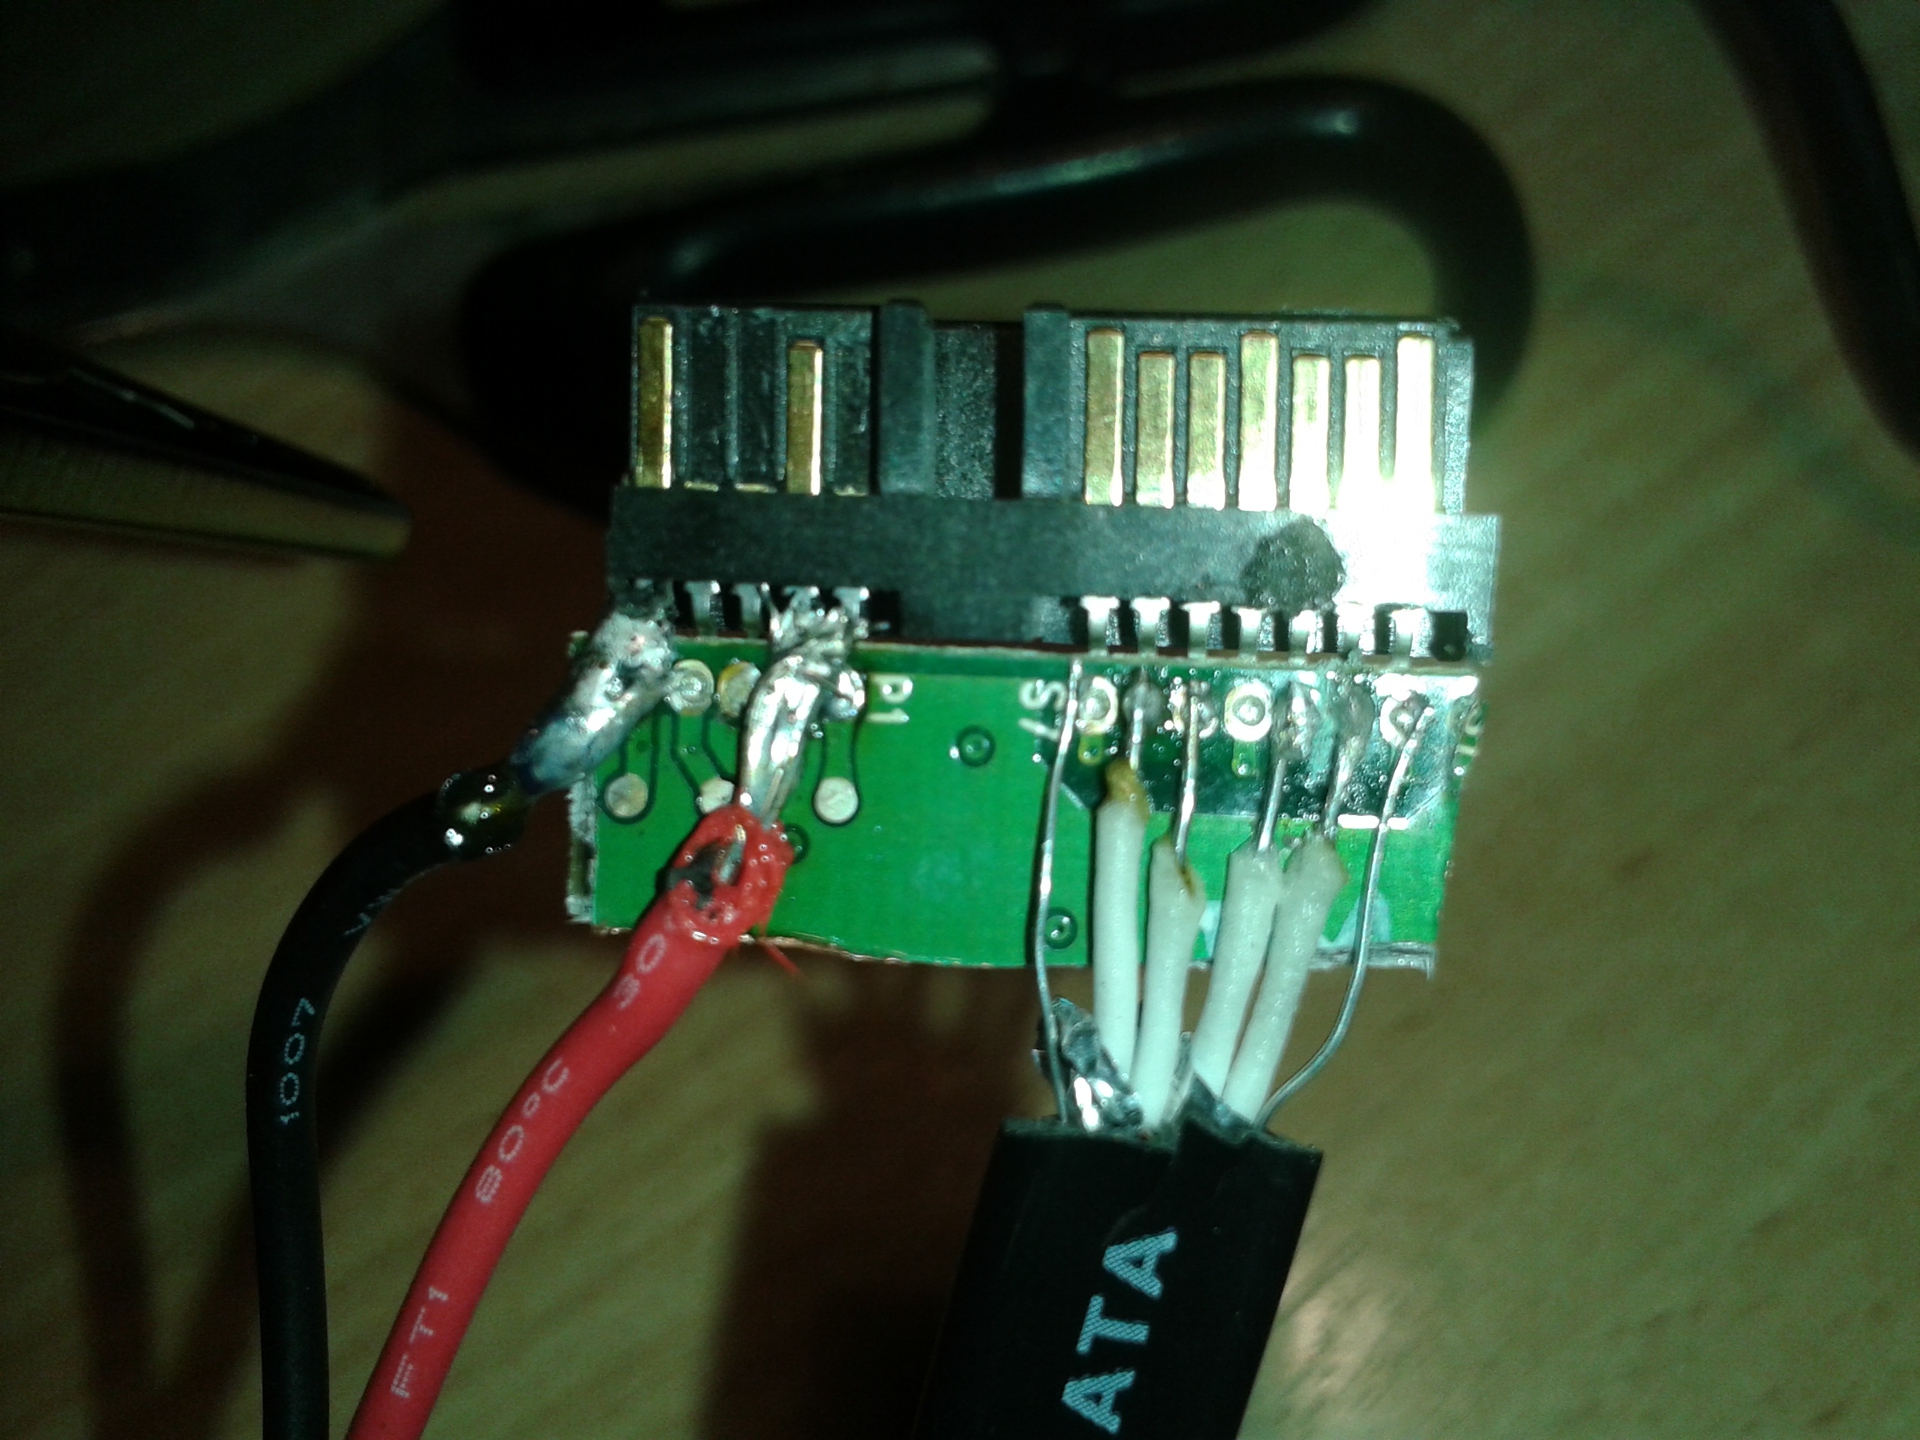
Armed with a soldering iron and a margin of patience, I soldered the whole thing into the SATA (ODA) -> SATA (HDD) adapter.
 Filling everything with ordinary shoe glue (well, I don’t have hot glue) and wrapping it with electrical tape, I got a completely aesthetic-looking wiring. After waiting for the glue to dry, he began to try to collect the whole thing. I glued the HDD with double-sided tape, thereby creating a “pillow”.

All connected and tightly inserted into the inside.

Crossing my fingers I turn on the laptop and immediately run into the BIOS.

Hooray! WDC decided.
I load the system and everything is fine.

There is no limit to joy and pride! It turns out how easy it is to connect a second disk to a laptop with a minimum of costs.
Just in my apartment was being renovated and it was full of tools to "fit" some of the details for my idea.
Using a grinder (angle grinder), the sata connector was modified to Slimline SATA.
On the supply side, 5 contact pads were left and other areas that were unnecessary to us were cut.
Having removed unnecessary contact pads, in total I got the connector I needed just like in a DVD drive.
A pinout diagram of the contacts was found in advance on the Internet.
Armed with a soldering iron and a margin of patience, I soldered the whole thing into the SATA (ODA) -> SATA (HDD) adapter.
Filling everything with ordinary shoe glue (well, I don’t have hot glue) and wrapping it with electrical tape, I got a completely aesthetic-looking wiring. After waiting for the glue to dry, he began to try to collect the whole thing. I glued the HDD with double-sided tape, thereby creating a “pillow”. All connected and tightly inserted into the inside.
Crossing my fingers I turn on the laptop and immediately run into the BIOS.
Hooray! WDC decided.
I load the system and everything is fine.
There is no limit to joy and pride! It turns out how easy it is to connect a second disk to a laptop with a minimum of costs.