Creating offline maps for iOS applications
- From the sandbox
- Tutorial

Good time, dear Khabrovchians!
In this article I will talk about how to implement offline maps.
Disclaimer. The article is not a PR of anything. This implementation option was chosen by me as the most optimal and I would like to tell about it in an accessible form.
Thanks!
Background
When developing a guide application for Hong Kong, there was a need to use offline maps. Google maps, unfortunately, do not provide such an opportunity, so, due to hopelessness, I had to use a service such as MapBox, or rather an extension for iOS - MapBox-ios-sdk.
Interested, I ask for cat.
Installing the necessary software
We will need:
- Postgres.app
- OSM-Bright
- osm2pgsql
- TileMill.app
Download and configure Postgres.app
Download the application from off. site , unpack, move to the application folder.
Next, run it.
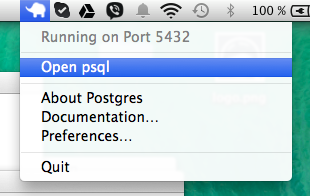
The application welcomes us with such a window.
Click "Open psql":

Or open the status bar through the status bar:
After these steps, a console with PostgreSQL running will open. Next, we need to create a base for storing tiles.
In the console, enter the following:
create database osm:
\connect osm
create extension postgis;
\quit
Download OSM Bright
Download the OSM Bright package from this link.
Unzip and open the folder, rename the configure.py.sample file to configure.py, open this file in a text editor and change the fields (if necessary).
Nevertheless, I advise you to do this so that in the future there is no confusion with projects.
So, changing the name, I indicated HongKong.
Left the default directory. This directory is used by the TileMill application, it is better not to change it, so as not to bother with TileMill later.
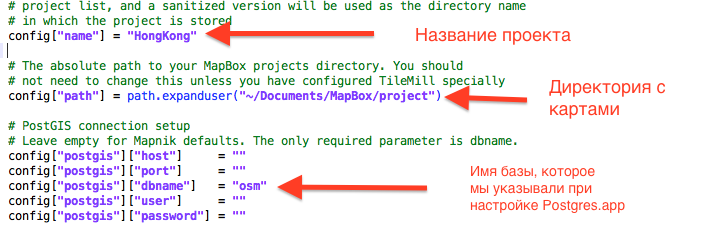
Username and password, as well as all other fields, are left blank.
Next we need to download the style files for our map.
They are here:
- tilemill-data.s3.amazonaws.com/osm/coastline-good.zip
- tilemill-data.s3.amazonaws.com/osm/shoreline_300.zip
- mapbox-geodata.s3.amazonaws.com/natural-earth-1.3.0/physical/10m-land.zip
After loading, mix them into the OSM Bright folder.
No need to decompress files OSM Bright will do it by itself.
Download and install osm2pgsql
Download the link , emulate the image and install osm2pgsql.
Download TileMill.app
We go to the site and download it , with the subsequent transfer of the application to the application directory.
Map loading
Before creating an offline map, we must determine its size. The card should not be too large, because the weight of the application will be more than 1-2 GB, which, as it seems to me, is not permissible.
Users who use the iPhone 16gb will be very disappointed.
Go to any of the following services.
I downloaded the map from metro.teczno.com.
We find our city and download the file with the extension .osm.pbf:

Conversion
osm2pgsql
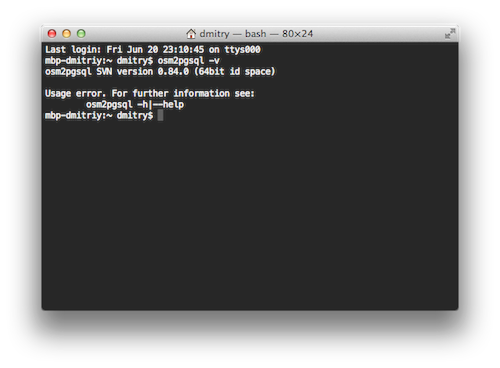
Open the "Terminal" and write.
osm2pgsql -cGs -d osm -S /usr/local/share/osm2pgsql/default.style ~/Downloads/.osm.pbf You can see the description of the parameters on the OpenStreetMap wiki wiki.openstreetmap.org/wiki/Osm2pgsql , or write the command in the terminal
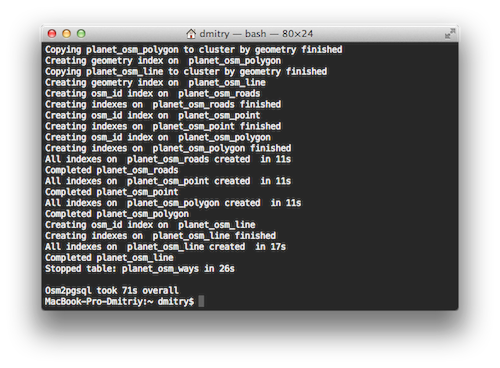
osm2pgsql --helpWe wait while the osm2pgsql package processes the card and transfers it to the Postgres database.
Usually it is 5-20 minutes, depending on the file size.
At the end you will see an inscription like this “Osm2pgsql took 71s overall”.
OSM Bright
Now we have to create a project for the TileMill application.
Go to the folder with OSM Bright.
cd ~/Downloads/mapbox-osm-brightAnd run the script.
./make.pyCreating offline maps
Open the TileMill.app application.
Attention! Possible bug. It consists in the fact that if the Postgres application is open during the start of TileMill, the TileMill application does not open and is constantly in a loading state. (It is treated by rebooting the computer).
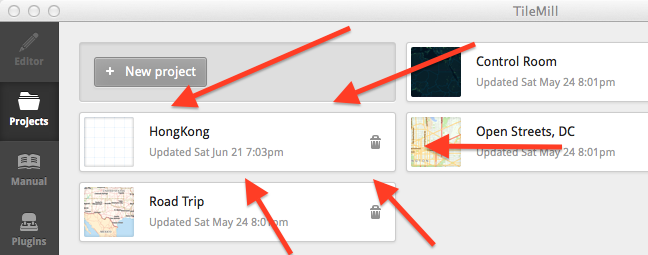
If everything was done correctly, the project will be displayed in the TileMill application.
We start Postgres, if it is closed, and open the project.
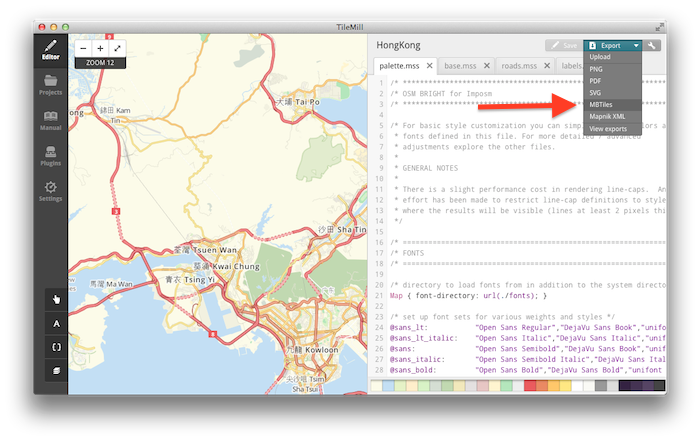
Click on “Export” and select the MBTiles format.
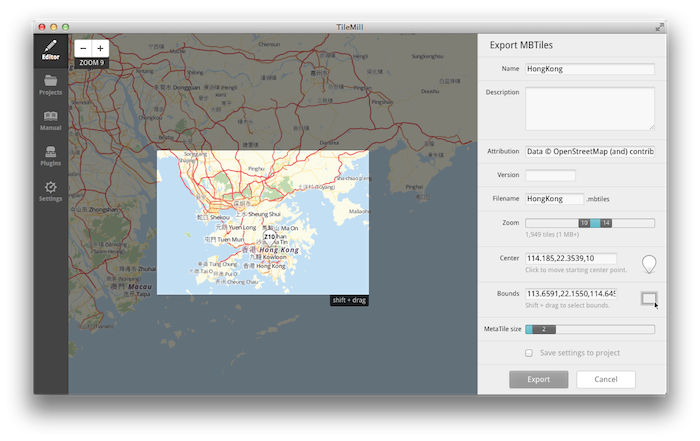
Set Zoom, for example, I set 10-14 and immediately mark the center point for minimum zoom.
If you do something wrong, the application will inform you about it.
Select, select the desired area.
And click "Export."
Converting and compressing a map can take a fairly large amount of time, from 10 minutes to a month, a year.
It all depends on the power of your Mac and the area of the card that you are compressing. The recommended zoom for the card in a real project, 11-16, compression on my MacBook Pro 13, mid 2012 takes 30-40 minutes.
After processing, the program will offer to save the file.

Save!
Map integration in the application
We connect MapBox-ios-sdk using Cocoa-Pods, if that, the SDK is here . I recommend using the “develop” branch, because the updated
version of SMCalloutView 2.0, which contains the iOS 7 style, is already connected to this version .
Podfile
platform: ios, '7.0'
pod 'Mapbox',: git => 'https://github.com/mapbox/mapbox-ios-sdk.git',: branch => 'develop'
pod 'Mapbox',: git => 'https://github.com/mapbox/mapbox-ios-sdk.git',: branch => 'develop'
Transfer the map created in TileMill to the project resources.
And add the map to the main view.
ViewController.m
@implementation ViewController
- (void)viewDidLoad
{
    [super viewDidLoad];
    RMMBTilesSource *offlineSource = [[RMMBTilesSource alloc] initWithTileSetResource:@"HongKong" ofType:@"mbtiles"];
    RMMapView *mapView = [[RMMapView alloc] initWithFrame:[self view].bounds andTilesource:offlineSource];
    [mapView setZoom:11];
    [mapView setMinZoom:11];
    [mapView setMaxZoom:14];
    [mapView setCenterCoordinate:CLLocationCoordinate2DMake(22.327330,114.123419)];
    //Прячем лого MapBox и кнопку информации о карте. =)
    [mapView setShowLogoBug:NO];
    [mapView setHideAttribution:YES];
    [mapView setAutoresizingMask:(UIViewAutoresizingFlexibleHeight | UIViewAutoresizingFlexibleWidth)];
    //Поддержка Retina Display
    [mapView setAdjustTilesForRetinaDisplay:YES];
    [self.view addSubview:mapView];
}
@end
Project with an example - github.com/Ne0nX/OfflineMaps-Example
Resources that I used in the process
www.mapbox.com/tilemill/docs/guides/osm-bright-mac-quickstart
github.com/mapbox/mapbox-ios-example
Thank you for reading the article to the end.
Good luck to you!