Mikrotik and GNS3
Good day, Habr!
Everyone has already seen, and successfully use an emulator like GNS3, which presents great opportunities for beginners who want to deal with this or that equipment, but do not have physical access to it. Or try to implement some kind of combat scheme, debug, check, and then send it to production.

Recently, interesting articles on working with Mikrotik equipment have appeared on Habré. Not everything can be tried on real hardware, so I had a question - is it possible to emulate it as well. As it turned out, Mikrotik himself is not far behind in this matter, and invites us to try ...
To simulate the network we are offered - GNS3.
To simulate hardware - Qemu.
And the image of RouterOS for x86 systems - RouterOS
1. First we need to prepare a virtual hard disk image, in which we will install RouterOS later. To do this, use the qemu-img utility.
It will be enough for us to create a simple image in qcow2 format of 1G in size.
Qcow2 is the format of the disk image of the QEMU program. The name is an abbreviation for the name of the Copy-On-Write format.
To do this, run the command
* An image is created in the current folder. For convenience, after installing the OS, you need to transfer it to the folder with the GNS3 project, or to any other place convenient for you
2. Next, you need to install RouterOS itself on our virtual hard disk image.
To do this, use the qemu utility.
There are many options for the utility, we need:
-boot [a | c | d | n]
Boot on floppy (a), hard disk (c), CD-ROM (d), or Etherboot (n). Hard disk boot is the default.
-cdrom file
Use file as CD-ROM image (you cannot use -hdc and and -cdrom at the same time). You can use the host CD-ROM by using / dev / cdrom as filename.
The qemu interface will start, and if everything is successful, we will see a prompt to select the necessary components. Press “i”for installation.
3. Now we need to add our new device to GNS3 itself.
Go to Edit → Symbol Manager.
Add the router icon, add the name Mikrotik (Name) to it, and select the Quemu guest type. Do not forget to click Apply to save the changes.

4. We also need to connect our hard disk image.
Go to Edit → Preferences → Qemu
Choose a name, path to the image, memory size, number and type of network interface.
Click Save.

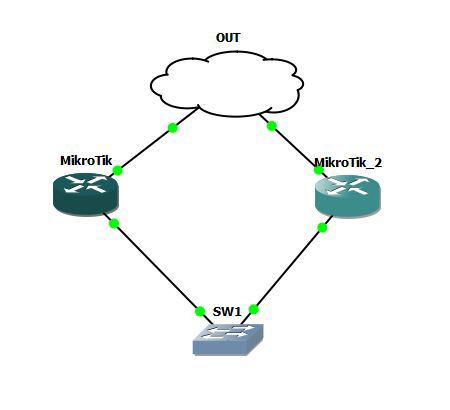
That's all. Our "stand" is ready for battle.
Have a nice study!
Everyone has already seen, and successfully use an emulator like GNS3, which presents great opportunities for beginners who want to deal with this or that equipment, but do not have physical access to it. Or try to implement some kind of combat scheme, debug, check, and then send it to production.
Recently, interesting articles on working with Mikrotik equipment have appeared on Habré. Not everything can be tried on real hardware, so I had a question - is it possible to emulate it as well. As it turned out, Mikrotik himself is not far behind in this matter, and invites us to try ...
I want too
To simulate the network we are offered - GNS3.
To simulate hardware - Qemu.
And the image of RouterOS for x86 systems - RouterOS
1. First we need to prepare a virtual hard disk image, in which we will install RouterOS later. To do this, use the qemu-img utility.
qemu-img create [-f format] filename [size]It will be enough for us to create a simple image in qcow2 format of 1G in size.
Qcow2 is the format of the disk image of the QEMU program. The name is an abbreviation for the name of the Copy-On-Write format.
To do this, run the command
qemu-img.exe create -f qcow2 mikrotik.img 1G* An image is created in the current folder. For convenience, after installing the OS, you need to transfer it to the folder with the GNS3 project, or to any other place convenient for you
2. Next, you need to install RouterOS itself on our virtual hard disk image.
To do this, use the qemu utility.
qemu [option][disk_image]There are many options for the utility, we need:
-boot [a | c | d | n]
Boot on floppy (a), hard disk (c), CD-ROM (d), or Etherboot (n). Hard disk boot is the default.
-cdrom file
Use file as CD-ROM image (you cannot use -hdc and and -cdrom at the same time). You can use the host CD-ROM by using / dev / cdrom as filename.
qemu.exe mikrotik.img -boot d -cdrom <путь_к_образу>/mikrotik.isoThe qemu interface will start, and if everything is successful, we will see a prompt to select the necessary components. Press “i”for installation.
3. Now we need to add our new device to GNS3 itself.
Go to Edit → Symbol Manager.
Add the router icon, add the name Mikrotik (Name) to it, and select the Quemu guest type. Do not forget to click Apply to save the changes.
4. We also need to connect our hard disk image.
Go to Edit → Preferences → Qemu
Choose a name, path to the image, memory size, number and type of network interface.
Click Save.
That's all. Our "stand" is ready for battle.
Have a nice study!