A fistful of relays, or a computer on electromagnetic relays. Part 1 - ALU
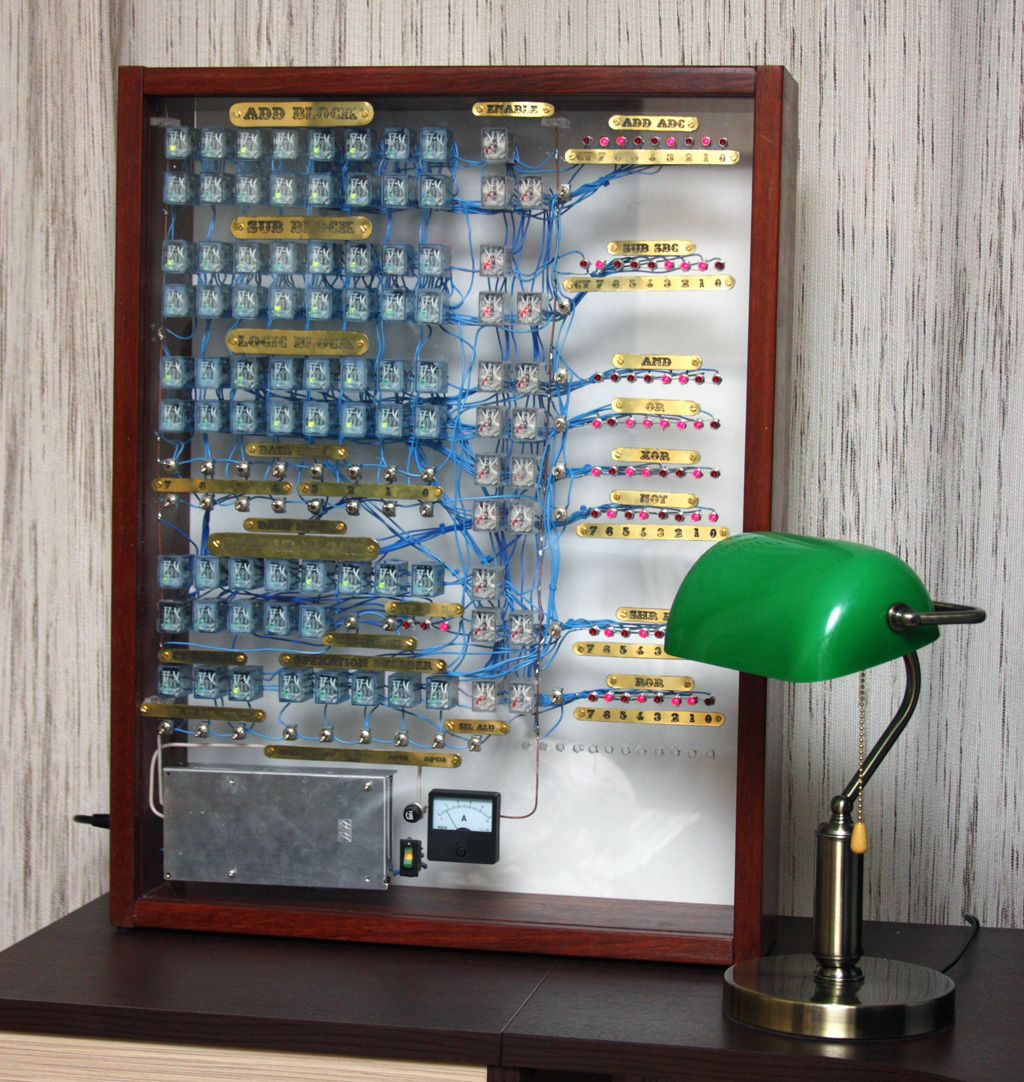
I will tell you about how you can create a computer (more precisely, so far only part of it) on electromagnetic relays with your own hands.
It all started with the fact that I read about the computer on electromagnetic relays, created by Harry Porter - an enthusiast from the University of Portland. Here is his photo next to this computer:
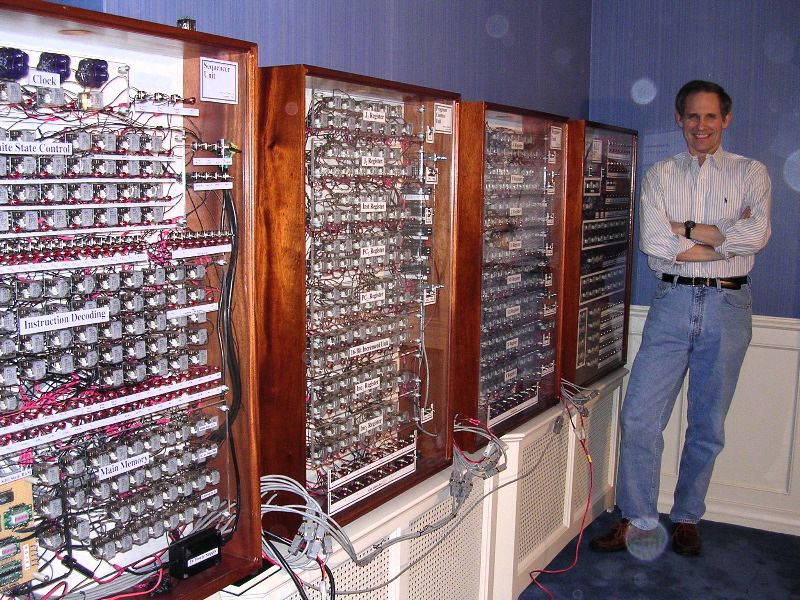
Since I am interested in old computers (part of my collection can be seen in this album ), I also wanted to create something like that. I began to look for other projects and found many
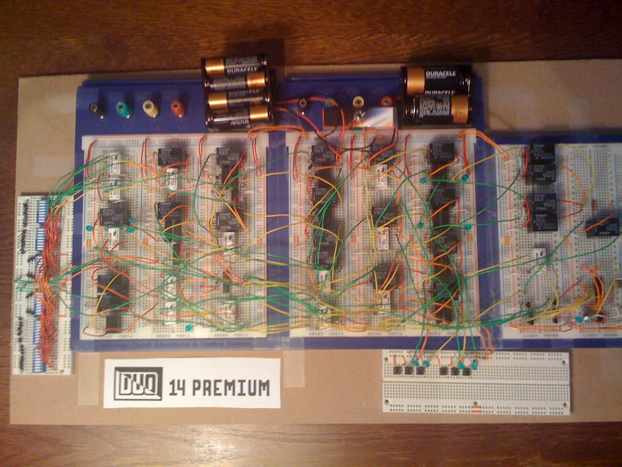
Some of them more or less repeated the project of Harry, some only demonstrated that the creation of such a computer is possible. For example, DUO 14 Premium , shown in the image below, can run a program containing up to 8 simple commands.
So, I planned to create a computer similar to HPRC . I wanted it to be possible to count at least something real, and also to make all its elements visual - to track the work of ALU, registers, instruction counter, etc.
I decided to start manufacturing with ALU. To determine the requirements for it, in general terms I developed a set of instructions, and also figured out what buses and signals would be needed. ALU has a parallel design (all bits are calculated at the same time) and is intended for 8-bit calculations.
I immediately decided that I needed to do a subtraction module. In many other computers, this module is not implemented, since its work can be performed using negation and addition. Thus, ALU will perform the following operations: addition, subtraction (with and without hyphenation), logical AND, OR, NOT, EXCLUSIVE OR, as well as shifts to the right (with hyphenation or in a circle). I took circuits for addition and logical operations from HPRC.
Another rare feature is that the result of the calculations is latched into the shadow register. It is needed so that the same general-purpose register can be used as an input and as an output.
Since ALU so far should work without other components of the computer, therefore, to debug it, toggle switches connected to the relay coils supply them with power. The calculation results can be observed using the LEDs connected to the outputs of the circuits. Regardless of the latched result, the computing units work continuously, therefore, with the help of indicators, you can simultaneously observe the results of all operations.
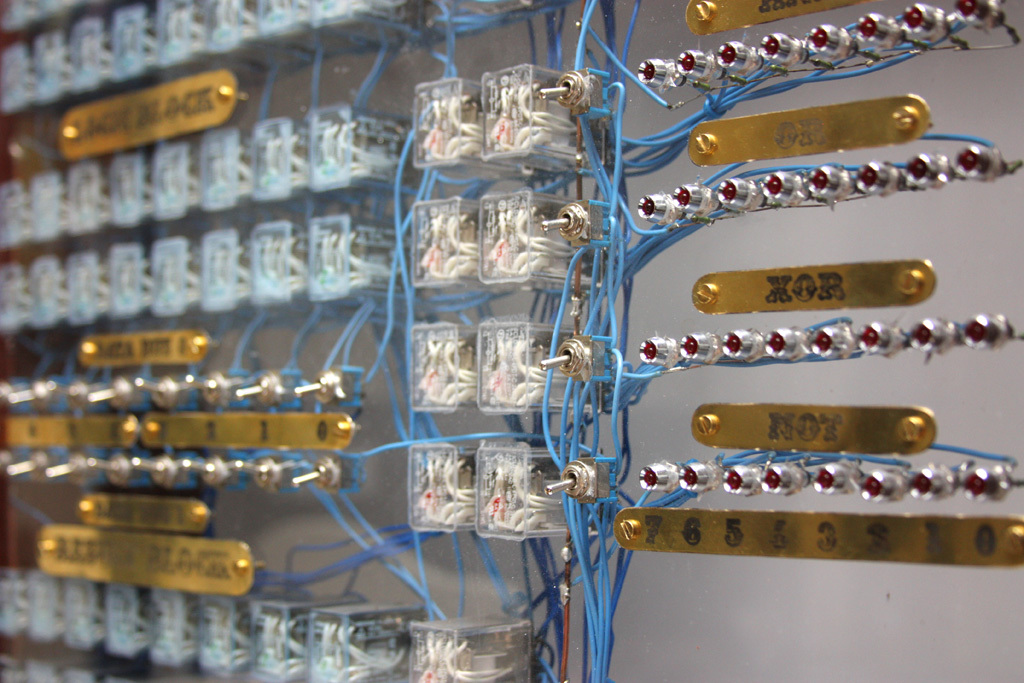
A power supply voltage of 24 V was chosen, rather than 12 V, as in most other modern computers using electromagnetic relays, to make the wires thinner. Subsequently, it turned out that this solution also has a drawback - there are no LEDs with a built-in resistor designed for 24 V, so I had to buy and solder the resistors separately.
Since one of the main properties of a computer should be visual, I chose a relay with transparent cases and built-in LEDs. In addition to the fact that they look beautiful, this eliminates the need for extra LEDs to indicate input signals.
After starting the assembly of the computer, while reading one of the blogs, I realized that I did not have enough protective diodes to prevent the appearance of arc discharges and knocking out indicators when the relays open. So I bought 100 pieces of 1N4448 diodes and soldered them parallel to each of the coils.
Since the computer should be visual, why should it not be beautiful? Harry used mahogany for the hull. I found merbau wood from suitable materials in the form of planed boards of the same thickness.
All components are mounted on a 6 mm Plexiglas sheet. The relays are glued, and everything else is either installed in specially drilled holes, or screwed on. Inscription plates are carved in brass. The most difficult thing was to find brass bolts of the right size for fixing the plates. In Russia, it was impossible to order anywhere, but then almost by accident I found them in a hobby store in Helsinki.
I started by buying a power supply, three dozen relays, wires, as well as switches to control the inputs and internal signals of the created ALU. Relays contain 4 on / off switches. In some cases, all 4 switches are not used, but it is practically impossible to save money by using a relay with fewer contacts.

These relays cost me about 200 rubles, so I began to look for cheaper options, since the entire ALU module, according to preliminary estimates, required about 100 pieces. I managed to order one batch of 100 pieces at the wholesale price a little more than 100 rubles per relay. But at this supplier, the relays themselves should not have appeared soon, so I continued searching.
It turned out that you can order relays directly from China much cheaper. I ordered another batch of 100 pieces at about 1 dollar per piece (at that time, the dollar cost around 30 rubles). Subsequently, it turned out that some relays obtained from China were deliberately defective. For example, the following picture shows that the wires inside the relay are reversed. Fortunately, to fix this bug, it was enough to swap external connections to this relay in a similar way.
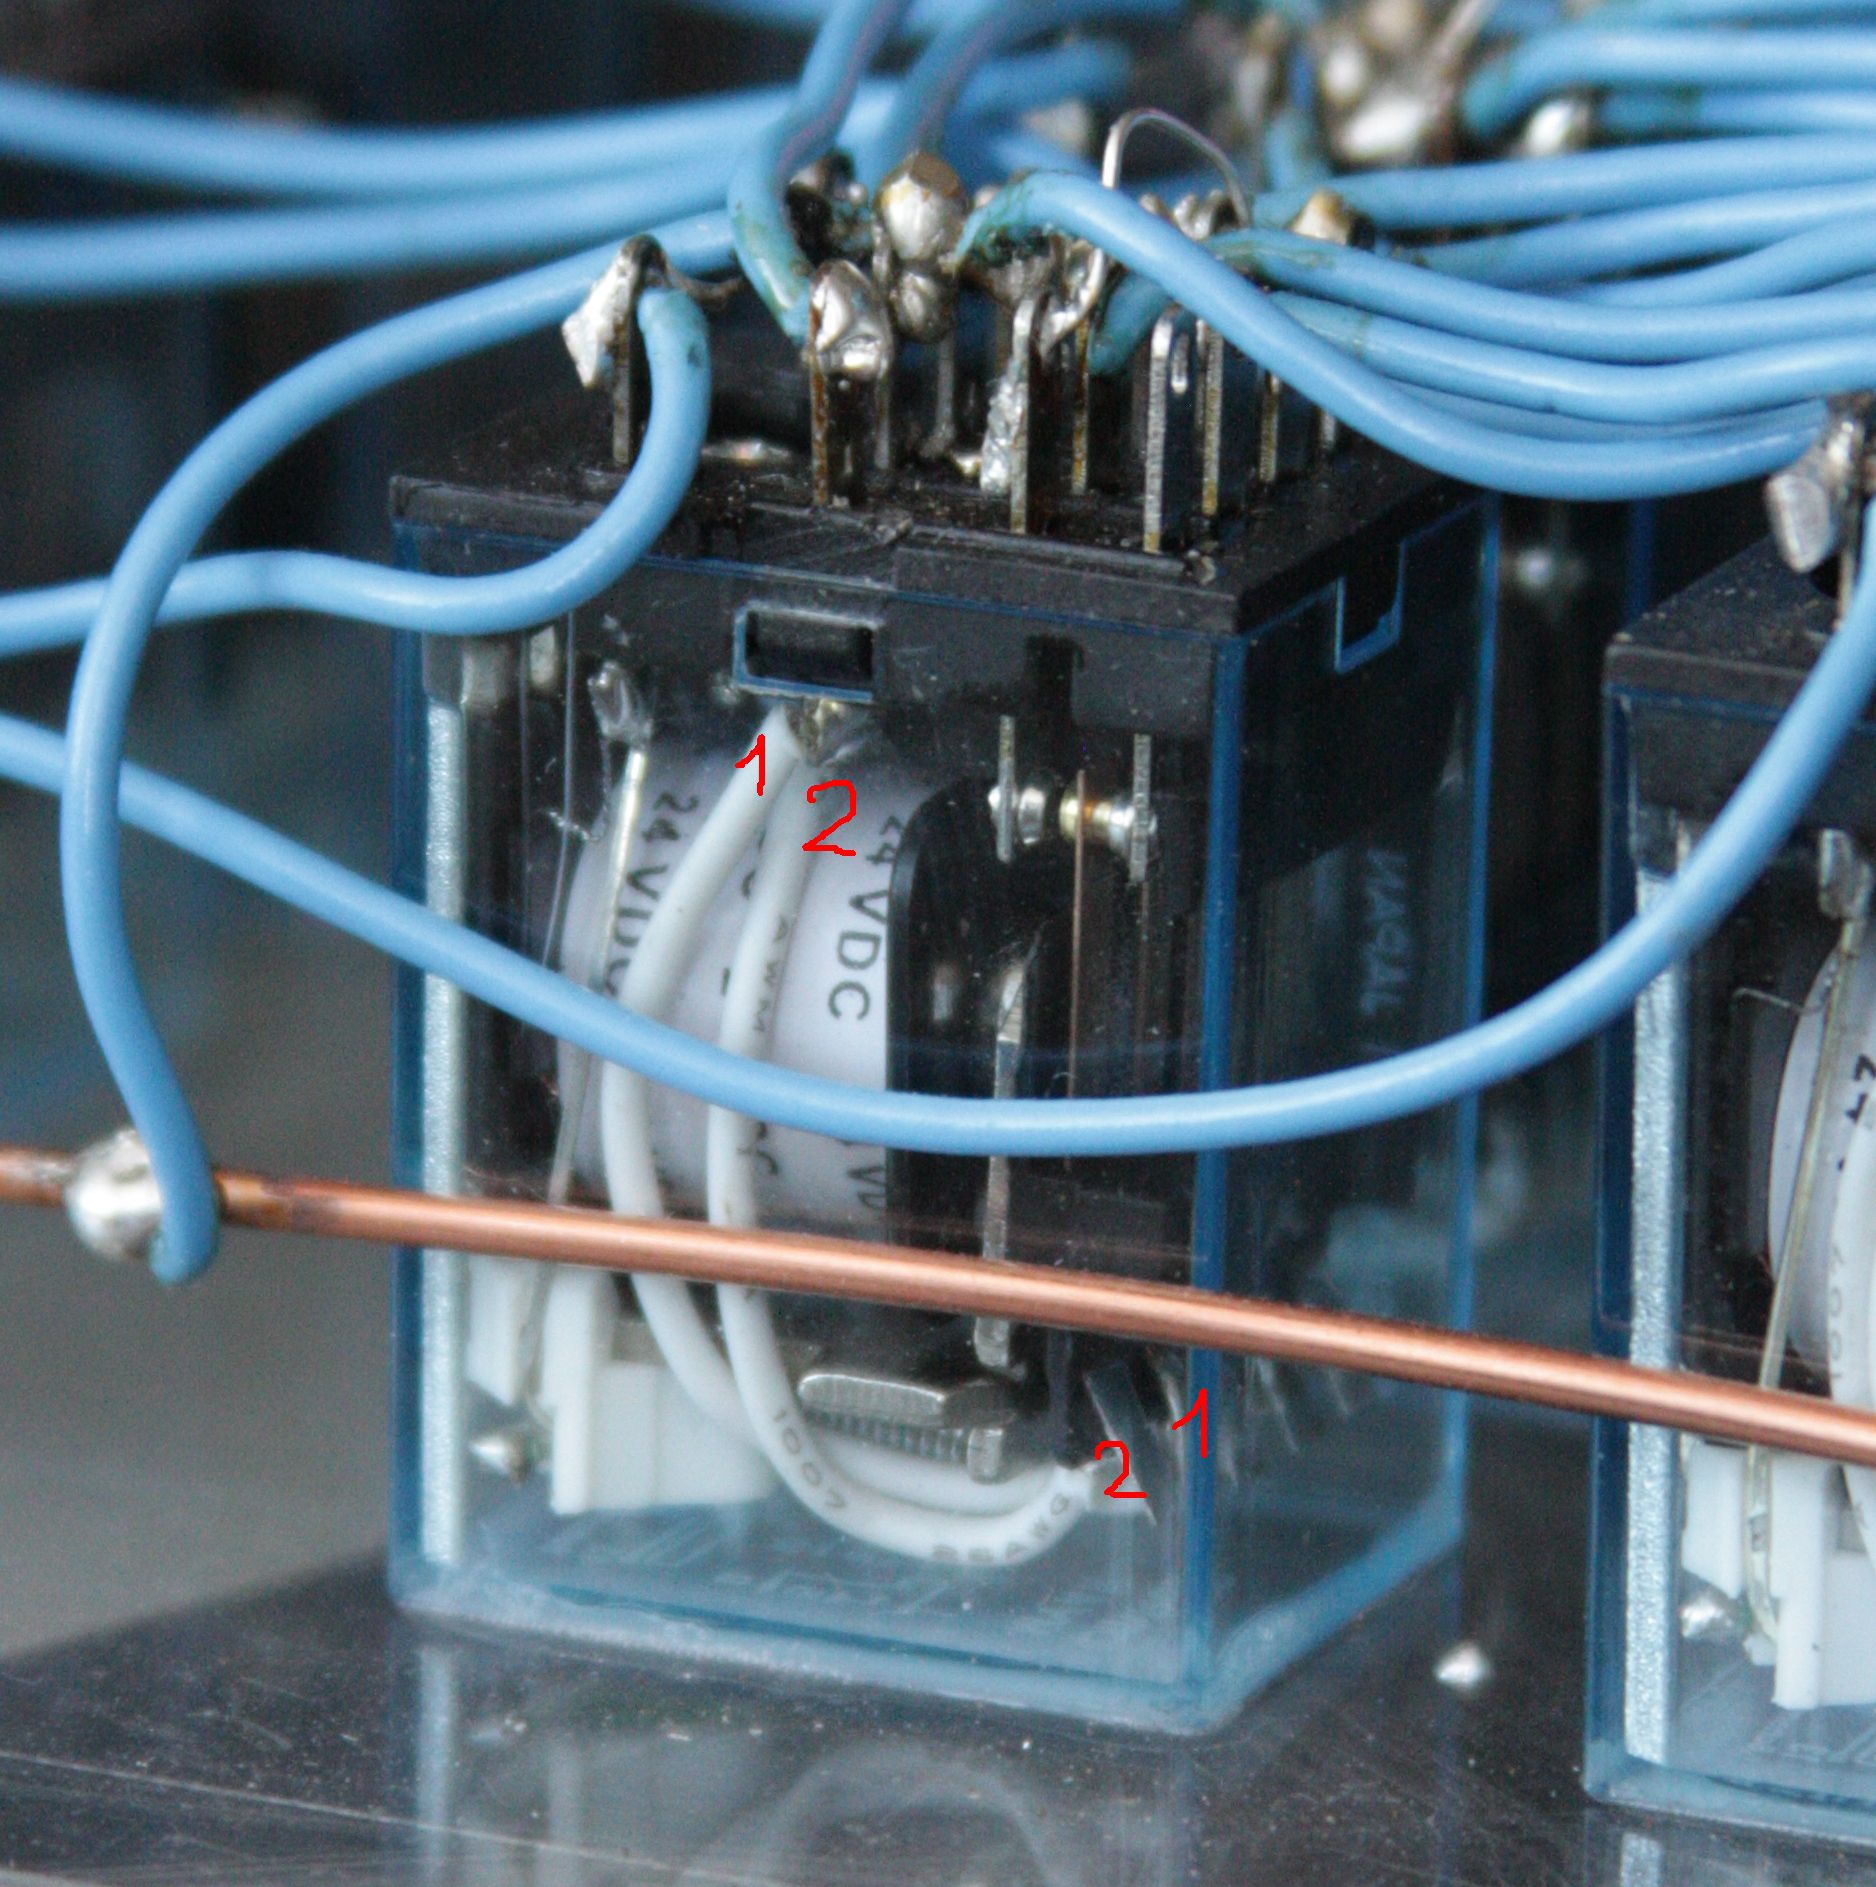
In addition, there were quite a few relays with oxidized contacts. In some cases, this turned out to be critical, and the relay had to be thrown out. But sometimes it was still possible to transfer the inputs and outputs to other contacts - the redundancy of the relay with 4 switches played its role.
When manufacturing the case, I had to master the simple work of wood processing, but the soldering took the most time - for many relays I had to solder the wires to all 14 pins.
The article was not very long and slightly superficial. More information can be found on the project website . If the community develops interest, I can write more about the characteristics and principles of operation of both ALU and the computer being designed.
It has been a year and a half since I decided to make my computer. During this time, I outlined the architecture and command system, and also created the first computer module - the arithmetic-logical device. Formally, of course, in ALU semiconductors are used - in LEDs for indication and in protective diodes. But all the logic is built on electromechanical relays. Only external connections are lacking in this block, but I will do them after other blocks appear to which ALU will connect. Next I plan to make a block of registers.
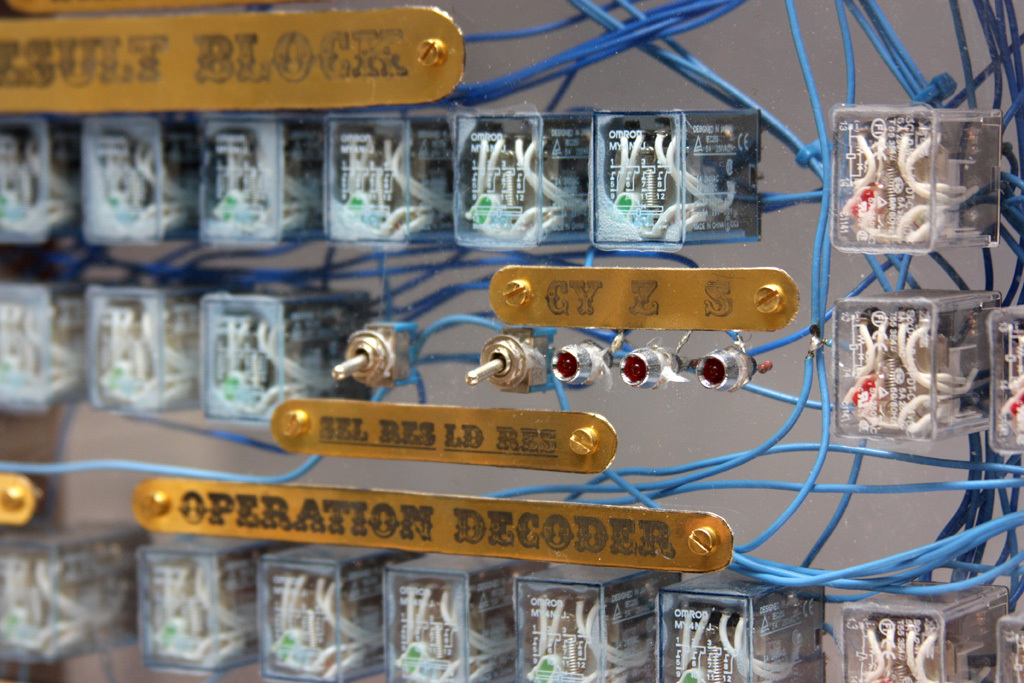
ALU consists of 88 relays, debugging signals are sent using 43 toggle switches, outputs are displayed using 70 LEDs. Block dimensions - 74x56x14 centimeters.
Relays with various kinds of malfunctions were found around 10. It is difficult to accurately calculate, since some remained in the circuit slightly modified for this reason.
So far it turns out 2 times cheaper than that of Harry. This does not include solder and flux, sandpaper, defective and damaged parts, as well as the cost of tools that I had in the process of manufacturing the case.
Upon completion of the implementation of the first module of my computer, I came to the conclusion that some things could be done better:
Project site: github.com/Dovgalyuk/Relay
Other computers:
How it all started
It all started with the fact that I read about the computer on electromagnetic relays, created by Harry Porter - an enthusiast from the University of Portland. Here is his photo next to this computer:
Since I am interested in old computers (part of my collection can be seen in this album ), I also wanted to create something like that. I began to look for other projects and found many
Other modern computers with electromagnetic relays
Some of them more or less repeated the project of Harry, some only demonstrated that the creation of such a computer is possible. For example, DUO 14 Premium , shown in the image below, can run a program containing up to 8 simple commands.
Project
So, I planned to create a computer similar to HPRC . I wanted it to be possible to count at least something real, and also to make all its elements visual - to track the work of ALU, registers, instruction counter, etc.
I decided to start manufacturing with ALU. To determine the requirements for it, in general terms I developed a set of instructions, and also figured out what buses and signals would be needed. ALU has a parallel design (all bits are calculated at the same time) and is intended for 8-bit calculations.
I immediately decided that I needed to do a subtraction module. In many other computers, this module is not implemented, since its work can be performed using negation and addition. Thus, ALU will perform the following operations: addition, subtraction (with and without hyphenation), logical AND, OR, NOT, EXCLUSIVE OR, as well as shifts to the right (with hyphenation or in a circle). I took circuits for addition and logical operations from HPRC.
Another rare feature is that the result of the calculations is latched into the shadow register. It is needed so that the same general-purpose register can be used as an input and as an output.
Since ALU so far should work without other components of the computer, therefore, to debug it, toggle switches connected to the relay coils supply them with power. The calculation results can be observed using the LEDs connected to the outputs of the circuits. Regardless of the latched result, the computing units work continuously, therefore, with the help of indicators, you can simultaneously observe the results of all operations.
Relay
A power supply voltage of 24 V was chosen, rather than 12 V, as in most other modern computers using electromagnetic relays, to make the wires thinner. Subsequently, it turned out that this solution also has a drawback - there are no LEDs with a built-in resistor designed for 24 V, so I had to buy and solder the resistors separately.
Since one of the main properties of a computer should be visual, I chose a relay with transparent cases and built-in LEDs. In addition to the fact that they look beautiful, this eliminates the need for extra LEDs to indicate input signals.
After starting the assembly of the computer, while reading one of the blogs, I realized that I did not have enough protective diodes to prevent the appearance of arc discharges and knocking out indicators when the relays open. So I bought 100 pieces of 1N4448 diodes and soldered them parallel to each of the coils.
Materials
Since the computer should be visual, why should it not be beautiful? Harry used mahogany for the hull. I found merbau wood from suitable materials in the form of planed boards of the same thickness.
All components are mounted on a 6 mm Plexiglas sheet. The relays are glued, and everything else is either installed in specially drilled holes, or screwed on. Inscription plates are carved in brass. The most difficult thing was to find brass bolts of the right size for fixing the plates. In Russia, it was impossible to order anywhere, but then almost by accident I found them in a hobby store in Helsinki.
Work
I started by buying a power supply, three dozen relays, wires, as well as switches to control the inputs and internal signals of the created ALU. Relays contain 4 on / off switches. In some cases, all 4 switches are not used, but it is practically impossible to save money by using a relay with fewer contacts.
These relays cost me about 200 rubles, so I began to look for cheaper options, since the entire ALU module, according to preliminary estimates, required about 100 pieces. I managed to order one batch of 100 pieces at the wholesale price a little more than 100 rubles per relay. But at this supplier, the relays themselves should not have appeared soon, so I continued searching.
It turned out that you can order relays directly from China much cheaper. I ordered another batch of 100 pieces at about 1 dollar per piece (at that time, the dollar cost around 30 rubles). Subsequently, it turned out that some relays obtained from China were deliberately defective. For example, the following picture shows that the wires inside the relay are reversed. Fortunately, to fix this bug, it was enough to swap external connections to this relay in a similar way.
In addition, there were quite a few relays with oxidized contacts. In some cases, this turned out to be critical, and the relay had to be thrown out. But sometimes it was still possible to transfer the inputs and outputs to other contacts - the redundancy of the relay with 4 switches played its role.
When manufacturing the case, I had to master the simple work of wood processing, but the soldering took the most time - for many relays I had to solder the wires to all 14 pins.
Summary
The article was not very long and slightly superficial. More information can be found on the project website . If the community develops interest, I can write more about the characteristics and principles of operation of both ALU and the computer being designed.
It has been a year and a half since I decided to make my computer. During this time, I outlined the architecture and command system, and also created the first computer module - the arithmetic-logical device. Formally, of course, in ALU semiconductors are used - in LEDs for indication and in protective diodes. But all the logic is built on electromechanical relays. Only external connections are lacking in this block, but I will do them after other blocks appear to which ALU will connect. Next I plan to make a block of registers.
Statistics
ALU consists of 88 relays, debugging signals are sent using 43 toggle switches, outputs are displayed using 70 LEDs. Block dimensions - 74x56x14 centimeters.
Relays with various kinds of malfunctions were found around 10. It is difficult to accurately calculate, since some remained in the circuit slightly modified for this reason.
Expenses
- Relay - 6120
- LEDs - 2660
- Toggle Switches - 1510
- Power Supply - 2520
- Wires and other parts - 1220
- Labels with inscriptions (materials, engraving and fasteners) - 3340
- Materials for the case - 4300
- Total - 21,670
So far it turns out 2 times cheaper than that of Harry. This does not include solder and flux, sandpaper, defective and damaged parts, as well as the cost of tools that I had in the process of manufacturing the case.
What can be done better
Upon completion of the implementation of the first module of my computer, I came to the conclusion that some things could be done better:
- Probably, the number of relays used in ALU could be reduced by combining the addition and subtraction modules. I think that in this way 8 relays could be saved.
- When working on the next module, you need to try to drill the holes more accurately. This time some of them turned out with small (and one with large) cracks.
- Practice has shown that in our city it is not very easy to make high-quality laser engraving on brass. Apparently, the next time you will have to try photolithography to make inscriptions.
- Probably, for frequently switching circuits, such as a clock generator, it is necessary to use duplication, since the relays have proved to be not very reliable.
References
Project site: github.com/Dovgalyuk/Relay
Other computers:
- Harry Porter's Relay Computer: web.cecs.pdx.edu/~harry/Relay
- Relay Computer Two: www.electronixandmore.com/projects/relaycomputertwo/index.html
- RC-3 Relay Computer: www.computerculture.org/projects/rc3
- Edmund Berkeley's Simon Relay Processor: www.cs.ubc.ca/~hilpert/e/simon/index.html
- TIM: www.northdownfarm.co.uk/rory/tim/tim-8.htm
- DUO 14 Premium: www.ostracodfiles.com/ostracod/relay.html
- Relay computer "trainer": relaysbc.sourceforge.net
- i² 8-Bit Relay Computer: isquared.weebly.com
- Kilian Leonhardt's relay computer: www.relaiscomputer.de
- Der Relaisrechner: www.schlaefendorf.de/relaisrechner/dokumentation/index.html