Approximation of the curve in the arrow path for the game St.Val
In this post I will tell you how to create control in a mobile application using trajectory drawing. This control is used in Harbor Master and FlightControl: the player draws a finger with a line along which ships and planes move. For my St.Val game, similar mechanics were required. How I did it and what I had to face - read below.
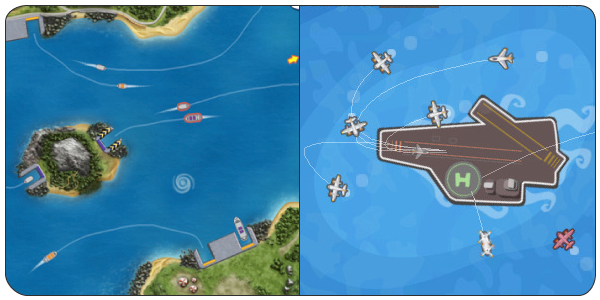
A few words about the game. At St.Val, the main goal is to connect hearts by color with arrows. The player’s task: to construct the arrow trajectory so that it connects the hearts in flight. The game was created based on Cocos2D 2.1 for iOS, below the video game mechanics.
To create a management you need to solve three problems:
Plus, I will separately describe the algorithm for detecting loops in trajectories, which I needed to expand the mechanics of the game.
Under the cut, the solution to these problems and a link to a demo project.
The demo project code is available here: github.com/AndreyZarembo/TouchInput
Reading finger coordinates is a simple task, because Cocos2D has work with separate Touch events, separated by type. To receive them, the object implements the CCTouchOneByOneDelegate protocol and registers with the Touch event manager:
The CCTouchOneByOneDelegate protocol includes methods:
To play, you need only one finger, so it’s enough to save the UITouch in the currentTouch variable at the first touch. If it is not nil, then the movement is already being tracked.
When the finger is released, we reset the currentTouch variable, and in the ccTouchMoved motion handler we check to see if this is the object being monitored. If yes - points are recorded.
All this works great until the game minimizes gestures and the control center panel pops up. In these cases, ccTouchCancelled is not called, but the ccTouchMoved event is no longer coming. This can be fixed by checking the phase at the finger. If _currentTouch.phase == UITouchPhaseCancelled , then the finger needs to be changed:
The coordinates will have to be filtered and approximated so that the line looks smooth and objects along it move uniformly.
To smooth the curve, a distance filter is used: all points must be at least 20px apart from each other. This is one and a half times smaller than a finger on the screen, so filtering is hidden. With a filtering distance of 20px, the number of processed points decreases by 50-70%, in the limit it is 95% when the finger moves pixel by pixel across the screen.
The resulting chain of points must be approximated by a curve; for this, the Kathmulla-Roma spline is used. It goes through the given 4 points, smooths the steps and is easy to calculate.

To start the curve from the first point, add boundary conditions: points are added in a straight line to the first and last segments. Then for N points we get an N-1 segment.

The post turned out to be voluminous, so I won’t talk in detail about the curve itself, below is the code for calculating its segments.
In the described curve, the movement in the coordinates of the screen will be uneven. In order to smooth the movement, each segment is divided into straight segments of 10px. This size was chosen for two reasons:
The mechanics of dividing into segments is quite simple. For each segment in the cycle, points are moved in such a step as to cover a distance of 1px, each point is compared with the last saved spline point. If the distance is greater than 10px, it is calculated how much it is larger, the correction is made in a straight line and a new point is added to the spline array. For optimization, this operation is performed only for new points. As a result, we get an array of points that are separated from each other at a distance of 10px and repeat the trajectory of the finger.
In the game you cannot draw an endless path, so the condition for the end of the drawing along the length was added.
In the game, the trajectory is displayed by moving points ("tracks"). They are located on the curve every 20px and move evenly towards the end of the path. To create a motion effect and simplify the animation, the points move within two segments of 10 pixels, from 0 to 20, then again return to 0. Due to the synchronous movement, it seems that they move continuously from beginning to end.
If there are N + 1 points in the curve, then N segments along which the tracks move, respectively, you need to place N / 2 tracks. For all points, an offset T is set, within [0.2], which is used to calculate the coordinates of each of the tracks.
At T from 0 to 1, the position is calculated as
At T from 1 to 2, the position is calculated as

As a result, all points move in a single file.
The boom launch is done using Actions from Cocos 2D. It consists of the following steps:
There are more of these stages in the game, but the essence does not change.
To collect the sequence of actions and start their execution, all actions are sequentially added to the NSMutableArray and passed to the CCSequence object to start the chain of actions.
CCCallBlock is added first to set the starting position - these are the coordinates of the first point of the curve. Here, the arrow is set to full opacity.
Then all points of the trajectory are added sequentially, for the correct orientation, the previous point is saved. The rotation of the arrow is determined from the difference in the coordinates of the current and past points using the arc tangent.
The elements of the curve are obtained by almost 10 pixels, but not exactly, therefore, for the uniform movement of the arrow, it is necessary to specify the length of the segment and determine the time of movement for each segment based on the speed of the arrow.
To complete the flight, the arrow should fly a little further than the trajectory. To do this, the lastDirectionVector variable stores the direction of the last segment in the form of a normalized vector. An arrow hides during hideEffectDuration , during which it flies in a straight line. To specify the direction, the normalized direction vector is scalar multiplied by the speed of the arrow and the time of disappearance.
After adding all the elements, the arrow goes into flight.
In one of the levels of the game, the hearts are joined not by the arrow trajectory, but by looping the hearts of the pair of hearts (see video from 0:55). To implement this mechanics, you need to find the intersection of the trajectory with itself.
To do this, a set of segments is scanned sequentially and checked to see if a segment of a segment intersects with a segment of previous segments. The intersection is determined using the "Oriented Area of the Triangle" method, because the intersection point itself is not important, and the numbers of intersecting segments are known from the cycle. The algorithm is taken from here:
e-maxx.ru/algo/segments_intersection_checking
The algorithm works well, but on a long curve it is slow. Therefore, the check was modified so as to check not every segment of five, but one large one. The number five is magic and was empirically chosen. The starting point of a block of five points is taken, the first four are skipped, and the fifth is taken as the end, it will also be the next starting point. The accuracy of the determination is reduced, but losses are acceptable. You can increase accuracy by checking small segments inside intersecting large ones.

All loops found are stored in the array as the numbers of the start and end segments of the ring. From these, the points of the polygon UIBezierPath were obtained , which has regular means of determining whether a point falls into it.
That's all!
The code for the demo project is available here: github.com/AndreyZarembo/TouchInput
ps In the process of preparing the post, the code was slightly modified and optimized.
A few words about the game. At St.Val, the main goal is to connect hearts by color with arrows. The player’s task: to construct the arrow trajectory so that it connects the hearts in flight. The game was created based on Cocos2D 2.1 for iOS, below the video game mechanics.
Main goals
To create a management you need to solve three problems:
- Read coordinates
- Smooth and approximate them
- Launch an arrow on them
Plus, I will separately describe the algorithm for detecting loops in trajectories, which I needed to expand the mechanics of the game.
Under the cut, the solution to these problems and a link to a demo project.
The demo project code is available here: github.com/AndreyZarembo/TouchInput
How coordinates are read
Reading finger coordinates is a simple task, because Cocos2D has work with separate Touch events, separated by type. To receive them, the object implements the CCTouchOneByOneDelegate protocol and registers with the Touch event manager:
[[[CCDirector sharedDirector] touchDispatcher] addTargetedDelegate:self priority:0 swallowsTouches: YES];
The CCTouchOneByOneDelegate protocol includes methods:
// Палец коснулся экрана
- (BOOL)ccTouchBegan:(UITouch *)touch withEvent:(UIEvent *)event
// Палец переместился по экрану
- (void)ccTouchMoved:(UITouch *)touch withEvent:(UIEvent *)event
// Палец подняли
- (void)ccTouchEnded:(UITouch *)touch withEvent:(UIEvent *)event
// Палец куда-то внезапно пропал или случилось что-то не то
- (void)ccTouchCancelled:(UITouch *)touch withEvent:(UIEvent *)event
To play, you need only one finger, so it’s enough to save the UITouch in the currentTouch variable at the first touch. If it is not nil, then the movement is already being tracked.
When the finger is released, we reset the currentTouch variable, and in the ccTouchMoved motion handler we check to see if this is the object being monitored. If yes - points are recorded.
Pitfall 1
All this works great until the game minimizes gestures and the control center panel pops up. In these cases, ccTouchCancelled is not called, but the ccTouchMoved event is no longer coming. This can be fixed by checking the phase at the finger. If _currentTouch.phase == UITouchPhaseCancelled , then the finger needs to be changed:
- (BOOL)ccTouchBegan:(UITouch *)touch withEvent:(UIEvent *)event {
    if (currentTouch == nil || currentTouch.phase == UITouchPhaseCancelled) {
        currentTouch = touch;
    }
    return YES;
}
- (void)ccTouchMoved:(UITouch *)touch withEvent:(UIEvent *)event {
    if (touch == currentTouch) {
	// Save point
    }
}
- (void)ccTouchEnded:(UITouch *)touch withEvent:(UIEvent *)event {
    if (touch == currentTouch) {
	// End trajectory
    }
}
- (void)ccTouchCancelled:(UITouch *)touch withEvent:(UIEvent *)event {
    if (touch == currentTouch) {
	// End trajectory
    }
}
What to do with coordinates
The coordinates will have to be filtered and approximated so that the line looks smooth and objects along it move uniformly.
To smooth the curve, a distance filter is used: all points must be at least 20px apart from each other. This is one and a half times smaller than a finger on the screen, so filtering is hidden. With a filtering distance of 20px, the number of processed points decreases by 50-70%, in the limit it is 95% when the finger moves pixel by pixel across the screen.
The resulting chain of points must be approximated by a curve; for this, the Kathmulla-Roma spline is used. It goes through the given 4 points, smooths the steps and is easy to calculate.
To start the curve from the first point, add boundary conditions: points are added in a straight line to the first and last segments. Then for N points we get an N-1 segment.
The post turned out to be voluminous, so I won’t talk in detail about the curve itself, below is the code for calculating its segments.
Pitfall 2
In the described curve, the movement in the coordinates of the screen will be uneven. In order to smooth the movement, each segment is divided into straight segments of 10px. This size was chosen for two reasons:
- this is a round number, so it is easy to determine how many segments are needed to place an object with a given normal coordinate on the curve (distance traveled along the curve);
- it is small enough so that the stepping does not make itself felt, while the number of split points is reduced by an order of magnitude.
The mechanics of dividing into segments is quite simple. For each segment in the cycle, points are moved in such a step as to cover a distance of 1px, each point is compared with the last saved spline point. If the distance is greater than 10px, it is calculated how much it is larger, the correction is made in a straight line and a new point is added to the spline array. For optimization, this operation is performed only for new points. As a result, we get an array of points that are separated from each other at a distance of 10px and repeat the trajectory of the finger.
In the game you cannot draw an endless path, so the condition for the end of the drawing along the length was added.
Movement of objects
In the game, the trajectory is displayed by moving points ("tracks"). They are located on the curve every 20px and move evenly towards the end of the path. To create a motion effect and simplify the animation, the points move within two segments of 10 pixels, from 0 to 20, then again return to 0. Due to the synchronous movement, it seems that they move continuously from beginning to end.
If there are N + 1 points in the curve, then N segments along which the tracks move, respectively, you need to place N / 2 tracks. For all points, an offset T is set, within [0.2], which is used to calculate the coordinates of each of the tracks.
At T from 0 to 1, the position is calculated as
Pt = Pt0*t+(1-t)*Pt1
At T from 1 to 2, the position is calculated as
Pt = Pt1*(t-1)+(2-t)*Pt2
As a result, all points move in a single file.
Arrow launch
The boom launch is done using Actions from Cocos 2D. It consists of the following steps:
- Setting the starting position of the boom
- Sequential movement and rotation of the arrow along the segments of the curve
- Hiding arrows
There are more of these stages in the game, but the essence does not change.
To collect the sequence of actions and start their execution, all actions are sequentially added to the NSMutableArray and passed to the CCSequence object to start the chain of actions.
CCCallBlock is added first to set the starting position - these are the coordinates of the first point of the curve. Here, the arrow is set to full opacity.
CCCallBlock *setInitialPosition = [CCCallBlock actionWithBlock:^{
    _arrow.position = pointVal.CGPointValue;
    _arrow.opacity = 255;
}];
[moves addObject: setInitialPosition];
Then all points of the trajectory are added sequentially, for the correct orientation, the previous point is saved. The rotation of the arrow is determined from the difference in the coordinates of the current and past points using the arc tangent.
Pitfall 3
The elements of the curve are obtained by almost 10 pixels, but not exactly, therefore, for the uniform movement of the arrow, it is necessary to specify the length of the segment and determine the time of movement for each segment based on the speed of the arrow.
CGPoint point = pointVal.CGPointValue;
CGPoint prevPoint = prevPointVal.CGPointValue;
CGPoint diff = CGPointMake(point.x-prevPoint.x, point.y-prevPoint.y);
CGFloat distance = hypotf(diff.x,diff.y);
CGFloat duration = distance / arrowSpeed;
lastDirectionVector = CGPointMake(diff.x/distance, diff.y/distance);
CGFloat angle = -atan2f(diff.y,diff.x)*180./M_PI;
CCMoveTo *moveArrow = [CCMoveTo actionWithDuration: duration position: point];
CCRotateTo *rotateArrow = [CCRotateTo actionWithDuration: duration angle: angle];
CCSpawn *moveAndRotate = [CCSpawn actionWithArray: @[ moveArrow, rotateArrow ]];
[moves addObject: moveAndRotate];
To complete the flight, the arrow should fly a little further than the trajectory. To do this, the lastDirectionVector variable stores the direction of the last segment in the form of a normalized vector. An arrow hides during hideEffectDuration , during which it flies in a straight line. To specify the direction, the normalized direction vector is scalar multiplied by the speed of the arrow and the time of disappearance.
CCFadeTo *hideArrow = [CCFadeTo actionWithDuration: hideEffectDuration opacity:0];
CCMoveBy *moveArrow = [CCMoveBy actionWithDuration: hideEffectDuration position: CGPointMake(lastDirectionVector.x*arrowSpeed*hideEffectDuration, lastDirectionVector.y*arrowSpeed*hideEffectDuration)];
CCSpawn *moveAndHide = [CCSpawn actionWithArray: @[ moveArrow, hideArrow ]];
[moves addObject: moveAndHide];
After adding all the elements, the arrow goes into flight.
[_arrow runAction: [CCSequence actionWithArray: moves]];
Loop detection
In one of the levels of the game, the hearts are joined not by the arrow trajectory, but by looping the hearts of the pair of hearts (see video from 0:55). To implement this mechanics, you need to find the intersection of the trajectory with itself.
To do this, a set of segments is scanned sequentially and checked to see if a segment of a segment intersects with a segment of previous segments. The intersection is determined using the "Oriented Area of the Triangle" method, because the intersection point itself is not important, and the numbers of intersecting segments are known from the cycle. The algorithm is taken from here:
e-maxx.ru/algo/segments_intersection_checking
Pitfall 4
The algorithm works well, but on a long curve it is slow. Therefore, the check was modified so as to check not every segment of five, but one large one. The number five is magic and was empirically chosen. The starting point of a block of five points is taken, the first four are skipped, and the fifth is taken as the end, it will also be the next starting point. The accuracy of the determination is reduced, but losses are acceptable. You can increase accuracy by checking small segments inside intersecting large ones.
All loops found are stored in the array as the numbers of the start and end segments of the ring. From these, the points of the polygon UIBezierPath were obtained , which has regular means of determining whether a point falls into it.
[path containsPoint: position]
That's all!
The code for the demo project is available here: github.com/AndreyZarembo/TouchInput
ps In the process of preparing the post, the code was slightly modified and optimized.