Making a USB key from Arduino to bypass passwordless authorization
 Bypassing passwordless authorization has long been haunting the minds of computer enthusiasts. When thinking about biometrics, a chill passes through the back: well, what if they cut off a finger or tear out an eye? And the most humane and no surprise method is, of course, USB keys.
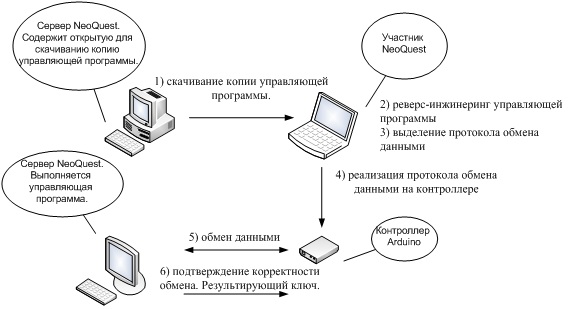
At the in-person tour of NeoQUEST 2013, we invited the participants to crack authorization based on the USB key we created made from Arduino. To successfully complete the task, the participants had to fake a USB key themselves, using a rather primitive authorization mechanism on Arduino, which consists in multiplying several matrices. At first glance, everything is simple, but the task was not without pitfalls. About how the trivial task of matrix multiplication by Arduino can cause difficulties for tough professionals who can write a driver without problems, hack a botnet, and generally bypass almost any protection technology, read under the cat.
Making a USB Key from Arduino
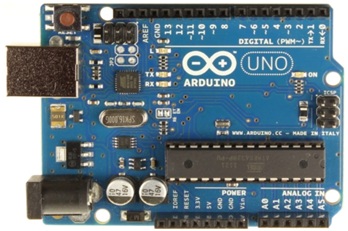
The Arduino we selected is a hardware computing platform whose main components are a simple I / O board and a Processing / Wiring development environment. It's simple - a small board based on Atmel's ATmel processor, I / O pins and a USB interface. The programming language is extremely similar to the native and beloved C, and for working with USB, no knowledge of the data transfer protocol is required - it is used as a COM port.
After reading the specification for the Atmel ATmega328 processor, we found a small flaw in Arduino or, as applied to the quest, a “twist”, namely, the very modest size of RAM (SRAM) - only 2 KB and non-volatile memory (EEPROM) - 1 KB. Therefore, in order to program matrix multiplication on Arduino, you need to remember about the lack of memory: at first glance, you need to store four matrices (the fourth to store the result of matrix multiplication). For 26x26 matrices, this will take 26 * 26 * 2 * 4 = 5408 bytes. Which is obviously more than 2KB.
The protocol scheme for multiplying matrices by size is as follows:
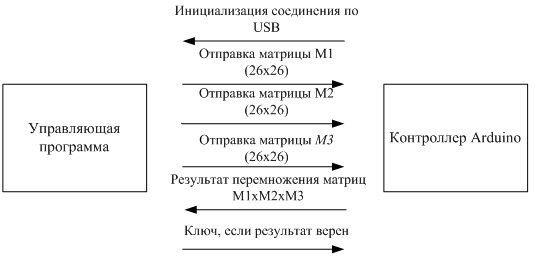
With a detailed analysis of the control program, it becomes noticeable that there is a subtle point: instead of matrix No. 3, matrix No. 2 is retransmitted. This reduces storage costs by up to 4056 bytes.
So the function of reading a matrix of size 20x20 is implemented (further we will explain why we decided to use precisely matrices of this size):
void read_matrix_a(){ int i = 0; int j = 0; while(j < 20) { while (Serial.available() < 20 * 2) // ожидание, пока во входном буфере не появится 40 байт { // 40 байт -- одна строка матрицы из 20 элементов типа int } for(i = 0; i < 20; i++) { unsigned int tmp1 = Serial.read(); // считывание очередного байта из буфера unsigned int tmp2 = Serial.read(); mat_a[j][i] = tmp1 * 256 + tmp2; // формирование элемента матрицы } j++; }}Having sorted out the matrix multiplication algorithm, we found that it is possible to store the resulting matrix in one of the multiplied ones, using an additional 26 bytes (one row) - total, 2730 bytes. This is more than 2KB, but, oddly enough, less than 3KB! Here, we immediately recall that there is an EEPROM, and this is a whole kilobyte of free space! We break one of the matrices into two parts - one will be stored in SRAM, and the second in EEPROM. The function of multiplying the matrices A and B without using the third matrix looks like this:
void matrix_multiply(){ int i, j, r; int out_counter; for(i = 0; i < 20; i++) // бежим по всем строкам матрицы A { curr_mul_string = i; // запоминаем номер текущей строки for(j = 0; j < 20; j++) tmp_string[j] = mat_a[curr_mul_string][j]; // сохраняем текущую строку в отдельный массив for(j = 0; j < 20; j++) // бежим по матрице B { unsigned long sum = 0; for(r = 0; r < 20; r++) // цикл перемножения элементов { sum += (get_a(i,r) % 32768) * (get_b(j, r) % 32768); sum %= 32768; } set_a(i, j, sum); // запись результата умножения в матрицу A } }}// функции get_a(x, y), get_b(x, y) возвращают значение элемента (x, y) соответствующей матрицы// функция set_a(x, y, val) устанавливает значения элемента (x, y) матрицы ATask development
The initial idea of the task was to combine the implementation of the cryptographic algorithm on Arduino with reverse engineering, but then we came up with a task for cryptography abruptly (and nobody passed it!). You could also come up with a task to reduce the complexity of the algorithm, since a simple processor for $ 10 clearly does not differ in speed ... But tasks of this type have already become boring, they are already enough in various competitions, such as ACM, TopCoder, CodeForces, so we don’t focus on computational complexity steel.
So, we have implemented all the task components for 26x26 matrices. The data exchange scheme for matrix multiplication by Arduino is as follows:
After developing the assignment, we began to “train on cats” (our employees, who were not particularly dedicated to Arduino, acted as cats). Here difficulties were revealed: it turns out that memory problems are not at all obvious. Arduino has no signals to notify about errors related to SRAM overflow, and the board itself in this situation begins to lag, as stated on the Arduino official website . Moreover, even when the problem was identified, the thought of using EEPROM never occurred to any of the “cats” ...
I had to simplify the task and, as it turned out later, it was the right decision, because for one day and 2 hours on the task (quest participants were in a hurry to escape from prison, there was a threat of execution hanging over them!) And there is something to think about. To simplify, we decided to use a matrix of a smaller dimension - 20x20. Memory costs, thus, decreased to 1600 bytes, which does not require the use of EEPROM. That is why the code uses 20x20 matrices everywhere. The main function is a loop for implementing the entire algorithm, including the output of the participant ID:
// основная функция-циклvoid loop() { int i,j; read_matrix_a(); // считываем матрицу A read_matrix_b(); // считываем матрицу B read_matrix_c(); // считываем матрицу C (заглушка) matrix_multiply(); // перемножаем матрицы A и B с записыванием результата в A matrix_multiply(); // перемножаем матрицы A (с новыми значениями) и B с записыванием результата в A write_matrix_a(); // выводим результат Serial.write(0xB4); // вывод ID участника Serial.write(0x36); Serial.write(0x5F); Serial.write(0x24);}Full-time quest completion
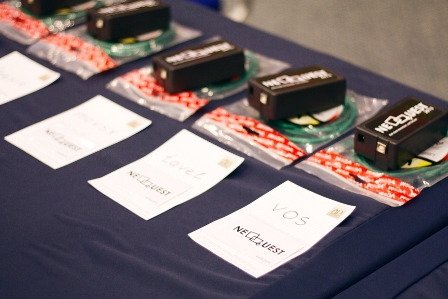
So, the boards are bought, tested, sealed in boxes and handed over to the participants. The quest has begun! During the first few hours of the competition, the participants only looked askance at the incomprehensible boxes given to them and were engaged in other tasks. Several times they tried to connect their USB mouse / keyboard to the computer port in order to open the desired script “show_results.sh”, which stores the keys, but such attempts were thwarted.
Then, several people nevertheless began to carry out the tasks as expected from them:
1. Reverse the control program
2. Select the communication protocol between the controller and the control program
3. Program the communication protocol on the controller
4. Profit!
In the third stage, as planned, difficulties arose. The most common and expected question was: “I wrote the correct program, uploaded it to the controller, but it does not work, what is it?” During a quick look, it turned out that the guys were doing everything right: they allocated matrices, each in kilobytes, there were also separate buffers for receiving and transmitting data (well, no worries about memory!). Everything overflows, nothing works.
Understanding that the time is not rubber, but the task must be completed, we hinted to the participants: “this board is not as strong as you think”, “look at the specification”. Participants nodded perplexedly and went to search for the required information. A few minutes later their faces lit up with understanding and willingness to solve the problem. And now, after half an hour, the first participant (AVictor) connected his programmed controller and received his long-awaited key from the task!
About an hour before the end of the contest, this task was submitted to the second participant (bumshmyak). The remaining competitors did not have time to bring the decision to its logical conclusion. Most of them have already reached the home stretch when the problem is fixed and only implementation is needed, but time flew inexorably.
Finally
At NeoQUEST-2014, expect new interesting tasks, including such “iron” ones as this! Registration for the online tour NeoQUEST-2014 starts in January, and a full-time tour will take place during the white nights in St. Petersburg! All updates can be monitored on our website .