Electronic ballasts, workplace lighting
In the office, where I spend my working time, there are no windows to the street, so the lighting lies entirely on fluorescent lamps mounted on the ceiling. Alas, I have quite sensitive eyes, so I notice a flicker and by the end of the day I feel somewhat broken. Part of the problem was solved by buying a high-quality table lamp, and then special computer glasses with yellow lenses.

Recently, a work colleague spoke about the fact that standard ballasts use cheap ballasts (ballasts), and that, if desired, they can be replaced with more advanced ballasts (electronic ballasts). The advantages over conventional start-up are the quick ignition of the lamps, the absence of a characteristic sound from the throttle, the filter that removes flicker, as well as a more sparing attitude to the lamps.
After reading the description on Wikipedia, as well as being impressed by the colleagues' stories, the next day I bought two electronic ballasts (for myself and my wife), the first to be found in a local flea market for 18 W T8 lamps. One set it immediately, and immediately noticed that I did not see the annoying flicker, and the lamps began to shine brighter. After a couple of days, I connected the second electronic ballast to a lamp above my wife’s workplace, at the same time decided to photograph the whole process. This article may seem trivial and amateurish to you, but this knowledge was new to me and several of my colleagues.
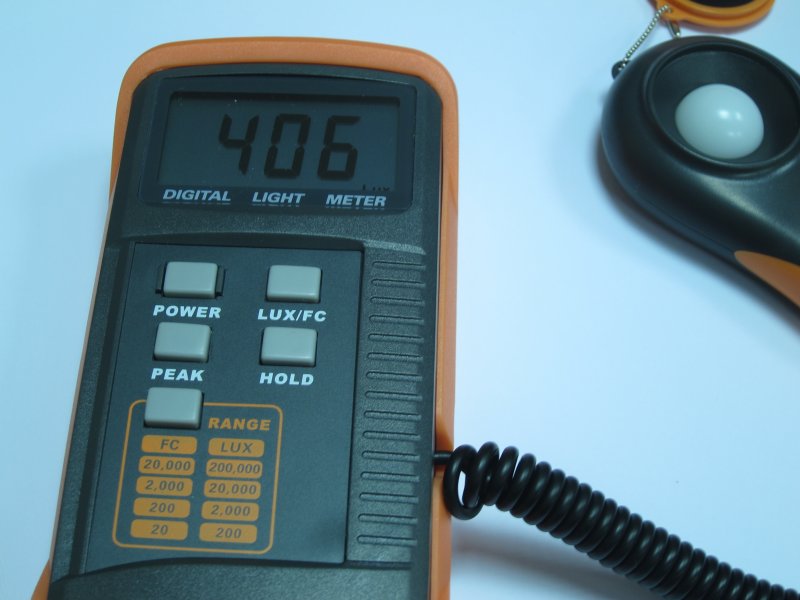
Before starting work, I measured the luminous flux, about 405-407 lux came out. Although I install electronic ballasts mainly in order to get rid of flicker, or rather increase its frequency, the changes in brightness are also interesting, because in the electronic start a higher efficiency is declared.
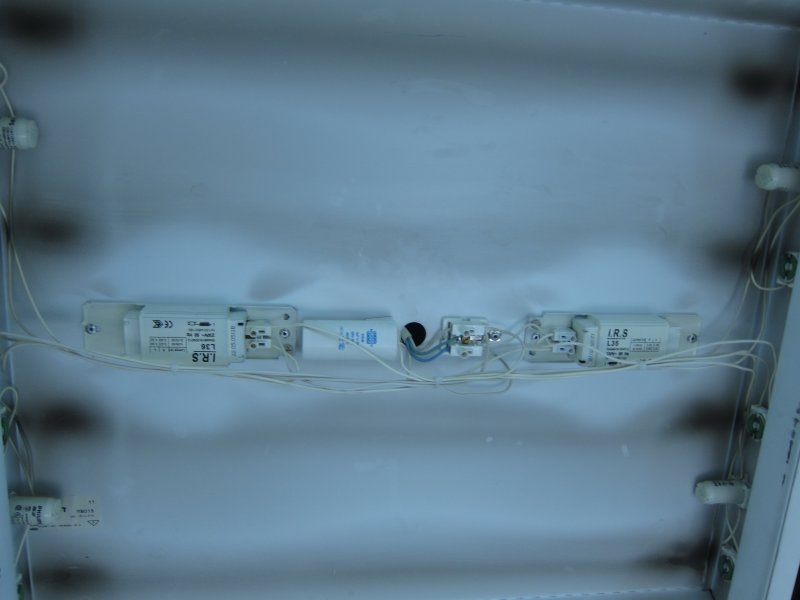
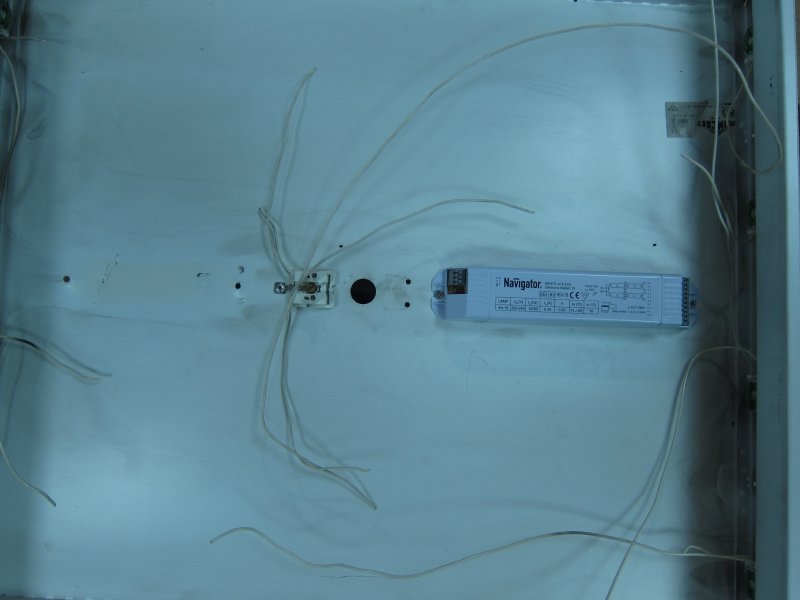
So, the diffuser is removed, the lamps are twisted, and now a “naked" lamp hangs on the ceiling. It contains an adapter for a power cable running under a suspended ceiling (sticks out of a hole in the center), two ballasts, as well as additional voltage converters (not strong in electrics, so I don’t know their role for sure). All this wealth is connected to the contacts for the lamps with the help of wires and generously flavored with years of accumulated dust.
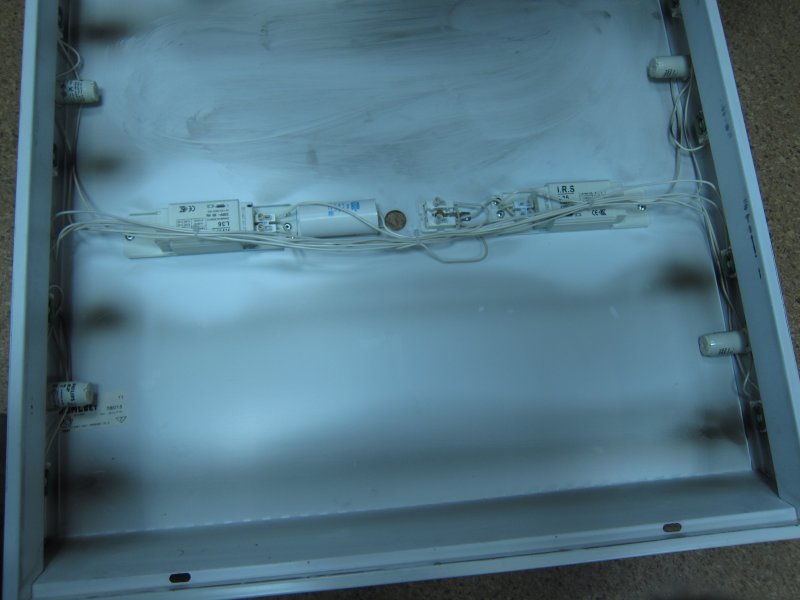
Turning off the upper light and unscrewing the clamps from the power supply (if you do, do not forget to check for voltage with a tester screwdriver, and protect the exposed contacts with electrical tape for the duration of work), pulled out the lamp from the suspended ceiling and laid it on the floor. A faithful assistant immediately wiped it from dust / dirt, because when installing the previous electronic ballast, I sensibly guessed it (in the photo only the beginning of the wash).
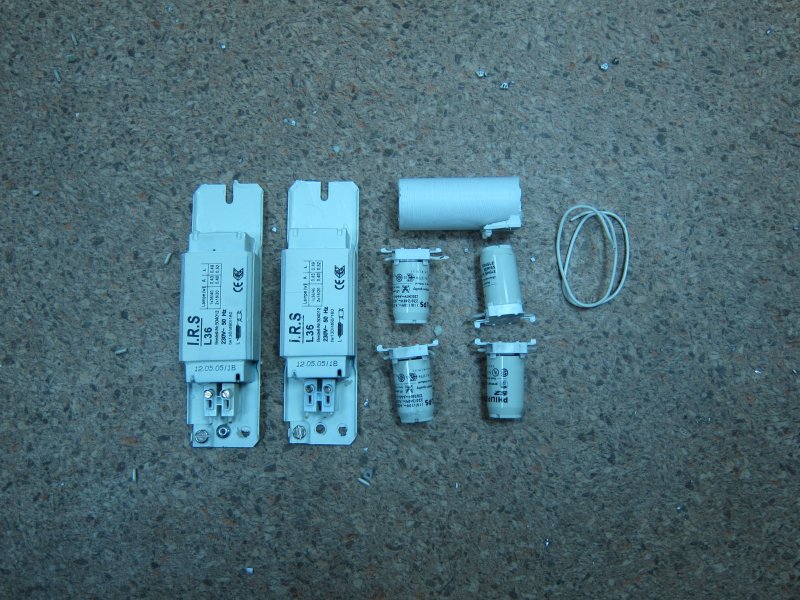
Having broken off with fasteners, he pulled out all the unnecessary stuffing from the lamp, having previously disconnected the wires from the devices, since they will be needed in the future. The only thing left and not useful is the adapter for the power cable. In the last installation I used it, since there was no land in that wiring. This time there was grounding, so I connected the wires directly to the electronic ballast, because the adapter only earthed the lamp housing.
Drills and drills were not at hand, so I screwed the holes in the thin sheet with a screwdriver and a sharp self-tapping screw. It was necessary to make two new holes for the dimensions of the mountings of the new electronic ballasts. After which I screwed the device with two wide and short chopped-off screws, it holds tight and does not lend itself to moderately strong jerking.
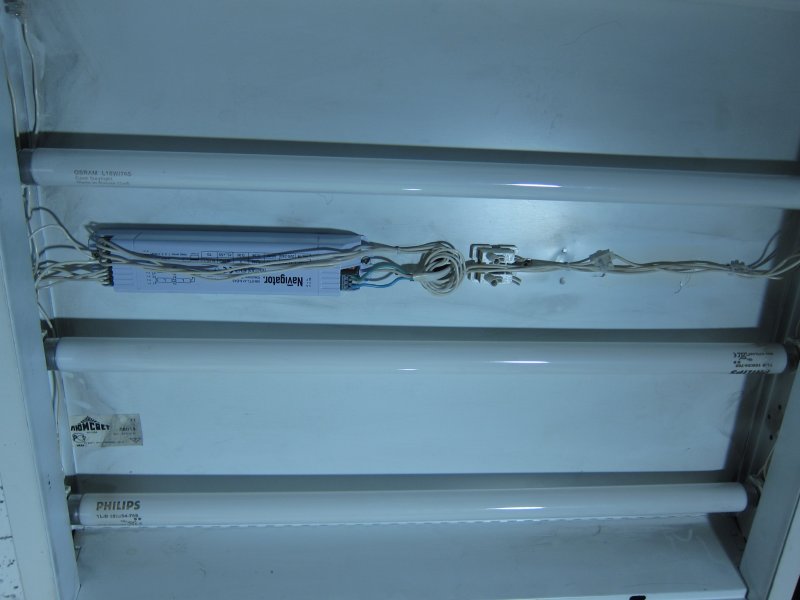
Then he connected the lamp contacts to the electronic ballasts according to the diagram drawn directly on the housing. Almost all the wires installed on the lamp earlier were used, in some places they had to be cut and lengthened, for this purpose, stocking up connecting elements in advance. He fixed all the noodles through the holes from the previous devices with small ties and more or less carefully laid them on the body. The plafond itself was carefully returned to its place and secured the wires of the power cable to the electronic ballast.
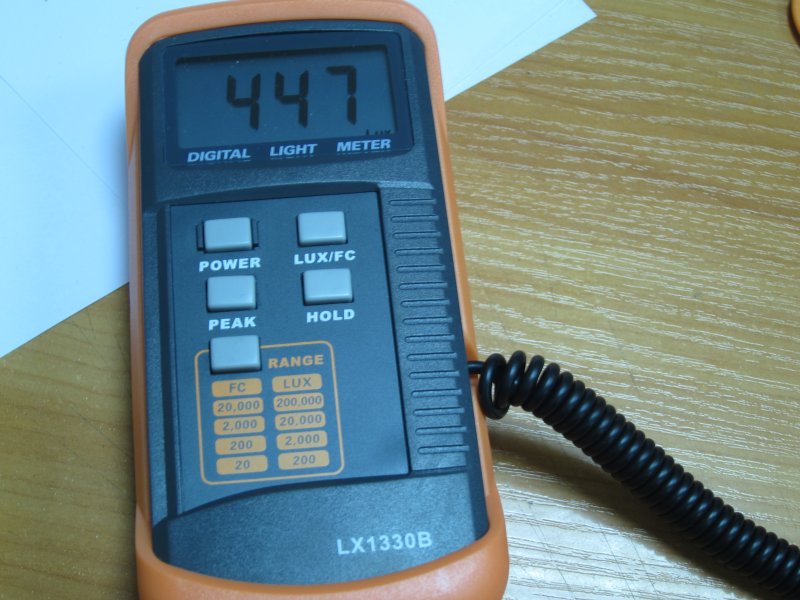
The first inclusion and the result is obvious, firstly, the promised silent and almost instantaneous inclusion, and secondly, the flickering of lamps imperceptible to the eye (on the camera, when you press the shutter button halfway to focus the frame, blinking is still visible, but it’s not so “aggressive” , as with adjacent lamps with ballasts), and, finally, even an increase in brightness is noticeable, which was confirmed by a light meter, showing 445-447 lux.
Of course, to ensure good working conditions is the employer's task, but even if you are not lucky with the workplace, you should not leave everything as it is. So, the installation of electronic ballasts does not require much effort and some special qualifications, at the same time, after connecting it, your eyes will probably say thank you, but vision is one of the main problems of IT specialists.
Addition:I do not have formal requirements for choosing electronic ballasts, everything I operated on is the unit price from 200-250 rubles for the device itself. Specifically, I bought a model Navigator 94449, but was guided only by the fact that it was the only model available on the local classifieds site, suitable for the characteristics of my lamp. Also in the first comment, jhonyxakep warns of ASD's pitfalls.
Recently, a work colleague spoke about the fact that standard ballasts use cheap ballasts (ballasts), and that, if desired, they can be replaced with more advanced ballasts (electronic ballasts). The advantages over conventional start-up are the quick ignition of the lamps, the absence of a characteristic sound from the throttle, the filter that removes flicker, as well as a more sparing attitude to the lamps.
After reading the description on Wikipedia, as well as being impressed by the colleagues' stories, the next day I bought two electronic ballasts (for myself and my wife), the first to be found in a local flea market for 18 W T8 lamps. One set it immediately, and immediately noticed that I did not see the annoying flicker, and the lamps began to shine brighter. After a couple of days, I connected the second electronic ballast to a lamp above my wife’s workplace, at the same time decided to photograph the whole process. This article may seem trivial and amateurish to you, but this knowledge was new to me and several of my colleagues.
Before starting work, I measured the luminous flux, about 405-407 lux came out. Although I install electronic ballasts mainly in order to get rid of flicker, or rather increase its frequency, the changes in brightness are also interesting, because in the electronic start a higher efficiency is declared.
So, the diffuser is removed, the lamps are twisted, and now a “naked" lamp hangs on the ceiling. It contains an adapter for a power cable running under a suspended ceiling (sticks out of a hole in the center), two ballasts, as well as additional voltage converters (not strong in electrics, so I don’t know their role for sure). All this wealth is connected to the contacts for the lamps with the help of wires and generously flavored with years of accumulated dust.
Turning off the upper light and unscrewing the clamps from the power supply (if you do, do not forget to check for voltage with a tester screwdriver, and protect the exposed contacts with electrical tape for the duration of work), pulled out the lamp from the suspended ceiling and laid it on the floor. A faithful assistant immediately wiped it from dust / dirt, because when installing the previous electronic ballast, I sensibly guessed it (in the photo only the beginning of the wash).
Having broken off with fasteners, he pulled out all the unnecessary stuffing from the lamp, having previously disconnected the wires from the devices, since they will be needed in the future. The only thing left and not useful is the adapter for the power cable. In the last installation I used it, since there was no land in that wiring. This time there was grounding, so I connected the wires directly to the electronic ballast, because the adapter only earthed the lamp housing.
Drills and drills were not at hand, so I screwed the holes in the thin sheet with a screwdriver and a sharp self-tapping screw. It was necessary to make two new holes for the dimensions of the mountings of the new electronic ballasts. After which I screwed the device with two wide and short chopped-off screws, it holds tight and does not lend itself to moderately strong jerking.
Then he connected the lamp contacts to the electronic ballasts according to the diagram drawn directly on the housing. Almost all the wires installed on the lamp earlier were used, in some places they had to be cut and lengthened, for this purpose, stocking up connecting elements in advance. He fixed all the noodles through the holes from the previous devices with small ties and more or less carefully laid them on the body. The plafond itself was carefully returned to its place and secured the wires of the power cable to the electronic ballast.
The first inclusion and the result is obvious, firstly, the promised silent and almost instantaneous inclusion, and secondly, the flickering of lamps imperceptible to the eye (on the camera, when you press the shutter button halfway to focus the frame, blinking is still visible, but it’s not so “aggressive” , as with adjacent lamps with ballasts), and, finally, even an increase in brightness is noticeable, which was confirmed by a light meter, showing 445-447 lux.
Of course, to ensure good working conditions is the employer's task, but even if you are not lucky with the workplace, you should not leave everything as it is. So, the installation of electronic ballasts does not require much effort and some special qualifications, at the same time, after connecting it, your eyes will probably say thank you, but vision is one of the main problems of IT specialists.
Addition:I do not have formal requirements for choosing electronic ballasts, everything I operated on is the unit price from 200-250 rubles for the device itself. Specifically, I bought a model Navigator 94449, but was guided only by the fact that it was the only model available on the local classifieds site, suitable for the characteristics of my lamp. Also in the first comment, jhonyxakep warns of ASD's pitfalls.